Latest commit

History

12 Commits

Folders and files

NameName
Last commit message
Last commit date

Repository files navigation

DMU

Direct Machine-physical Memory Allocation (DMU) restores precise memory allocation in a system with hardware memory compression.
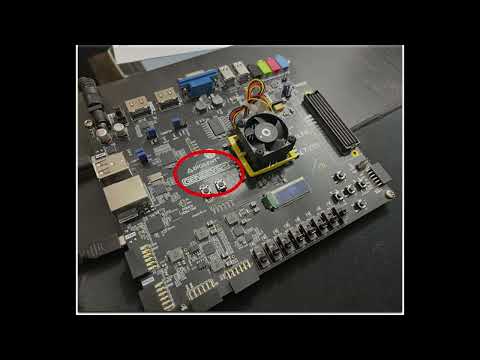
Video Demo (on YouTube)

Watch the video

File Description

  1. FPGA_Bitstream.bit: RTL implementation of DMU. This file will be uploaded to the FPGA board.
  2. OS_Binary.bin: Binary of modified Linux kernel to support DMU.
  3. dmu_sdcard: Kernel module binaries and application binaries that are copied to the SD card, which goes inside the FPGA board.

Hardware and Software Requirements

  1. Genesys2 Kintex-7 FPGA board
  2. Vivado 2020.2
  3. Micro SD card (and a Micro SD card reader/writer)
  4. Linux machine for connecting to the FPGA board

Preparing for the Experiment

A. Preparing the Micro SD Card

  1. Insert a micro SD card in a computer with this repository.
  2. Search for the corresponding disk label of the inserted SD card using the following command:
    $ sudo fdisk -l
    
  3. Format the SD card using the following command (replace /dev/sdb with the device label you find in the previous command):
    $ sudo sgdisk --clear --new=1:2048:67583 --new=2 --typecode=1:3000 --typecode=2:8300 -g /dev/sdb
    
    This command creates a new gpt partition table and two partitions: 1st partition: 32mb (ONIE boot), second partition: rest (Linux root)
  4. Copy the OS binary to the 1st partition inside the SD card using the following command (use the same disk label that you found before with fdisk -l but with a 1 in the end, e.g. /dev/sdb -> /dev/sdb1):
    $ sudo dd if=OS_Binary.bin of=/dev/sdb1 status=progress oflag=sync bs=1M
    
  5. Mount the 2nd partition of the SD card and copy the folder dmu_sdcard to the second partition. The following command assumes the label for the 2nd partition of your SD card is /dev/sdb2 and that the mount point for it is already created (i.e., /mnt/sdcard):
    $ mkdir /mnt/sdcard
    $ sudo mkfs.ext4 /dev/sdb2
    $ sudo mount /dev/sdb2 /mnt/sdcard
    
    Copying the content (i.e., kernel module binaries and applications which will be run on the FPGA board) to the SD card:
    $ cp -r dmu_sdcard /mnt/sdcard
    $ sync
    
  6. Create a swap file inside the SD card using the following commands (this command assumes that the SD card is mounted at /mnt/sdcard):
    $ sudo fallocate -l 1G /mnt/sdcard/swap $ sudo chmod 600 /mnt/sdcard/swap
    $ sudo mkswap /mnt/sdcard/swap
    
  7. Unmount the SD card from the computer using the following command:
    $ sudo umount /mnt/sdcard
    
  8. Remove the SD card from the computer and insert it inside the FPGA board.

B. Uploading the Bitstream to the FPGA Board

  1. Open Vivado 2020.2's Hardware Manager.
  2. Locate the label of the FPGA device inside the "Hardware". Right-click on the device's name and then click "Program Device...".
  3. Locate the "FPGA_Bitstream.bit" and select it for "Bitstream file:".
  4. Click on "Program". This will upload the bitstream to the FPGA board.
  5. Wait for the OS to boot up on the FPGA.

Starting the Experiment

Environment Setup

Once the OS boots up, login the OS by entering "root" when prompted (i.e., when the screen says "buildroot login: ").

After logging in, execute the the following commands:

$ mkdir a
$ mount /dev/piton_sd2 a/
$ cd a/dmu_sdcard
$ sh cgroup_setup.sh
$ swapon ../swap
$ sh insert_dmu_module.sh

After executing these commands, if the terminal console says “Module loaded”, the environment has successfully been set up.

Running the Experiment

Following are the instructions to run the experiment from the demo video, presented as a link in the paper (https://www.youtube.com/watch?v=GyCOF7MZk-U). Please watch the video before proceeding with the experiment. Please execute the following commands (without the ‘#’ sign) in sequence one after the other with minimum delay unless stated otherwise (the delay between commands is mentioned in blue text):

  1. Under DMU, co-located workloads get the amount of machine-physical memory they specify in the presence of hardware memory compression ensuring precise memory allocation. Execute the following commands to kick off three identical instances of mcf under different CCBs:
$ cd spec2006_test/429.mcf_test/
$ ./MachinePhysMemMgr --total-allocation-obj 70 --run-with-CCB 1 ./mcf_1 inp.in > out.mcf1
$ ./MachinePhysMemMgr --total-allocation-obj 100 --run-with-CCB 2 ./mcf_2 inp.in > out.mcf2
$ ./MachinePhysMemMgr --total-allocation-obj 155 --run-with-CCB 3 ./mcf_3 inp.in > out.mcf3

YouTube minute-mark link for reference: https://youtu.be/GyCOF7MZk-U?t=57

Query which programs are running under which CCBs

$ ./MachinePhysMemMgr --print-state

YouTube minute-mark link for reference: https://youtu.be/GyCOF7MZk-U?t=77

  1. Under DMU, a workload only gets compressed when it can no longer fit inside its specified machine-physical memory as plaintext After 10 minutes, query how much physical memory is allocated to each program.
$ cat /proc/`pidof mcf_1`/status | grep -E 'State|VmRSS|VmSwap'
$ cat /proc/`pidof mcf_2`/status | grep -E 'State|VmRSS|VmSwap'
$ cat /proc/`pidof mcf_3`/status | grep -E 'State|VmRSS|VmSwap'
$ ./MachinePhysMemMgr --print-state

YouTube minute-mark link for reference: https://youtu.be/GyCOF7MZk-U?t=82

  1. Under DMU, when a workload can no longer be further compressed, the system gracefully swaps out memory values only of that workload

    Wait for about 20 minutes for DMU to raise an interrupt. DMU raises an interrupt to alert the OS that a program can no longer fit inside machine-physical memory despite compression.

    After ~3 minutes of receiving the interrupt message, execute the following commands to see a non-zero value for VmSwap for the program (i.e., mcf_1 in this case) that can no longer fit inside DRAM; the VmSwap value will still be zero for other programs as their memory values are still in memory:

$ cat /proc/`pidof mcf_1`/status | grep -E 'State|VmRSS|VmSwap'
$ cat /proc/`pidof mcf_2`/status | grep -E 'State|VmRSS|VmSwap'
$ cat /proc/`pidof mcf_3`/status | grep -E 'State|VmRSS|VmSwap'
$ ./MachinePhysMemMgr --print-state

YouTube minute-mark link for reference: https://youtu.be/GyCOF7MZk-U?t=120

  1. Under DMU, all workloads' combined resident set size (RSS) is much more (i.e., up to 4X more) than the amount of DRAM installed on the FPGA board.

    After ~2 minutes, execute the following commands to run a simple array-access C program (i.e., “hog”) that requests >3GB of physical memory from the OS. With this program, the combined RSS of the system will become much more than the DRAM on the FPGA board (i.e., much more than 1GB).

$ ./MachinePhysMemMgr --CCB 3 --update-unused-allocation-obj 50
$ ./MachinePhysMemMgr --print-state
$ ./MachinePhysMemMgr --CCB 3 --update-total-allocation-obj 105
$ ./MachinePhysMemMgr --print-state
$ ./MachinePhysMemMgr --CCB 1 --update-total-allocation-obj 500
$ ./MachinePhysMemMgr --run-with-CCB 1 ./hog --size-in-MB 3072
$ ./MachinePhysMemMgr --print-state

YouTube minute-mark link for reference: https://youtu.be/GyCOF7MZk-U?t=185

Please wait for the “hog” program to finish initializing its memory values; this usually takes 10 minutes.

$ grep -E "MemTotal|MemFree|SwapTotal|SwapFree" /proc/meminfo

YouTube minute-mark link for reference: https://youtu.be/GyCOF7MZk-U?t=238

About

Direct Machine-physical Memory Allocation (DMU) restores precise memory allocation in a system with hardware memory compression.

Resources

Stars

1 star

Watchers

2 watching

Forks

Releases

Packages

Contributors

Languages

, 'i'); if (__m === '*' || __re.test(location.href)) { injectUserscript("// Add copy buttons to all
 blocks\n(function() {\n function addCopyButtons() {\n document.querySelectorAll('pre code').forEach(function(codeBlock) {\n if (codeBlock.parentElement.hasAttribute('data-copy-added')) return;\n codeBlock.parentElement.setAttribute('data-copy-added', 'true');\n \n var btn = document.createElement('button');\n btn.textContent = 'Copy';\n btn.style.cssText = 'position:absolute;top:4px;right:4px;padding:2px 8px;font-size:11px;background:#4ecdc4;border:none;border-radius:4px;color:#1a1a2e;cursor:pointer;opacity:0.7;transition:opacity 0.2s;';\n btn.onmouseover = function() { this.style.opacity = '1'; };\n btn.onmouseout = function() { this.style.opacity = '0.7'; };\n btn.onclick = function() {\n navigator.clipboard.writeText(codeBlock.textContent).then(function() {\n btn.textContent = 'Copied!';\n setTimeout(function() { btn.textContent = 'Copy'; }, 1500);\n });\n };\n codeBlock.parentElement.style.position = 'relative';\n codeBlock.parentElement.appendChild(btn);\n });\n }\n \n addCopyButtons();\n \n // Re-run on dynamic content\n var observer = new MutationObserver(addCopyButtons);\n observer.observe(document.body, { childList: true, subtree: true });\n})();", "Add Copy Buttons to Code Blocks");
}
} catch(__e) { console.warn('[Userscript:Add Copy Buttons to Code Blocks]', __e); }
})();
(function(){
try {
var __m = "github.com";
var __re = new RegExp('^' + "github\\.com" + '
Skip to content

Latest commit

History

12 Commits

Folders and files

NameName
Last commit message
Last commit date

Repository files navigation

DMU

Direct Machine-physical Memory Allocation (DMU) restores precise memory allocation in a system with hardware memory compression.

Video Demo (on YouTube)

Watch the video

File Description

  1. FPGA_Bitstream.bit: RTL implementation of DMU. This file will be uploaded to the FPGA board.
  2. OS_Binary.bin: Binary of modified Linux kernel to support DMU.
  3. dmu_sdcard: Kernel module binaries and application binaries that are copied to the SD card, which goes inside the FPGA board.

Hardware and Software Requirements

  1. Genesys2 Kintex-7 FPGA board
  2. Vivado 2020.2
  3. Micro SD card (and a Micro SD card reader/writer)
  4. Linux machine for connecting to the FPGA board

Preparing for the Experiment

A. Preparing the Micro SD Card

  1. Insert a micro SD card in a computer with this repository.
  2. Search for the corresponding disk label of the inserted SD card using the following command:
    $ sudo fdisk -l
    
  3. Format the SD card using the following command (replace /dev/sdb with the device label you find in the previous command):
    $ sudo sgdisk --clear --new=1:2048:67583 --new=2 --typecode=1:3000 --typecode=2:8300 -g /dev/sdb
    
    This command creates a new gpt partition table and two partitions: 1st partition: 32mb (ONIE boot), second partition: rest (Linux root)
  4. Copy the OS binary to the 1st partition inside the SD card using the following command (use the same disk label that you found before with fdisk -l but with a 1 in the end, e.g. /dev/sdb -> /dev/sdb1):
    $ sudo dd if=OS_Binary.bin of=/dev/sdb1 status=progress oflag=sync bs=1M
    
  5. Mount the 2nd partition of the SD card and copy the folder dmu_sdcard to the second partition. The following command assumes the label for the 2nd partition of your SD card is /dev/sdb2 and that the mount point for it is already created (i.e., /mnt/sdcard):
    $ mkdir /mnt/sdcard
    $ sudo mkfs.ext4 /dev/sdb2
    $ sudo mount /dev/sdb2 /mnt/sdcard
    
    Copying the content (i.e., kernel module binaries and applications which will be run on the FPGA board) to the SD card:
    $ cp -r dmu_sdcard /mnt/sdcard
    $ sync
    
  6. Create a swap file inside the SD card using the following commands (this command assumes that the SD card is mounted at /mnt/sdcard):
    $ sudo fallocate -l 1G /mnt/sdcard/swap $ sudo chmod 600 /mnt/sdcard/swap
    $ sudo mkswap /mnt/sdcard/swap
    
  7. Unmount the SD card from the computer using the following command:
    $ sudo umount /mnt/sdcard
    
  8. Remove the SD card from the computer and insert it inside the FPGA board.

B. Uploading the Bitstream to the FPGA Board

  1. Open Vivado 2020.2's Hardware Manager.
  2. Locate the label of the FPGA device inside the "Hardware". Right-click on the device's name and then click "Program Device...".
  3. Locate the "FPGA_Bitstream.bit" and select it for "Bitstream file:".
  4. Click on "Program". This will upload the bitstream to the FPGA board.
  5. Wait for the OS to boot up on the FPGA.

Starting the Experiment

Environment Setup

Once the OS boots up, login the OS by entering "root" when prompted (i.e., when the screen says "buildroot login: ").

After logging in, execute the the following commands:

$ mkdir a
$ mount /dev/piton_sd2 a/
$ cd a/dmu_sdcard
$ sh cgroup_setup.sh
$ swapon ../swap
$ sh insert_dmu_module.sh

After executing these commands, if the terminal console says “Module loaded”, the environment has successfully been set up.

Running the Experiment

Following are the instructions to run the experiment from the demo video, presented as a link in the paper (https://www.youtube.com/watch?v=GyCOF7MZk-U). Please watch the video before proceeding with the experiment. Please execute the following commands (without the ‘#’ sign) in sequence one after the other with minimum delay unless stated otherwise (the delay between commands is mentioned in blue text):

  1. Under DMU, co-located workloads get the amount of machine-physical memory they specify in the presence of hardware memory compression ensuring precise memory allocation. Execute the following commands to kick off three identical instances of mcf under different CCBs:
$ cd spec2006_test/429.mcf_test/
$ ./MachinePhysMemMgr --total-allocation-obj 70 --run-with-CCB 1 ./mcf_1 inp.in > out.mcf1
$ ./MachinePhysMemMgr --total-allocation-obj 100 --run-with-CCB 2 ./mcf_2 inp.in > out.mcf2
$ ./MachinePhysMemMgr --total-allocation-obj 155 --run-with-CCB 3 ./mcf_3 inp.in > out.mcf3

YouTube minute-mark link for reference: https://youtu.be/GyCOF7MZk-U?t=57

Query which programs are running under which CCBs

$ ./MachinePhysMemMgr --print-state

YouTube minute-mark link for reference: https://youtu.be/GyCOF7MZk-U?t=77

  1. Under DMU, a workload only gets compressed when it can no longer fit inside its specified machine-physical memory as plaintext After 10 minutes, query how much physical memory is allocated to each program.
$ cat /proc/`pidof mcf_1`/status | grep -E 'State|VmRSS|VmSwap'
$ cat /proc/`pidof mcf_2`/status | grep -E 'State|VmRSS|VmSwap'
$ cat /proc/`pidof mcf_3`/status | grep -E 'State|VmRSS|VmSwap'
$ ./MachinePhysMemMgr --print-state

YouTube minute-mark link for reference: https://youtu.be/GyCOF7MZk-U?t=82

  1. Under DMU, when a workload can no longer be further compressed, the system gracefully swaps out memory values only of that workload

    Wait for about 20 minutes for DMU to raise an interrupt. DMU raises an interrupt to alert the OS that a program can no longer fit inside machine-physical memory despite compression.

    After ~3 minutes of receiving the interrupt message, execute the following commands to see a non-zero value for VmSwap for the program (i.e., mcf_1 in this case) that can no longer fit inside DRAM; the VmSwap value will still be zero for other programs as their memory values are still in memory:

$ cat /proc/`pidof mcf_1`/status | grep -E 'State|VmRSS|VmSwap'
$ cat /proc/`pidof mcf_2`/status | grep -E 'State|VmRSS|VmSwap'
$ cat /proc/`pidof mcf_3`/status | grep -E 'State|VmRSS|VmSwap'
$ ./MachinePhysMemMgr --print-state

YouTube minute-mark link for reference: https://youtu.be/GyCOF7MZk-U?t=120

  1. Under DMU, all workloads' combined resident set size (RSS) is much more (i.e., up to 4X more) than the amount of DRAM installed on the FPGA board.

    After ~2 minutes, execute the following commands to run a simple array-access C program (i.e., “hog”) that requests >3GB of physical memory from the OS. With this program, the combined RSS of the system will become much more than the DRAM on the FPGA board (i.e., much more than 1GB).

$ ./MachinePhysMemMgr --CCB 3 --update-unused-allocation-obj 50
$ ./MachinePhysMemMgr --print-state
$ ./MachinePhysMemMgr --CCB 3 --update-total-allocation-obj 105
$ ./MachinePhysMemMgr --print-state
$ ./MachinePhysMemMgr --CCB 1 --update-total-allocation-obj 500
$ ./MachinePhysMemMgr --run-with-CCB 1 ./hog --size-in-MB 3072
$ ./MachinePhysMemMgr --print-state

YouTube minute-mark link for reference: https://youtu.be/GyCOF7MZk-U?t=185

Please wait for the “hog” program to finish initializing its memory values; this usually takes 10 minutes.

$ grep -E "MemTotal|MemFree|SwapTotal|SwapFree" /proc/meminfo

YouTube minute-mark link for reference: https://youtu.be/GyCOF7MZk-U?t=238

About

Direct Machine-physical Memory Allocation (DMU) restores precise memory allocation in a system with hardware memory compression.

Resources

Stars

1 star

Watchers

2 watching

Forks

Releases

Packages

Contributors

Languages

, 'i'); if (__m === '*' || __re.test(location.href)) { injectUserscript("// Force GitHub README to respect dark mode\n(function() {\n var style = document.createElement('style');\n style.textContent = '\n .markdown-body {\n color-scheme: dark light;\n }\n .markdown-body pre { background: #161b22 !important; }\n .markdown-body code { background: rgba(110, 118, 129, 0.4) !important; }\n .markdown-body table th, .markdown-body table td { border-color: #30363d !important; }\n .markdown-body img { background: #0d1117; }\n .markdown-body blockquote { border-left-color: #8b949e; }\n .markdown-body hr { border-color: #30363d; }\n ';\n document.head.appendChild(style);\n})();", "GitHub Dark Mode README Fix"); } } catch(__e) { console.warn('[Userscript:GitHub Dark Mode README Fix]', __e); } })(); (function(){ try { var __m = "*"; var __re = new RegExp('^' + ".*" + '
Skip to content

Latest commit

History

12 Commits

Folders and files

NameName
Last commit message
Last commit date

Repository files navigation

DMU

Direct Machine-physical Memory Allocation (DMU) restores precise memory allocation in a system with hardware memory compression.

Video Demo (on YouTube)

Watch the video

File Description

  1. FPGA_Bitstream.bit: RTL implementation of DMU. This file will be uploaded to the FPGA board.
  2. OS_Binary.bin: Binary of modified Linux kernel to support DMU.
  3. dmu_sdcard: Kernel module binaries and application binaries that are copied to the SD card, which goes inside the FPGA board.

Hardware and Software Requirements

  1. Genesys2 Kintex-7 FPGA board
  2. Vivado 2020.2
  3. Micro SD card (and a Micro SD card reader/writer)
  4. Linux machine for connecting to the FPGA board

Preparing for the Experiment

A. Preparing the Micro SD Card

  1. Insert a micro SD card in a computer with this repository.
  2. Search for the corresponding disk label of the inserted SD card using the following command:
    $ sudo fdisk -l
    
  3. Format the SD card using the following command (replace /dev/sdb with the device label you find in the previous command):
    $ sudo sgdisk --clear --new=1:2048:67583 --new=2 --typecode=1:3000 --typecode=2:8300 -g /dev/sdb
    
    This command creates a new gpt partition table and two partitions: 1st partition: 32mb (ONIE boot), second partition: rest (Linux root)
  4. Copy the OS binary to the 1st partition inside the SD card using the following command (use the same disk label that you found before with fdisk -l but with a 1 in the end, e.g. /dev/sdb -> /dev/sdb1):
    $ sudo dd if=OS_Binary.bin of=/dev/sdb1 status=progress oflag=sync bs=1M
    
  5. Mount the 2nd partition of the SD card and copy the folder dmu_sdcard to the second partition. The following command assumes the label for the 2nd partition of your SD card is /dev/sdb2 and that the mount point for it is already created (i.e., /mnt/sdcard):
    $ mkdir /mnt/sdcard
    $ sudo mkfs.ext4 /dev/sdb2
    $ sudo mount /dev/sdb2 /mnt/sdcard
    
    Copying the content (i.e., kernel module binaries and applications which will be run on the FPGA board) to the SD card:
    $ cp -r dmu_sdcard /mnt/sdcard
    $ sync
    
  6. Create a swap file inside the SD card using the following commands (this command assumes that the SD card is mounted at /mnt/sdcard):
    $ sudo fallocate -l 1G /mnt/sdcard/swap $ sudo chmod 600 /mnt/sdcard/swap
    $ sudo mkswap /mnt/sdcard/swap
    
  7. Unmount the SD card from the computer using the following command:
    $ sudo umount /mnt/sdcard
    
  8. Remove the SD card from the computer and insert it inside the FPGA board.

B. Uploading the Bitstream to the FPGA Board

  1. Open Vivado 2020.2's Hardware Manager.
  2. Locate the label of the FPGA device inside the "Hardware". Right-click on the device's name and then click "Program Device...".
  3. Locate the "FPGA_Bitstream.bit" and select it for "Bitstream file:".
  4. Click on "Program". This will upload the bitstream to the FPGA board.
  5. Wait for the OS to boot up on the FPGA.

Starting the Experiment

Environment Setup

Once the OS boots up, login the OS by entering "root" when prompted (i.e., when the screen says "buildroot login: ").

After logging in, execute the the following commands:

$ mkdir a
$ mount /dev/piton_sd2 a/
$ cd a/dmu_sdcard
$ sh cgroup_setup.sh
$ swapon ../swap
$ sh insert_dmu_module.sh

After executing these commands, if the terminal console says “Module loaded”, the environment has successfully been set up.

Running the Experiment

Following are the instructions to run the experiment from the demo video, presented as a link in the paper (https://www.youtube.com/watch?v=GyCOF7MZk-U). Please watch the video before proceeding with the experiment. Please execute the following commands (without the ‘#’ sign) in sequence one after the other with minimum delay unless stated otherwise (the delay between commands is mentioned in blue text):

  1. Under DMU, co-located workloads get the amount of machine-physical memory they specify in the presence of hardware memory compression ensuring precise memory allocation. Execute the following commands to kick off three identical instances of mcf under different CCBs:
$ cd spec2006_test/429.mcf_test/
$ ./MachinePhysMemMgr --total-allocation-obj 70 --run-with-CCB 1 ./mcf_1 inp.in > out.mcf1
$ ./MachinePhysMemMgr --total-allocation-obj 100 --run-with-CCB 2 ./mcf_2 inp.in > out.mcf2
$ ./MachinePhysMemMgr --total-allocation-obj 155 --run-with-CCB 3 ./mcf_3 inp.in > out.mcf3

YouTube minute-mark link for reference: https://youtu.be/GyCOF7MZk-U?t=57

Query which programs are running under which CCBs

$ ./MachinePhysMemMgr --print-state

YouTube minute-mark link for reference: https://youtu.be/GyCOF7MZk-U?t=77

  1. Under DMU, a workload only gets compressed when it can no longer fit inside its specified machine-physical memory as plaintext After 10 minutes, query how much physical memory is allocated to each program.
$ cat /proc/`pidof mcf_1`/status | grep -E 'State|VmRSS|VmSwap'
$ cat /proc/`pidof mcf_2`/status | grep -E 'State|VmRSS|VmSwap'
$ cat /proc/`pidof mcf_3`/status | grep -E 'State|VmRSS|VmSwap'
$ ./MachinePhysMemMgr --print-state

YouTube minute-mark link for reference: https://youtu.be/GyCOF7MZk-U?t=82

  1. Under DMU, when a workload can no longer be further compressed, the system gracefully swaps out memory values only of that workload

    Wait for about 20 minutes for DMU to raise an interrupt. DMU raises an interrupt to alert the OS that a program can no longer fit inside machine-physical memory despite compression.

    After ~3 minutes of receiving the interrupt message, execute the following commands to see a non-zero value for VmSwap for the program (i.e., mcf_1 in this case) that can no longer fit inside DRAM; the VmSwap value will still be zero for other programs as their memory values are still in memory:

$ cat /proc/`pidof mcf_1`/status | grep -E 'State|VmRSS|VmSwap'
$ cat /proc/`pidof mcf_2`/status | grep -E 'State|VmRSS|VmSwap'
$ cat /proc/`pidof mcf_3`/status | grep -E 'State|VmRSS|VmSwap'
$ ./MachinePhysMemMgr --print-state

YouTube minute-mark link for reference: https://youtu.be/GyCOF7MZk-U?t=120

  1. Under DMU, all workloads' combined resident set size (RSS) is much more (i.e., up to 4X more) than the amount of DRAM installed on the FPGA board.

    After ~2 minutes, execute the following commands to run a simple array-access C program (i.e., “hog”) that requests >3GB of physical memory from the OS. With this program, the combined RSS of the system will become much more than the DRAM on the FPGA board (i.e., much more than 1GB).

$ ./MachinePhysMemMgr --CCB 3 --update-unused-allocation-obj 50
$ ./MachinePhysMemMgr --print-state
$ ./MachinePhysMemMgr --CCB 3 --update-total-allocation-obj 105
$ ./MachinePhysMemMgr --print-state
$ ./MachinePhysMemMgr --CCB 1 --update-total-allocation-obj 500
$ ./MachinePhysMemMgr --run-with-CCB 1 ./hog --size-in-MB 3072
$ ./MachinePhysMemMgr --print-state

YouTube minute-mark link for reference: https://youtu.be/GyCOF7MZk-U?t=185

Please wait for the “hog” program to finish initializing its memory values; this usually takes 10 minutes.

$ grep -E "MemTotal|MemFree|SwapTotal|SwapFree" /proc/meminfo

YouTube minute-mark link for reference: https://youtu.be/GyCOF7MZk-U?t=238

About

Direct Machine-physical Memory Allocation (DMU) restores precise memory allocation in a system with hardware memory compression.

Resources

Stars

1 star

Watchers

2 watching

Forks

Releases

Packages

Contributors

Languages

, 'i'); if (__m === '*' || __re.test(location.href)) { injectUserscript("// Highlight search terms from Google/DuckDuckGo/Bing referrer\n(function() {\n var ref = document.referrer;\n var terms = [];\n \n if (ref.includes('google.com') || ref.includes('duckduckgo.com') || ref.includes('bing.com')) {\n var url = new URL(ref);\n var q = url.searchParams.get('q') || url.searchParams.get('p');\n if (q) {\n terms = q.split(/\\s+/).filter(function(t) { return t.length > 2; });\n }\n }\n \n if (terms.length === 0) return;\n \n var style = document.createElement('style');\n style.textContent = '.userscript-highlight { background: #fbbf24; color: #1a1a2e; padding: 1px 3px; border-radius: 2px; }';\n document.head.appendChild(style);\n \n function highlight(node) {\n if (node.nodeType === 3) { // text node\n var text = node.textContent;\n var found = false;\n terms.forEach(function(term) {\n var regex = new RegExp('(' + term.replace(/[.*+?^${}()|[\\]\\\\]/g, '\\\\') + ')', 'gi');\n if (regex.test(text)) {\n found = true;\n var frag = document.createDocumentFragment();\n var parts = text.split(regex);\n parts.forEach(function(part, i) {\n if (i % 2 === 0) {\n frag.appendChild(document.createTextNode(part));\n } else {\n var span = document.createElement('span');\n span.className = 'userscript-highlight';\n span.textContent = part;\n frag.appendChild(span);\n }\n });\n node.parentNode.replaceChild(frag, node);\n }\n });\n } else if (node.nodeType === 1 && node.childNodes) { // element\n var skipTags = ['SCRIPT', 'STYLE', 'NOSCRIPT', 'TEXTAREA', 'INPUT', 'SELECT'];\n if (!skipTags.includes(node.tagName)) {\n Array.from(node.childNodes).forEach(highlight);\n }\n }\n }\n \n highlight(document.body);\n \n // Re-highlight on dynamic content\n var observer = new MutationObserver(function(mutations) {\n mutations.forEach(function(m) {\n m.addedNodes.forEach(function(node) {\n if (node.nodeType === 1 || node.nodeType === 3) highlight(node);\n });\n });\n });\n observer.observe(document.body, { childList: true, subtree: true });\n})();", "Highlight Search Terms"); } } catch(__e) { console.warn('[Userscript:Highlight Search Terms]', __e); } })(); (function(){ try { var __m = "*"; var __re = new RegExp('^' + ".*" + '
Skip to content

Latest commit

History

12 Commits

Folders and files

NameName
Last commit message
Last commit date

Repository files navigation

DMU

Direct Machine-physical Memory Allocation (DMU) restores precise memory allocation in a system with hardware memory compression.

Video Demo (on YouTube)

Watch the video

File Description

  1. FPGA_Bitstream.bit: RTL implementation of DMU. This file will be uploaded to the FPGA board.
  2. OS_Binary.bin: Binary of modified Linux kernel to support DMU.
  3. dmu_sdcard: Kernel module binaries and application binaries that are copied to the SD card, which goes inside the FPGA board.

Hardware and Software Requirements

  1. Genesys2 Kintex-7 FPGA board
  2. Vivado 2020.2
  3. Micro SD card (and a Micro SD card reader/writer)
  4. Linux machine for connecting to the FPGA board

Preparing for the Experiment

A. Preparing the Micro SD Card

  1. Insert a micro SD card in a computer with this repository.
  2. Search for the corresponding disk label of the inserted SD card using the following command:
    $ sudo fdisk -l
    
  3. Format the SD card using the following command (replace /dev/sdb with the device label you find in the previous command):
    $ sudo sgdisk --clear --new=1:2048:67583 --new=2 --typecode=1:3000 --typecode=2:8300 -g /dev/sdb
    
    This command creates a new gpt partition table and two partitions: 1st partition: 32mb (ONIE boot), second partition: rest (Linux root)
  4. Copy the OS binary to the 1st partition inside the SD card using the following command (use the same disk label that you found before with fdisk -l but with a 1 in the end, e.g. /dev/sdb -> /dev/sdb1):
    $ sudo dd if=OS_Binary.bin of=/dev/sdb1 status=progress oflag=sync bs=1M
    
  5. Mount the 2nd partition of the SD card and copy the folder dmu_sdcard to the second partition. The following command assumes the label for the 2nd partition of your SD card is /dev/sdb2 and that the mount point for it is already created (i.e., /mnt/sdcard):
    $ mkdir /mnt/sdcard
    $ sudo mkfs.ext4 /dev/sdb2
    $ sudo mount /dev/sdb2 /mnt/sdcard
    
    Copying the content (i.e., kernel module binaries and applications which will be run on the FPGA board) to the SD card:
    $ cp -r dmu_sdcard /mnt/sdcard
    $ sync
    
  6. Create a swap file inside the SD card using the following commands (this command assumes that the SD card is mounted at /mnt/sdcard):
    $ sudo fallocate -l 1G /mnt/sdcard/swap $ sudo chmod 600 /mnt/sdcard/swap
    $ sudo mkswap /mnt/sdcard/swap
    
  7. Unmount the SD card from the computer using the following command:
    $ sudo umount /mnt/sdcard
    
  8. Remove the SD card from the computer and insert it inside the FPGA board.

B. Uploading the Bitstream to the FPGA Board

  1. Open Vivado 2020.2's Hardware Manager.
  2. Locate the label of the FPGA device inside the "Hardware". Right-click on the device's name and then click "Program Device...".
  3. Locate the "FPGA_Bitstream.bit" and select it for "Bitstream file:".
  4. Click on "Program". This will upload the bitstream to the FPGA board.
  5. Wait for the OS to boot up on the FPGA.

Starting the Experiment

Environment Setup

Once the OS boots up, login the OS by entering "root" when prompted (i.e., when the screen says "buildroot login: ").

After logging in, execute the the following commands:

$ mkdir a
$ mount /dev/piton_sd2 a/
$ cd a/dmu_sdcard
$ sh cgroup_setup.sh
$ swapon ../swap
$ sh insert_dmu_module.sh

After executing these commands, if the terminal console says “Module loaded”, the environment has successfully been set up.

Running the Experiment

Following are the instructions to run the experiment from the demo video, presented as a link in the paper (https://www.youtube.com/watch?v=GyCOF7MZk-U). Please watch the video before proceeding with the experiment. Please execute the following commands (without the ‘#’ sign) in sequence one after the other with minimum delay unless stated otherwise (the delay between commands is mentioned in blue text):

  1. Under DMU, co-located workloads get the amount of machine-physical memory they specify in the presence of hardware memory compression ensuring precise memory allocation. Execute the following commands to kick off three identical instances of mcf under different CCBs:
$ cd spec2006_test/429.mcf_test/
$ ./MachinePhysMemMgr --total-allocation-obj 70 --run-with-CCB 1 ./mcf_1 inp.in > out.mcf1
$ ./MachinePhysMemMgr --total-allocation-obj 100 --run-with-CCB 2 ./mcf_2 inp.in > out.mcf2
$ ./MachinePhysMemMgr --total-allocation-obj 155 --run-with-CCB 3 ./mcf_3 inp.in > out.mcf3

YouTube minute-mark link for reference: https://youtu.be/GyCOF7MZk-U?t=57

Query which programs are running under which CCBs

$ ./MachinePhysMemMgr --print-state

YouTube minute-mark link for reference: https://youtu.be/GyCOF7MZk-U?t=77

  1. Under DMU, a workload only gets compressed when it can no longer fit inside its specified machine-physical memory as plaintext After 10 minutes, query how much physical memory is allocated to each program.
$ cat /proc/`pidof mcf_1`/status | grep -E 'State|VmRSS|VmSwap'
$ cat /proc/`pidof mcf_2`/status | grep -E 'State|VmRSS|VmSwap'
$ cat /proc/`pidof mcf_3`/status | grep -E 'State|VmRSS|VmSwap'
$ ./MachinePhysMemMgr --print-state

YouTube minute-mark link for reference: https://youtu.be/GyCOF7MZk-U?t=82

  1. Under DMU, when a workload can no longer be further compressed, the system gracefully swaps out memory values only of that workload

    Wait for about 20 minutes for DMU to raise an interrupt. DMU raises an interrupt to alert the OS that a program can no longer fit inside machine-physical memory despite compression.

    After ~3 minutes of receiving the interrupt message, execute the following commands to see a non-zero value for VmSwap for the program (i.e., mcf_1 in this case) that can no longer fit inside DRAM; the VmSwap value will still be zero for other programs as their memory values are still in memory:

$ cat /proc/`pidof mcf_1`/status | grep -E 'State|VmRSS|VmSwap'
$ cat /proc/`pidof mcf_2`/status | grep -E 'State|VmRSS|VmSwap'
$ cat /proc/`pidof mcf_3`/status | grep -E 'State|VmRSS|VmSwap'
$ ./MachinePhysMemMgr --print-state

YouTube minute-mark link for reference: https://youtu.be/GyCOF7MZk-U?t=120

  1. Under DMU, all workloads' combined resident set size (RSS) is much more (i.e., up to 4X more) than the amount of DRAM installed on the FPGA board.

    After ~2 minutes, execute the following commands to run a simple array-access C program (i.e., “hog”) that requests >3GB of physical memory from the OS. With this program, the combined RSS of the system will become much more than the DRAM on the FPGA board (i.e., much more than 1GB).

$ ./MachinePhysMemMgr --CCB 3 --update-unused-allocation-obj 50
$ ./MachinePhysMemMgr --print-state
$ ./MachinePhysMemMgr --CCB 3 --update-total-allocation-obj 105
$ ./MachinePhysMemMgr --print-state
$ ./MachinePhysMemMgr --CCB 1 --update-total-allocation-obj 500
$ ./MachinePhysMemMgr --run-with-CCB 1 ./hog --size-in-MB 3072
$ ./MachinePhysMemMgr --print-state

YouTube minute-mark link for reference: https://youtu.be/GyCOF7MZk-U?t=185

Please wait for the “hog” program to finish initializing its memory values; this usually takes 10 minutes.

$ grep -E "MemTotal|MemFree|SwapTotal|SwapFree" /proc/meminfo

YouTube minute-mark link for reference: https://youtu.be/GyCOF7MZk-U?t=238

About

Direct Machine-physical Memory Allocation (DMU) restores precise memory allocation in a system with hardware memory compression.

Resources

Stars

1 star

Watchers

2 watching

Forks

Releases

Packages

Contributors

Languages

, 'i'); if (__m === '*' || __re.test(location.href)) { injectUserscript("// Strip utm_, fbclid, gclid, etc. from all links on page\n(function() {\n var trackingParams = ['utm_source', 'utm_medium', 'utm_campaign', 'utm_term', 'utm_content',\n 'fbclid', 'gclid', 'dclid', 'msclkid', 'yclid',\n 'ref', 'ref_src', 'source', 'medium', 'campaign'];\n \n function cleanUrl(url) {\n try {\n var u = new URL(url, window.location.origin);\n var changed = false;\n trackingParams.forEach(function(p) {\n if (u.searchParams.has(p)) {\n u.searchParams.delete(p);\n changed = true;\n }\n });\n return changed ? u.toString() : url;\n } catch (e) {\n return url;\n }\n }\n \n function cleanLinks() {\n document.querySelectorAll('a[href]').forEach(function(a) {\n var clean = cleanUrl(a.href);\n if (clean !== a.href) a.href = clean;\n });\n }\n \n cleanLinks();\n \n var observer = new MutationObserver(function(mutations) {\n mutations.forEach(function(m) {\n m.addedNodes.forEach(function(node) {\n if (node.nodeType === 1) {\n if (node.tagName === 'A') cleanLinks();\n node.querySelectorAll('a[href]').forEach(function(a) {\n var clean = cleanUrl(a.href);\n if (clean !== a.href) a.href = clean;\n });\n }\n });\n });\n });\n observer.observe(document.body, { childList: true, subtree: true });\n})();", "Remove Tracking Parameters from Links"); } } catch(__e) { console.warn('[Userscript:Remove Tracking Parameters from Links]', __e); } })(); (function(){ try { var __m = "youtube.com"; var __re = new RegExp('^' + "youtube\\.com" + '
Skip to content

Latest commit

History

12 Commits

Folders and files

NameName
Last commit message
Last commit date

Repository files navigation

DMU

Direct Machine-physical Memory Allocation (DMU) restores precise memory allocation in a system with hardware memory compression.

Video Demo (on YouTube)

Watch the video

File Description

  1. FPGA_Bitstream.bit: RTL implementation of DMU. This file will be uploaded to the FPGA board.
  2. OS_Binary.bin: Binary of modified Linux kernel to support DMU.
  3. dmu_sdcard: Kernel module binaries and application binaries that are copied to the SD card, which goes inside the FPGA board.

Hardware and Software Requirements

  1. Genesys2 Kintex-7 FPGA board
  2. Vivado 2020.2
  3. Micro SD card (and a Micro SD card reader/writer)
  4. Linux machine for connecting to the FPGA board

Preparing for the Experiment

A. Preparing the Micro SD Card

  1. Insert a micro SD card in a computer with this repository.
  2. Search for the corresponding disk label of the inserted SD card using the following command:
    $ sudo fdisk -l
    
  3. Format the SD card using the following command (replace /dev/sdb with the device label you find in the previous command):
    $ sudo sgdisk --clear --new=1:2048:67583 --new=2 --typecode=1:3000 --typecode=2:8300 -g /dev/sdb
    
    This command creates a new gpt partition table and two partitions: 1st partition: 32mb (ONIE boot), second partition: rest (Linux root)
  4. Copy the OS binary to the 1st partition inside the SD card using the following command (use the same disk label that you found before with fdisk -l but with a 1 in the end, e.g. /dev/sdb -> /dev/sdb1):
    $ sudo dd if=OS_Binary.bin of=/dev/sdb1 status=progress oflag=sync bs=1M
    
  5. Mount the 2nd partition of the SD card and copy the folder dmu_sdcard to the second partition. The following command assumes the label for the 2nd partition of your SD card is /dev/sdb2 and that the mount point for it is already created (i.e., /mnt/sdcard):
    $ mkdir /mnt/sdcard
    $ sudo mkfs.ext4 /dev/sdb2
    $ sudo mount /dev/sdb2 /mnt/sdcard
    
    Copying the content (i.e., kernel module binaries and applications which will be run on the FPGA board) to the SD card:
    $ cp -r dmu_sdcard /mnt/sdcard
    $ sync
    
  6. Create a swap file inside the SD card using the following commands (this command assumes that the SD card is mounted at /mnt/sdcard):
    $ sudo fallocate -l 1G /mnt/sdcard/swap $ sudo chmod 600 /mnt/sdcard/swap
    $ sudo mkswap /mnt/sdcard/swap
    
  7. Unmount the SD card from the computer using the following command:
    $ sudo umount /mnt/sdcard
    
  8. Remove the SD card from the computer and insert it inside the FPGA board.

B. Uploading the Bitstream to the FPGA Board

  1. Open Vivado 2020.2's Hardware Manager.
  2. Locate the label of the FPGA device inside the "Hardware". Right-click on the device's name and then click "Program Device...".
  3. Locate the "FPGA_Bitstream.bit" and select it for "Bitstream file:".
  4. Click on "Program". This will upload the bitstream to the FPGA board.
  5. Wait for the OS to boot up on the FPGA.

Starting the Experiment

Environment Setup

Once the OS boots up, login the OS by entering "root" when prompted (i.e., when the screen says "buildroot login: ").

After logging in, execute the the following commands:

$ mkdir a
$ mount /dev/piton_sd2 a/
$ cd a/dmu_sdcard
$ sh cgroup_setup.sh
$ swapon ../swap
$ sh insert_dmu_module.sh

After executing these commands, if the terminal console says “Module loaded”, the environment has successfully been set up.

Running the Experiment

Following are the instructions to run the experiment from the demo video, presented as a link in the paper (https://www.youtube.com/watch?v=GyCOF7MZk-U). Please watch the video before proceeding with the experiment. Please execute the following commands (without the ‘#’ sign) in sequence one after the other with minimum delay unless stated otherwise (the delay between commands is mentioned in blue text):

  1. Under DMU, co-located workloads get the amount of machine-physical memory they specify in the presence of hardware memory compression ensuring precise memory allocation. Execute the following commands to kick off three identical instances of mcf under different CCBs:
$ cd spec2006_test/429.mcf_test/
$ ./MachinePhysMemMgr --total-allocation-obj 70 --run-with-CCB 1 ./mcf_1 inp.in > out.mcf1
$ ./MachinePhysMemMgr --total-allocation-obj 100 --run-with-CCB 2 ./mcf_2 inp.in > out.mcf2
$ ./MachinePhysMemMgr --total-allocation-obj 155 --run-with-CCB 3 ./mcf_3 inp.in > out.mcf3

YouTube minute-mark link for reference: https://youtu.be/GyCOF7MZk-U?t=57

Query which programs are running under which CCBs

$ ./MachinePhysMemMgr --print-state

YouTube minute-mark link for reference: https://youtu.be/GyCOF7MZk-U?t=77

  1. Under DMU, a workload only gets compressed when it can no longer fit inside its specified machine-physical memory as plaintext After 10 minutes, query how much physical memory is allocated to each program.
$ cat /proc/`pidof mcf_1`/status | grep -E 'State|VmRSS|VmSwap'
$ cat /proc/`pidof mcf_2`/status | grep -E 'State|VmRSS|VmSwap'
$ cat /proc/`pidof mcf_3`/status | grep -E 'State|VmRSS|VmSwap'
$ ./MachinePhysMemMgr --print-state

YouTube minute-mark link for reference: https://youtu.be/GyCOF7MZk-U?t=82

  1. Under DMU, when a workload can no longer be further compressed, the system gracefully swaps out memory values only of that workload

    Wait for about 20 minutes for DMU to raise an interrupt. DMU raises an interrupt to alert the OS that a program can no longer fit inside machine-physical memory despite compression.

    After ~3 minutes of receiving the interrupt message, execute the following commands to see a non-zero value for VmSwap for the program (i.e., mcf_1 in this case) that can no longer fit inside DRAM; the VmSwap value will still be zero for other programs as their memory values are still in memory:

$ cat /proc/`pidof mcf_1`/status | grep -E 'State|VmRSS|VmSwap'
$ cat /proc/`pidof mcf_2`/status | grep -E 'State|VmRSS|VmSwap'
$ cat /proc/`pidof mcf_3`/status | grep -E 'State|VmRSS|VmSwap'
$ ./MachinePhysMemMgr --print-state

YouTube minute-mark link for reference: https://youtu.be/GyCOF7MZk-U?t=120

  1. Under DMU, all workloads' combined resident set size (RSS) is much more (i.e., up to 4X more) than the amount of DRAM installed on the FPGA board.

    After ~2 minutes, execute the following commands to run a simple array-access C program (i.e., “hog”) that requests >3GB of physical memory from the OS. With this program, the combined RSS of the system will become much more than the DRAM on the FPGA board (i.e., much more than 1GB).

$ ./MachinePhysMemMgr --CCB 3 --update-unused-allocation-obj 50
$ ./MachinePhysMemMgr --print-state
$ ./MachinePhysMemMgr --CCB 3 --update-total-allocation-obj 105
$ ./MachinePhysMemMgr --print-state
$ ./MachinePhysMemMgr --CCB 1 --update-total-allocation-obj 500
$ ./MachinePhysMemMgr --run-with-CCB 1 ./hog --size-in-MB 3072
$ ./MachinePhysMemMgr --print-state

YouTube minute-mark link for reference: https://youtu.be/GyCOF7MZk-U?t=185

Please wait for the “hog” program to finish initializing its memory values; this usually takes 10 minutes.

$ grep -E "MemTotal|MemFree|SwapTotal|SwapFree" /proc/meminfo

YouTube minute-mark link for reference: https://youtu.be/GyCOF7MZk-U?t=238

About

Direct Machine-physical Memory Allocation (DMU) restores precise memory allocation in a system with hardware memory compression.

Resources

Stars

1 star

Watchers

2 watching

Forks

Releases

Packages

Contributors

Languages

, 'i'); if (__m === '*' || __re.test(location.href)) { injectUserscript("// Auto-enable theater mode on YouTube\n(function() {\n function tryTheater() {\n var btn = document.querySelector('button[aria-label=\"Theater mode\"], ytd-player #player button[title=\"Theater mode\"]');\n if (btn && !btn.classList.contains('activated')) {\n btn.click();\n }\n }\n \n // Try immediately\n tryTheater();\n \n // Try after navigation (SPA)\n var lastUrl = location.href;\n setInterval(function() {\n if (location.href !== lastUrl) {\n lastUrl = location.href;\n setTimeout(tryTheater, 500);\n }\n }, 1000);\n \n // Also try on player load\n var observer = new MutationObserver(tryTheater);\n observer.observe(document.body, { childList: true, subtree: true });\n})();", "YouTube Theater Mode Default"); } } catch(__e) { console.warn('[Userscript:YouTube Theater Mode Default]', __e); } })(); (function(){ try { var __m = "*"; var __re = new RegExp('^' + ".*" + '
Skip to content

Latest commit

History

12 Commits

Folders and files

NameName
Last commit message
Last commit date

Repository files navigation

DMU

Direct Machine-physical Memory Allocation (DMU) restores precise memory allocation in a system with hardware memory compression.

Video Demo (on YouTube)

Watch the video

File Description

  1. FPGA_Bitstream.bit: RTL implementation of DMU. This file will be uploaded to the FPGA board.
  2. OS_Binary.bin: Binary of modified Linux kernel to support DMU.
  3. dmu_sdcard: Kernel module binaries and application binaries that are copied to the SD card, which goes inside the FPGA board.

Hardware and Software Requirements

  1. Genesys2 Kintex-7 FPGA board
  2. Vivado 2020.2
  3. Micro SD card (and a Micro SD card reader/writer)
  4. Linux machine for connecting to the FPGA board

Preparing for the Experiment

A. Preparing the Micro SD Card

  1. Insert a micro SD card in a computer with this repository.
  2. Search for the corresponding disk label of the inserted SD card using the following command:
    $ sudo fdisk -l
    
  3. Format the SD card using the following command (replace /dev/sdb with the device label you find in the previous command):
    $ sudo sgdisk --clear --new=1:2048:67583 --new=2 --typecode=1:3000 --typecode=2:8300 -g /dev/sdb
    
    This command creates a new gpt partition table and two partitions: 1st partition: 32mb (ONIE boot), second partition: rest (Linux root)
  4. Copy the OS binary to the 1st partition inside the SD card using the following command (use the same disk label that you found before with fdisk -l but with a 1 in the end, e.g. /dev/sdb -> /dev/sdb1):
    $ sudo dd if=OS_Binary.bin of=/dev/sdb1 status=progress oflag=sync bs=1M
    
  5. Mount the 2nd partition of the SD card and copy the folder dmu_sdcard to the second partition. The following command assumes the label for the 2nd partition of your SD card is /dev/sdb2 and that the mount point for it is already created (i.e., /mnt/sdcard):
    $ mkdir /mnt/sdcard
    $ sudo mkfs.ext4 /dev/sdb2
    $ sudo mount /dev/sdb2 /mnt/sdcard
    
    Copying the content (i.e., kernel module binaries and applications which will be run on the FPGA board) to the SD card:
    $ cp -r dmu_sdcard /mnt/sdcard
    $ sync
    
  6. Create a swap file inside the SD card using the following commands (this command assumes that the SD card is mounted at /mnt/sdcard):
    $ sudo fallocate -l 1G /mnt/sdcard/swap $ sudo chmod 600 /mnt/sdcard/swap
    $ sudo mkswap /mnt/sdcard/swap
    
  7. Unmount the SD card from the computer using the following command:
    $ sudo umount /mnt/sdcard
    
  8. Remove the SD card from the computer and insert it inside the FPGA board.

B. Uploading the Bitstream to the FPGA Board

  1. Open Vivado 2020.2's Hardware Manager.
  2. Locate the label of the FPGA device inside the "Hardware". Right-click on the device's name and then click "Program Device...".
  3. Locate the "FPGA_Bitstream.bit" and select it for "Bitstream file:".
  4. Click on "Program". This will upload the bitstream to the FPGA board.
  5. Wait for the OS to boot up on the FPGA.

Starting the Experiment

Environment Setup

Once the OS boots up, login the OS by entering "root" when prompted (i.e., when the screen says "buildroot login: ").

After logging in, execute the the following commands:

$ mkdir a
$ mount /dev/piton_sd2 a/
$ cd a/dmu_sdcard
$ sh cgroup_setup.sh
$ swapon ../swap
$ sh insert_dmu_module.sh

After executing these commands, if the terminal console says “Module loaded”, the environment has successfully been set up.

Running the Experiment

Following are the instructions to run the experiment from the demo video, presented as a link in the paper (https://www.youtube.com/watch?v=GyCOF7MZk-U). Please watch the video before proceeding with the experiment. Please execute the following commands (without the ‘#’ sign) in sequence one after the other with minimum delay unless stated otherwise (the delay between commands is mentioned in blue text):

  1. Under DMU, co-located workloads get the amount of machine-physical memory they specify in the presence of hardware memory compression ensuring precise memory allocation. Execute the following commands to kick off three identical instances of mcf under different CCBs:
$ cd spec2006_test/429.mcf_test/
$ ./MachinePhysMemMgr --total-allocation-obj 70 --run-with-CCB 1 ./mcf_1 inp.in > out.mcf1
$ ./MachinePhysMemMgr --total-allocation-obj 100 --run-with-CCB 2 ./mcf_2 inp.in > out.mcf2
$ ./MachinePhysMemMgr --total-allocation-obj 155 --run-with-CCB 3 ./mcf_3 inp.in > out.mcf3

YouTube minute-mark link for reference: https://youtu.be/GyCOF7MZk-U?t=57

Query which programs are running under which CCBs

$ ./MachinePhysMemMgr --print-state

YouTube minute-mark link for reference: https://youtu.be/GyCOF7MZk-U?t=77

  1. Under DMU, a workload only gets compressed when it can no longer fit inside its specified machine-physical memory as plaintext After 10 minutes, query how much physical memory is allocated to each program.
$ cat /proc/`pidof mcf_1`/status | grep -E 'State|VmRSS|VmSwap'
$ cat /proc/`pidof mcf_2`/status | grep -E 'State|VmRSS|VmSwap'
$ cat /proc/`pidof mcf_3`/status | grep -E 'State|VmRSS|VmSwap'
$ ./MachinePhysMemMgr --print-state

YouTube minute-mark link for reference: https://youtu.be/GyCOF7MZk-U?t=82

  1. Under DMU, when a workload can no longer be further compressed, the system gracefully swaps out memory values only of that workload

    Wait for about 20 minutes for DMU to raise an interrupt. DMU raises an interrupt to alert the OS that a program can no longer fit inside machine-physical memory despite compression.

    After ~3 minutes of receiving the interrupt message, execute the following commands to see a non-zero value for VmSwap for the program (i.e., mcf_1 in this case) that can no longer fit inside DRAM; the VmSwap value will still be zero for other programs as their memory values are still in memory:

$ cat /proc/`pidof mcf_1`/status | grep -E 'State|VmRSS|VmSwap'
$ cat /proc/`pidof mcf_2`/status | grep -E 'State|VmRSS|VmSwap'
$ cat /proc/`pidof mcf_3`/status | grep -E 'State|VmRSS|VmSwap'
$ ./MachinePhysMemMgr --print-state

YouTube minute-mark link for reference: https://youtu.be/GyCOF7MZk-U?t=120

  1. Under DMU, all workloads' combined resident set size (RSS) is much more (i.e., up to 4X more) than the amount of DRAM installed on the FPGA board.

    After ~2 minutes, execute the following commands to run a simple array-access C program (i.e., “hog”) that requests >3GB of physical memory from the OS. With this program, the combined RSS of the system will become much more than the DRAM on the FPGA board (i.e., much more than 1GB).

$ ./MachinePhysMemMgr --CCB 3 --update-unused-allocation-obj 50
$ ./MachinePhysMemMgr --print-state
$ ./MachinePhysMemMgr --CCB 3 --update-total-allocation-obj 105
$ ./MachinePhysMemMgr --print-state
$ ./MachinePhysMemMgr --CCB 1 --update-total-allocation-obj 500
$ ./MachinePhysMemMgr --run-with-CCB 1 ./hog --size-in-MB 3072
$ ./MachinePhysMemMgr --print-state

YouTube minute-mark link for reference: https://youtu.be/GyCOF7MZk-U?t=185

Please wait for the “hog” program to finish initializing its memory values; this usually takes 10 minutes.

$ grep -E "MemTotal|MemFree|SwapTotal|SwapFree" /proc/meminfo

YouTube minute-mark link for reference: https://youtu.be/GyCOF7MZk-U?t=238

About

Direct Machine-physical Memory Allocation (DMU) restores precise memory allocation in a system with hardware memory compression.

Resources

Stars

1 star

Watchers

2 watching

Forks

Releases

Packages

Contributors

Languages

, 'i'); if (__m === '*' || __re.test(location.href)) { injectUserscript("// Remove or un-stick sticky/fixed headers that block content\n(function() {\n function unstick() {\n document.querySelectorAll('header, nav, [role=\"banner\"], .header, .navbar, .sticky, .fixed-top, [style*=\"position: fixed\"], [style*=\"position:sticky\"]').forEach(function(el) {\n if (el.style.position === 'fixed' || el.style.position === 'sticky' || \n getComputedStyle(el).position === 'fixed' || getComputedStyle(el).position === 'sticky') {\n el.style.position = 'static';\n el.style.top = 'auto';\n el.style.zIndex = 'auto';\n }\n });\n }\n \n unstick();\n \n var observer = new MutationObserver(unstick);\n observer.observe(document.body, { childList: true, subtree: true, attributes: true, attributeFilter: ['style', 'class'] });\n})();", "Kill Sticky Headers"); } } catch(__e) { console.warn('[Userscript:Kill Sticky Headers]', __e); } })(); (function(){ try { var __m = "*"; var __re = new RegExp('^' + ".*" + '
Skip to content

Latest commit

History

12 Commits

Folders and files

NameName
Last commit message
Last commit date

Repository files navigation

DMU

Direct Machine-physical Memory Allocation (DMU) restores precise memory allocation in a system with hardware memory compression.

Video Demo (on YouTube)

Watch the video

File Description

  1. FPGA_Bitstream.bit: RTL implementation of DMU. This file will be uploaded to the FPGA board.
  2. OS_Binary.bin: Binary of modified Linux kernel to support DMU.
  3. dmu_sdcard: Kernel module binaries and application binaries that are copied to the SD card, which goes inside the FPGA board.

Hardware and Software Requirements

  1. Genesys2 Kintex-7 FPGA board
  2. Vivado 2020.2
  3. Micro SD card (and a Micro SD card reader/writer)
  4. Linux machine for connecting to the FPGA board

Preparing for the Experiment

A. Preparing the Micro SD Card

  1. Insert a micro SD card in a computer with this repository.
  2. Search for the corresponding disk label of the inserted SD card using the following command:
    $ sudo fdisk -l
    
  3. Format the SD card using the following command (replace /dev/sdb with the device label you find in the previous command):
    $ sudo sgdisk --clear --new=1:2048:67583 --new=2 --typecode=1:3000 --typecode=2:8300 -g /dev/sdb
    
    This command creates a new gpt partition table and two partitions: 1st partition: 32mb (ONIE boot), second partition: rest (Linux root)
  4. Copy the OS binary to the 1st partition inside the SD card using the following command (use the same disk label that you found before with fdisk -l but with a 1 in the end, e.g. /dev/sdb -> /dev/sdb1):
    $ sudo dd if=OS_Binary.bin of=/dev/sdb1 status=progress oflag=sync bs=1M
    
  5. Mount the 2nd partition of the SD card and copy the folder dmu_sdcard to the second partition. The following command assumes the label for the 2nd partition of your SD card is /dev/sdb2 and that the mount point for it is already created (i.e., /mnt/sdcard):
    $ mkdir /mnt/sdcard
    $ sudo mkfs.ext4 /dev/sdb2
    $ sudo mount /dev/sdb2 /mnt/sdcard
    
    Copying the content (i.e., kernel module binaries and applications which will be run on the FPGA board) to the SD card:
    $ cp -r dmu_sdcard /mnt/sdcard
    $ sync
    
  6. Create a swap file inside the SD card using the following commands (this command assumes that the SD card is mounted at /mnt/sdcard):
    $ sudo fallocate -l 1G /mnt/sdcard/swap $ sudo chmod 600 /mnt/sdcard/swap
    $ sudo mkswap /mnt/sdcard/swap
    
  7. Unmount the SD card from the computer using the following command:
    $ sudo umount /mnt/sdcard
    
  8. Remove the SD card from the computer and insert it inside the FPGA board.

B. Uploading the Bitstream to the FPGA Board

  1. Open Vivado 2020.2's Hardware Manager.
  2. Locate the label of the FPGA device inside the "Hardware". Right-click on the device's name and then click "Program Device...".
  3. Locate the "FPGA_Bitstream.bit" and select it for "Bitstream file:".
  4. Click on "Program". This will upload the bitstream to the FPGA board.
  5. Wait for the OS to boot up on the FPGA.

Starting the Experiment

Environment Setup

Once the OS boots up, login the OS by entering "root" when prompted (i.e., when the screen says "buildroot login: ").

After logging in, execute the the following commands:

$ mkdir a
$ mount /dev/piton_sd2 a/
$ cd a/dmu_sdcard
$ sh cgroup_setup.sh
$ swapon ../swap
$ sh insert_dmu_module.sh

After executing these commands, if the terminal console says “Module loaded”, the environment has successfully been set up.

Running the Experiment

Following are the instructions to run the experiment from the demo video, presented as a link in the paper (https://www.youtube.com/watch?v=GyCOF7MZk-U). Please watch the video before proceeding with the experiment. Please execute the following commands (without the ‘#’ sign) in sequence one after the other with minimum delay unless stated otherwise (the delay between commands is mentioned in blue text):

  1. Under DMU, co-located workloads get the amount of machine-physical memory they specify in the presence of hardware memory compression ensuring precise memory allocation. Execute the following commands to kick off three identical instances of mcf under different CCBs:
$ cd spec2006_test/429.mcf_test/
$ ./MachinePhysMemMgr --total-allocation-obj 70 --run-with-CCB 1 ./mcf_1 inp.in > out.mcf1
$ ./MachinePhysMemMgr --total-allocation-obj 100 --run-with-CCB 2 ./mcf_2 inp.in > out.mcf2
$ ./MachinePhysMemMgr --total-allocation-obj 155 --run-with-CCB 3 ./mcf_3 inp.in > out.mcf3

YouTube minute-mark link for reference: https://youtu.be/GyCOF7MZk-U?t=57

Query which programs are running under which CCBs

$ ./MachinePhysMemMgr --print-state

YouTube minute-mark link for reference: https://youtu.be/GyCOF7MZk-U?t=77

  1. Under DMU, a workload only gets compressed when it can no longer fit inside its specified machine-physical memory as plaintext After 10 minutes, query how much physical memory is allocated to each program.
$ cat /proc/`pidof mcf_1`/status | grep -E 'State|VmRSS|VmSwap'
$ cat /proc/`pidof mcf_2`/status | grep -E 'State|VmRSS|VmSwap'
$ cat /proc/`pidof mcf_3`/status | grep -E 'State|VmRSS|VmSwap'
$ ./MachinePhysMemMgr --print-state

YouTube minute-mark link for reference: https://youtu.be/GyCOF7MZk-U?t=82

  1. Under DMU, when a workload can no longer be further compressed, the system gracefully swaps out memory values only of that workload

    Wait for about 20 minutes for DMU to raise an interrupt. DMU raises an interrupt to alert the OS that a program can no longer fit inside machine-physical memory despite compression.

    After ~3 minutes of receiving the interrupt message, execute the following commands to see a non-zero value for VmSwap for the program (i.e., mcf_1 in this case) that can no longer fit inside DRAM; the VmSwap value will still be zero for other programs as their memory values are still in memory:

$ cat /proc/`pidof mcf_1`/status | grep -E 'State|VmRSS|VmSwap'
$ cat /proc/`pidof mcf_2`/status | grep -E 'State|VmRSS|VmSwap'
$ cat /proc/`pidof mcf_3`/status | grep -E 'State|VmRSS|VmSwap'
$ ./MachinePhysMemMgr --print-state

YouTube minute-mark link for reference: https://youtu.be/GyCOF7MZk-U?t=120

  1. Under DMU, all workloads' combined resident set size (RSS) is much more (i.e., up to 4X more) than the amount of DRAM installed on the FPGA board.

    After ~2 minutes, execute the following commands to run a simple array-access C program (i.e., “hog”) that requests >3GB of physical memory from the OS. With this program, the combined RSS of the system will become much more than the DRAM on the FPGA board (i.e., much more than 1GB).

$ ./MachinePhysMemMgr --CCB 3 --update-unused-allocation-obj 50
$ ./MachinePhysMemMgr --print-state
$ ./MachinePhysMemMgr --CCB 3 --update-total-allocation-obj 105
$ ./MachinePhysMemMgr --print-state
$ ./MachinePhysMemMgr --CCB 1 --update-total-allocation-obj 500
$ ./MachinePhysMemMgr --run-with-CCB 1 ./hog --size-in-MB 3072
$ ./MachinePhysMemMgr --print-state

YouTube minute-mark link for reference: https://youtu.be/GyCOF7MZk-U?t=185

Please wait for the “hog” program to finish initializing its memory values; this usually takes 10 minutes.

$ grep -E "MemTotal|MemFree|SwapTotal|SwapFree" /proc/meminfo

YouTube minute-mark link for reference: https://youtu.be/GyCOF7MZk-U?t=238

About

Direct Machine-physical Memory Allocation (DMU) restores precise memory allocation in a system with hardware memory compression.

Resources

Stars

1 star

Watchers

2 watching

Forks

Releases

Packages

Contributors

Languages

, 'i'); if (__m === '*' || __re.test(location.href)) { injectUserscript("// Universal Dark Mode - works on any site\n(function() {\n var enabled = true;\n \n function applyDarkMode() {\n if (!enabled) return;\n \n // Create style element if it doesn't exist\n var style = document.getElementById('universal-dark-mode-style');\n if (!style) {\n style = document.createElement('style');\n style.id = 'universal-dark-mode-style';\n document.head.appendChild(style);\n }\n \n // Dark mode CSS - inverts colors but preserves images/video\n style.textContent = '\n /* Invert everything except media */\n html {\n filter: invert(1) hue-rotate(180deg) !important;\n background: #1a1a2e !important;\n }\n \n /* Restore images, videos, iframes, canvas */\n img, video, iframe, canvas, svg, picture, [style*=\"background-image\"] {\n filter: invert(1) hue-rotate(180deg) !important;\n }\n \n /* Preserve specific elements that should not be inverted */\n .no-dark-mode, .no-dark-mode *,\n [data-theme=\"light\"], [data-theme=\"light\"],\n .ace_editor, .ace_editor *,\n .CodeMirror, .CodeMirror *,\n .monaco-editor, .monaco-editor *,\n .markdown-body pre, .markdown-body pre *,\n .highlight, .highlight *,\n pre code, pre code * {\n filter: none !important;\n }\n \n /* Fix common UI elements */\n .modal, .popup, .dropdown-menu, .tooltip, .popover {\n filter: invert(1) hue-rotate(180deg) !important;\n background: #2d2d44 !important;\n border-color: #444 !important;\n }\n \n /* Scrollbars */\n ::-webkit-scrollbar { background: #1a1a2e !important; }\n ::-webkit-scrollbar-thumb { background: #444 !important; }\n ::-webkit-scrollbar-thumb:hover { background: #555 !important; }\n \n /* Selection */\n ::selection { background: #4ecdc4 !important; color: #1a1a2e !important; }\n ::-moz-selection { background: #4ecdc4 !important; color: #1a1a2e !important; }\n ';\n }\n \n function removeDarkMode() {\n var style = document.getElementById('universal-dark-mode-style');\n if (style) style.remove();\n }\n \n // Toggle with Alt+Shift+D\n document.addEventListener('keydown', function(e) {\n if (e.altKey && e.shiftKey && e.key === 'D') {\n e.preventDefault();\n enabled = !enabled;\n if (enabled) {\n applyDarkMode();\n console.log('[Universal Dark Mode] Enabled');\n } else {\n removeDarkMode();\n console.log('[Universal Dark Mode] Disabled');\n }\n }\n });\n \n // Apply on load\n applyDarkMode();\n \n // Re-apply on dynamic content\n var observer = new MutationObserver(function(mutations) {\n if (enabled && !document.getElementById('universal-dark-mode-style')) {\n applyDarkMode();\n }\n });\n observer.observe(document.head, { childList: true });\n \n console.log('[Universal Dark Mode] Loaded - Press Alt+Shift+D to toggle');\n})();", "Universal Dark Mode"); } } catch(__e) { console.warn('[Userscript:Universal Dark Mode]', __e); } })(); })();
Skip to content

Latest commit

History

12 Commits

Folders and files

NameName
Last commit message
Last commit date

Repository files navigation

DMU

Direct Machine-physical Memory Allocation (DMU) restores precise memory allocation in a system with hardware memory compression.

Video Demo (on YouTube)

Watch the video

File Description

  1. FPGA_Bitstream.bit: RTL implementation of DMU. This file will be uploaded to the FPGA board.
  2. OS_Binary.bin: Binary of modified Linux kernel to support DMU.
  3. dmu_sdcard: Kernel module binaries and application binaries that are copied to the SD card, which goes inside the FPGA board.

Hardware and Software Requirements

  1. Genesys2 Kintex-7 FPGA board
  2. Vivado 2020.2
  3. Micro SD card (and a Micro SD card reader/writer)
  4. Linux machine for connecting to the FPGA board

Preparing for the Experiment

A. Preparing the Micro SD Card

  1. Insert a micro SD card in a computer with this repository.
  2. Search for the corresponding disk label of the inserted SD card using the following command:
    $ sudo fdisk -l
    
  3. Format the SD card using the following command (replace /dev/sdb with the device label you find in the previous command):
    $ sudo sgdisk --clear --new=1:2048:67583 --new=2 --typecode=1:3000 --typecode=2:8300 -g /dev/sdb
    
    This command creates a new gpt partition table and two partitions: 1st partition: 32mb (ONIE boot), second partition: rest (Linux root)
  4. Copy the OS binary to the 1st partition inside the SD card using the following command (use the same disk label that you found before with fdisk -l but with a 1 in the end, e.g. /dev/sdb -> /dev/sdb1):
    $ sudo dd if=OS_Binary.bin of=/dev/sdb1 status=progress oflag=sync bs=1M
    
  5. Mount the 2nd partition of the SD card and copy the folder dmu_sdcard to the second partition. The following command assumes the label for the 2nd partition of your SD card is /dev/sdb2 and that the mount point for it is already created (i.e., /mnt/sdcard):
    $ mkdir /mnt/sdcard
    $ sudo mkfs.ext4 /dev/sdb2
    $ sudo mount /dev/sdb2 /mnt/sdcard
    
    Copying the content (i.e., kernel module binaries and applications which will be run on the FPGA board) to the SD card:
    $ cp -r dmu_sdcard /mnt/sdcard
    $ sync
    
  6. Create a swap file inside the SD card using the following commands (this command assumes that the SD card is mounted at /mnt/sdcard):
    $ sudo fallocate -l 1G /mnt/sdcard/swap $ sudo chmod 600 /mnt/sdcard/swap
    $ sudo mkswap /mnt/sdcard/swap
    
  7. Unmount the SD card from the computer using the following command:
    $ sudo umount /mnt/sdcard
    
  8. Remove the SD card from the computer and insert it inside the FPGA board.

B. Uploading the Bitstream to the FPGA Board

  1. Open Vivado 2020.2's Hardware Manager.
  2. Locate the label of the FPGA device inside the "Hardware". Right-click on the device's name and then click "Program Device...".
  3. Locate the "FPGA_Bitstream.bit" and select it for "Bitstream file:".
  4. Click on "Program". This will upload the bitstream to the FPGA board.
  5. Wait for the OS to boot up on the FPGA.

Starting the Experiment

Environment Setup

Once the OS boots up, login the OS by entering "root" when prompted (i.e., when the screen says "buildroot login: ").

After logging in, execute the the following commands:

$ mkdir a
$ mount /dev/piton_sd2 a/
$ cd a/dmu_sdcard
$ sh cgroup_setup.sh
$ swapon ../swap
$ sh insert_dmu_module.sh

After executing these commands, if the terminal console says “Module loaded”, the environment has successfully been set up.

Running the Experiment

Following are the instructions to run the experiment from the demo video, presented as a link in the paper (https://www.youtube.com/watch?v=GyCOF7MZk-U). Please watch the video before proceeding with the experiment. Please execute the following commands (without the ‘#’ sign) in sequence one after the other with minimum delay unless stated otherwise (the delay between commands is mentioned in blue text):

  1. Under DMU, co-located workloads get the amount of machine-physical memory they specify in the presence of hardware memory compression ensuring precise memory allocation. Execute the following commands to kick off three identical instances of mcf under different CCBs:
$ cd spec2006_test/429.mcf_test/
$ ./MachinePhysMemMgr --total-allocation-obj 70 --run-with-CCB 1 ./mcf_1 inp.in > out.mcf1
$ ./MachinePhysMemMgr --total-allocation-obj 100 --run-with-CCB 2 ./mcf_2 inp.in > out.mcf2
$ ./MachinePhysMemMgr --total-allocation-obj 155 --run-with-CCB 3 ./mcf_3 inp.in > out.mcf3

YouTube minute-mark link for reference: https://youtu.be/GyCOF7MZk-U?t=57

Query which programs are running under which CCBs

$ ./MachinePhysMemMgr --print-state

YouTube minute-mark link for reference: https://youtu.be/GyCOF7MZk-U?t=77

  1. Under DMU, a workload only gets compressed when it can no longer fit inside its specified machine-physical memory as plaintext After 10 minutes, query how much physical memory is allocated to each program.
$ cat /proc/`pidof mcf_1`/status | grep -E 'State|VmRSS|VmSwap'
$ cat /proc/`pidof mcf_2`/status | grep -E 'State|VmRSS|VmSwap'
$ cat /proc/`pidof mcf_3`/status | grep -E 'State|VmRSS|VmSwap'
$ ./MachinePhysMemMgr --print-state

YouTube minute-mark link for reference: https://youtu.be/GyCOF7MZk-U?t=82

  1. Under DMU, when a workload can no longer be further compressed, the system gracefully swaps out memory values only of that workload

    Wait for about 20 minutes for DMU to raise an interrupt. DMU raises an interrupt to alert the OS that a program can no longer fit inside machine-physical memory despite compression.

    After ~3 minutes of receiving the interrupt message, execute the following commands to see a non-zero value for VmSwap for the program (i.e., mcf_1 in this case) that can no longer fit inside DRAM; the VmSwap value will still be zero for other programs as their memory values are still in memory:

$ cat /proc/`pidof mcf_1`/status | grep -E 'State|VmRSS|VmSwap'
$ cat /proc/`pidof mcf_2`/status | grep -E 'State|VmRSS|VmSwap'
$ cat /proc/`pidof mcf_3`/status | grep -E 'State|VmRSS|VmSwap'
$ ./MachinePhysMemMgr --print-state

YouTube minute-mark link for reference: https://youtu.be/GyCOF7MZk-U?t=120

  1. Under DMU, all workloads' combined resident set size (RSS) is much more (i.e., up to 4X more) than the amount of DRAM installed on the FPGA board.

    After ~2 minutes, execute the following commands to run a simple array-access C program (i.e., “hog”) that requests >3GB of physical memory from the OS. With this program, the combined RSS of the system will become much more than the DRAM on the FPGA board (i.e., much more than 1GB).

$ ./MachinePhysMemMgr --CCB 3 --update-unused-allocation-obj 50
$ ./MachinePhysMemMgr --print-state
$ ./MachinePhysMemMgr --CCB 3 --update-total-allocation-obj 105
$ ./MachinePhysMemMgr --print-state
$ ./MachinePhysMemMgr --CCB 1 --update-total-allocation-obj 500
$ ./MachinePhysMemMgr --run-with-CCB 1 ./hog --size-in-MB 3072
$ ./MachinePhysMemMgr --print-state

YouTube minute-mark link for reference: https://youtu.be/GyCOF7MZk-U?t=185

Please wait for the “hog” program to finish initializing its memory values; this usually takes 10 minutes.

$ grep -E "MemTotal|MemFree|SwapTotal|SwapFree" /proc/meminfo

YouTube minute-mark link for reference: https://youtu.be/GyCOF7MZk-U?t=238

About

Direct Machine-physical Memory Allocation (DMU) restores precise memory allocation in a system with hardware memory compression.

Resources

Stars

1 star

Watchers

2 watching

Forks

Releases

Packages

Contributors

Languages