



npm install react-native-video-processing --saveyarn add react-native-video-processing$ npm test or $ yarn test
Note: For RN 0.60+
cd ios && pod installiOS Prerequisite: Please make sure CocoaPods is installed on your system
- Add the line below to your `Podfile` -> `ios/Podfile` and run pod install:
pod 'GPUImage', git: 'https://github.com/LeoARApp/GPUImage.git'
Note: For RN 0.4x use 1.0 version, for RN 0.3x use 0.16
Open up
android/app/src/main/java/[...]/MainApplication.javaAdd
import com.shahenlibrary.RNVideoProcessingPackage;to the imports at the top of the fileAdd new
new RNVideoProcessingPackage()to the list returned by the getPackages() methodAppend the following lines to
android/settings.gradle:
include ':react-native-video-processing'
project(':react-native-video-processing').projectDir = new File(rootProject.projectDir, '../node_modules/react-native-video-processing/android')
- Insert the following lines inside the dependencies block in
android/app/build.gradle:
compile project(':react-native-video-processing')
- Add the following lines to
AndroidManifest.xml:
 <uses-permission android:name="android.permission.READ_EXTERNAL_STORAGE" />
<uses-permission android:name="android.permission.WRITE_EXTERNAL_STORAGE"/>
In Xcode, right click your Xcode project and create
New GroupcalledRNVideoProcessing.Go to
node_modules/react-native-video-processing/ios/RNVideoProcessingand drag the.swiftfiles under the group you just created. PressCreate folder referencesoption if not pressed.Repeat steps 1 & 2 for the subdirectories
RNVideoTrimmer,RNTrimmerView, andICGVideoTrimmerand all the files underneath them. Make sure you keep the folders hierarchy the same.Go to
node_modules/react-native-video-processing/ios/GPUImage/frameworkand dragGPUImage.xcodeprojto your project's root directory in Xcode.
Under your project's
Build Phases, make sure the.swiftfiles you added appear underCompile Sources.Under your project's
Generaltab, add the following frameworks toLinked Frameworks and Libraries:

- CoreMedia
- CoreVideo
- OpenGLES
- AVFoundation
- QuartzCore
- MobileCoreServices
- GPUImage
Add
GPUImage.frameworkiOStoEmbedded Binaries.Navigate to your project's bridging header file <ProjectName-Bridging-Header.h> and add
#import "RNVideoProcessing.h".Clean and run your project.
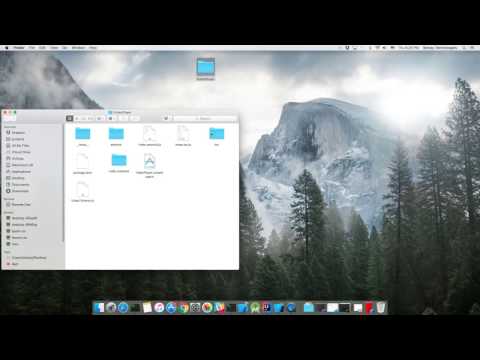
Check the following video for more setup reference.
- Clone mobile-ffmpeg
- Setup project, see Prerequisites in README.
- Modify
build/android-ffmpeg.shso it generates binaries (more info)- Delete --disable-programs line
- Change --disable-static line to --enable-static
- Delete --enable-shared line
- Compile binaries:
./android.sh --lts --disable-arm-v7a-neon --enable-x264 --enable-gpl --speed. The command might finish withfailed. That's okay because we modified the build script. Make sure every build outputs:ffmpeg: ok. - Find
ffmpegbinaries inprebuilt/[android-arm|android-arm64|android-x86|android-x86_64]/ffmpeg/bin/ffmpeg - Copy and rename binaries to
android/src/main/jniLibs/[armeabi-v7a|arm64-v8a|x86|x86_64]/libffmpeg.so. Make sure you rename the binaries fromffmpegtolibffmpeg.so!
importReact,{Component}from'react';import{View}from'react-native';import{VideoPlayer,Trimmer}from'react-native-video-processing';classAppextendsComponent{trimVideo(){constoptions={startTime: 0,endTime: 15,quality: VideoPlayer.Constants.quality.QUALITY_1280x720,// iOS onlysaveToCameraRoll: true,// default is false // iOS onlysaveWithCurrentDate: true,// default is false // iOS only};this.videoPlayerRef.trim(options).then((newSource)=>console.log(newSource)).catch(console.warn);}compressVideo(){constoptions={width: 720,height: 1280,bitrateMultiplier: 3,saveToCameraRoll: true,// default is false, iOS onlysaveWithCurrentDate: true,// default is false, iOS onlyminimumBitrate: 300000,removeAudio: true,// default is false};this.videoPlayerRef.compress(options).then((newSource)=>console.log(newSource)).catch(console.warn);}getPreviewImageForSecond(second){constmaximumSize={width: 640,height: 1024};// default is { width: 1080, height: 1080 } iOS onlythis.videoPlayerRef.getPreviewForSecond(second,maximumSize)// maximumSize is iOS only.then((base64String)=>console.log('This is BASE64 of image',base64String)).catch(console.warn);}getVideoInfo(){this.videoPlayerRef.getVideoInfo().then((info)=>console.log(info)).catch(console.warn);}render(){return(<Viewstyle={{flex: 1}}><VideoPlayerref={ref=>this.videoPlayerRef=ref}startTime={30}// secondsendTime={120}// secondsplay={true}// default falsereplay={true}// should player play video again if it's endedrotate={true}// use this prop to rotate video if it captured in landscape mode iOS onlysource={'file:///sdcard/DCIM/....'}playerWidth={300}// iOS onlyplayerHeight={500}// iOS onlystyle={{backgroundColor: 'black'}}resizeMode={VideoPlayer.Constants.resizeMode.CONTAIN}onChange={({ nativeEvent })=>console.log({ nativeEvent })}// get Current time on every second/><Trimmersource={'file:///sdcard/DCIM/....'}height={100}width={300}onTrackerMove={(e)=>console.log(e.currentTime)}// iOS onlycurrentTime={this.video.currentTime}// use this prop to set tracker position iOS onlythemeColor={'white'}// iOS onlythumbWidth={30}// iOS onlytrackerColor={'green'}// iOS onlyonChange={(e)=>console.log(e.startTime,e.endTime)}/></View>);}}Or you can use ProcessingManager without mounting VideoPlayer component:
importReact,{Component}from'react';import{View}from'react-native';import{ProcessingManager}from'react-native-video-processing';exportclassAppextendsComponent{componentWillMount(){const{ source }=this.props;ProcessingManager.getVideoInfo(source).then(({ duration, size, frameRate, bitrate })=>console.log(duration,size,frameRate,bitrate));// on iOS it's possible to trim remote files by using remote file as sourceProcessingManager.trim(source,options)// like VideoPlayer trim options.then((data)=>console.log(data));ProcessingManager.compress(source,options)// like VideoPlayer compress options.then((data)=>console.log(data));ProcessingManager.reverse(source)// reverses the source video.then((data)=>console.log(data));// returns the new file sourceProcessingManager.boomerang(source)// creates a "boomerang" of the surce video (plays forward then plays backwards).then((data)=>console.log(data));// returns the new file sourceconstmaximumSize={width: 100,height: 200};ProcessingManager.getPreviewForSecond(source,forSecond,maximumSize).then((data)=>console.log(data))}render(){return<View/>;}}If this project was helpful to you, please


- Please follow the eslint style guide.
- Please commit with
$ npm run commit
- Use FFMpeg instead of MP4Parser
- Add ability to add GLSL filters
- Android should be able to compress video
- More processing options
- Create native trimmer component for Android
- Provide Standalone API
- Describe API methods with parameters in README