






If you are not familiarized with NSFetchedResultsController, it allows you to efficiently manage the results returned from a Core Data fetch request to provide data for a UITableView or a UICollectionView. NSFetchedResultsController monitors changes in Core Data objects and notifies the view about those changes allowing you to be reactive about them.1
Using NSFetchedResultsController and NSFetchedResultsControllerDelegate is awesome, but sadly it involves a lot of boilerplate. Well, luckily with DATASource not anymore.
- Encapsulates NSFetchedResultsController and NSFetchedResultsControllerDelegate boilerplate
- Supports indexed tables out of the box
- Supports sectioned collections out of the box
- Swift
- Objective-C compatibility
Hooking up your table view to your Task model and making your UITableView react to insertions, updates and deletions is as simple as this.
Swift:
lazy vardataSource:DATASource={letrequest:NSFetchRequest=NSFetchRequest<NSFetchRequestResult>(entityName:"Task")
request.sortDescriptors =[NSSortDescriptor(key:"title", ascending:true)]letdataSource=DATASource(tableView:self.tableView, cellIdentifier:"Cell", fetchRequest: request, mainContext:self.dataStack.mainContext, configuration:{ cell, item, indexPath in
cell.textLabel?.text = item.valueForKey("title")as?String})return dataSource }()overridefunc viewDidLoad(){
super.viewDidLoad()self.tableView.dataSource =self.dataSource
}
Objective-C:
NSFetchRequest *request = [[NSFetchRequestalloc] initWithEntityName:@"Task"];
request.sortDescriptors = @[[NSSortDescriptor sortDescriptorWithKey:@"title" ascending:YES]];
DATASource *dataSource = [[DATASource alloc] initWithTableView:self.tableView
cellIdentifier:@"Cell"fetchRequest:request
mainContext:self.dataStack.mainContext
sectionName:nilconfiguration:^(UITableViewCell * _Nonnull cell, NSManagedObject * _Nonnull item, NSIndexPath * _Nonnull indexPath) {
cell.textLabel.text = [item valueForKey:@"name"];
}];
self.tableView.dataSource = dataSource;DATASource provides an easy way to show an sectioned UITableView, you just need to specify the attribute we should use to group your items. This attribute is located in the dataSource initializer as a parameter called sectionName.
Check the TableViewControllerWithSections Demo for an example of this, were we have an sectioned UITableView of names, where each section is defined by the first letter of the name, just like the Contacts app!
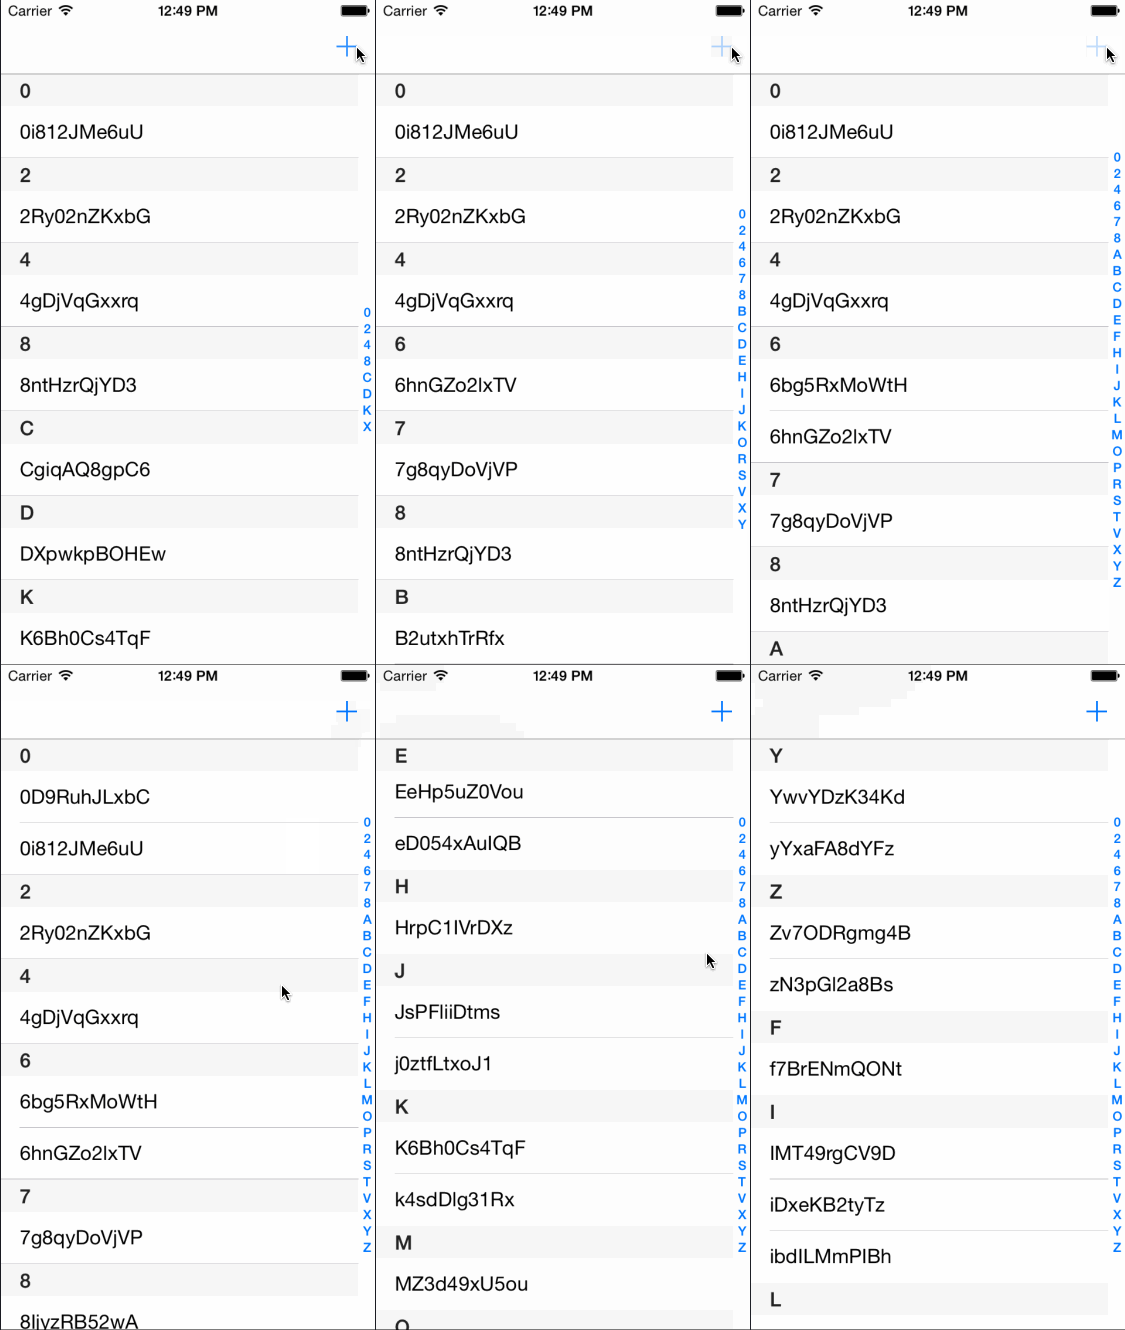
You can disable the indexes by overwritting the method that generates them and just return an empty list of indexes. Add the DATASourceDelegate protocol to your controller then implement the sectionIndexTitlesForDataSource:dataSource:tableView method, like this:
self.dataSource.delegate =selfextensionMyController:DATASourceDelegate{func sectionIndexTitlesForDataSource(dataSource:DATASource, tableView:UITableView)->[String]{return[String]()}}By default DATASource uses the UITableView's built-in header. But many apps require the use of custom headers when using sectioned table views. To be able to use your custom header view, you will need to disable the built-in header by implementing dataSource:tableView:titleForHeaderInSection: in the DATASourceDelegate so it returns nil:
self.dataSource.delegate =selfextensionMyController:DATASourceDelegate{func dataSource(dataSource:DATASource, tableView:UITableView, titleForHeaderInSection section:Int)->String?{returnnil}}DATASource also provides a simple method to get the title for an specific section, useful when dealing with custom headers.
letsectionTitle=self.dataSource.titleForHeaderInSection(section)DATASource takes ownership of your UITableViewDataSource providing boilerplate functionality for the most common tasks, but if you need to override any of the UITableViewDataSource methods you can use the DATASourceDelegate.
Hooking up a UICollectionView is as simple as doing it with a UITableView, just use this method.
Swift:
letrequest:NSFetchRequest=NSFetchRequest<NSFetchRequestResult>(entityName:"Task")
request.sortDescriptors =[NSSortDescriptor(key:"title", ascending:true)]letdataSource=DATASource(collectionView:self.collectionView, cellIdentifier:"Cell", fetchRequest: request, mainContext:self.dataStack.mainContext, configuration:{ cell, item, indexPath in
cell.textLabel.text = item.valueForKey("title")as?String})
collectionView.dataSource = dataSource
Objective-C:
NSFetchRequest *request = [[NSFetchRequestalloc] initWithEntityName:@"Task"];
request.sortDescriptors = @[[NSSortDescriptor sortDescriptorWithKey:@"title" ascending:YES]];
DATASource *dataSource = [[DATASource alloc] initWithCollectionView:self.collectionView
cellIdentifier:CollectionCellIdentifier
fetchRequest:request
mainContext:self.dataStack.mainContext
sectionName:nilconfiguration:^(UICollectionViewCell * _Nonnull cell, NSManagedObject * _Nonnull item, NSIndexPath * _Nonnull indexPath) {
CollectionCell *collectionCell = (CollectionCell *)cell;
[collectionCell updateWithText:[item valueForKey:@"name"]];
}];
self.collectionView.dataSource = dataSource;DATASource provides an easy way to show an grouped UICollectionView, you just need to specify the attribute we should use to group your items. This attribute is located in the dataSource initializer as a parameter called sectionName. This will create a collectionView reusable header.
Check the CollectionViewControllerWithSections Demo for an example of this, were we have a grouped UICollectionView using the first letter of a name as a header, just like the Contacts.app!

DATASource takes ownership of your UICollectionViewDataSource providing boilerplate functionality for the most common tasks, but if you need to override any of the UICollectionViewDataSource methods you can use the DATASourceDelegate. Check the CollectionView Demo where we show how to add a footer view to your DATASource backed UICollectionView.
By default UITableViewRowAnimation.automatic is used to animate inserts, updates and deletes, but if you want to overwrite this animation types you can use the animations dictionary on DATASource.
letdataSource=...
dataSource.animations[.insert]=.fadeletdataSource=...
dataSource.animations =[.update:.none,.move :.none,.insert:.none]DATASource is available through CocoaPods. To install it, simply add the following line to your Podfile:
pod'DATASource','~> 7'DATASource is also available through Carthage. To install it, simply add the following line to your Cartfile:
github"SyncDB/DATASource" ~> 7.0Elvis Nuñez, @3lvis
DATASource is available under the MIT license. See the LICENSE file for more info.
1.- Quoted from the RealmResultsController article.