

An IoT + Azure sample that detects the sentiment of incoming text messages, performs sentiment analysis on the text, and changes the color of a Philips Hue lightbulb to correspond with the average sentiment.

- The phone on the left sends a text message to the Twilio phone number.
- Twilio forwards the text message to an Azure Function
- This first Azure Function determines the sentiment of the message then sends an emoji response back to the phone on the left
- The second Azure Function saves the message to an Azure SQL Database
- The third Azure Function invokes SignalR
- SignalR sends a real-time update to the phone on the right, containing the new message
- The phone on the right displays the new message, then updates its background color to match the average sentiment of the received messages
- The phone on the right then simultaneously changes the light color of the Philips Hue light to match the average sentiment

{
"documents": [
{
"language": "en",
"id": "251c99d7-1f89-426a-a3ad-c6fa1b34f020",
"text": "I hope you find time to actually get your reports done today."
}
]
}{
"sentiment": {
"documents": [
{
"id": "251c99d7-1f89-426a-a3ad-c6fa1b34f020",
"score": 0.776355504989624
}
]
}To use the Sentiment Analysis API, we'll need to first create an API Key using the Azure Portal.
Navigate to the Azure Portal
- If you are new to Azure, use this sign-up link to receive a free $200 credit
On the Azure Portal, select + Create a Resource
In the New window, select AI + Machine Learning
In the Featured frame, select Text Analytics
In the Create window, make the following selections
- Name: TextMood
- Subscription: [Select your Azure subscription]
- Location: [Select the location closest to you]
- Pricing Tier: F0 (5K Transactions per 30 days)
- This is a free tier
- Resource Group: TextMood
In the Create window, select Create
On the Azure Portal, select the bell-shaped notification icon
Stand by while the Notifications window says Deployment in progress...
Once the deployment has finished, on the Notifications window, select Go to resource
In the TextMood Resource page, select Keys and locate KEY 1
- We will use this API Key when we create our Azure Function
In the TextMood Resource page, select Overview and locate the Endpoint
- We will use this Url when we create our Azure Function
Azure Functions are a serverless offering in Azure. In these steps, we will use Azure Functions to create a POST API.
Clone or download this repo
- To clone the repo using git, open a cmd prompt and enter the following command:
git clone https://github.com/brminnick/TextMood.git
- To download the repo use the following steps:
- Click Clone or Download
- Click Download Zip
- To clone the repo using git, open a cmd prompt and enter the following command:
After downloading/cloning the repo, locate
TextMood.slnLaunch
TextMood.slnin Visual StudioIn CognitiveServicesConstants.cs, for
TextSentimentAPIKey, replaceYour API Keywith the Key from the TextAnalytics Cognitive Service resource created earlierIn CognitiveServicesConstants.cs, for
BaseUrl, replaceYour Cognitive Services Base Urlwith the Base Url from the TextAnalytics Cognitive Service resource created earlierIn the Visual Studio Solution Explorer, right-click the TextMood project
In the right-click menu, select Publish

- In the Publish window, select Function App
- In the Publish window, select Create New
- In the Public window, select Publish

In the Create App Service window, enter an App Name
- Note: The app name needs to be unique because it will be used for the Function's url
- I recommend using TextMood[LastName]
- In this example, I am using TextMoodMinnick
In the Create App Service window, select your subscription
In the Create App Service window, next to Resource Group select New...

- In the New resource group name window, enter TextMood
- In the New resource group name, select OK

- In the Create App Service window, next to Hosting Plan, select New...
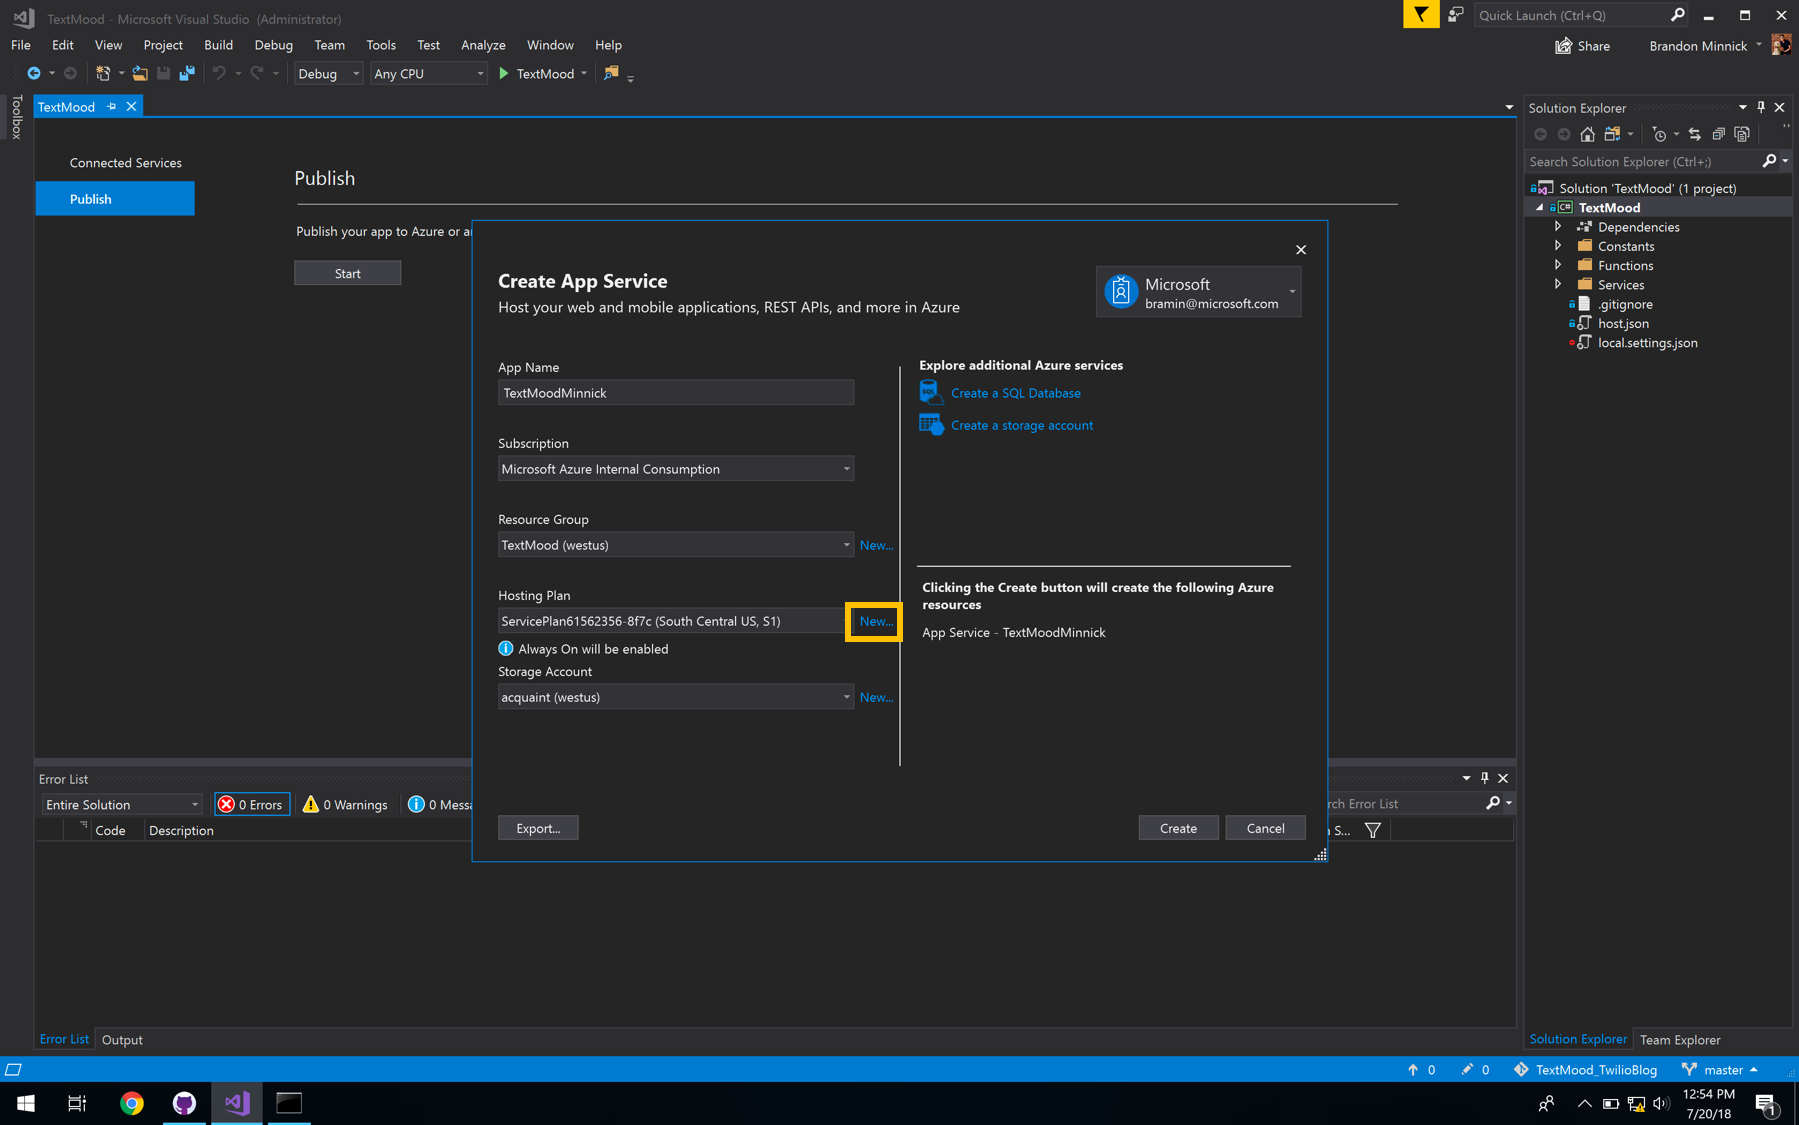
In the Configure Hosting Plan window, enter a name for App Service Plan
- I recommend using TextMood[LastName]Plan
- In this example, I am using TextMoodMinnickPlan
- I recommend using TextMood[LastName]Plan
In the Configure Hosting Plan window, select a Location
- I recommend selecting the location closest to you
In the Configure Hosting Plan window, for the Size, select Consumption
In the Configure Hosting Plan window, select OK

- In the Create App Service window, next to Storage Account, select New...

- In the Storage Account window, enter an Account Name
- I recommend using textmood[LastName]
- In this example, I am using textmoodminnick
- I recommend using textmood[LastName]
- In the Storage Account window, for the Account Type, select Standard - Locally Redundant
- In the Storage Account window, select OK

- In the Create App Service window, select Create
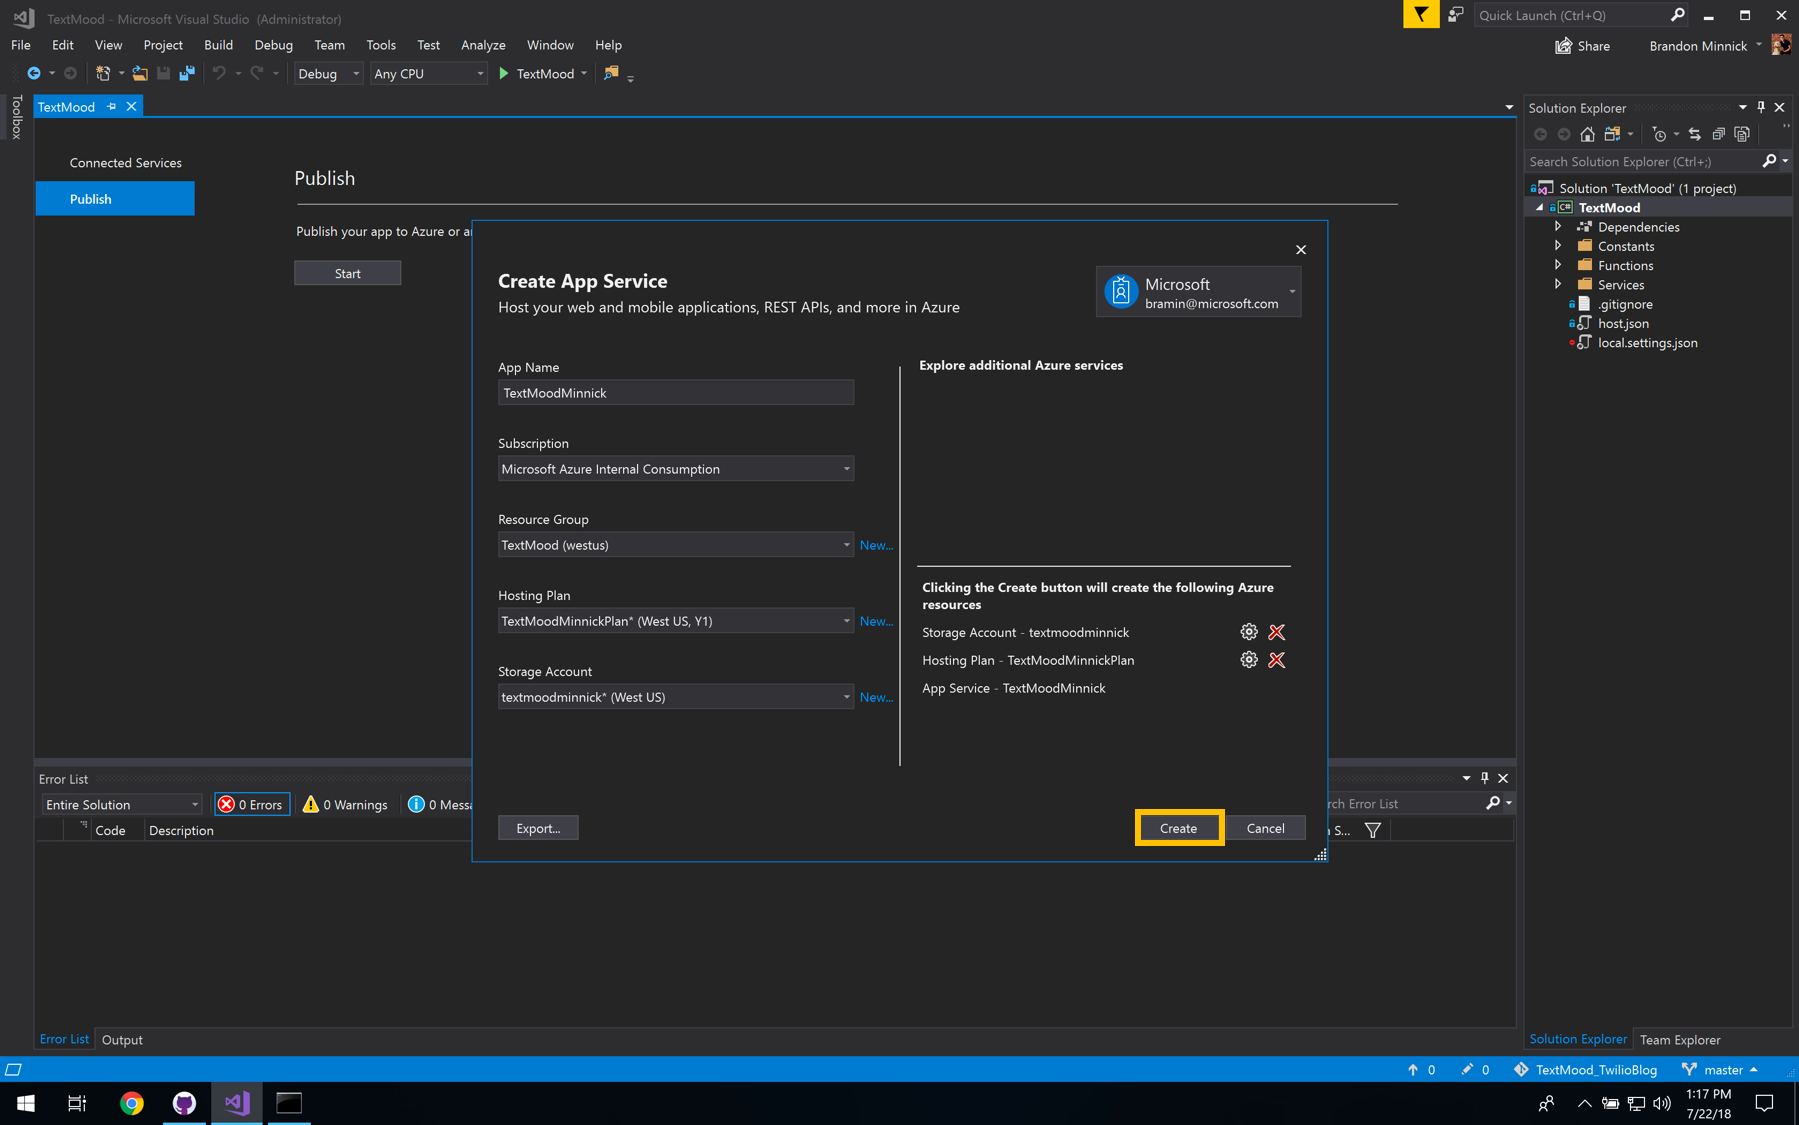
- Stand by while the Azure Function is created

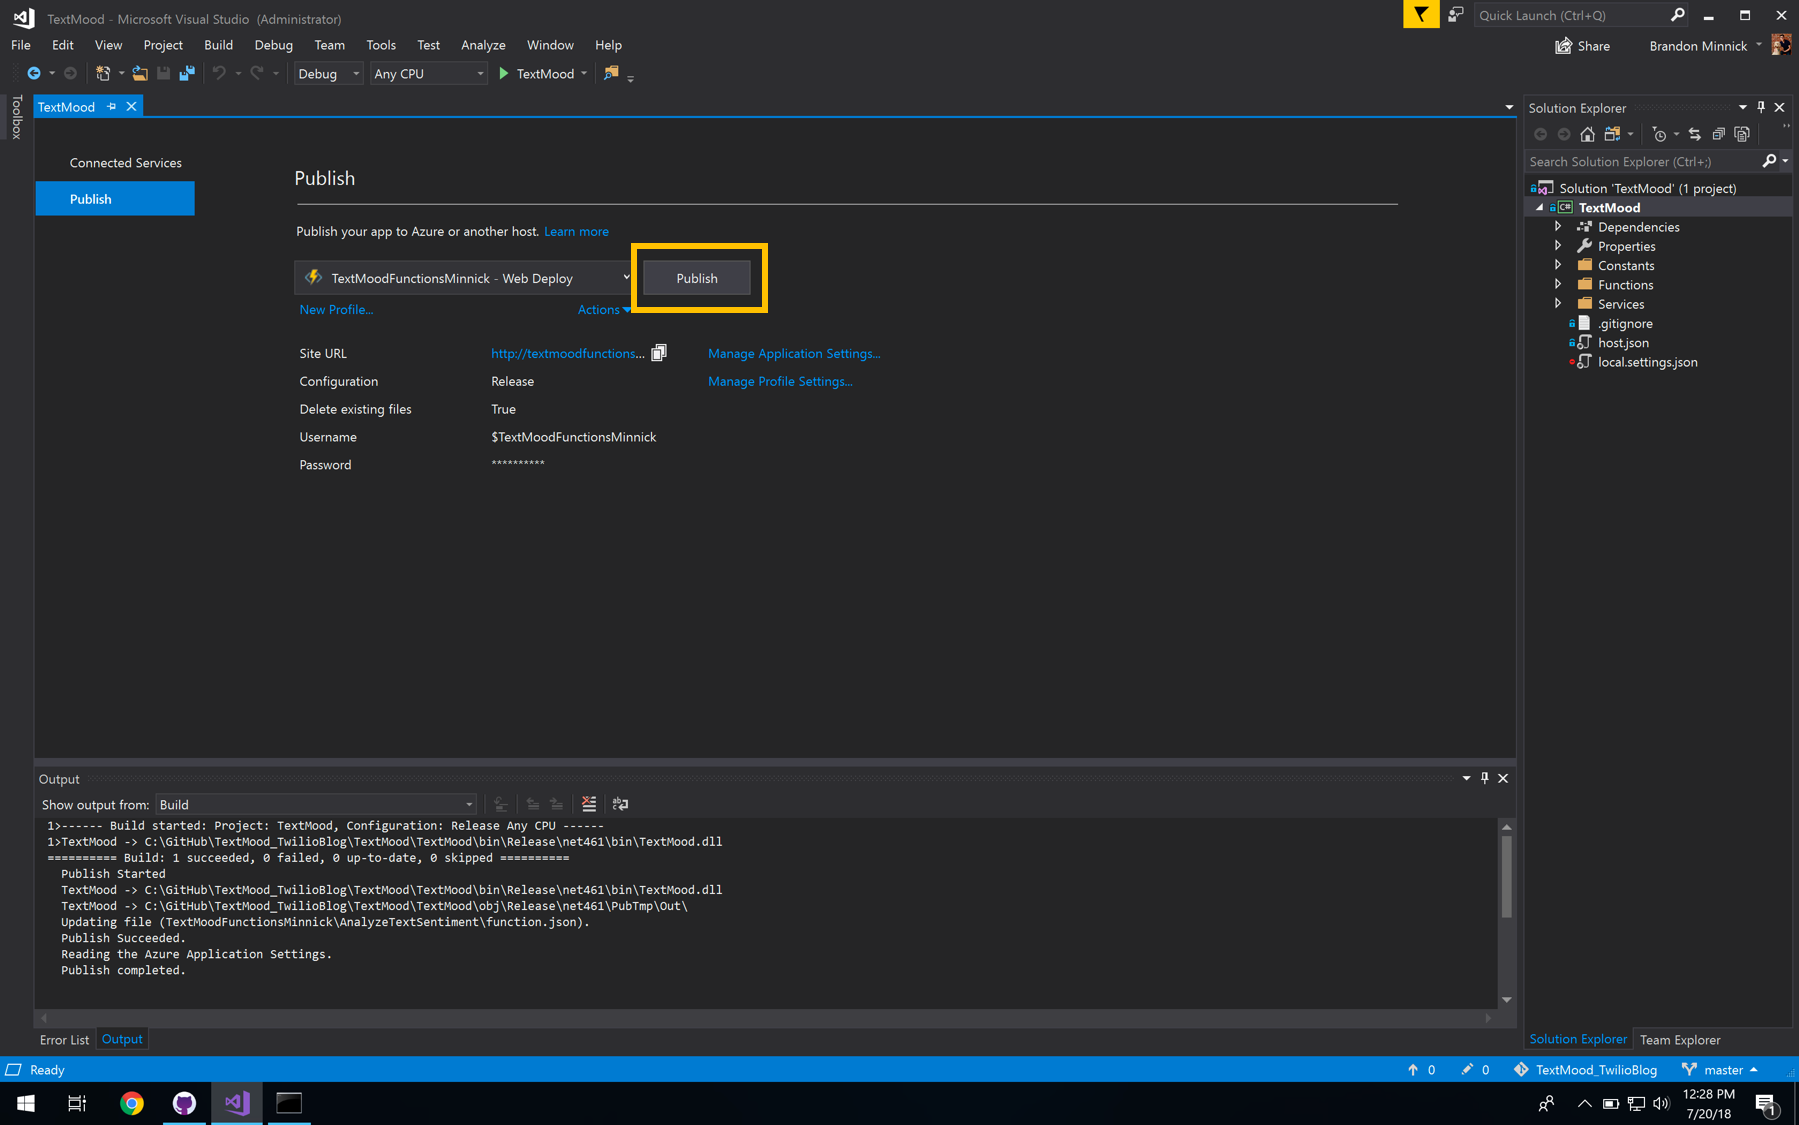
- In the Visual Studio Solution Explorer, right-click the TextMood project
- In the right-click menu, select Publish
- In the Publish window, select Publish
- Navigate to the Azure Portal
- On the Azure Portal, select Resource Groups
- In the Resource Group window, select TextMood

- In the TextMood Resource Group window, select Overview
- In the TextMood Overview window, select the Azure Function resource, TextMood[LastName]

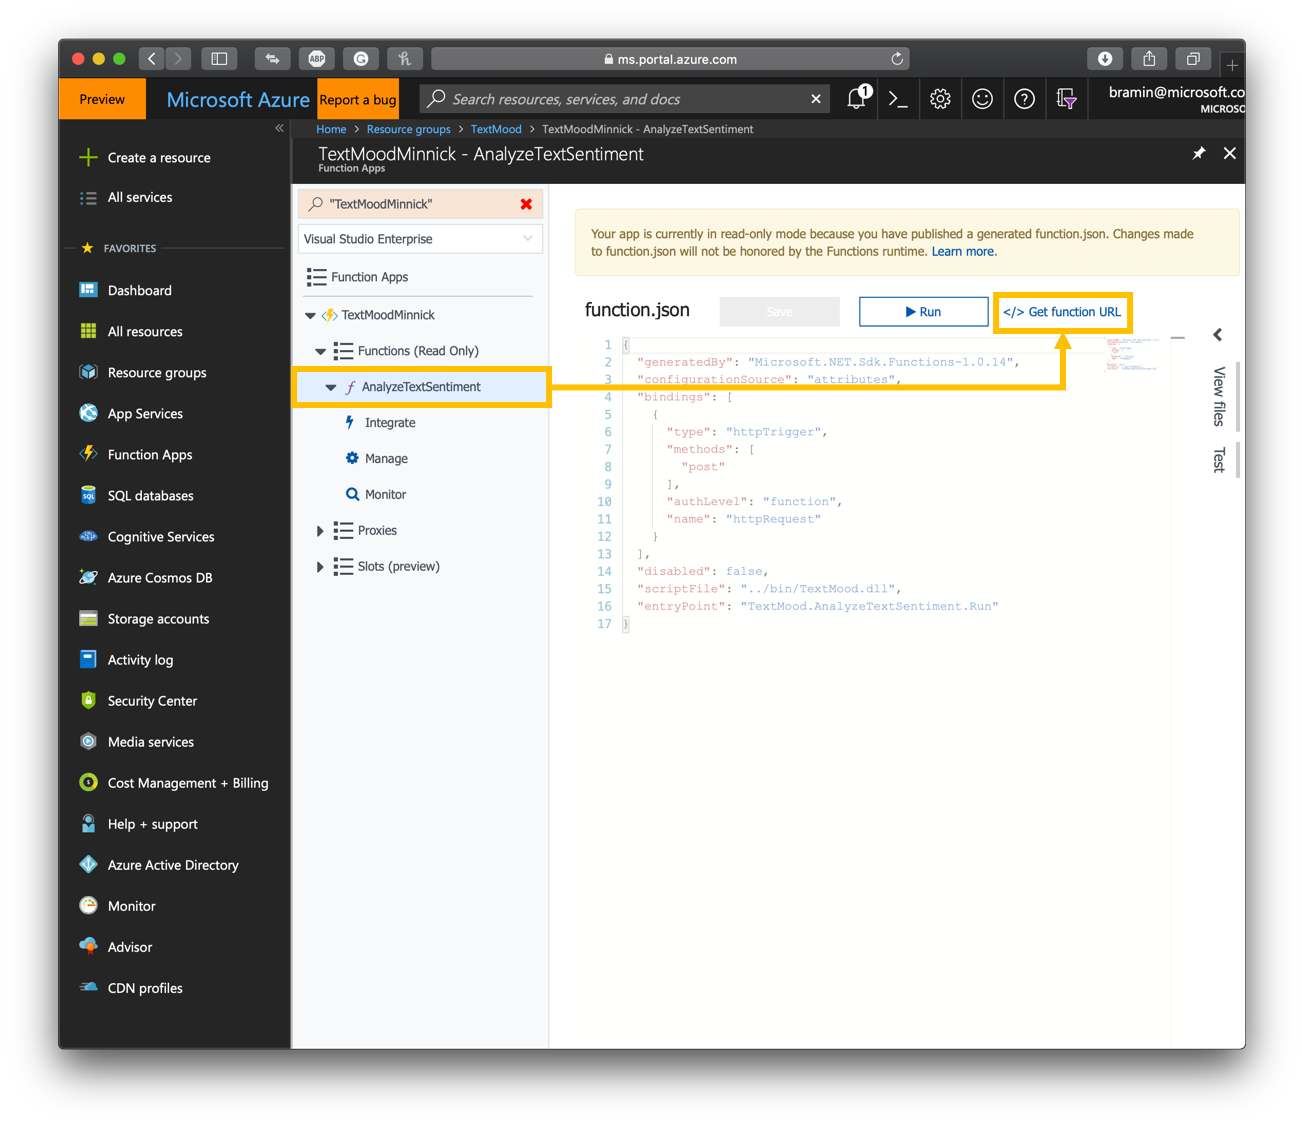
- In the Azure Functions window, select AnalyzeTextSentiment
- In the AnalyzeSentiment window, select Get Function Url
- We will use this Url when we create our Twilio phone number
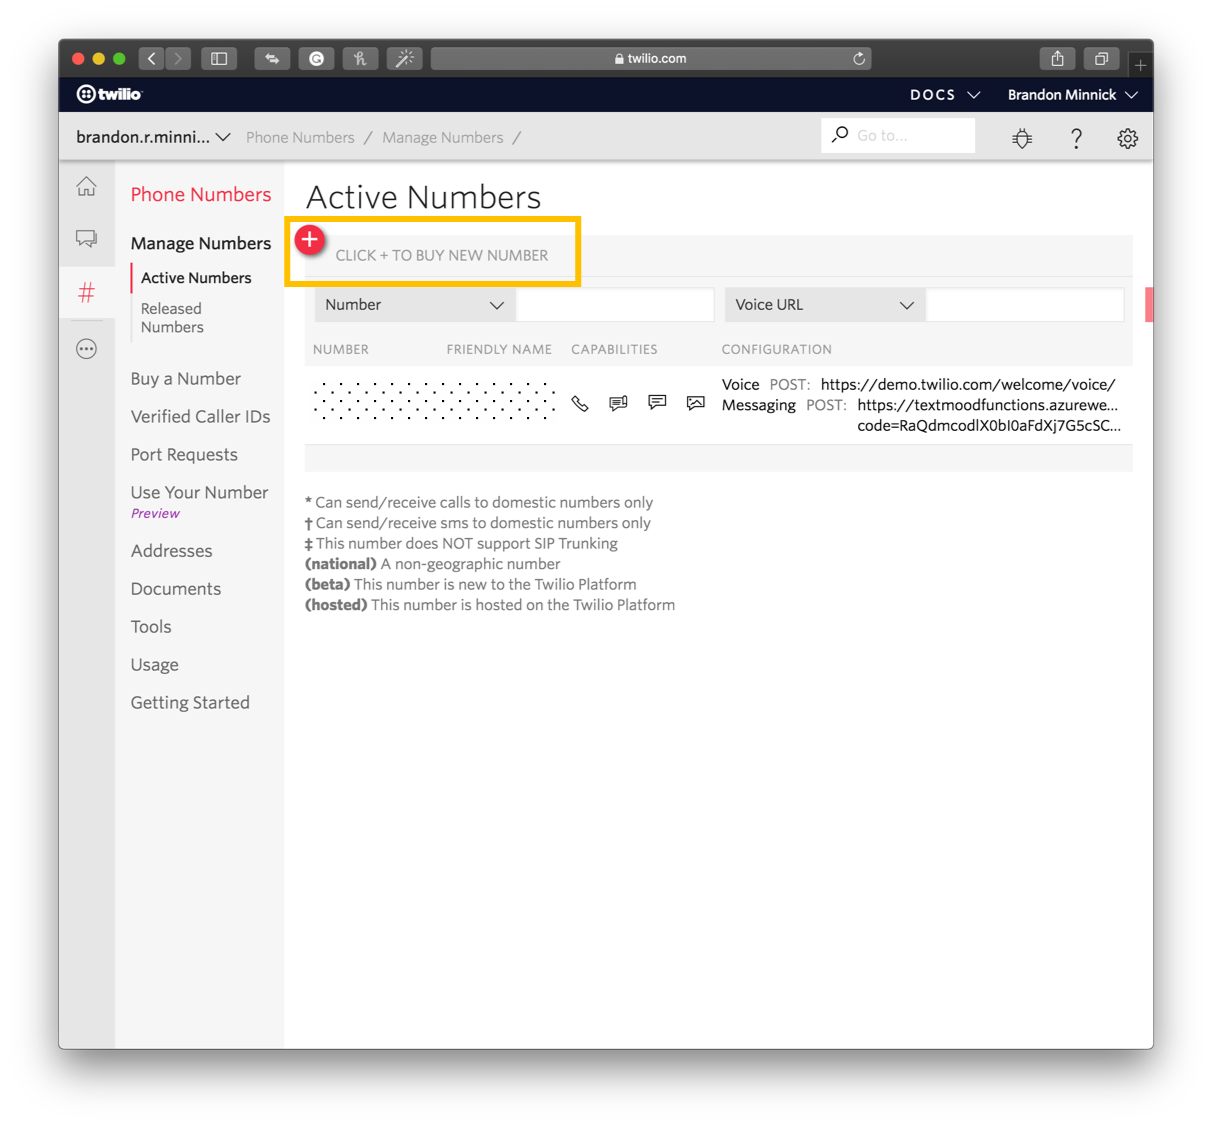
Log into your Twilio account and navigate to the Manage Numbers page.
Click the + sign to buy a new number
- Note you may skip this step if you have an existing Twilio Phone Number
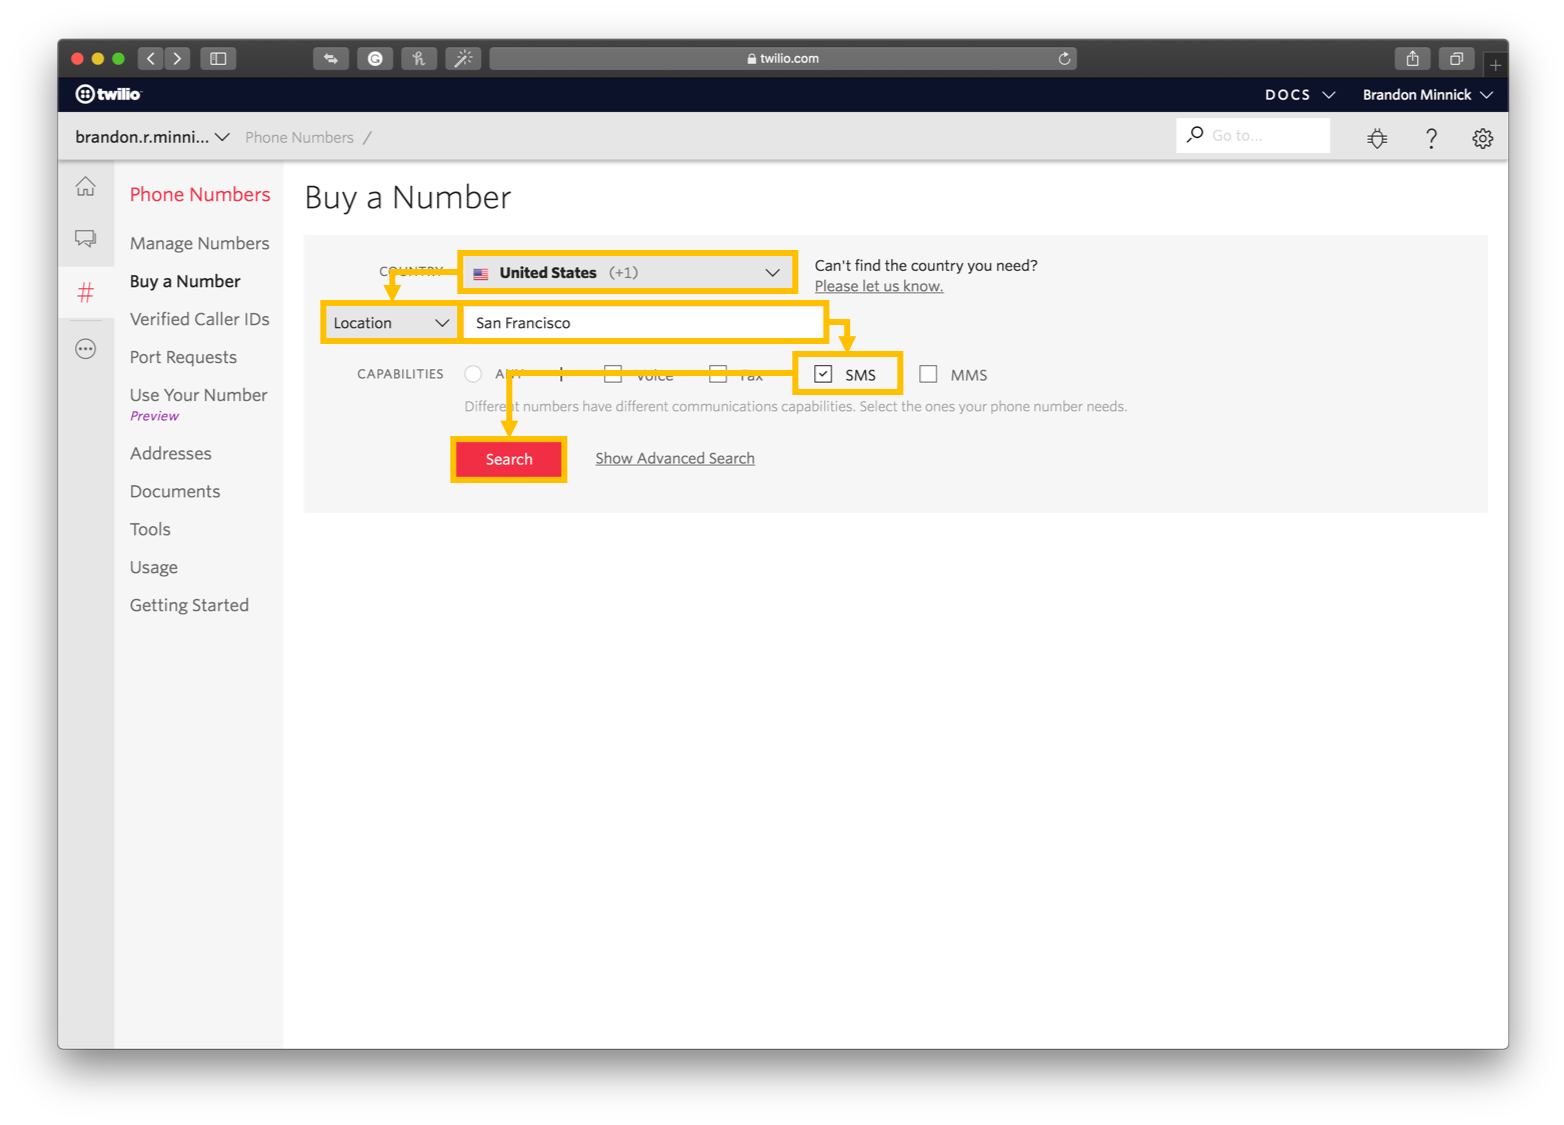
On the Buy a Number page, select a Country
- For this example, I am using United States
On the Buy a Number page, tap the Number drop down and change it to Location
On the Buy a Number page, enter a location name
- For this example, I am using San Francisco
On the Buy a Number page, check SMS
On the Buy a Number page, click Search
- On the search results page, locate the number you'd like to purchase and select Buy

- In the confirmation window, select Buy This Number

- In the purchase confirmation window, select Setup Number

- In the Messaging section, next to A Message Comes In, select Webhook
- In the Messaging section, next to A Message Comes In, enter the Azure Function Url that we created in the previous section
- In the Messaging section, next to A Message Comes In, select HTTP POST
- In the Manage Numbers window, select Save

- Open a text messaging app and send a text message to your Twilio phone number
