
This is a Computer vision package that makes its easy to run Image processing and AI functions. At the core it uses OpenCV and Mediapipe libraries.
You can simply use pip to install the latest version of cvzone.
pip install cvzone
For sample usage and examples, please refer to the Examples folder in this repository. This folder contains various examples to help you understand how to make the most out of cvzone's features.
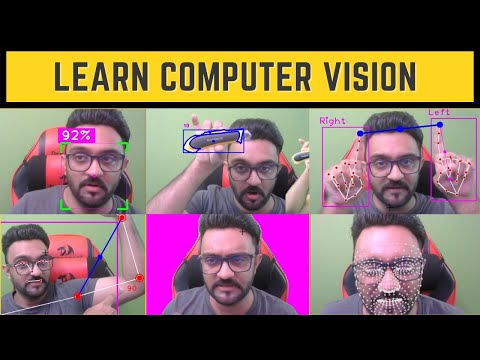
- Installations
- Corner Rectangle
- PutTextRect
- Download Image from URL
- Overlay PNG
- Rotate Image
- Stack Images
- FPS
- Finding Contours
- Color Module
- Classification Module
- Face Detection
- Face Mesh Module
- Selfie Segmentation Module
- Hand Tracking Module
- Pose Module
- Serial Module
- Plot Module
To install the cvzone package, run the following command:
pip install cvzone
importcv2importcvzone# Importing the cvzone library# Initialize the webcamcap=cv2.VideoCapture(2) # Capture video from the third webcam (0-based index)# Main loop to continuously capture frameswhileTrue:
# Capture a single frame from the webcamsuccess, img=cap.read() # 'success' is a boolean that indicates if the frame was captured successfully, and 'img' contains the frame itself# Add a rectangle with styled corners to the imageimg=cvzone.cornerRect(
img, # The image to draw on
(200, 200, 300, 200), # The position and dimensions of the rectangle (x, y, width, height)l=30, # Length of the corner edgest=5, # Thickness of the corner edgesrt=1, # Thickness of the rectanglecolorR=(255, 0, 255), # Color of the rectanglecolorC=(0, 255, 0) # Color of the corner edges
)
# Show the modified imagecv2.imshow("Image", img) # Display the image in a window named "Image"# Wait for 1 millisecond between framescv2.waitKey(1) # Waits 1 ms for a key event (not being used here)
importcv2importcvzone# Importing the cvzone library# Initialize the webcamcap=cv2.VideoCapture(2) # Capture video from the third webcam (0-based index)# Main loop to continuously capture frameswhileTrue:
# Capture a single frame from the webcamsuccess, img=cap.read() # 'success' is a boolean that indicates if the frame was captured successfully, and 'img' contains the frame itself# Add a rectangle and put text inside it on the imageimg, bbox=cvzone.putTextRect(
img, "CVZone", (50, 50), # Image and starting position of the rectanglescale=3, thickness=3, # Font scale and thicknesscolorT=(255, 255, 255), colorR=(255, 0, 255), # Text color and Rectangle colorfont=cv2.FONT_HERSHEY_PLAIN, # Font typeoffset=10, # Offset of text inside the rectangleborder=5, colorB=(0, 255, 0) # Border thickness and color
)
# Show the modified imagecv2.imshow("Image", img) # Display the image in a window named "Image"# Wait for 1 millisecond between framescv2.waitKey(1) # Waits 1 ms for a key event (not being used here)importcv2importcvzoneimgNormal=cvzone.downloadImageFromUrl(
url='https://github.com/cvzone/cvzone/blob/master/Results/shapes.png?raw=true')
imgPNG=cvzone.downloadImageFromUrl(
url='https://github.com/cvzone/cvzone/blob/master/Results/cvzoneLogo.png?raw=true',
keepTransparency=True)
imgPNG=cv2.resize(imgPNG,(0,0),None,3,3)
cv2.imshow("Image Normal", imgNormal)
cv2.imshow("Transparent Image", imgPNG)
cv2.waitKey(0)
importcv2importcvzone# Initialize camera capturecap=cv2.VideoCapture(2)
# imgPNG = cvzone.downloadImageFromUrl(# url='https://github.com/cvzone/cvzone/blob/master/Results/cvzoneLogo.png?raw=true',# keepTransparency=True)imgPNG=cv2.imread("cvzoneLogo.png",cv2.IMREAD_UNCHANGED)
whileTrue:
# Read image frame from camerasuccess, img=cap.read()
imgOverlay=cvzone.overlayPNG(img, imgPNG, pos=[-30, 50])
imgOverlay=cvzone.overlayPNG(img, imgPNG, pos=[200, 200])
imgOverlay=cvzone.overlayPNG(img, imgPNG, pos=[500, 400])
cv2.imshow("imgOverlay", imgOverlay)
cv2.waitKey(1)
importcv2fromcvzone.UtilsimportrotateImage# Import rotateImage function from cvzone.Utils# Initialize the video capturecap=cv2.VideoCapture(2) # Capture video from the third webcam (index starts at 0)# Start the loop to continuously get frames from the webcamwhileTrue:
# Read a frame from the webcamsuccess, img=cap.read() # 'success' will be True if the frame is read successfully, 'img' will contain the frame# Rotate the image by 60 degrees without keeping the sizeimgRotated60=rotateImage(img, 60, scale=1,
keepSize=False) # Rotate image 60 degrees, scale it by 1, and don't keep original size# Rotate the image by 60 degrees while keeping the sizeimgRotated60KeepSize=rotateImage(img, 60, scale=1,
keepSize=True) # Rotate image 60 degrees, scale it by 1, and keep the original size# Display the rotated imagescv2.imshow("imgRotated60", imgRotated60) # Show the 60-degree rotated image without keeping the sizecv2.imshow("imgRotated60KeepSize", imgRotated60KeepSize) # Show the 60-degree rotated image while keeping the size# Wait for 1 millisecond between framescv2.waitKey(1) # Wait for 1 ms, during which any key press can be detected (not being used here)
importcv2importcvzone# Initialize camera capturecap=cv2.VideoCapture(2)
# Start an infinite loop to continually capture frameswhileTrue:
# Read image frame from camerasuccess, img=cap.read()
# Convert the image to grayscaleimgGray=cv2.cvtColor(img, cv2.COLOR_BGR2GRAY)
# Resize the image to be smaller (0.1x of original size)imgSmall=cv2.resize(img, (0, 0), None, 0.1, 0.1)
# Resize the image to be larger (3x of original size)imgBig=cv2.resize(img, (0, 0), None, 3, 3)
# Apply Canny edge detection on the grayscale imageimgCanny=cv2.Canny(imgGray, 50, 150)
# Convert the image to HSV color spaceimgHSV=cv2.cvtColor(img, cv2.COLOR_BGR2HSV)
# Create a list of all processed imagesimgList= [img, imgGray, imgCanny, imgSmall, imgBig, imgHSV]
# Stack the images together using cvzone's stackImages functionstackedImg=cvzone.stackImages(imgList, 3, 0.7)
# Display the stacked imagescv2.imshow("stackedImg", stackedImg)
# Wait for 1 millisecond; this also allows for keyboard inputscv2.waitKey(1)importcvzoneimportcv2# Initialize the FPS class with an average count of 30 frames for smoothingfpsReader=cvzone.FPS(avgCount=30)
# Initialize the webcam and set it to capturecap=cv2.VideoCapture(0)
cap.set(cv2.CAP_PROP_FPS, 30) # Set the frames per second to 30# Main loop to capture frames and display FPSwhileTrue:
# Read a frame from the webcamsuccess, img=cap.read()
# Update the FPS counter and draw the FPS on the image# fpsReader.update returns the current FPS and the updated imagefps, img=fpsReader.update(img, pos=(20, 50),
bgColor=(255, 0, 255), textColor=(255, 255, 255),
scale=3, thickness=3)
# Display the image with the FPS countercv2.imshow("Image", img)
# Wait for 1 ms to show this frame, then continue to the next framecv2.waitKey(1)importcv2# Importing the OpenCV library for computer vision tasksimportcvzone# Importing the cvzone library for additional functionalitiesimportnumpyasnp# Importing NumPy library for numerical operations# Download an image containing shapes from a given URLimgShapes=cvzone.downloadImageFromUrl(
url='https://github.com/cvzone/cvzone/blob/master/Results/shapes.png?raw=true')
# Perform edge detection using the Canny algorithmimgCanny=cv2.Canny(imgShapes, 50, 150)
# Dilate the edges to strengthen the detected contoursimgDilated=cv2.dilate(imgCanny, np.ones((5, 5), np.uint8), iterations=1)
# Find contours in the image without any corner filteringimgContours, conFound=cvzone.findContours(
imgShapes, imgDilated, minArea=1000, sort=True,
filter=None, drawCon=True, c=(255, 0, 0), ct=(255, 0, 255),
retrType=cv2.RETR_EXTERNAL, approxType=cv2.CHAIN_APPROX_NONE)
# Find contours in the image and filter them based on corner points (either 3 or 4 corners)imgContoursFiltered, conFoundFiltered=cvzone.findContours(
imgShapes, imgDilated, minArea=1000, sort=True,
filter=[3, 4], drawCon=True, c=(255, 0, 0), ct=(255, 0, 255),
retrType=cv2.RETR_EXTERNAL, approxType=cv2.CHAIN_APPROX_NONE)
# Display the image with all found contourscv2.imshow("imgContours", imgContours)
# Display the image with filtered contours (either 3 or 4 corners)cv2.imshow("imgContoursFiltered", imgContoursFiltered)
# Wait until a key is pressed to close the windowscv2.waitKey(0)importcvzoneimportcv2# Create an instance of the ColorFinder class with trackBar set to True.myColorFinder=cvzone.ColorFinder(trackBar=True)
# Initialize the video capture using OpenCV.# Using the third camera (index 2). Adjust index if you have multiple cameras.cap=cv2.VideoCapture(2)
# Set the dimensions of the camera feed to 640x480.cap.set(3, 640)
cap.set(4, 480)
# Custom color values for detecting orange.# 'hmin', 'smin', 'vmin' are the minimum values for Hue, Saturation, and Value.# 'hmax', 'smax', 'vmax' are the maximum values for Hue, Saturation, and Value.hsvVals= {'hmin': 10, 'smin': 55, 'vmin': 215, 'hmax': 42, 'smax': 255, 'vmax': 255}
# Main loop to continuously get frames from the camera.whileTrue:
# Read the current frame from the camera.success, img=cap.read()
# Use the update method from the ColorFinder class to detect the color.# It returns the masked color image and a binary mask.imgOrange, mask=myColorFinder.update(img, hsvVals)
# Stack the original image, the masked color image, and the binary mask.imgStack=cvzone.stackImages([img, imgOrange, mask], 3, 1)
# Show the stacked images.cv2.imshow("Image Stack", imgStack)
# Break the loop if the 'q' key is pressed.ifcv2.waitKey(1) &0xFF==ord('q'):
breakfromcvzone.ClassificationModuleimportClassifierimportcv2cap=cv2.VideoCapture(2) # Initialize video capturepath="C:/Users/USER/Documents/maskModel/"maskClassifier=Classifier(f'{path}/keras_model.h5', f'{path}/labels.txt')
whileTrue:
_, img=cap.read() # Capture frame-by-frameprediction=maskClassifier.getPrediction(img)
print(prediction) # Print prediction resultcv2.imshow("Image", img)
cv2.waitKey(1) # Wait for a key pressimportcvzonefromcvzone.FaceDetectionModuleimportFaceDetectorimportcv2# Initialize the webcam# '2' means the third camera connected to the computer, usually 0 refers to the built-in webcamcap=cv2.VideoCapture(2)
# Initialize the FaceDetector object# minDetectionCon: Minimum detection confidence threshold# modelSelection: 0 for short-range detection (2 meters), 1 for long-range detection (5 meters)detector=FaceDetector(minDetectionCon=0.5, modelSelection=0)
# Run the loop to continually get frames from the webcamwhileTrue:
# Read the current frame from the webcam# success: Boolean, whether the frame was successfully grabbed# img: the captured framesuccess, img=cap.read()
# Detect faces in the image# img: Updated image# bboxs: List of bounding boxes around detected facesimg, bboxs=detector.findFaces(img, draw=False)
# Check if any face is detectedifbboxs:
# Loop through each bounding boxforbboxinbboxs:
# bbox contains 'id', 'bbox', 'score', 'center'# ---- Get Data ---- #center=bbox["center"]
x, y, w, h=bbox['bbox']
score=int(bbox['score'][0] *100)
# ---- Draw Data ---- #cv2.circle(img, center, 5, (255, 0, 255), cv2.FILLED)
cvzone.putTextRect(img, f'{score}%', (x, y-10))
cvzone.cornerRect(img, (x, y, w, h))
# Display the image in a window named 'Image'cv2.imshow("Image", img)
# Wait for 1 millisecond, and keep the window opencv2.waitKey(1)fromcvzone.FaceMeshModuleimportFaceMeshDetectorimportcv2# Initialize the webcam# '2' indicates the third camera connected to the computer, '0' would usually refer to the built-in webcamcap=cv2.VideoCapture(2)
# Initialize FaceMeshDetector object# staticMode: If True, the detection happens only once, else every frame# maxFaces: Maximum number of faces to detect# minDetectionCon: Minimum detection confidence threshold# minTrackCon: Minimum tracking confidence thresholddetector=FaceMeshDetector(staticMode=False, maxFaces=2, minDetectionCon=0.5, minTrackCon=0.5)
# Start the loop to continually get frames from the webcamwhileTrue:
# Read the current frame from the webcam# success: Boolean, whether the frame was successfully grabbed# img: The current framesuccess, img=cap.read()
# Find face mesh in the image# img: Updated image with the face mesh if draw=True# faces: Detected face informationimg, faces=detector.findFaceMesh(img, draw=True)
# Check if any faces are detectediffaces:
# Loop through each detected faceforfaceinfaces:
# Get specific points for the eye# leftEyeUpPoint: Point above the left eye# leftEyeDownPoint: Point below the left eyeleftEyeUpPoint=face[159]
leftEyeDownPoint=face[23]
# Calculate the vertical distance between the eye points# leftEyeVerticalDistance: Distance between points above and below the left eye# info: Additional information (like coordinates)leftEyeVerticalDistance, info=detector.findDistance(leftEyeUpPoint, leftEyeDownPoint)
# Print the vertical distance for debugging or informationprint(leftEyeVerticalDistance)
# Display the image in a window named 'Image'cv2.imshow("Image", img)
# Wait for 1 millisecond to check for any user input, keeping the window opencv2.waitKey(1)importcvzonefromcvzone.SelfiSegmentationModuleimportSelfiSegmentationimportcv2# Initialize the webcam. '2' indicates the third camera connected to the computer.# '0' usually refers to the built-in camera.cap=cv2.VideoCapture(2)
# Set the frame width to 640 pixelscap.set(3, 640)
# Set the frame height to 480 pixelscap.set(4, 480)
# Initialize the SelfiSegmentation class. It will be used for background removal.# model is 0 or 1 - 0 is general 1 is landscape(faster)segmentor=SelfiSegmentation(model=0)
# Infinite loop to keep capturing frames from the webcamwhileTrue:
# Capture a single framesuccess, img=cap.read()
# Use the SelfiSegmentation class to remove the background# Replace it with a magenta background (255, 0, 255)# imgBG can be a color or an image as well. must be same size as the original if image# 'cutThreshold' is the sensitivity of the segmentation.imgOut=segmentor.removeBG(img, imgBg=(255, 0, 255), cutThreshold=0.1)
# Stack the original image and the image with background removed side by sideimgStacked=cvzone.stackImages([img, imgOut], cols=2, scale=1)
# Display the stacked imagescv2.imshow("Image", imgStacked)
# Check for 'q' key press to break the loop and close the windowifcv2.waitKey(1) &0xFF==ord('q'):
breakfromcvzone.HandTrackingModuleimportHandDetectorimportcv2# Initialize the webcam to capture video# The '2' indicates the third camera connected to your computer; '0' would usually refer to the built-in cameracap=cv2.VideoCapture(2)
# Initialize the HandDetector class with the given parametersdetector=HandDetector(staticMode=False, maxHands=2, modelComplexity=1, detectionCon=0.5, minTrackCon=0.5)
# Continuously get frames from the webcamwhileTrue:
# Capture each frame from the webcam# 'success' will be True if the frame is successfully captured, 'img' will contain the framesuccess, img=cap.read()
# Find hands in the current frame# The 'draw' parameter draws landmarks and hand outlines on the image if set to True# The 'flipType' parameter flips the image, making it easier for some detectionshands, img=detector.findHands(img, draw=True, flipType=True)
# Check if any hands are detectedifhands:
# Information for the first hand detectedhand1=hands[0] # Get the first hand detectedlmList1=hand1["lmList"] # List of 21 landmarks for the first handbbox1=hand1["bbox"] # Bounding box around the first hand (x,y,w,h coordinates)center1=hand1['center'] # Center coordinates of the first handhandType1=hand1["type"] # Type of the first hand ("Left" or "Right")# Count the number of fingers up for the first handfingers1=detector.fingersUp(hand1)
print(f'H1 = {fingers1.count(1)}', end=" ") # Print the count of fingers that are up# Calculate distance between specific landmarks on the first hand and draw it on the imagelength, info, img=detector.findDistance(lmList1[8][0:2], lmList1[12][0:2], img, color=(255, 0, 255),
scale=10)
# Check if a second hand is detectediflen(hands) ==2:
# Information for the second handhand2=hands[1]
lmList2=hand2["lmList"]
bbox2=hand2["bbox"]
center2=hand2['center']
handType2=hand2["type"]
# Count the number of fingers up for the second handfingers2=detector.fingersUp(hand2)
print(f'H2 = {fingers2.count(1)}', end=" ")
# Calculate distance between the index fingers of both hands and draw it on the imagelength, info, img=detector.findDistance(lmList1[8][0:2], lmList2[8][0:2], img, color=(255, 0, 0),
scale=10)
print(" ") # New line for better readability of the printed output# Display the image in a windowcv2.imshow("Image", img)
# Keep the window open and update it for each frame; wait for 1 millisecond between framescv2.waitKey(1)fromcvzone.PoseModuleimportPoseDetectorimportcv2# Initialize the webcam and set it to the third camera (index 2)cap=cv2.VideoCapture(2)
# Initialize the PoseDetector class with the given parametersdetector=PoseDetector(staticMode=False,
modelComplexity=1,
smoothLandmarks=True,
enableSegmentation=False,
smoothSegmentation=True,
detectionCon=0.5,
trackCon=0.5)
# Loop to continuously get frames from the webcamwhileTrue:
# Capture each frame from the webcamsuccess, img=cap.read()
# Find the human pose in the frameimg=detector.findPose(img)
# Find the landmarks, bounding box, and center of the body in the frame# Set draw=True to draw the landmarks and bounding box on the imagelmList, bboxInfo=detector.findPosition(img, draw=True, bboxWithHands=False)
# Check if any body landmarks are detectediflmList:
# Get the center of the bounding box around the bodycenter=bboxInfo["center"]
# Draw a circle at the center of the bounding boxcv2.circle(img, center, 5, (255, 0, 255), cv2.FILLED)
# Calculate the distance between landmarks 11 and 15 and draw it on the imagelength, img, info=detector.findDistance(lmList[11][0:2],
lmList[15][0:2],
img=img,
color=(255, 0, 0),
scale=10)
# Calculate the angle between landmarks 11, 13, and 15 and draw it on the imageangle, img=detector.findAngle(lmList[11][0:2],
lmList[13][0:2],
lmList[15][0:2],
img=img,
color=(0, 0, 255),
scale=10)
# Check if the angle is close to 50 degrees with an offset of 10isCloseAngle50=detector.angleCheck(myAngle=angle,
targetAngle=50,
offset=10)
# Print the result of the angle checkprint(isCloseAngle50)
# Display the frame in a windowcv2.imshow("Image", img)
# Wait for 1 millisecond between each framecv2.waitKey(1)fromcvzone.SerialModuleimportSerialObject# Initialize the Arduino SerialObject with optional parameters# baudRate = 9600, digits = 1, max_retries = 5arduino=SerialObject(portNo=None, baudRate=9600, digits=1, max_retries=5)
# Initialize a counter to keep track of iterationscount=0# Start an infinite loopwhileTrue:
# Increment the counter on each iterationcount+=1# Print data received from the Arduino# getData method returns the list of data received from the Arduinoprint(arduino.getData())
# If the count is less than 100ifcount<100:
# Send a list containing [1] to the Arduinoarduino.sendData([1])
else:
# If the count is 100 or greater, send a list containing [0] to the Arduinoarduino.sendData([0])
# Reset the count back to 0 once it reaches 200# This will make the cycle repeatifcount==200:
count=0#include<cvzone.h>
SerialData serialData(1,1); //(numOfValsRec,digitsPerValRec)/*0 or 1 - 1 digit0 to 99 - 2 digits0 to 999 - 3 digits*///SerialData serialData; // if not receving only sendingint sendVals[2]; // min val of 2 even when sending 1int valsRec[1];
int x = 0;
voidsetup() {
serialData.begin(9600);
pinMode(13,OUTPUT);
}
voidloop() {
// ------- To SEND --------
x +=1;
if (x==100){x=0;}
sendVals[0] = x;
serialData.Send(sendVals);
// ------- To Recieve --------
serialData.Get(valsRec);
digitalWrite(13,valsRec[0]);
}fromcvzone.PlotModuleimportLivePlotimportcv2importmathsinPlot=LivePlot(w=1200, yLimit=[-100, 100], interval=0.01)
xSin=0whileTrue:
xSin+=1ifxSin==360: xSin=0imgPlotSin=sinPlot.update(int(math.sin(math.radians(xSin)) *100))
cv2.imshow("Image Sin Plot", imgPlotSin)
ifcv2.waitKey(1) &0xFF==ord('q'):
breakfromcvzone.PlotModuleimportLivePlotfromcvzone.FaceDetectionModuleimportFaceDetectorimportcv2importcvzonecap=cv2.VideoCapture(1)
detector=FaceDetector(minDetectionCon=0.85, modelSelection=0)
xPlot=LivePlot(w=1200, yLimit=[0, 500], interval=0.01)
whileTrue:
success, img=cap.read()
img, bboxs=detector.findFaces(img, draw=False)
val=0ifbboxs:
# Loop through each bounding boxforbboxinbboxs:
# bbox contains 'id', 'bbox', 'score', 'center'# ---- Get Data ---- #center=bbox["center"]
x, y, w, h=bbox['bbox']
score=int(bbox['score'][0] *100)
val=center[0]
# ---- Draw Data ---- #cv2.circle(img, center, 5, (255, 0, 255), cv2.FILLED)
cvzone.putTextRect(img, f'{score}%', (x, y-10))
cvzone.cornerRect(img, (x, y, w, h))
imgPlot=xPlot.update(val)
cv2.imshow("Image Plot", imgPlot)
cv2.imshow("Image", img)
ifcv2.waitKey(1) &0xFF==ord('q'):
break