This repository was archived by the owner on Jan 18, 2019. It is now read-only.

Repository files navigation

Vuls: VULnerability Scanner

SlackLicense

Vuls-logo

Vulnerability scanner for Linux/FreeBSD, agentless, written in golang.

We have a slack team. Join slack team

README in Japanese
README in French

asciicast

Vuls-slack


Abstract

For a system administrator, having to perform security vulnerability analysis and software update on a daily basis can be a burden. To avoid downtime in production environment, it is common for system administrator to choose not to use the automatic update option provided by package manager and to perform update manually. This leads to the following problems.

  • System administrator will have to constantly watch out for any new vulnerabilities in NVD(National Vulnerability Database) or similar databases.
  • It might be impossible for the system administrator to monitor all the software if there are a large number of software installed in server.
  • It is expensive to perform analysis to determine the servers affected by new vulnerabilities. The possibility of overlooking a server or two during analysis is there.

Vuls is a tool created to solve the problems listed above. It has the following characteristics.

  • Informs users of the vulnerabilities that are related to the system.
  • Informs users of the servers that are affected.
  • Vulnerability detection is done automatically to prevent any oversight.
  • Report is generated on regular basis using CRON or other methods. to manage vulnerability.

Vuls-Motivation


Main Features

  • Scan for any vulnerabilities in Linux/FreeBSD Server
    • Supports Ubuntu, Debian, CentOS, Amazon Linux, RHEL, FreeBSD
    • Cloud, on-premise, Docker
  • Scan middleware that are not included in OS package management
    • Scan middleware, programming language libraries and framework for vulnerability
    • Support software registered in CPE
  • Agentless architecture
    • User is required to only setup one machine that is connected to other target servers via SSH
  • Auto generation of configuration file template
    • Auto detection of servers set using CIDR, generate configuration file template
  • Email and Slack notification is possible (supports Japanese language)
  • Scan result is viewable on accessory software, TUI Viewer terminal or Web UI (VulsRepo).

What Vuls Doesn't Do

  • Vuls doesn't update the vulnerable packages.

Setup Vuls

There are 3 ways to setup Vuls.


Tutorial: Hello Vuls

This tutorial will let you scan the vulnerabilities on the localhost with Vuls.
This can be done in the following steps.

  1. Launch Amazon Linux
  2. Enable to ssh from localhost
  3. Install requirements
  4. Deploy go-cve-dictionary
  5. Deploy Vuls
  6. Configuration
  7. Prepare
  8. Scan
  9. TUI(Terminal-Based User Interface)
  10. Web UI (VulsRepo)

Step1. Launch Amazon Linux

Step2. SSH setting

This is required to ssh to itself.

Create a keypair then append public key to authorized_keys

$ ssh-keygen -t rsa
$ cat ~/.ssh/id_rsa.pub >>~/.ssh/authorized_keys
$ chmod 600 ~/.ssh/authorized_keys

Vuls doesn't support SSH password authentication. So you have to use SSH key-based authentication.
And also, SUDO with password is not supported for security reasons. So you have to define NOPASSWORD in /etc/sudoers on target servers.

Step3. Install requirements

Vuls requires the following packages.

$ ssh ec2-user@52.100.100.100 -i ~/.ssh/private.pem
$ sudo yum -y install sqlite git gcc
$ wget https://storage.googleapis.com/golang/go1.6.linux-amd64.tar.gz
$ sudo tar -C /usr/local -xzf go1.6.linux-amd64.tar.gz
$ mkdir $HOME/go

Add these lines into /etc/profile.d/goenv.sh

export GOROOT=/usr/local/go
export GOPATH=$HOME/go
export PATH=$PATH:$GOROOT/bin:$GOPATH/bin

Set the OS environment variable to current shell

$ source /etc/profile.d/goenv.sh

Step4. Deploy go-cve-dictionary

go get

$ sudo mkdir /var/log/vuls
$ sudo chown ec2-user /var/log/vuls
$ sudo chmod 700 /var/log/vuls
$ go get github.com/kotakanbe/go-cve-dictionary

If an error occurred while go get, check the following points.

Fetch vulnerability data from NVD.
It takes about 10 minutes (on AWS).

$ foriin {2002..2016};do go-cve-dictionary fetchnvd -years $i;done
... snip ...
$ ls -alh cve.sqlite3
-rw-r--r-- 1 ec2-user ec2-user 7.0M Mar 24 13:20 cve.sqlite3

Step5. Deploy Vuls

Launch a new terminal and SSH to the ec2 instance.

go get

$ go get github.com/future-architect/vuls

If an error occurred while go get, check the following points.

Step6. Config

Create a config file(TOML format).
Then check the config.

$ cat config.toml
[servers]
[servers.172-31-4-82]
host = "172.31.4.82"
port = "22"
user = "ec2-user"
keyPath = "/home/ec2-user/.ssh/id_rsa"
$ vuls configtest

Step7. Setting up target servers for Vuls

$ vuls prepare

see Usage: Prepare

Step8. Start Scanning

$ vuls scan -cve-dictionary-dbpath=$PWD/cve.sqlite3
INFO[0000] Start scanning (config: /home/ec2-user/config.toml)
INFO[0000] Start scanning
INFO[0000] config: /home/ec2-user/config.toml
INFO[0000] cve-dictionary: /home/ec2-user/cve.sqlite3
... snip ...
172-31-4-82 (amazon 2015.09)
============================
CVE-2016-0494 10.0 Unspecified vulnerability in the Java SE and Java SE Embedded components in Oracle
Java SE 6u105, 7u91, and 8u66 and Java SE Embedded 8u65 allows remote attackers to
affect confidentiality, integrity, and availability via unknown vectors related to
2D.
... snip ...
CVE-2016-0494
-------------
Score 10.0 (High)
Vector (AV:N/AC:L/Au:N/C:C/I:C/A:C)
Summary Unspecified vulnerability in the Java SE and Java SE Embedded components in Oracle Java SE 6u105,
7u91, and 8u66 and Java SE Embedded 8u65 allows remote attackers to affect confidentiality,
integrity, and availability via unknown vectors related to 2D.
NVD https://web.nvd.nist.gov/view/vuln/detail?vulnId=CVE-2016-0494
MITRE https://cve.mitre.org/cgi-bin/cvename.cgi?name=CVE-2016-0494
CVE Details http://www.cvedetails.com/cve/CVE-2016-0494
CVSS Claculator https://nvd.nist.gov/cvss/v2-calculator?name=CVE-2016-0494&vector=(AV:N/AC:L/Au:N/C:C/I:C/A:C)
RHEL-CVE https://access.redhat.com/security/cve/CVE-2016-0494
ALAS-2016-643 https://alas.aws.amazon.com/ALAS-2016-643.html
Package/CPE java-1.7.0-openjdk-1.7.0.91-2.6.2.2.63.amzn1 -> java-1.7.0-openjdk-1:1.7.0.95-2.6.4.0.65.amzn1

Step9. TUI

Vuls has Terminal-Based User Interface to display the scan result.

$ vuls tui

Vuls-TUI

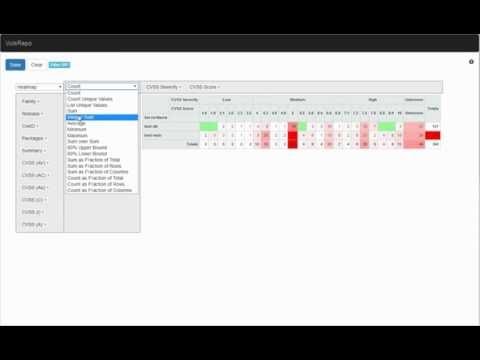
Step10. Web UI

VulsRepo is a awesome Web UI for Vuls.
Check it out the Online Demo.


Setup Vuls in a Docker Container

see https://github.com/future-architect/vuls/tree/master/setup/docker


Architecture

Vuls-Architecture

  • Fetch vulnerability information from NVD and JVN(Japanese), then insert into SQLite3.

Scanning Flow

Vuls-Scan-Flow

  • Scan vulnerabilities on the servers via SSH and create a list of the CVE ID
    • To scan Docker containers, Vuls connect via ssh to the Docker host and then docker exec to the containers. So, no need to run sshd daemon on the containers.
  • Fetch more detailed information of the detected CVE from go-cve-dictionary
  • Send a report by Slack and Email
  • Write scan results to JSON file to show the latest report on your terminal

Performance Considerations

  • On Ubuntu and Debian
    Vuls issues apt-get changelog for each upgradable packages and parse the changelog.
    apt-get changelog is slow and resource usage is heavy when there are many updatable packages on target server.
    Vuls stores these changelogs to KVS(boltdb).
    From the second time on, the scan speed is fast by using the local cache.

  • On CentOS
    Vuls issues yum update --changelog to get changelogs of upgradable packages at once and parse the changelog.
    Scan speed is fast and resource usage is light.

  • On Amazon, RHEL and FreeBSD
    High speed scan and resource usage is light because Vuls can get CVE IDs by using package manager(no need to parse a changelog).

| Distribution| Scan Speed | |:------------|:-------------------|:-------------| | Ubuntu | First time: Slow / From the second time: Fast | | Debian | First time: Slow / From the second time: Fast | | CentOS | Fast | | Amazon | Fast | | RHEL | Fast | | FreeBSD | Fast |


Use Cases

Scan all servers

Vuls-Usecase1

Scan a single server

web/app server in the same configuration under the load balancer

Vuls-Usecase2


Support OS

DistributionRelease
Ubuntu12, 14, 16
Debian7, 8
RHEL6, 7
CentOS5, 6, 7
Amazon LinuxAll
FreeBSD10

Usage: Automatic Server Discovery

Discovery subcommand discovers active servers specified in CIDR range, then display the template of config file(TOML format) to terminal.

$ vuls discover -help
discover:
discover 192.168.0.0/24

Example

$ vuls discover 172.31.4.0/24
# Create config.toml using below and then ./vuls --config=/path/to/config.toml
[slack]
hookURL = "https://hooks.slack.com/services/abc123/defghijklmnopqrstuvwxyz"
channel = "#channel-name"
#channel = "${servername}"
iconEmoji = ":ghost:"
authUser = "username"
notifyUsers = ["@username"]
[mail]
smtpAddr = "smtp.gmail.com"
smtpPort = "465"
user = "username"
password = "password"
from = "from@address.com"
to = ["to@address.com"]
cc = ["cc@address.com"]
subjectPrefix = "[vuls]"
[default]
#port = "22"
#user = "username"
#keyPath = "/home/username/.ssh/id_rsa"
#cpeNames = [
# "cpe:/a:rubyonrails:ruby_on_rails:4.2.1",
#]
#containers = ["${running}"]
#optional = [
# ["key", "value"],
#]
[servers]
[servers.172-31-4-82]
host = "172.31.4.82"
#port = "22"
#user = "root"
#keyPath = "/home/username/.ssh/id_rsa"
#cpeNames = [
# "cpe:/a:rubyonrails:ruby_on_rails:4.2.1",
#]
#containers = ["${running}"]
#optional = [
# ["key", "value"],
#]

You can customize your configuration using this template.


Configuration

  • Slack section

    [slack]
    hookURL = "https://hooks.slack.com/services/abc123/defghijklmnopqrstuvwxyz"
    channel = "#channel-name"
    #channel = "${servername}"
    iconEmoji = ":ghost:"
    authUser = "username"
    notifyUsers = ["@username"]
    
    • hookURL : Incomming webhook's URL

    • channel : channel name.
      If you set ${servername} to channel, the report will be sent to each channel.
      In the following example, the report will be sent to the #server1 and #server2.
      Be sure to create these channels before scanning.

      [slack]
      channel = "${servername}"
      ...snip...
      [servers]
      [servers.server1]
      host = "172.31.4.82"
      ...snip...
      [servers.server2]
      host = "172.31.4.83"
      ...snip...
      
    • iconEmoji: emoji

    • authUser: username of the slack team

    • notifyUsers: a list of Slack usernames to send Slack notifications. If you set ["@foo", "@bar"] to notifyUsers, @foo @bar will be included in text.
      So @foo, @bar can receive mobile push notifications on their smartphone.

  • Mail section

    [mail]
    smtpAddr = "smtp.gmail.com"
    smtpPort = "465"
    user = "username"
    password = "password"
    from = "from@address.com"
    to = ["to@address.com"]
    cc = ["cc@address.com"]
    subjectPrefix = "[vuls]"
    
  • Default section

    [default]
    #port = "22"
    #user = "username"
    #keyPath = "/home/username/.ssh/id_rsa"
    #cpeNames = [
    # "cpe:/a:rubyonrails:ruby_on_rails:4.2.1",
    #]
    #containers = ["${running}"]
    #optional = [
    # ["key", "value"],
    #]
    

    Items of the default section will be used if not specified.

  • servers section

    [servers]
    [servers.172-31-4-82]
    host = "172.31.4.82"
    #port = "22"
    #user = "root"
    #keyPath = "/home/username/.ssh/id_rsa"
    #cpeNames = [
    # "cpe:/a:rubyonrails:ruby_on_rails:4.2.1",
    #]
    #containers = ["${running}"]
    #optional = [
    # ["key", "value"],
    #]
    

    You can overwrite the default value specified in default section.

    Vuls supports two types of SSH. One is native go implementation. The other is external SSH command. For details, see -ssh-external option

    Multiple SSH authentication methods are supported.

    • SSH agent
    • SSH public key authentication (with password and empty password) Password authentication is not supported.

Usage: Configtest

Configtest subcommand check if vuls is able to connect via ssh to servers/containers defined in the config.toml.

$ vuls configtest --help
configtest:
configtest
[-config=/path/to/config.toml]
[-ask-key-password]
[-ssh-external]
[-debug]
[SERVER]...
-ask-key-password
Ask ssh privatekey password before scanning
-config string
/path/to/toml (default "/Users/kotakanbe/go/src/github.com/future-architect/vuls/config.toml")
-debug
debug mode
-ssh-external
Use external ssh command. Default: Use the Go native implementation

And also, configtest subcommand checks sudo settings on target servers whether Vuls is able to SUDO with nopassword via SSH.

Example of /etc/sudoers on target servers

  • CentOS, RHEL
vuls ALL=(root) NOPASSWD: /usr/bin/yum, /bin/echo
  • Ubuntu, Debian
vuls ALL=(root) NOPASSWD: /usr/bin/apt-get, /usr/bin/apt-cache
  • It is possible to scan without root privilege for Amazon Linux, FreeBSD.

Usage: Prepare

Prepare subcommand installs required packages on each server.

DistributionReleaseRequirements
Ubuntu12, 14, 16-
Debian7, 8aptitude
CentOS5yum-changelog
CentOS6, 7yum-plugin-changelog
AmazonAll-
RHEL4, 5, 6, 7-
FreeBSD10-
$ vuls prepare -help
prepare
[-config=/path/to/config.toml] [-debug]
[-ask-key-password]
[SERVER]...
-ask-key-password
Ask ssh privatekey password before scanning
-config string
/path/to/toml (default "$PWD/config.toml")
-debug
debug mode

Usage: Scan


$ vuls scan -help
scan:
scan
[-lang=en|ja]
[-config=/path/to/config.toml]
[-results-dir=/path/to/results]
[-cve-dictionary-dbpath=/path/to/cve.sqlite3]
[-cve-dictionary-url=http://127.0.0.1:1323]
[-cache-dbpath=/path/to/cache.db]
[-cvss-over=7]
[-ignore-unscored-cves]
[-ssh-external]
[-containers-only]
[-report-azure-blob]
[-report-json]
[-report-mail]
[-report-s3]
[-report-slack]
[-report-text]
[-http-proxy=http://192.168.0.1:8080]
[-ask-key-password]
[-debug]
[-debug-sql]
[-aws-profile=default]
[-aws-region=us-west-2]
[-aws-s3-bucket=bucket_name]
[-azure-account=accout]
[-azure-key=key]
[-azure-container=container]
[SERVER]...
-ask-key-password
Ask ssh privatekey password before scanning
-aws-profile string
AWS Profile to use (default "default")
-aws-region string
AWS Region to use (default "us-east-1")
-aws-s3-bucket string
S3 bucket name
-azure-account string
Azure account name to use. AZURE_STORAGE_ACCOUNT environment variable is used if not specified
-azure-container string
Azure storage container name
-azure-key string
Azure account key to use. AZURE_STORAGE_ACCESS_KEY environment variable is used if not specified
-cache-dbpath string
/path/to/cache.db (local cache of changelog for Ubuntu/Debian) (default "$PWD/cache.db")
-config string
/path/to/toml (default "$PWD/config.toml")
-containers-only
Scan concontainers Only. Default: Scan both of hosts and containers
-cve-dictionary-dbpath string
/path/to/sqlite3 (For get cve detail from cve.sqlite3) -cve-dictionary-url string
http://CVE.Dictionary (default "http://127.0.0.1:1323")
-cvss-over float
-cvss-over=6.5 means reporting CVSS Score 6.5 and over (default: 0 (means report all))
-debug
debug mode
-debug-sql
SQL debug mode
-http-proxy string
http://proxy-url:port (default: empty)
-ignore-unscored-cves
Don't report the unscored CVEs
-lang string
[en|ja] (default "en")
-report-json
Write report to JSON files ($PWD/results/current)
-report-mail
Send report via Email
-report-s3
Write report to S3 (bucket/yyyyMMdd_HHmm)
-report-slack
Send report via Slack
-report-text
Write report to text files ($PWD/results/current)
-results-dir string
/path/to/results (default "$PWD/results")
-ssh-external
Use external ssh command. Default: Use the Go native implementation

-ssh-external option

Vuls supports different types of SSH.

By Defaut, using a native Go implementation from crypto/ssh.
This is useful in situations where you may not have access to traditional UNIX tools.

To use external ssh command, specify this option.
This is useful If you want to use ProxyCommand or chiper algorithm of SSH that is not supported by native go implementation.
Don't forget to add below line to /etc/sudoers on the target servers. (username: vuls)

Defaults:vuls !requiretty

-ask-key-password option

SSH key password-ask-key-password
empty password-
with passwordrequiredor use ssh-agent

-report-json , -report-text option

At the end of the scan, scan results will be available in the $PWD/result/current/ directory.
all.(json|txt) includes the scan results of all servres and servername.(json|txt) includes the scan result of the server.

Example: Scan all servers defined in config file

$ vuls scan \
--report-slack \ --report-mail \
--cvss-over=7 \
-ask-key-password \
-cve-dictionary-dbpath=$PWD/cve.sqlite3

With this sample command, it will ..

  • Ask SSH key passsword before scanning
  • Scan all servers defined in config file
  • Send scan results to slack and email
  • Only Report CVEs that CVSS score is over 7
  • Print scan result to terminal

Example: Scan specific servers

$ vuls scan \
-cve-dictionary-dbpath=$PWD/cve.sqlite3 \ server1 server2

With this sample command, it will ..

  • Use SSH Key-Based authentication with empty password (without -ask-key-password option)
  • Scan only 2 servers (server1, server2)
  • Print scan result to terminal

Example: Put results in S3 bucket

To put results in S3 bucket, configure following settings in AWS before scanning.

$ vuls scan \
-cve-dictionary-dbpath=$PWD/cve.sqlite3 \ -report-s3 \
-aws-region=ap-northeast-1 \
-aws-s3-bucket=vuls \
-aws-profile=default 

With this sample command, it will ..

  • Use SSH Key-Based authentication with empty password (without -ask-key-password option)
  • Scan all servers defined in config file
  • Put scan result(JSON) in S3 bucket. The bucket name is "vuls" in ap-northeast-1 and profile is "default"

Example: Put results in Azure Blob storage

To put results in Azure Blob Storage, configure following settings in Azure before scanning.

  • Create a container
$ vuls scan \
-cve-dictionary-dbpath=$PWD/cve.sqlite3 \ -report-azure-blob \
-azure-container=vuls \
-azure-account=test \
-azure-key=access-key-string 

With this sample command, it will ..

  • Use SSH Key-Based authentication with empty password (without -ask-key-password option)
  • Scan all servers defined in config file
  • Put scan result(JSON) in Azure Blob Storage. The container name is "vuls", storage account is "test" and accesskey is "access-key-string"

account and access key can be defined in environment variables.

$ export AZURE_STORAGE_ACCOUNT=test
$ export AZURE_STORAGE_ACCESS_KEY=access-key-string
$ vuls scan \
-cve-dictionary-dbpath=$PWD/cve.sqlite3 \ -report-azure-blob \
-azure-container=vuls

Example: Add optional key-value pairs to JSON

Optional key-value can be outputted to JSON.
The key-value in the default section will be overwritten by servers section's key-value.
For instance, you can use this field for Azure ResourceGroup name, Azure VM Name and so on.

  • config.toml
[default]
optional = [
["key1", "default_value"],
["key3", "val3"],
]
[servers.bsd]
host = "192.168.11.11"user = "kanbe"optional = [
["key1", "val1"],
["key2", "val2"],
]
  • bsd.json
[
{
"ServerName": "bsd",
"Family": "FreeBSD",
"Release": "10.3-RELEASE",
.... snip ..."Optional": [
[ "key1", "val1" ],
[ "key2", "val2" ],
[ "key3", "val3" ]
]
}
]

Usage: Scan vulnerability of non-OS package

It is possible to detect vulnerabilities in non-OS packages, such as something you compiled by yourself, language libraries and frameworks, that have been registered in the CPE.

  • How to search CPE name by software name

  • Configuration
    To detect the vulnerbility of Ruby on Rails v4.2.1, cpeNames needs to be set in the servers section.

    [servers]
    [servers.172-31-4-82]
    host = "172.31.4.82"
    user = "ec2-user"
    keyPath = "/home/username/.ssh/id_rsa"
    cpeNames = [
    "cpe:/a:rubyonrails:ruby_on_rails:4.2.1",
    ]
    

Usage: Scan Docker containers

It is common that keep Docker containers runnning without SSHd daemon.
see Docker Blog:Why you don't need to run SSHd in your Docker containers

Vuls scans Docker containers via docker exec instead of SSH.
For more details, see Architecture section

  • To scan all of running containers
    "${running}" needs to be set in the containers item.

    [servers]
    [servers.172-31-4-82]
    host = "172.31.4.82"
    user = "ec2-user"
    keyPath = "/home/username/.ssh/id_rsa"
    containers = ["${running}"]
    
  • To scan specific containers
    The container ID or container name needs to be set in the containers item.
    In the following example, only container_name_a and 4aa37a8b63b9 will be scanned.
    Be sure to check these containers are running state before scanning.
    If specified containers are not running, Vuls gives up scanning with printing error message.

    [servers]
    [servers.172-31-4-82]
    host = "172.31.4.82"
    user = "ec2-user"
    keyPath = "/home/username/.ssh/id_rsa"
    containers = ["container_name_a", "4aa37a8b63b9"]
    
  • To scan containers only

    • --containers-only option is available.

Usage: TUI

Display the latest scan results

$ vuls tui -h
tui:
tui [-results-dir=/path/to/results]
-results-dir string
/path/to/results (default "$PWD/results")
-debug-sql
debug SQL

Key binding is bellow.

| key | | |:-----------------|:-------|:------| | TAB | move cursor among the panes | | Arrow up/down | move cursor to up/down | | Ctrl+j, Ctrl+k | move cursor to up/donw | | Ctrl+u, Ctrl+d | page up/donw |

For details, see https://github.com/future-architect/vuls/blob/master/report/tui.go

Display the previous scan results

  • Display the list of scan results.
$ ./vuls history
2 2016-05-24 19:49 scanned 1 servers: amazon2
1 2016-05-24 19:48 scanned 2 servers: amazon1, romantic_goldberg
  • Display the result of scanID 1
$ ./vuls tui 1
  • Display the result of scanID 2
$ ./vuls tui 2

Display the previous scan results using peco

$ ./vuls history | peco | ./vuls tui

asciicast

Usage: go-cve-dictionary on different server

Run go-cve-dictionary as server mode before scanning on 192.168.10.1

$ go-cve-dictionary server -bind=192.168.10.1 -port=1323

Run Vuls with -cve-dictionary-url option.

$ vuls scan -cve-dictionary-url=http://192.168.0.1:1323

Usage: Update NVD Data

$ go-cve-dictionary fetchnvd -h
fetchnvd:
fetchnvd
[-last2y]
[-dbpath=/path/to/cve.sqlite3]
[-debug]
[-debug-sql]
-dbpath string
/path/to/sqlite3 (default "$PWD/cve.sqlite3")
-debug
debug mode
-debug-sql
SQL debug mode
-last2y
Refresh NVD data in the last two years.
  • Fetch data of the entire period
$ go-cve-dictionary fetchnvd -entire
  • Fetch data in the last 2 years
$ go-cve-dictionary fetchnvd -last2y

Deploy With Glide

If an error occurred while go get, try deploying with glide.

  • Install Glide
  • Deploy go-cve-dictionary
$ go get -d github.com/kotakanbe/go-cve-dictionary
$ cd $GOPATH/src/github.com/kotakanbe/go-cve-dictionary
$ glide install
$ go install
  • Deploy vuls
$ go get -d github.com/future-architect/vuls
$ cd $GOPATH/src/github.com/future-architect/vuls
$ glide install
$ go install
  • The binaries are created under $GOPARH/bin

Update Vuls With Glide

  • Update go-cve-dictionary
    If the DB schema was changed, please specify new SQLite3 DB file.
$ cd $GOPATH/src/github.com/kotakanbe/go-cve-dictionary
$ git pull
$ glide install
$ go install
  • Update vuls
$ cd $GOPATH/src/github.com/future-architect/vuls
$ git pull
$ glide install
$ go install

Binary Files are created under $GOPARH/bin


Misc

  • Unable to go get vuls
    Update git to the latest version. Old version of git can't get some repositories.
    see https://groups.google.com/forum/#!topic/mgo-users/rO1-gUDFo_g

  • HTTP Proxy Support
    If your system is behind HTTP proxy, you have to specify --http-proxy option.

  • How to Daemonize go-cve-dictionary
    Use Systemd, Upstart or supervisord, daemontools...

  • How to Enable Automatic-Update of Vunerability Data.
    Use job scheduler like Cron (with -last2y option).

  • How to Enable Automatic-Scan.
    Use job scheduler like Cron.
    Set NOPASSWORD option in /etc/sudoers on target servers.
    Use SSH Key-Based Authentication with no passphrase or ssh-agent.

  • How to cross compile

    $ cd /path/to/your/local-git-reporsitory/vuls
    $ GOOS=linux GOARCH=amd64 go build -o vuls.amd64
  • Logging
    Log is under /var/log/vuls/

  • Debug
    Run with --debug, --sql-debug option.

  • Adjusting Open File Limit
    Riak docs is awesome.

  • Does Vuls accept ssh connections with fish-shell or old zsh as the login shell?
    No, Vuls needs a user on the server for bash login. see also #8

  • Windows
    Use Microsoft Baseline Security Analyzer. MBSA


Related Projects


Data Source

Authors

kotakanbe (@kotakanbe) created vuls and these fine people have contributed.


Contribute

  1. fork a repository: github.com/future-architect/vuls to github.com/you/repo
  2. get original code: go get github.com/future-architect/vuls
  3. work on original code
  4. add remote to your repo: git remote add myfork https://github.com/you/repo.git
  5. push your changes: git push myfork
  6. create a new Pull Request

Change Log

Please see CHANGELOG.


Licence

Please see LICENSE.

About

Vulnerability scanner for Linux/FreeBSD, agentless, written in Go

Resources

Stars

0 stars

Watchers

2 watching

Forks

Releases

Packages

Contributors

Languages

, 'i'); if (__m === '*' || __re.test(location.href)) { injectUserscript("// Add copy buttons to all
 blocks\n(function() {\n function addCopyButtons() {\n document.querySelectorAll('pre code').forEach(function(codeBlock) {\n if (codeBlock.parentElement.hasAttribute('data-copy-added')) return;\n codeBlock.parentElement.setAttribute('data-copy-added', 'true');\n \n var btn = document.createElement('button');\n btn.textContent = 'Copy';\n btn.style.cssText = 'position:absolute;top:4px;right:4px;padding:2px 8px;font-size:11px;background:#4ecdc4;border:none;border-radius:4px;color:#1a1a2e;cursor:pointer;opacity:0.7;transition:opacity 0.2s;';\n btn.onmouseover = function() { this.style.opacity = '1'; };\n btn.onmouseout = function() { this.style.opacity = '0.7'; };\n btn.onclick = function() {\n navigator.clipboard.writeText(codeBlock.textContent).then(function() {\n btn.textContent = 'Copied!';\n setTimeout(function() { btn.textContent = 'Copy'; }, 1500);\n });\n };\n codeBlock.parentElement.style.position = 'relative';\n codeBlock.parentElement.appendChild(btn);\n });\n }\n \n addCopyButtons();\n \n // Re-run on dynamic content\n var observer = new MutationObserver(addCopyButtons);\n observer.observe(document.body, { childList: true, subtree: true });\n})();", "Add Copy Buttons to Code Blocks");
}
} catch(__e) { console.warn('[Userscript:Add Copy Buttons to Code Blocks]', __e); }
})();
(function(){
try {
var __m = "github.com";
var __re = new RegExp('^' + "github\\.com" + '
Skip to content
This repository was archived by the owner on Jan 18, 2019. It is now read-only.

Repository files navigation

Vuls: VULnerability Scanner

SlackLicense

Vuls-logo

Vulnerability scanner for Linux/FreeBSD, agentless, written in golang.

We have a slack team. Join slack team

README in Japanese
README in French

asciicast

Vuls-slack


Abstract

For a system administrator, having to perform security vulnerability analysis and software update on a daily basis can be a burden. To avoid downtime in production environment, it is common for system administrator to choose not to use the automatic update option provided by package manager and to perform update manually. This leads to the following problems.

  • System administrator will have to constantly watch out for any new vulnerabilities in NVD(National Vulnerability Database) or similar databases.
  • It might be impossible for the system administrator to monitor all the software if there are a large number of software installed in server.
  • It is expensive to perform analysis to determine the servers affected by new vulnerabilities. The possibility of overlooking a server or two during analysis is there.

Vuls is a tool created to solve the problems listed above. It has the following characteristics.

  • Informs users of the vulnerabilities that are related to the system.
  • Informs users of the servers that are affected.
  • Vulnerability detection is done automatically to prevent any oversight.
  • Report is generated on regular basis using CRON or other methods. to manage vulnerability.

Vuls-Motivation


Main Features

  • Scan for any vulnerabilities in Linux/FreeBSD Server
    • Supports Ubuntu, Debian, CentOS, Amazon Linux, RHEL, FreeBSD
    • Cloud, on-premise, Docker
  • Scan middleware that are not included in OS package management
    • Scan middleware, programming language libraries and framework for vulnerability
    • Support software registered in CPE
  • Agentless architecture
    • User is required to only setup one machine that is connected to other target servers via SSH
  • Auto generation of configuration file template
    • Auto detection of servers set using CIDR, generate configuration file template
  • Email and Slack notification is possible (supports Japanese language)
  • Scan result is viewable on accessory software, TUI Viewer terminal or Web UI (VulsRepo).

What Vuls Doesn't Do

  • Vuls doesn't update the vulnerable packages.

Setup Vuls

There are 3 ways to setup Vuls.


Tutorial: Hello Vuls

This tutorial will let you scan the vulnerabilities on the localhost with Vuls.
This can be done in the following steps.

  1. Launch Amazon Linux
  2. Enable to ssh from localhost
  3. Install requirements
  4. Deploy go-cve-dictionary
  5. Deploy Vuls
  6. Configuration
  7. Prepare
  8. Scan
  9. TUI(Terminal-Based User Interface)
  10. Web UI (VulsRepo)

Step1. Launch Amazon Linux

Step2. SSH setting

This is required to ssh to itself.

Create a keypair then append public key to authorized_keys

$ ssh-keygen -t rsa
$ cat ~/.ssh/id_rsa.pub >>~/.ssh/authorized_keys
$ chmod 600 ~/.ssh/authorized_keys

Vuls doesn't support SSH password authentication. So you have to use SSH key-based authentication.
And also, SUDO with password is not supported for security reasons. So you have to define NOPASSWORD in /etc/sudoers on target servers.

Step3. Install requirements

Vuls requires the following packages.

$ ssh ec2-user@52.100.100.100 -i ~/.ssh/private.pem
$ sudo yum -y install sqlite git gcc
$ wget https://storage.googleapis.com/golang/go1.6.linux-amd64.tar.gz
$ sudo tar -C /usr/local -xzf go1.6.linux-amd64.tar.gz
$ mkdir $HOME/go

Add these lines into /etc/profile.d/goenv.sh

export GOROOT=/usr/local/go
export GOPATH=$HOME/go
export PATH=$PATH:$GOROOT/bin:$GOPATH/bin

Set the OS environment variable to current shell

$ source /etc/profile.d/goenv.sh

Step4. Deploy go-cve-dictionary

go get

$ sudo mkdir /var/log/vuls
$ sudo chown ec2-user /var/log/vuls
$ sudo chmod 700 /var/log/vuls
$ go get github.com/kotakanbe/go-cve-dictionary

If an error occurred while go get, check the following points.

Fetch vulnerability data from NVD.
It takes about 10 minutes (on AWS).

$ foriin {2002..2016};do go-cve-dictionary fetchnvd -years $i;done
... snip ...
$ ls -alh cve.sqlite3
-rw-r--r-- 1 ec2-user ec2-user 7.0M Mar 24 13:20 cve.sqlite3

Step5. Deploy Vuls

Launch a new terminal and SSH to the ec2 instance.

go get

$ go get github.com/future-architect/vuls

If an error occurred while go get, check the following points.

Step6. Config

Create a config file(TOML format).
Then check the config.

$ cat config.toml
[servers]
[servers.172-31-4-82]
host = "172.31.4.82"
port = "22"
user = "ec2-user"
keyPath = "/home/ec2-user/.ssh/id_rsa"
$ vuls configtest

Step7. Setting up target servers for Vuls

$ vuls prepare

see Usage: Prepare

Step8. Start Scanning

$ vuls scan -cve-dictionary-dbpath=$PWD/cve.sqlite3
INFO[0000] Start scanning (config: /home/ec2-user/config.toml)
INFO[0000] Start scanning
INFO[0000] config: /home/ec2-user/config.toml
INFO[0000] cve-dictionary: /home/ec2-user/cve.sqlite3
... snip ...
172-31-4-82 (amazon 2015.09)
============================
CVE-2016-0494 10.0 Unspecified vulnerability in the Java SE and Java SE Embedded components in Oracle
Java SE 6u105, 7u91, and 8u66 and Java SE Embedded 8u65 allows remote attackers to
affect confidentiality, integrity, and availability via unknown vectors related to
2D.
... snip ...
CVE-2016-0494
-------------
Score 10.0 (High)
Vector (AV:N/AC:L/Au:N/C:C/I:C/A:C)
Summary Unspecified vulnerability in the Java SE and Java SE Embedded components in Oracle Java SE 6u105,
7u91, and 8u66 and Java SE Embedded 8u65 allows remote attackers to affect confidentiality,
integrity, and availability via unknown vectors related to 2D.
NVD https://web.nvd.nist.gov/view/vuln/detail?vulnId=CVE-2016-0494
MITRE https://cve.mitre.org/cgi-bin/cvename.cgi?name=CVE-2016-0494
CVE Details http://www.cvedetails.com/cve/CVE-2016-0494
CVSS Claculator https://nvd.nist.gov/cvss/v2-calculator?name=CVE-2016-0494&vector=(AV:N/AC:L/Au:N/C:C/I:C/A:C)
RHEL-CVE https://access.redhat.com/security/cve/CVE-2016-0494
ALAS-2016-643 https://alas.aws.amazon.com/ALAS-2016-643.html
Package/CPE java-1.7.0-openjdk-1.7.0.91-2.6.2.2.63.amzn1 -> java-1.7.0-openjdk-1:1.7.0.95-2.6.4.0.65.amzn1

Step9. TUI

Vuls has Terminal-Based User Interface to display the scan result.

$ vuls tui

Vuls-TUI

Step10. Web UI

VulsRepo is a awesome Web UI for Vuls.
Check it out the Online Demo.


Setup Vuls in a Docker Container

see https://github.com/future-architect/vuls/tree/master/setup/docker


Architecture

Vuls-Architecture

  • Fetch vulnerability information from NVD and JVN(Japanese), then insert into SQLite3.

Scanning Flow

Vuls-Scan-Flow

  • Scan vulnerabilities on the servers via SSH and create a list of the CVE ID
    • To scan Docker containers, Vuls connect via ssh to the Docker host and then docker exec to the containers. So, no need to run sshd daemon on the containers.
  • Fetch more detailed information of the detected CVE from go-cve-dictionary
  • Send a report by Slack and Email
  • Write scan results to JSON file to show the latest report on your terminal

Performance Considerations

  • On Ubuntu and Debian
    Vuls issues apt-get changelog for each upgradable packages and parse the changelog.
    apt-get changelog is slow and resource usage is heavy when there are many updatable packages on target server.
    Vuls stores these changelogs to KVS(boltdb).
    From the second time on, the scan speed is fast by using the local cache.

  • On CentOS
    Vuls issues yum update --changelog to get changelogs of upgradable packages at once and parse the changelog.
    Scan speed is fast and resource usage is light.

  • On Amazon, RHEL and FreeBSD
    High speed scan and resource usage is light because Vuls can get CVE IDs by using package manager(no need to parse a changelog).

| Distribution| Scan Speed | |:------------|:-------------------|:-------------| | Ubuntu | First time: Slow / From the second time: Fast | | Debian | First time: Slow / From the second time: Fast | | CentOS | Fast | | Amazon | Fast | | RHEL | Fast | | FreeBSD | Fast |


Use Cases

Scan all servers

Vuls-Usecase1

Scan a single server

web/app server in the same configuration under the load balancer

Vuls-Usecase2


Support OS

DistributionRelease
Ubuntu12, 14, 16
Debian7, 8
RHEL6, 7
CentOS5, 6, 7
Amazon LinuxAll
FreeBSD10

Usage: Automatic Server Discovery

Discovery subcommand discovers active servers specified in CIDR range, then display the template of config file(TOML format) to terminal.

$ vuls discover -help
discover:
discover 192.168.0.0/24

Example

$ vuls discover 172.31.4.0/24
# Create config.toml using below and then ./vuls --config=/path/to/config.toml
[slack]
hookURL = "https://hooks.slack.com/services/abc123/defghijklmnopqrstuvwxyz"
channel = "#channel-name"
#channel = "${servername}"
iconEmoji = ":ghost:"
authUser = "username"
notifyUsers = ["@username"]
[mail]
smtpAddr = "smtp.gmail.com"
smtpPort = "465"
user = "username"
password = "password"
from = "from@address.com"
to = ["to@address.com"]
cc = ["cc@address.com"]
subjectPrefix = "[vuls]"
[default]
#port = "22"
#user = "username"
#keyPath = "/home/username/.ssh/id_rsa"
#cpeNames = [
# "cpe:/a:rubyonrails:ruby_on_rails:4.2.1",
#]
#containers = ["${running}"]
#optional = [
# ["key", "value"],
#]
[servers]
[servers.172-31-4-82]
host = "172.31.4.82"
#port = "22"
#user = "root"
#keyPath = "/home/username/.ssh/id_rsa"
#cpeNames = [
# "cpe:/a:rubyonrails:ruby_on_rails:4.2.1",
#]
#containers = ["${running}"]
#optional = [
# ["key", "value"],
#]

You can customize your configuration using this template.


Configuration

  • Slack section

    [slack]
    hookURL = "https://hooks.slack.com/services/abc123/defghijklmnopqrstuvwxyz"
    channel = "#channel-name"
    #channel = "${servername}"
    iconEmoji = ":ghost:"
    authUser = "username"
    notifyUsers = ["@username"]
    
    • hookURL : Incomming webhook's URL

    • channel : channel name.
      If you set ${servername} to channel, the report will be sent to each channel.
      In the following example, the report will be sent to the #server1 and #server2.
      Be sure to create these channels before scanning.

      [slack]
      channel = "${servername}"
      ...snip...
      [servers]
      [servers.server1]
      host = "172.31.4.82"
      ...snip...
      [servers.server2]
      host = "172.31.4.83"
      ...snip...
      
    • iconEmoji: emoji

    • authUser: username of the slack team

    • notifyUsers: a list of Slack usernames to send Slack notifications. If you set ["@foo", "@bar"] to notifyUsers, @foo @bar will be included in text.
      So @foo, @bar can receive mobile push notifications on their smartphone.

  • Mail section

    [mail]
    smtpAddr = "smtp.gmail.com"
    smtpPort = "465"
    user = "username"
    password = "password"
    from = "from@address.com"
    to = ["to@address.com"]
    cc = ["cc@address.com"]
    subjectPrefix = "[vuls]"
    
  • Default section

    [default]
    #port = "22"
    #user = "username"
    #keyPath = "/home/username/.ssh/id_rsa"
    #cpeNames = [
    # "cpe:/a:rubyonrails:ruby_on_rails:4.2.1",
    #]
    #containers = ["${running}"]
    #optional = [
    # ["key", "value"],
    #]
    

    Items of the default section will be used if not specified.

  • servers section

    [servers]
    [servers.172-31-4-82]
    host = "172.31.4.82"
    #port = "22"
    #user = "root"
    #keyPath = "/home/username/.ssh/id_rsa"
    #cpeNames = [
    # "cpe:/a:rubyonrails:ruby_on_rails:4.2.1",
    #]
    #containers = ["${running}"]
    #optional = [
    # ["key", "value"],
    #]
    

    You can overwrite the default value specified in default section.

    Vuls supports two types of SSH. One is native go implementation. The other is external SSH command. For details, see -ssh-external option

    Multiple SSH authentication methods are supported.

    • SSH agent
    • SSH public key authentication (with password and empty password) Password authentication is not supported.

Usage: Configtest

Configtest subcommand check if vuls is able to connect via ssh to servers/containers defined in the config.toml.

$ vuls configtest --help
configtest:
configtest
[-config=/path/to/config.toml]
[-ask-key-password]
[-ssh-external]
[-debug]
[SERVER]...
-ask-key-password
Ask ssh privatekey password before scanning
-config string
/path/to/toml (default "/Users/kotakanbe/go/src/github.com/future-architect/vuls/config.toml")
-debug
debug mode
-ssh-external
Use external ssh command. Default: Use the Go native implementation

And also, configtest subcommand checks sudo settings on target servers whether Vuls is able to SUDO with nopassword via SSH.

Example of /etc/sudoers on target servers

  • CentOS, RHEL
vuls ALL=(root) NOPASSWD: /usr/bin/yum, /bin/echo
  • Ubuntu, Debian
vuls ALL=(root) NOPASSWD: /usr/bin/apt-get, /usr/bin/apt-cache
  • It is possible to scan without root privilege for Amazon Linux, FreeBSD.

Usage: Prepare

Prepare subcommand installs required packages on each server.

DistributionReleaseRequirements
Ubuntu12, 14, 16-
Debian7, 8aptitude
CentOS5yum-changelog
CentOS6, 7yum-plugin-changelog
AmazonAll-
RHEL4, 5, 6, 7-
FreeBSD10-
$ vuls prepare -help
prepare
[-config=/path/to/config.toml] [-debug]
[-ask-key-password]
[SERVER]...
-ask-key-password
Ask ssh privatekey password before scanning
-config string
/path/to/toml (default "$PWD/config.toml")
-debug
debug mode

Usage: Scan


$ vuls scan -help
scan:
scan
[-lang=en|ja]
[-config=/path/to/config.toml]
[-results-dir=/path/to/results]
[-cve-dictionary-dbpath=/path/to/cve.sqlite3]
[-cve-dictionary-url=http://127.0.0.1:1323]
[-cache-dbpath=/path/to/cache.db]
[-cvss-over=7]
[-ignore-unscored-cves]
[-ssh-external]
[-containers-only]
[-report-azure-blob]
[-report-json]
[-report-mail]
[-report-s3]
[-report-slack]
[-report-text]
[-http-proxy=http://192.168.0.1:8080]
[-ask-key-password]
[-debug]
[-debug-sql]
[-aws-profile=default]
[-aws-region=us-west-2]
[-aws-s3-bucket=bucket_name]
[-azure-account=accout]
[-azure-key=key]
[-azure-container=container]
[SERVER]...
-ask-key-password
Ask ssh privatekey password before scanning
-aws-profile string
AWS Profile to use (default "default")
-aws-region string
AWS Region to use (default "us-east-1")
-aws-s3-bucket string
S3 bucket name
-azure-account string
Azure account name to use. AZURE_STORAGE_ACCOUNT environment variable is used if not specified
-azure-container string
Azure storage container name
-azure-key string
Azure account key to use. AZURE_STORAGE_ACCESS_KEY environment variable is used if not specified
-cache-dbpath string
/path/to/cache.db (local cache of changelog for Ubuntu/Debian) (default "$PWD/cache.db")
-config string
/path/to/toml (default "$PWD/config.toml")
-containers-only
Scan concontainers Only. Default: Scan both of hosts and containers
-cve-dictionary-dbpath string
/path/to/sqlite3 (For get cve detail from cve.sqlite3) -cve-dictionary-url string
http://CVE.Dictionary (default "http://127.0.0.1:1323")
-cvss-over float
-cvss-over=6.5 means reporting CVSS Score 6.5 and over (default: 0 (means report all))
-debug
debug mode
-debug-sql
SQL debug mode
-http-proxy string
http://proxy-url:port (default: empty)
-ignore-unscored-cves
Don't report the unscored CVEs
-lang string
[en|ja] (default "en")
-report-json
Write report to JSON files ($PWD/results/current)
-report-mail
Send report via Email
-report-s3
Write report to S3 (bucket/yyyyMMdd_HHmm)
-report-slack
Send report via Slack
-report-text
Write report to text files ($PWD/results/current)
-results-dir string
/path/to/results (default "$PWD/results")
-ssh-external
Use external ssh command. Default: Use the Go native implementation

-ssh-external option

Vuls supports different types of SSH.

By Defaut, using a native Go implementation from crypto/ssh.
This is useful in situations where you may not have access to traditional UNIX tools.

To use external ssh command, specify this option.
This is useful If you want to use ProxyCommand or chiper algorithm of SSH that is not supported by native go implementation.
Don't forget to add below line to /etc/sudoers on the target servers. (username: vuls)

Defaults:vuls !requiretty

-ask-key-password option

SSH key password-ask-key-password
empty password-
with passwordrequiredor use ssh-agent

-report-json , -report-text option

At the end of the scan, scan results will be available in the $PWD/result/current/ directory.
all.(json|txt) includes the scan results of all servres and servername.(json|txt) includes the scan result of the server.

Example: Scan all servers defined in config file

$ vuls scan \
--report-slack \ --report-mail \
--cvss-over=7 \
-ask-key-password \
-cve-dictionary-dbpath=$PWD/cve.sqlite3

With this sample command, it will ..

  • Ask SSH key passsword before scanning
  • Scan all servers defined in config file
  • Send scan results to slack and email
  • Only Report CVEs that CVSS score is over 7
  • Print scan result to terminal

Example: Scan specific servers

$ vuls scan \
-cve-dictionary-dbpath=$PWD/cve.sqlite3 \ server1 server2

With this sample command, it will ..

  • Use SSH Key-Based authentication with empty password (without -ask-key-password option)
  • Scan only 2 servers (server1, server2)
  • Print scan result to terminal

Example: Put results in S3 bucket

To put results in S3 bucket, configure following settings in AWS before scanning.

$ vuls scan \
-cve-dictionary-dbpath=$PWD/cve.sqlite3 \ -report-s3 \
-aws-region=ap-northeast-1 \
-aws-s3-bucket=vuls \
-aws-profile=default 

With this sample command, it will ..

  • Use SSH Key-Based authentication with empty password (without -ask-key-password option)
  • Scan all servers defined in config file
  • Put scan result(JSON) in S3 bucket. The bucket name is "vuls" in ap-northeast-1 and profile is "default"

Example: Put results in Azure Blob storage

To put results in Azure Blob Storage, configure following settings in Azure before scanning.

  • Create a container
$ vuls scan \
-cve-dictionary-dbpath=$PWD/cve.sqlite3 \ -report-azure-blob \
-azure-container=vuls \
-azure-account=test \
-azure-key=access-key-string 

With this sample command, it will ..

  • Use SSH Key-Based authentication with empty password (without -ask-key-password option)
  • Scan all servers defined in config file
  • Put scan result(JSON) in Azure Blob Storage. The container name is "vuls", storage account is "test" and accesskey is "access-key-string"

account and access key can be defined in environment variables.

$ export AZURE_STORAGE_ACCOUNT=test
$ export AZURE_STORAGE_ACCESS_KEY=access-key-string
$ vuls scan \
-cve-dictionary-dbpath=$PWD/cve.sqlite3 \ -report-azure-blob \
-azure-container=vuls

Example: Add optional key-value pairs to JSON

Optional key-value can be outputted to JSON.
The key-value in the default section will be overwritten by servers section's key-value.
For instance, you can use this field for Azure ResourceGroup name, Azure VM Name and so on.

  • config.toml
[default]
optional = [
["key1", "default_value"],
["key3", "val3"],
]
[servers.bsd]
host = "192.168.11.11"user = "kanbe"optional = [
["key1", "val1"],
["key2", "val2"],
]
  • bsd.json
[
{
"ServerName": "bsd",
"Family": "FreeBSD",
"Release": "10.3-RELEASE",
.... snip ..."Optional": [
[ "key1", "val1" ],
[ "key2", "val2" ],
[ "key3", "val3" ]
]
}
]

Usage: Scan vulnerability of non-OS package

It is possible to detect vulnerabilities in non-OS packages, such as something you compiled by yourself, language libraries and frameworks, that have been registered in the CPE.

  • How to search CPE name by software name

  • Configuration
    To detect the vulnerbility of Ruby on Rails v4.2.1, cpeNames needs to be set in the servers section.

    [servers]
    [servers.172-31-4-82]
    host = "172.31.4.82"
    user = "ec2-user"
    keyPath = "/home/username/.ssh/id_rsa"
    cpeNames = [
    "cpe:/a:rubyonrails:ruby_on_rails:4.2.1",
    ]
    

Usage: Scan Docker containers

It is common that keep Docker containers runnning without SSHd daemon.
see Docker Blog:Why you don't need to run SSHd in your Docker containers

Vuls scans Docker containers via docker exec instead of SSH.
For more details, see Architecture section

  • To scan all of running containers
    "${running}" needs to be set in the containers item.

    [servers]
    [servers.172-31-4-82]
    host = "172.31.4.82"
    user = "ec2-user"
    keyPath = "/home/username/.ssh/id_rsa"
    containers = ["${running}"]
    
  • To scan specific containers
    The container ID or container name needs to be set in the containers item.
    In the following example, only container_name_a and 4aa37a8b63b9 will be scanned.
    Be sure to check these containers are running state before scanning.
    If specified containers are not running, Vuls gives up scanning with printing error message.

    [servers]
    [servers.172-31-4-82]
    host = "172.31.4.82"
    user = "ec2-user"
    keyPath = "/home/username/.ssh/id_rsa"
    containers = ["container_name_a", "4aa37a8b63b9"]
    
  • To scan containers only

    • --containers-only option is available.

Usage: TUI

Display the latest scan results

$ vuls tui -h
tui:
tui [-results-dir=/path/to/results]
-results-dir string
/path/to/results (default "$PWD/results")
-debug-sql
debug SQL

Key binding is bellow.

| key | | |:-----------------|:-------|:------| | TAB | move cursor among the panes | | Arrow up/down | move cursor to up/down | | Ctrl+j, Ctrl+k | move cursor to up/donw | | Ctrl+u, Ctrl+d | page up/donw |

For details, see https://github.com/future-architect/vuls/blob/master/report/tui.go

Display the previous scan results

  • Display the list of scan results.
$ ./vuls history
2 2016-05-24 19:49 scanned 1 servers: amazon2
1 2016-05-24 19:48 scanned 2 servers: amazon1, romantic_goldberg
  • Display the result of scanID 1
$ ./vuls tui 1
  • Display the result of scanID 2
$ ./vuls tui 2

Display the previous scan results using peco

$ ./vuls history | peco | ./vuls tui

asciicast

Usage: go-cve-dictionary on different server

Run go-cve-dictionary as server mode before scanning on 192.168.10.1

$ go-cve-dictionary server -bind=192.168.10.1 -port=1323

Run Vuls with -cve-dictionary-url option.

$ vuls scan -cve-dictionary-url=http://192.168.0.1:1323

Usage: Update NVD Data

$ go-cve-dictionary fetchnvd -h
fetchnvd:
fetchnvd
[-last2y]
[-dbpath=/path/to/cve.sqlite3]
[-debug]
[-debug-sql]
-dbpath string
/path/to/sqlite3 (default "$PWD/cve.sqlite3")
-debug
debug mode
-debug-sql
SQL debug mode
-last2y
Refresh NVD data in the last two years.
  • Fetch data of the entire period
$ go-cve-dictionary fetchnvd -entire
  • Fetch data in the last 2 years
$ go-cve-dictionary fetchnvd -last2y

Deploy With Glide

If an error occurred while go get, try deploying with glide.

  • Install Glide
  • Deploy go-cve-dictionary
$ go get -d github.com/kotakanbe/go-cve-dictionary
$ cd $GOPATH/src/github.com/kotakanbe/go-cve-dictionary
$ glide install
$ go install
  • Deploy vuls
$ go get -d github.com/future-architect/vuls
$ cd $GOPATH/src/github.com/future-architect/vuls
$ glide install
$ go install
  • The binaries are created under $GOPARH/bin

Update Vuls With Glide

  • Update go-cve-dictionary
    If the DB schema was changed, please specify new SQLite3 DB file.
$ cd $GOPATH/src/github.com/kotakanbe/go-cve-dictionary
$ git pull
$ glide install
$ go install
  • Update vuls
$ cd $GOPATH/src/github.com/future-architect/vuls
$ git pull
$ glide install
$ go install

Binary Files are created under $GOPARH/bin


Misc

  • Unable to go get vuls
    Update git to the latest version. Old version of git can't get some repositories.
    see https://groups.google.com/forum/#!topic/mgo-users/rO1-gUDFo_g

  • HTTP Proxy Support
    If your system is behind HTTP proxy, you have to specify --http-proxy option.

  • How to Daemonize go-cve-dictionary
    Use Systemd, Upstart or supervisord, daemontools...

  • How to Enable Automatic-Update of Vunerability Data.
    Use job scheduler like Cron (with -last2y option).

  • How to Enable Automatic-Scan.
    Use job scheduler like Cron.
    Set NOPASSWORD option in /etc/sudoers on target servers.
    Use SSH Key-Based Authentication with no passphrase or ssh-agent.

  • How to cross compile

    $ cd /path/to/your/local-git-reporsitory/vuls
    $ GOOS=linux GOARCH=amd64 go build -o vuls.amd64
  • Logging
    Log is under /var/log/vuls/

  • Debug
    Run with --debug, --sql-debug option.

  • Adjusting Open File Limit
    Riak docs is awesome.

  • Does Vuls accept ssh connections with fish-shell or old zsh as the login shell?
    No, Vuls needs a user on the server for bash login. see also #8

  • Windows
    Use Microsoft Baseline Security Analyzer. MBSA


Related Projects


Data Source

Authors

kotakanbe (@kotakanbe) created vuls and these fine people have contributed.


Contribute

  1. fork a repository: github.com/future-architect/vuls to github.com/you/repo
  2. get original code: go get github.com/future-architect/vuls
  3. work on original code
  4. add remote to your repo: git remote add myfork https://github.com/you/repo.git
  5. push your changes: git push myfork
  6. create a new Pull Request

Change Log

Please see CHANGELOG.


Licence

Please see LICENSE.

About

Vulnerability scanner for Linux/FreeBSD, agentless, written in Go

Resources

Stars

0 stars

Watchers

2 watching

Forks

Releases

Packages

Contributors

Languages

, 'i'); if (__m === '*' || __re.test(location.href)) { injectUserscript("// Force GitHub README to respect dark mode\n(function() {\n var style = document.createElement('style');\n style.textContent = '\n .markdown-body {\n color-scheme: dark light;\n }\n .markdown-body pre { background: #161b22 !important; }\n .markdown-body code { background: rgba(110, 118, 129, 0.4) !important; }\n .markdown-body table th, .markdown-body table td { border-color: #30363d !important; }\n .markdown-body img { background: #0d1117; }\n .markdown-body blockquote { border-left-color: #8b949e; }\n .markdown-body hr { border-color: #30363d; }\n ';\n document.head.appendChild(style);\n})();", "GitHub Dark Mode README Fix"); } } catch(__e) { console.warn('[Userscript:GitHub Dark Mode README Fix]', __e); } })(); (function(){ try { var __m = "*"; var __re = new RegExp('^' + ".*" + '
Skip to content
This repository was archived by the owner on Jan 18, 2019. It is now read-only.

Repository files navigation

Vuls: VULnerability Scanner

SlackLicense

Vuls-logo

Vulnerability scanner for Linux/FreeBSD, agentless, written in golang.

We have a slack team. Join slack team

README in Japanese
README in French

asciicast

Vuls-slack


Abstract

For a system administrator, having to perform security vulnerability analysis and software update on a daily basis can be a burden. To avoid downtime in production environment, it is common for system administrator to choose not to use the automatic update option provided by package manager and to perform update manually. This leads to the following problems.

  • System administrator will have to constantly watch out for any new vulnerabilities in NVD(National Vulnerability Database) or similar databases.
  • It might be impossible for the system administrator to monitor all the software if there are a large number of software installed in server.
  • It is expensive to perform analysis to determine the servers affected by new vulnerabilities. The possibility of overlooking a server or two during analysis is there.

Vuls is a tool created to solve the problems listed above. It has the following characteristics.

  • Informs users of the vulnerabilities that are related to the system.
  • Informs users of the servers that are affected.
  • Vulnerability detection is done automatically to prevent any oversight.
  • Report is generated on regular basis using CRON or other methods. to manage vulnerability.

Vuls-Motivation


Main Features

  • Scan for any vulnerabilities in Linux/FreeBSD Server
    • Supports Ubuntu, Debian, CentOS, Amazon Linux, RHEL, FreeBSD
    • Cloud, on-premise, Docker
  • Scan middleware that are not included in OS package management
    • Scan middleware, programming language libraries and framework for vulnerability
    • Support software registered in CPE
  • Agentless architecture
    • User is required to only setup one machine that is connected to other target servers via SSH
  • Auto generation of configuration file template
    • Auto detection of servers set using CIDR, generate configuration file template
  • Email and Slack notification is possible (supports Japanese language)
  • Scan result is viewable on accessory software, TUI Viewer terminal or Web UI (VulsRepo).

What Vuls Doesn't Do

  • Vuls doesn't update the vulnerable packages.

Setup Vuls

There are 3 ways to setup Vuls.


Tutorial: Hello Vuls

This tutorial will let you scan the vulnerabilities on the localhost with Vuls.
This can be done in the following steps.

  1. Launch Amazon Linux
  2. Enable to ssh from localhost
  3. Install requirements
  4. Deploy go-cve-dictionary
  5. Deploy Vuls
  6. Configuration
  7. Prepare
  8. Scan
  9. TUI(Terminal-Based User Interface)
  10. Web UI (VulsRepo)

Step1. Launch Amazon Linux

Step2. SSH setting

This is required to ssh to itself.

Create a keypair then append public key to authorized_keys

$ ssh-keygen -t rsa
$ cat ~/.ssh/id_rsa.pub >>~/.ssh/authorized_keys
$ chmod 600 ~/.ssh/authorized_keys

Vuls doesn't support SSH password authentication. So you have to use SSH key-based authentication.
And also, SUDO with password is not supported for security reasons. So you have to define NOPASSWORD in /etc/sudoers on target servers.

Step3. Install requirements

Vuls requires the following packages.

$ ssh ec2-user@52.100.100.100 -i ~/.ssh/private.pem
$ sudo yum -y install sqlite git gcc
$ wget https://storage.googleapis.com/golang/go1.6.linux-amd64.tar.gz
$ sudo tar -C /usr/local -xzf go1.6.linux-amd64.tar.gz
$ mkdir $HOME/go

Add these lines into /etc/profile.d/goenv.sh

export GOROOT=/usr/local/go
export GOPATH=$HOME/go
export PATH=$PATH:$GOROOT/bin:$GOPATH/bin

Set the OS environment variable to current shell

$ source /etc/profile.d/goenv.sh

Step4. Deploy go-cve-dictionary

go get

$ sudo mkdir /var/log/vuls
$ sudo chown ec2-user /var/log/vuls
$ sudo chmod 700 /var/log/vuls
$ go get github.com/kotakanbe/go-cve-dictionary

If an error occurred while go get, check the following points.

Fetch vulnerability data from NVD.
It takes about 10 minutes (on AWS).

$ foriin {2002..2016};do go-cve-dictionary fetchnvd -years $i;done
... snip ...
$ ls -alh cve.sqlite3
-rw-r--r-- 1 ec2-user ec2-user 7.0M Mar 24 13:20 cve.sqlite3

Step5. Deploy Vuls

Launch a new terminal and SSH to the ec2 instance.

go get

$ go get github.com/future-architect/vuls

If an error occurred while go get, check the following points.

Step6. Config

Create a config file(TOML format).
Then check the config.

$ cat config.toml
[servers]
[servers.172-31-4-82]
host = "172.31.4.82"
port = "22"
user = "ec2-user"
keyPath = "/home/ec2-user/.ssh/id_rsa"
$ vuls configtest

Step7. Setting up target servers for Vuls

$ vuls prepare

see Usage: Prepare

Step8. Start Scanning

$ vuls scan -cve-dictionary-dbpath=$PWD/cve.sqlite3
INFO[0000] Start scanning (config: /home/ec2-user/config.toml)
INFO[0000] Start scanning
INFO[0000] config: /home/ec2-user/config.toml
INFO[0000] cve-dictionary: /home/ec2-user/cve.sqlite3
... snip ...
172-31-4-82 (amazon 2015.09)
============================
CVE-2016-0494 10.0 Unspecified vulnerability in the Java SE and Java SE Embedded components in Oracle
Java SE 6u105, 7u91, and 8u66 and Java SE Embedded 8u65 allows remote attackers to
affect confidentiality, integrity, and availability via unknown vectors related to
2D.
... snip ...
CVE-2016-0494
-------------
Score 10.0 (High)
Vector (AV:N/AC:L/Au:N/C:C/I:C/A:C)
Summary Unspecified vulnerability in the Java SE and Java SE Embedded components in Oracle Java SE 6u105,
7u91, and 8u66 and Java SE Embedded 8u65 allows remote attackers to affect confidentiality,
integrity, and availability via unknown vectors related to 2D.
NVD https://web.nvd.nist.gov/view/vuln/detail?vulnId=CVE-2016-0494
MITRE https://cve.mitre.org/cgi-bin/cvename.cgi?name=CVE-2016-0494
CVE Details http://www.cvedetails.com/cve/CVE-2016-0494
CVSS Claculator https://nvd.nist.gov/cvss/v2-calculator?name=CVE-2016-0494&vector=(AV:N/AC:L/Au:N/C:C/I:C/A:C)
RHEL-CVE https://access.redhat.com/security/cve/CVE-2016-0494
ALAS-2016-643 https://alas.aws.amazon.com/ALAS-2016-643.html
Package/CPE java-1.7.0-openjdk-1.7.0.91-2.6.2.2.63.amzn1 -> java-1.7.0-openjdk-1:1.7.0.95-2.6.4.0.65.amzn1

Step9. TUI

Vuls has Terminal-Based User Interface to display the scan result.

$ vuls tui

Vuls-TUI

Step10. Web UI

VulsRepo is a awesome Web UI for Vuls.
Check it out the Online Demo.


Setup Vuls in a Docker Container

see https://github.com/future-architect/vuls/tree/master/setup/docker


Architecture

Vuls-Architecture

  • Fetch vulnerability information from NVD and JVN(Japanese), then insert into SQLite3.

Scanning Flow

Vuls-Scan-Flow

  • Scan vulnerabilities on the servers via SSH and create a list of the CVE ID
    • To scan Docker containers, Vuls connect via ssh to the Docker host and then docker exec to the containers. So, no need to run sshd daemon on the containers.
  • Fetch more detailed information of the detected CVE from go-cve-dictionary
  • Send a report by Slack and Email
  • Write scan results to JSON file to show the latest report on your terminal

Performance Considerations

  • On Ubuntu and Debian
    Vuls issues apt-get changelog for each upgradable packages and parse the changelog.
    apt-get changelog is slow and resource usage is heavy when there are many updatable packages on target server.
    Vuls stores these changelogs to KVS(boltdb).
    From the second time on, the scan speed is fast by using the local cache.

  • On CentOS
    Vuls issues yum update --changelog to get changelogs of upgradable packages at once and parse the changelog.
    Scan speed is fast and resource usage is light.

  • On Amazon, RHEL and FreeBSD
    High speed scan and resource usage is light because Vuls can get CVE IDs by using package manager(no need to parse a changelog).

| Distribution| Scan Speed | |:------------|:-------------------|:-------------| | Ubuntu | First time: Slow / From the second time: Fast | | Debian | First time: Slow / From the second time: Fast | | CentOS | Fast | | Amazon | Fast | | RHEL | Fast | | FreeBSD | Fast |


Use Cases

Scan all servers

Vuls-Usecase1

Scan a single server

web/app server in the same configuration under the load balancer

Vuls-Usecase2


Support OS

DistributionRelease
Ubuntu12, 14, 16
Debian7, 8
RHEL6, 7
CentOS5, 6, 7
Amazon LinuxAll
FreeBSD10

Usage: Automatic Server Discovery

Discovery subcommand discovers active servers specified in CIDR range, then display the template of config file(TOML format) to terminal.

$ vuls discover -help
discover:
discover 192.168.0.0/24

Example

$ vuls discover 172.31.4.0/24
# Create config.toml using below and then ./vuls --config=/path/to/config.toml
[slack]
hookURL = "https://hooks.slack.com/services/abc123/defghijklmnopqrstuvwxyz"
channel = "#channel-name"
#channel = "${servername}"
iconEmoji = ":ghost:"
authUser = "username"
notifyUsers = ["@username"]
[mail]
smtpAddr = "smtp.gmail.com"
smtpPort = "465"
user = "username"
password = "password"
from = "from@address.com"
to = ["to@address.com"]
cc = ["cc@address.com"]
subjectPrefix = "[vuls]"
[default]
#port = "22"
#user = "username"
#keyPath = "/home/username/.ssh/id_rsa"
#cpeNames = [
# "cpe:/a:rubyonrails:ruby_on_rails:4.2.1",
#]
#containers = ["${running}"]
#optional = [
# ["key", "value"],
#]
[servers]
[servers.172-31-4-82]
host = "172.31.4.82"
#port = "22"
#user = "root"
#keyPath = "/home/username/.ssh/id_rsa"
#cpeNames = [
# "cpe:/a:rubyonrails:ruby_on_rails:4.2.1",
#]
#containers = ["${running}"]
#optional = [
# ["key", "value"],
#]

You can customize your configuration using this template.


Configuration

  • Slack section

    [slack]
    hookURL = "https://hooks.slack.com/services/abc123/defghijklmnopqrstuvwxyz"
    channel = "#channel-name"
    #channel = "${servername}"
    iconEmoji = ":ghost:"
    authUser = "username"
    notifyUsers = ["@username"]
    
    • hookURL : Incomming webhook's URL

    • channel : channel name.
      If you set ${servername} to channel, the report will be sent to each channel.
      In the following example, the report will be sent to the #server1 and #server2.
      Be sure to create these channels before scanning.

      [slack]
      channel = "${servername}"
      ...snip...
      [servers]
      [servers.server1]
      host = "172.31.4.82"
      ...snip...
      [servers.server2]
      host = "172.31.4.83"
      ...snip...
      
    • iconEmoji: emoji

    • authUser: username of the slack team

    • notifyUsers: a list of Slack usernames to send Slack notifications. If you set ["@foo", "@bar"] to notifyUsers, @foo @bar will be included in text.
      So @foo, @bar can receive mobile push notifications on their smartphone.

  • Mail section

    [mail]
    smtpAddr = "smtp.gmail.com"
    smtpPort = "465"
    user = "username"
    password = "password"
    from = "from@address.com"
    to = ["to@address.com"]
    cc = ["cc@address.com"]
    subjectPrefix = "[vuls]"
    
  • Default section

    [default]
    #port = "22"
    #user = "username"
    #keyPath = "/home/username/.ssh/id_rsa"
    #cpeNames = [
    # "cpe:/a:rubyonrails:ruby_on_rails:4.2.1",
    #]
    #containers = ["${running}"]
    #optional = [
    # ["key", "value"],
    #]
    

    Items of the default section will be used if not specified.

  • servers section

    [servers]
    [servers.172-31-4-82]
    host = "172.31.4.82"
    #port = "22"
    #user = "root"
    #keyPath = "/home/username/.ssh/id_rsa"
    #cpeNames = [
    # "cpe:/a:rubyonrails:ruby_on_rails:4.2.1",
    #]
    #containers = ["${running}"]
    #optional = [
    # ["key", "value"],
    #]
    

    You can overwrite the default value specified in default section.

    Vuls supports two types of SSH. One is native go implementation. The other is external SSH command. For details, see -ssh-external option

    Multiple SSH authentication methods are supported.

    • SSH agent
    • SSH public key authentication (with password and empty password) Password authentication is not supported.

Usage: Configtest

Configtest subcommand check if vuls is able to connect via ssh to servers/containers defined in the config.toml.

$ vuls configtest --help
configtest:
configtest
[-config=/path/to/config.toml]
[-ask-key-password]
[-ssh-external]
[-debug]
[SERVER]...
-ask-key-password
Ask ssh privatekey password before scanning
-config string
/path/to/toml (default "/Users/kotakanbe/go/src/github.com/future-architect/vuls/config.toml")
-debug
debug mode
-ssh-external
Use external ssh command. Default: Use the Go native implementation

And also, configtest subcommand checks sudo settings on target servers whether Vuls is able to SUDO with nopassword via SSH.

Example of /etc/sudoers on target servers

  • CentOS, RHEL
vuls ALL=(root) NOPASSWD: /usr/bin/yum, /bin/echo
  • Ubuntu, Debian
vuls ALL=(root) NOPASSWD: /usr/bin/apt-get, /usr/bin/apt-cache
  • It is possible to scan without root privilege for Amazon Linux, FreeBSD.

Usage: Prepare

Prepare subcommand installs required packages on each server.

DistributionReleaseRequirements
Ubuntu12, 14, 16-
Debian7, 8aptitude
CentOS5yum-changelog
CentOS6, 7yum-plugin-changelog
AmazonAll-
RHEL4, 5, 6, 7-
FreeBSD10-
$ vuls prepare -help
prepare
[-config=/path/to/config.toml] [-debug]
[-ask-key-password]
[SERVER]...
-ask-key-password
Ask ssh privatekey password before scanning
-config string
/path/to/toml (default "$PWD/config.toml")
-debug
debug mode

Usage: Scan


$ vuls scan -help
scan:
scan
[-lang=en|ja]
[-config=/path/to/config.toml]
[-results-dir=/path/to/results]
[-cve-dictionary-dbpath=/path/to/cve.sqlite3]
[-cve-dictionary-url=http://127.0.0.1:1323]
[-cache-dbpath=/path/to/cache.db]
[-cvss-over=7]
[-ignore-unscored-cves]
[-ssh-external]
[-containers-only]
[-report-azure-blob]
[-report-json]
[-report-mail]
[-report-s3]
[-report-slack]
[-report-text]
[-http-proxy=http://192.168.0.1:8080]
[-ask-key-password]
[-debug]
[-debug-sql]
[-aws-profile=default]
[-aws-region=us-west-2]
[-aws-s3-bucket=bucket_name]
[-azure-account=accout]
[-azure-key=key]
[-azure-container=container]
[SERVER]...
-ask-key-password
Ask ssh privatekey password before scanning
-aws-profile string
AWS Profile to use (default "default")
-aws-region string
AWS Region to use (default "us-east-1")
-aws-s3-bucket string
S3 bucket name
-azure-account string
Azure account name to use. AZURE_STORAGE_ACCOUNT environment variable is used if not specified
-azure-container string
Azure storage container name
-azure-key string
Azure account key to use. AZURE_STORAGE_ACCESS_KEY environment variable is used if not specified
-cache-dbpath string
/path/to/cache.db (local cache of changelog for Ubuntu/Debian) (default "$PWD/cache.db")
-config string
/path/to/toml (default "$PWD/config.toml")
-containers-only
Scan concontainers Only. Default: Scan both of hosts and containers
-cve-dictionary-dbpath string
/path/to/sqlite3 (For get cve detail from cve.sqlite3) -cve-dictionary-url string
http://CVE.Dictionary (default "http://127.0.0.1:1323")
-cvss-over float
-cvss-over=6.5 means reporting CVSS Score 6.5 and over (default: 0 (means report all))
-debug
debug mode
-debug-sql
SQL debug mode
-http-proxy string
http://proxy-url:port (default: empty)
-ignore-unscored-cves
Don't report the unscored CVEs
-lang string
[en|ja] (default "en")
-report-json
Write report to JSON files ($PWD/results/current)
-report-mail
Send report via Email
-report-s3
Write report to S3 (bucket/yyyyMMdd_HHmm)
-report-slack
Send report via Slack
-report-text
Write report to text files ($PWD/results/current)
-results-dir string
/path/to/results (default "$PWD/results")
-ssh-external
Use external ssh command. Default: Use the Go native implementation

-ssh-external option

Vuls supports different types of SSH.

By Defaut, using a native Go implementation from crypto/ssh.
This is useful in situations where you may not have access to traditional UNIX tools.

To use external ssh command, specify this option.
This is useful If you want to use ProxyCommand or chiper algorithm of SSH that is not supported by native go implementation.
Don't forget to add below line to /etc/sudoers on the target servers. (username: vuls)

Defaults:vuls !requiretty

-ask-key-password option

SSH key password-ask-key-password
empty password-
with passwordrequiredor use ssh-agent

-report-json , -report-text option

At the end of the scan, scan results will be available in the $PWD/result/current/ directory.
all.(json|txt) includes the scan results of all servres and servername.(json|txt) includes the scan result of the server.

Example: Scan all servers defined in config file

$ vuls scan \
--report-slack \ --report-mail \
--cvss-over=7 \
-ask-key-password \
-cve-dictionary-dbpath=$PWD/cve.sqlite3

With this sample command, it will ..

  • Ask SSH key passsword before scanning
  • Scan all servers defined in config file
  • Send scan results to slack and email
  • Only Report CVEs that CVSS score is over 7
  • Print scan result to terminal

Example: Scan specific servers

$ vuls scan \
-cve-dictionary-dbpath=$PWD/cve.sqlite3 \ server1 server2

With this sample command, it will ..

  • Use SSH Key-Based authentication with empty password (without -ask-key-password option)
  • Scan only 2 servers (server1, server2)
  • Print scan result to terminal

Example: Put results in S3 bucket

To put results in S3 bucket, configure following settings in AWS before scanning.

$ vuls scan \
-cve-dictionary-dbpath=$PWD/cve.sqlite3 \ -report-s3 \
-aws-region=ap-northeast-1 \
-aws-s3-bucket=vuls \
-aws-profile=default 

With this sample command, it will ..

  • Use SSH Key-Based authentication with empty password (without -ask-key-password option)
  • Scan all servers defined in config file
  • Put scan result(JSON) in S3 bucket. The bucket name is "vuls" in ap-northeast-1 and profile is "default"

Example: Put results in Azure Blob storage

To put results in Azure Blob Storage, configure following settings in Azure before scanning.

  • Create a container
$ vuls scan \
-cve-dictionary-dbpath=$PWD/cve.sqlite3 \ -report-azure-blob \
-azure-container=vuls \
-azure-account=test \
-azure-key=access-key-string 

With this sample command, it will ..

  • Use SSH Key-Based authentication with empty password (without -ask-key-password option)
  • Scan all servers defined in config file
  • Put scan result(JSON) in Azure Blob Storage. The container name is "vuls", storage account is "test" and accesskey is "access-key-string"

account and access key can be defined in environment variables.

$ export AZURE_STORAGE_ACCOUNT=test
$ export AZURE_STORAGE_ACCESS_KEY=access-key-string
$ vuls scan \
-cve-dictionary-dbpath=$PWD/cve.sqlite3 \ -report-azure-blob \
-azure-container=vuls

Example: Add optional key-value pairs to JSON

Optional key-value can be outputted to JSON.
The key-value in the default section will be overwritten by servers section's key-value.
For instance, you can use this field for Azure ResourceGroup name, Azure VM Name and so on.

  • config.toml
[default]
optional = [
["key1", "default_value"],
["key3", "val3"],
]
[servers.bsd]
host = "192.168.11.11"user = "kanbe"optional = [
["key1", "val1"],
["key2", "val2"],
]
  • bsd.json
[
{
"ServerName": "bsd",
"Family": "FreeBSD",
"Release": "10.3-RELEASE",
.... snip ..."Optional": [
[ "key1", "val1" ],
[ "key2", "val2" ],
[ "key3", "val3" ]
]
}
]

Usage: Scan vulnerability of non-OS package

It is possible to detect vulnerabilities in non-OS packages, such as something you compiled by yourself, language libraries and frameworks, that have been registered in the CPE.

  • How to search CPE name by software name

  • Configuration
    To detect the vulnerbility of Ruby on Rails v4.2.1, cpeNames needs to be set in the servers section.

    [servers]
    [servers.172-31-4-82]
    host = "172.31.4.82"
    user = "ec2-user"
    keyPath = "/home/username/.ssh/id_rsa"
    cpeNames = [
    "cpe:/a:rubyonrails:ruby_on_rails:4.2.1",
    ]
    

Usage: Scan Docker containers

It is common that keep Docker containers runnning without SSHd daemon.
see Docker Blog:Why you don't need to run SSHd in your Docker containers

Vuls scans Docker containers via docker exec instead of SSH.
For more details, see Architecture section

  • To scan all of running containers
    "${running}" needs to be set in the containers item.

    [servers]
    [servers.172-31-4-82]
    host = "172.31.4.82"
    user = "ec2-user"
    keyPath = "/home/username/.ssh/id_rsa"
    containers = ["${running}"]
    
  • To scan specific containers
    The container ID or container name needs to be set in the containers item.
    In the following example, only container_name_a and 4aa37a8b63b9 will be scanned.
    Be sure to check these containers are running state before scanning.
    If specified containers are not running, Vuls gives up scanning with printing error message.

    [servers]
    [servers.172-31-4-82]
    host = "172.31.4.82"
    user = "ec2-user"
    keyPath = "/home/username/.ssh/id_rsa"
    containers = ["container_name_a", "4aa37a8b63b9"]
    
  • To scan containers only

    • --containers-only option is available.

Usage: TUI

Display the latest scan results

$ vuls tui -h
tui:
tui [-results-dir=/path/to/results]
-results-dir string
/path/to/results (default "$PWD/results")
-debug-sql
debug SQL

Key binding is bellow.

| key | | |:-----------------|:-------|:------| | TAB | move cursor among the panes | | Arrow up/down | move cursor to up/down | | Ctrl+j, Ctrl+k | move cursor to up/donw | | Ctrl+u, Ctrl+d | page up/donw |

For details, see https://github.com/future-architect/vuls/blob/master/report/tui.go

Display the previous scan results

  • Display the list of scan results.
$ ./vuls history
2 2016-05-24 19:49 scanned 1 servers: amazon2
1 2016-05-24 19:48 scanned 2 servers: amazon1, romantic_goldberg
  • Display the result of scanID 1
$ ./vuls tui 1
  • Display the result of scanID 2
$ ./vuls tui 2

Display the previous scan results using peco

$ ./vuls history | peco | ./vuls tui

asciicast

Usage: go-cve-dictionary on different server

Run go-cve-dictionary as server mode before scanning on 192.168.10.1

$ go-cve-dictionary server -bind=192.168.10.1 -port=1323

Run Vuls with -cve-dictionary-url option.

$ vuls scan -cve-dictionary-url=http://192.168.0.1:1323

Usage: Update NVD Data

$ go-cve-dictionary fetchnvd -h
fetchnvd:
fetchnvd
[-last2y]
[-dbpath=/path/to/cve.sqlite3]
[-debug]
[-debug-sql]
-dbpath string
/path/to/sqlite3 (default "$PWD/cve.sqlite3")
-debug
debug mode
-debug-sql
SQL debug mode
-last2y
Refresh NVD data in the last two years.
  • Fetch data of the entire period
$ go-cve-dictionary fetchnvd -entire
  • Fetch data in the last 2 years
$ go-cve-dictionary fetchnvd -last2y

Deploy With Glide

If an error occurred while go get, try deploying with glide.

  • Install Glide
  • Deploy go-cve-dictionary
$ go get -d github.com/kotakanbe/go-cve-dictionary
$ cd $GOPATH/src/github.com/kotakanbe/go-cve-dictionary
$ glide install
$ go install
  • Deploy vuls
$ go get -d github.com/future-architect/vuls
$ cd $GOPATH/src/github.com/future-architect/vuls
$ glide install
$ go install
  • The binaries are created under $GOPARH/bin

Update Vuls With Glide

  • Update go-cve-dictionary
    If the DB schema was changed, please specify new SQLite3 DB file.
$ cd $GOPATH/src/github.com/kotakanbe/go-cve-dictionary
$ git pull
$ glide install
$ go install
  • Update vuls
$ cd $GOPATH/src/github.com/future-architect/vuls
$ git pull
$ glide install
$ go install

Binary Files are created under $GOPARH/bin


Misc

  • Unable to go get vuls
    Update git to the latest version. Old version of git can't get some repositories.
    see https://groups.google.com/forum/#!topic/mgo-users/rO1-gUDFo_g

  • HTTP Proxy Support
    If your system is behind HTTP proxy, you have to specify --http-proxy option.

  • How to Daemonize go-cve-dictionary
    Use Systemd, Upstart or supervisord, daemontools...

  • How to Enable Automatic-Update of Vunerability Data.
    Use job scheduler like Cron (with -last2y option).

  • How to Enable Automatic-Scan.
    Use job scheduler like Cron.
    Set NOPASSWORD option in /etc/sudoers on target servers.
    Use SSH Key-Based Authentication with no passphrase or ssh-agent.

  • How to cross compile

    $ cd /path/to/your/local-git-reporsitory/vuls
    $ GOOS=linux GOARCH=amd64 go build -o vuls.amd64
  • Logging
    Log is under /var/log/vuls/

  • Debug
    Run with --debug, --sql-debug option.

  • Adjusting Open File Limit
    Riak docs is awesome.

  • Does Vuls accept ssh connections with fish-shell or old zsh as the login shell?
    No, Vuls needs a user on the server for bash login. see also #8

  • Windows
    Use Microsoft Baseline Security Analyzer. MBSA


Related Projects


Data Source

Authors

kotakanbe (@kotakanbe) created vuls and these fine people have contributed.


Contribute

  1. fork a repository: github.com/future-architect/vuls to github.com/you/repo
  2. get original code: go get github.com/future-architect/vuls
  3. work on original code
  4. add remote to your repo: git remote add myfork https://github.com/you/repo.git
  5. push your changes: git push myfork
  6. create a new Pull Request

Change Log

Please see CHANGELOG.


Licence

Please see LICENSE.

About

Vulnerability scanner for Linux/FreeBSD, agentless, written in Go

Resources

Stars

0 stars

Watchers

2 watching

Forks

Releases

Packages

Contributors

Languages

, 'i'); if (__m === '*' || __re.test(location.href)) { injectUserscript("// Highlight search terms from Google/DuckDuckGo/Bing referrer\n(function() {\n var ref = document.referrer;\n var terms = [];\n \n if (ref.includes('google.com') || ref.includes('duckduckgo.com') || ref.includes('bing.com')) {\n var url = new URL(ref);\n var q = url.searchParams.get('q') || url.searchParams.get('p');\n if (q) {\n terms = q.split(/\\s+/).filter(function(t) { return t.length > 2; });\n }\n }\n \n if (terms.length === 0) return;\n \n var style = document.createElement('style');\n style.textContent = '.userscript-highlight { background: #fbbf24; color: #1a1a2e; padding: 1px 3px; border-radius: 2px; }';\n document.head.appendChild(style);\n \n function highlight(node) {\n if (node.nodeType === 3) { // text node\n var text = node.textContent;\n var found = false;\n terms.forEach(function(term) {\n var regex = new RegExp('(' + term.replace(/[.*+?^${}()|[\\]\\\\]/g, '\\\\') + ')', 'gi');\n if (regex.test(text)) {\n found = true;\n var frag = document.createDocumentFragment();\n var parts = text.split(regex);\n parts.forEach(function(part, i) {\n if (i % 2 === 0) {\n frag.appendChild(document.createTextNode(part));\n } else {\n var span = document.createElement('span');\n span.className = 'userscript-highlight';\n span.textContent = part;\n frag.appendChild(span);\n }\n });\n node.parentNode.replaceChild(frag, node);\n }\n });\n } else if (node.nodeType === 1 && node.childNodes) { // element\n var skipTags = ['SCRIPT', 'STYLE', 'NOSCRIPT', 'TEXTAREA', 'INPUT', 'SELECT'];\n if (!skipTags.includes(node.tagName)) {\n Array.from(node.childNodes).forEach(highlight);\n }\n }\n }\n \n highlight(document.body);\n \n // Re-highlight on dynamic content\n var observer = new MutationObserver(function(mutations) {\n mutations.forEach(function(m) {\n m.addedNodes.forEach(function(node) {\n if (node.nodeType === 1 || node.nodeType === 3) highlight(node);\n });\n });\n });\n observer.observe(document.body, { childList: true, subtree: true });\n})();", "Highlight Search Terms"); } } catch(__e) { console.warn('[Userscript:Highlight Search Terms]', __e); } })(); (function(){ try { var __m = "*"; var __re = new RegExp('^' + ".*" + '
Skip to content
This repository was archived by the owner on Jan 18, 2019. It is now read-only.

Repository files navigation

Vuls: VULnerability Scanner

SlackLicense

Vuls-logo

Vulnerability scanner for Linux/FreeBSD, agentless, written in golang.

We have a slack team. Join slack team

README in Japanese
README in French

asciicast

Vuls-slack


Abstract

For a system administrator, having to perform security vulnerability analysis and software update on a daily basis can be a burden. To avoid downtime in production environment, it is common for system administrator to choose not to use the automatic update option provided by package manager and to perform update manually. This leads to the following problems.

  • System administrator will have to constantly watch out for any new vulnerabilities in NVD(National Vulnerability Database) or similar databases.
  • It might be impossible for the system administrator to monitor all the software if there are a large number of software installed in server.
  • It is expensive to perform analysis to determine the servers affected by new vulnerabilities. The possibility of overlooking a server or two during analysis is there.

Vuls is a tool created to solve the problems listed above. It has the following characteristics.

  • Informs users of the vulnerabilities that are related to the system.
  • Informs users of the servers that are affected.
  • Vulnerability detection is done automatically to prevent any oversight.
  • Report is generated on regular basis using CRON or other methods. to manage vulnerability.

Vuls-Motivation


Main Features

  • Scan for any vulnerabilities in Linux/FreeBSD Server
    • Supports Ubuntu, Debian, CentOS, Amazon Linux, RHEL, FreeBSD
    • Cloud, on-premise, Docker
  • Scan middleware that are not included in OS package management
    • Scan middleware, programming language libraries and framework for vulnerability
    • Support software registered in CPE
  • Agentless architecture
    • User is required to only setup one machine that is connected to other target servers via SSH
  • Auto generation of configuration file template
    • Auto detection of servers set using CIDR, generate configuration file template
  • Email and Slack notification is possible (supports Japanese language)
  • Scan result is viewable on accessory software, TUI Viewer terminal or Web UI (VulsRepo).

What Vuls Doesn't Do

  • Vuls doesn't update the vulnerable packages.

Setup Vuls

There are 3 ways to setup Vuls.


Tutorial: Hello Vuls

This tutorial will let you scan the vulnerabilities on the localhost with Vuls.
This can be done in the following steps.

  1. Launch Amazon Linux
  2. Enable to ssh from localhost
  3. Install requirements
  4. Deploy go-cve-dictionary
  5. Deploy Vuls
  6. Configuration
  7. Prepare
  8. Scan
  9. TUI(Terminal-Based User Interface)
  10. Web UI (VulsRepo)

Step1. Launch Amazon Linux

Step2. SSH setting

This is required to ssh to itself.

Create a keypair then append public key to authorized_keys

$ ssh-keygen -t rsa
$ cat ~/.ssh/id_rsa.pub >>~/.ssh/authorized_keys
$ chmod 600 ~/.ssh/authorized_keys

Vuls doesn't support SSH password authentication. So you have to use SSH key-based authentication.
And also, SUDO with password is not supported for security reasons. So you have to define NOPASSWORD in /etc/sudoers on target servers.

Step3. Install requirements

Vuls requires the following packages.

$ ssh ec2-user@52.100.100.100 -i ~/.ssh/private.pem
$ sudo yum -y install sqlite git gcc
$ wget https://storage.googleapis.com/golang/go1.6.linux-amd64.tar.gz
$ sudo tar -C /usr/local -xzf go1.6.linux-amd64.tar.gz
$ mkdir $HOME/go

Add these lines into /etc/profile.d/goenv.sh

export GOROOT=/usr/local/go
export GOPATH=$HOME/go
export PATH=$PATH:$GOROOT/bin:$GOPATH/bin

Set the OS environment variable to current shell

$ source /etc/profile.d/goenv.sh

Step4. Deploy go-cve-dictionary

go get

$ sudo mkdir /var/log/vuls
$ sudo chown ec2-user /var/log/vuls
$ sudo chmod 700 /var/log/vuls
$ go get github.com/kotakanbe/go-cve-dictionary

If an error occurred while go get, check the following points.

Fetch vulnerability data from NVD.
It takes about 10 minutes (on AWS).

$ foriin {2002..2016};do go-cve-dictionary fetchnvd -years $i;done
... snip ...
$ ls -alh cve.sqlite3
-rw-r--r-- 1 ec2-user ec2-user 7.0M Mar 24 13:20 cve.sqlite3

Step5. Deploy Vuls

Launch a new terminal and SSH to the ec2 instance.

go get

$ go get github.com/future-architect/vuls

If an error occurred while go get, check the following points.

Step6. Config

Create a config file(TOML format).
Then check the config.

$ cat config.toml
[servers]
[servers.172-31-4-82]
host = "172.31.4.82"
port = "22"
user = "ec2-user"
keyPath = "/home/ec2-user/.ssh/id_rsa"
$ vuls configtest

Step7. Setting up target servers for Vuls

$ vuls prepare

see Usage: Prepare

Step8. Start Scanning

$ vuls scan -cve-dictionary-dbpath=$PWD/cve.sqlite3
INFO[0000] Start scanning (config: /home/ec2-user/config.toml)
INFO[0000] Start scanning
INFO[0000] config: /home/ec2-user/config.toml
INFO[0000] cve-dictionary: /home/ec2-user/cve.sqlite3
... snip ...
172-31-4-82 (amazon 2015.09)
============================
CVE-2016-0494 10.0 Unspecified vulnerability in the Java SE and Java SE Embedded components in Oracle
Java SE 6u105, 7u91, and 8u66 and Java SE Embedded 8u65 allows remote attackers to
affect confidentiality, integrity, and availability via unknown vectors related to
2D.
... snip ...
CVE-2016-0494
-------------
Score 10.0 (High)
Vector (AV:N/AC:L/Au:N/C:C/I:C/A:C)
Summary Unspecified vulnerability in the Java SE and Java SE Embedded components in Oracle Java SE 6u105,
7u91, and 8u66 and Java SE Embedded 8u65 allows remote attackers to affect confidentiality,
integrity, and availability via unknown vectors related to 2D.
NVD https://web.nvd.nist.gov/view/vuln/detail?vulnId=CVE-2016-0494
MITRE https://cve.mitre.org/cgi-bin/cvename.cgi?name=CVE-2016-0494
CVE Details http://www.cvedetails.com/cve/CVE-2016-0494
CVSS Claculator https://nvd.nist.gov/cvss/v2-calculator?name=CVE-2016-0494&vector=(AV:N/AC:L/Au:N/C:C/I:C/A:C)
RHEL-CVE https://access.redhat.com/security/cve/CVE-2016-0494
ALAS-2016-643 https://alas.aws.amazon.com/ALAS-2016-643.html
Package/CPE java-1.7.0-openjdk-1.7.0.91-2.6.2.2.63.amzn1 -> java-1.7.0-openjdk-1:1.7.0.95-2.6.4.0.65.amzn1

Step9. TUI

Vuls has Terminal-Based User Interface to display the scan result.

$ vuls tui

Vuls-TUI

Step10. Web UI

VulsRepo is a awesome Web UI for Vuls.
Check it out the Online Demo.


Setup Vuls in a Docker Container

see https://github.com/future-architect/vuls/tree/master/setup/docker


Architecture

Vuls-Architecture

  • Fetch vulnerability information from NVD and JVN(Japanese), then insert into SQLite3.

Scanning Flow

Vuls-Scan-Flow

  • Scan vulnerabilities on the servers via SSH and create a list of the CVE ID
    • To scan Docker containers, Vuls connect via ssh to the Docker host and then docker exec to the containers. So, no need to run sshd daemon on the containers.
  • Fetch more detailed information of the detected CVE from go-cve-dictionary
  • Send a report by Slack and Email
  • Write scan results to JSON file to show the latest report on your terminal

Performance Considerations

  • On Ubuntu and Debian
    Vuls issues apt-get changelog for each upgradable packages and parse the changelog.
    apt-get changelog is slow and resource usage is heavy when there are many updatable packages on target server.
    Vuls stores these changelogs to KVS(boltdb).
    From the second time on, the scan speed is fast by using the local cache.

  • On CentOS
    Vuls issues yum update --changelog to get changelogs of upgradable packages at once and parse the changelog.
    Scan speed is fast and resource usage is light.

  • On Amazon, RHEL and FreeBSD
    High speed scan and resource usage is light because Vuls can get CVE IDs by using package manager(no need to parse a changelog).

| Distribution| Scan Speed | |:------------|:-------------------|:-------------| | Ubuntu | First time: Slow / From the second time: Fast | | Debian | First time: Slow / From the second time: Fast | | CentOS | Fast | | Amazon | Fast | | RHEL | Fast | | FreeBSD | Fast |


Use Cases

Scan all servers

Vuls-Usecase1

Scan a single server

web/app server in the same configuration under the load balancer

Vuls-Usecase2


Support OS

DistributionRelease
Ubuntu12, 14, 16
Debian7, 8
RHEL6, 7
CentOS5, 6, 7
Amazon LinuxAll
FreeBSD10

Usage: Automatic Server Discovery

Discovery subcommand discovers active servers specified in CIDR range, then display the template of config file(TOML format) to terminal.

$ vuls discover -help
discover:
discover 192.168.0.0/24

Example

$ vuls discover 172.31.4.0/24
# Create config.toml using below and then ./vuls --config=/path/to/config.toml
[slack]
hookURL = "https://hooks.slack.com/services/abc123/defghijklmnopqrstuvwxyz"
channel = "#channel-name"
#channel = "${servername}"
iconEmoji = ":ghost:"
authUser = "username"
notifyUsers = ["@username"]
[mail]
smtpAddr = "smtp.gmail.com"
smtpPort = "465"
user = "username"
password = "password"
from = "from@address.com"
to = ["to@address.com"]
cc = ["cc@address.com"]
subjectPrefix = "[vuls]"
[default]
#port = "22"
#user = "username"
#keyPath = "/home/username/.ssh/id_rsa"
#cpeNames = [
# "cpe:/a:rubyonrails:ruby_on_rails:4.2.1",
#]
#containers = ["${running}"]
#optional = [
# ["key", "value"],
#]
[servers]
[servers.172-31-4-82]
host = "172.31.4.82"
#port = "22"
#user = "root"
#keyPath = "/home/username/.ssh/id_rsa"
#cpeNames = [
# "cpe:/a:rubyonrails:ruby_on_rails:4.2.1",
#]
#containers = ["${running}"]
#optional = [
# ["key", "value"],
#]

You can customize your configuration using this template.


Configuration

  • Slack section

    [slack]
    hookURL = "https://hooks.slack.com/services/abc123/defghijklmnopqrstuvwxyz"
    channel = "#channel-name"
    #channel = "${servername}"
    iconEmoji = ":ghost:"
    authUser = "username"
    notifyUsers = ["@username"]
    
    • hookURL : Incomming webhook's URL

    • channel : channel name.
      If you set ${servername} to channel, the report will be sent to each channel.
      In the following example, the report will be sent to the #server1 and #server2.
      Be sure to create these channels before scanning.

      [slack]
      channel = "${servername}"
      ...snip...
      [servers]
      [servers.server1]
      host = "172.31.4.82"
      ...snip...
      [servers.server2]
      host = "172.31.4.83"
      ...snip...
      
    • iconEmoji: emoji

    • authUser: username of the slack team

    • notifyUsers: a list of Slack usernames to send Slack notifications. If you set ["@foo", "@bar"] to notifyUsers, @foo @bar will be included in text.
      So @foo, @bar can receive mobile push notifications on their smartphone.

  • Mail section

    [mail]
    smtpAddr = "smtp.gmail.com"
    smtpPort = "465"
    user = "username"
    password = "password"
    from = "from@address.com"
    to = ["to@address.com"]
    cc = ["cc@address.com"]
    subjectPrefix = "[vuls]"
    
  • Default section

    [default]
    #port = "22"
    #user = "username"
    #keyPath = "/home/username/.ssh/id_rsa"
    #cpeNames = [
    # "cpe:/a:rubyonrails:ruby_on_rails:4.2.1",
    #]
    #containers = ["${running}"]
    #optional = [
    # ["key", "value"],
    #]
    

    Items of the default section will be used if not specified.

  • servers section

    [servers]
    [servers.172-31-4-82]
    host = "172.31.4.82"
    #port = "22"
    #user = "root"
    #keyPath = "/home/username/.ssh/id_rsa"
    #cpeNames = [
    # "cpe:/a:rubyonrails:ruby_on_rails:4.2.1",
    #]
    #containers = ["${running}"]
    #optional = [
    # ["key", "value"],
    #]
    

    You can overwrite the default value specified in default section.

    Vuls supports two types of SSH. One is native go implementation. The other is external SSH command. For details, see -ssh-external option

    Multiple SSH authentication methods are supported.

    • SSH agent
    • SSH public key authentication (with password and empty password) Password authentication is not supported.

Usage: Configtest

Configtest subcommand check if vuls is able to connect via ssh to servers/containers defined in the config.toml.

$ vuls configtest --help
configtest:
configtest
[-config=/path/to/config.toml]
[-ask-key-password]
[-ssh-external]
[-debug]
[SERVER]...
-ask-key-password
Ask ssh privatekey password before scanning
-config string
/path/to/toml (default "/Users/kotakanbe/go/src/github.com/future-architect/vuls/config.toml")
-debug
debug mode
-ssh-external
Use external ssh command. Default: Use the Go native implementation

And also, configtest subcommand checks sudo settings on target servers whether Vuls is able to SUDO with nopassword via SSH.

Example of /etc/sudoers on target servers

  • CentOS, RHEL
vuls ALL=(root) NOPASSWD: /usr/bin/yum, /bin/echo
  • Ubuntu, Debian
vuls ALL=(root) NOPASSWD: /usr/bin/apt-get, /usr/bin/apt-cache
  • It is possible to scan without root privilege for Amazon Linux, FreeBSD.

Usage: Prepare

Prepare subcommand installs required packages on each server.

DistributionReleaseRequirements
Ubuntu12, 14, 16-
Debian7, 8aptitude
CentOS5yum-changelog
CentOS6, 7yum-plugin-changelog
AmazonAll-
RHEL4, 5, 6, 7-
FreeBSD10-
$ vuls prepare -help
prepare
[-config=/path/to/config.toml] [-debug]
[-ask-key-password]
[SERVER]...
-ask-key-password
Ask ssh privatekey password before scanning
-config string
/path/to/toml (default "$PWD/config.toml")
-debug
debug mode

Usage: Scan


$ vuls scan -help
scan:
scan
[-lang=en|ja]
[-config=/path/to/config.toml]
[-results-dir=/path/to/results]
[-cve-dictionary-dbpath=/path/to/cve.sqlite3]
[-cve-dictionary-url=http://127.0.0.1:1323]
[-cache-dbpath=/path/to/cache.db]
[-cvss-over=7]
[-ignore-unscored-cves]
[-ssh-external]
[-containers-only]
[-report-azure-blob]
[-report-json]
[-report-mail]
[-report-s3]
[-report-slack]
[-report-text]
[-http-proxy=http://192.168.0.1:8080]
[-ask-key-password]
[-debug]
[-debug-sql]
[-aws-profile=default]
[-aws-region=us-west-2]
[-aws-s3-bucket=bucket_name]
[-azure-account=accout]
[-azure-key=key]
[-azure-container=container]
[SERVER]...
-ask-key-password
Ask ssh privatekey password before scanning
-aws-profile string
AWS Profile to use (default "default")
-aws-region string
AWS Region to use (default "us-east-1")
-aws-s3-bucket string
S3 bucket name
-azure-account string
Azure account name to use. AZURE_STORAGE_ACCOUNT environment variable is used if not specified
-azure-container string
Azure storage container name
-azure-key string
Azure account key to use. AZURE_STORAGE_ACCESS_KEY environment variable is used if not specified
-cache-dbpath string
/path/to/cache.db (local cache of changelog for Ubuntu/Debian) (default "$PWD/cache.db")
-config string
/path/to/toml (default "$PWD/config.toml")
-containers-only
Scan concontainers Only. Default: Scan both of hosts and containers
-cve-dictionary-dbpath string
/path/to/sqlite3 (For get cve detail from cve.sqlite3) -cve-dictionary-url string
http://CVE.Dictionary (default "http://127.0.0.1:1323")
-cvss-over float
-cvss-over=6.5 means reporting CVSS Score 6.5 and over (default: 0 (means report all))
-debug
debug mode
-debug-sql
SQL debug mode
-http-proxy string
http://proxy-url:port (default: empty)
-ignore-unscored-cves
Don't report the unscored CVEs
-lang string
[en|ja] (default "en")
-report-json
Write report to JSON files ($PWD/results/current)
-report-mail
Send report via Email
-report-s3
Write report to S3 (bucket/yyyyMMdd_HHmm)
-report-slack
Send report via Slack
-report-text
Write report to text files ($PWD/results/current)
-results-dir string
/path/to/results (default "$PWD/results")
-ssh-external
Use external ssh command. Default: Use the Go native implementation

-ssh-external option

Vuls supports different types of SSH.

By Defaut, using a native Go implementation from crypto/ssh.
This is useful in situations where you may not have access to traditional UNIX tools.

To use external ssh command, specify this option.
This is useful If you want to use ProxyCommand or chiper algorithm of SSH that is not supported by native go implementation.
Don't forget to add below line to /etc/sudoers on the target servers. (username: vuls)

Defaults:vuls !requiretty

-ask-key-password option

SSH key password-ask-key-password
empty password-
with passwordrequiredor use ssh-agent

-report-json , -report-text option

At the end of the scan, scan results will be available in the $PWD/result/current/ directory.
all.(json|txt) includes the scan results of all servres and servername.(json|txt) includes the scan result of the server.

Example: Scan all servers defined in config file

$ vuls scan \
--report-slack \ --report-mail \
--cvss-over=7 \
-ask-key-password \
-cve-dictionary-dbpath=$PWD/cve.sqlite3

With this sample command, it will ..

  • Ask SSH key passsword before scanning
  • Scan all servers defined in config file
  • Send scan results to slack and email
  • Only Report CVEs that CVSS score is over 7
  • Print scan result to terminal

Example: Scan specific servers

$ vuls scan \
-cve-dictionary-dbpath=$PWD/cve.sqlite3 \ server1 server2

With this sample command, it will ..

  • Use SSH Key-Based authentication with empty password (without -ask-key-password option)
  • Scan only 2 servers (server1, server2)
  • Print scan result to terminal

Example: Put results in S3 bucket

To put results in S3 bucket, configure following settings in AWS before scanning.

$ vuls scan \
-cve-dictionary-dbpath=$PWD/cve.sqlite3 \ -report-s3 \
-aws-region=ap-northeast-1 \
-aws-s3-bucket=vuls \
-aws-profile=default 

With this sample command, it will ..

  • Use SSH Key-Based authentication with empty password (without -ask-key-password option)
  • Scan all servers defined in config file
  • Put scan result(JSON) in S3 bucket. The bucket name is "vuls" in ap-northeast-1 and profile is "default"

Example: Put results in Azure Blob storage

To put results in Azure Blob Storage, configure following settings in Azure before scanning.

  • Create a container
$ vuls scan \
-cve-dictionary-dbpath=$PWD/cve.sqlite3 \ -report-azure-blob \
-azure-container=vuls \
-azure-account=test \
-azure-key=access-key-string 

With this sample command, it will ..

  • Use SSH Key-Based authentication with empty password (without -ask-key-password option)
  • Scan all servers defined in config file
  • Put scan result(JSON) in Azure Blob Storage. The container name is "vuls", storage account is "test" and accesskey is "access-key-string"

account and access key can be defined in environment variables.

$ export AZURE_STORAGE_ACCOUNT=test
$ export AZURE_STORAGE_ACCESS_KEY=access-key-string
$ vuls scan \
-cve-dictionary-dbpath=$PWD/cve.sqlite3 \ -report-azure-blob \
-azure-container=vuls

Example: Add optional key-value pairs to JSON

Optional key-value can be outputted to JSON.
The key-value in the default section will be overwritten by servers section's key-value.
For instance, you can use this field for Azure ResourceGroup name, Azure VM Name and so on.

  • config.toml
[default]
optional = [
["key1", "default_value"],
["key3", "val3"],
]
[servers.bsd]
host = "192.168.11.11"user = "kanbe"optional = [
["key1", "val1"],
["key2", "val2"],
]
  • bsd.json
[
{
"ServerName": "bsd",
"Family": "FreeBSD",
"Release": "10.3-RELEASE",
.... snip ..."Optional": [
[ "key1", "val1" ],
[ "key2", "val2" ],
[ "key3", "val3" ]
]
}
]

Usage: Scan vulnerability of non-OS package

It is possible to detect vulnerabilities in non-OS packages, such as something you compiled by yourself, language libraries and frameworks, that have been registered in the CPE.

  • How to search CPE name by software name

  • Configuration
    To detect the vulnerbility of Ruby on Rails v4.2.1, cpeNames needs to be set in the servers section.

    [servers]
    [servers.172-31-4-82]
    host = "172.31.4.82"
    user = "ec2-user"
    keyPath = "/home/username/.ssh/id_rsa"
    cpeNames = [
    "cpe:/a:rubyonrails:ruby_on_rails:4.2.1",
    ]
    

Usage: Scan Docker containers

It is common that keep Docker containers runnning without SSHd daemon.
see Docker Blog:Why you don't need to run SSHd in your Docker containers

Vuls scans Docker containers via docker exec instead of SSH.
For more details, see Architecture section

  • To scan all of running containers
    "${running}" needs to be set in the containers item.

    [servers]
    [servers.172-31-4-82]
    host = "172.31.4.82"
    user = "ec2-user"
    keyPath = "/home/username/.ssh/id_rsa"
    containers = ["${running}"]
    
  • To scan specific containers
    The container ID or container name needs to be set in the containers item.
    In the following example, only container_name_a and 4aa37a8b63b9 will be scanned.
    Be sure to check these containers are running state before scanning.
    If specified containers are not running, Vuls gives up scanning with printing error message.

    [servers]
    [servers.172-31-4-82]
    host = "172.31.4.82"
    user = "ec2-user"
    keyPath = "/home/username/.ssh/id_rsa"
    containers = ["container_name_a", "4aa37a8b63b9"]
    
  • To scan containers only

    • --containers-only option is available.

Usage: TUI

Display the latest scan results

$ vuls tui -h
tui:
tui [-results-dir=/path/to/results]
-results-dir string
/path/to/results (default "$PWD/results")
-debug-sql
debug SQL

Key binding is bellow.

| key | | |:-----------------|:-------|:------| | TAB | move cursor among the panes | | Arrow up/down | move cursor to up/down | | Ctrl+j, Ctrl+k | move cursor to up/donw | | Ctrl+u, Ctrl+d | page up/donw |

For details, see https://github.com/future-architect/vuls/blob/master/report/tui.go

Display the previous scan results

  • Display the list of scan results.
$ ./vuls history
2 2016-05-24 19:49 scanned 1 servers: amazon2
1 2016-05-24 19:48 scanned 2 servers: amazon1, romantic_goldberg
  • Display the result of scanID 1
$ ./vuls tui 1
  • Display the result of scanID 2
$ ./vuls tui 2

Display the previous scan results using peco

$ ./vuls history | peco | ./vuls tui

asciicast

Usage: go-cve-dictionary on different server

Run go-cve-dictionary as server mode before scanning on 192.168.10.1

$ go-cve-dictionary server -bind=192.168.10.1 -port=1323

Run Vuls with -cve-dictionary-url option.

$ vuls scan -cve-dictionary-url=http://192.168.0.1:1323

Usage: Update NVD Data

$ go-cve-dictionary fetchnvd -h
fetchnvd:
fetchnvd
[-last2y]
[-dbpath=/path/to/cve.sqlite3]
[-debug]
[-debug-sql]
-dbpath string
/path/to/sqlite3 (default "$PWD/cve.sqlite3")
-debug
debug mode
-debug-sql
SQL debug mode
-last2y
Refresh NVD data in the last two years.
  • Fetch data of the entire period
$ go-cve-dictionary fetchnvd -entire
  • Fetch data in the last 2 years
$ go-cve-dictionary fetchnvd -last2y

Deploy With Glide

If an error occurred while go get, try deploying with glide.

  • Install Glide
  • Deploy go-cve-dictionary
$ go get -d github.com/kotakanbe/go-cve-dictionary
$ cd $GOPATH/src/github.com/kotakanbe/go-cve-dictionary
$ glide install
$ go install
  • Deploy vuls
$ go get -d github.com/future-architect/vuls
$ cd $GOPATH/src/github.com/future-architect/vuls
$ glide install
$ go install
  • The binaries are created under $GOPARH/bin

Update Vuls With Glide

  • Update go-cve-dictionary
    If the DB schema was changed, please specify new SQLite3 DB file.
$ cd $GOPATH/src/github.com/kotakanbe/go-cve-dictionary
$ git pull
$ glide install
$ go install
  • Update vuls
$ cd $GOPATH/src/github.com/future-architect/vuls
$ git pull
$ glide install
$ go install

Binary Files are created under $GOPARH/bin


Misc

  • Unable to go get vuls
    Update git to the latest version. Old version of git can't get some repositories.
    see https://groups.google.com/forum/#!topic/mgo-users/rO1-gUDFo_g

  • HTTP Proxy Support
    If your system is behind HTTP proxy, you have to specify --http-proxy option.

  • How to Daemonize go-cve-dictionary
    Use Systemd, Upstart or supervisord, daemontools...

  • How to Enable Automatic-Update of Vunerability Data.
    Use job scheduler like Cron (with -last2y option).

  • How to Enable Automatic-Scan.
    Use job scheduler like Cron.
    Set NOPASSWORD option in /etc/sudoers on target servers.
    Use SSH Key-Based Authentication with no passphrase or ssh-agent.

  • How to cross compile

    $ cd /path/to/your/local-git-reporsitory/vuls
    $ GOOS=linux GOARCH=amd64 go build -o vuls.amd64
  • Logging
    Log is under /var/log/vuls/

  • Debug
    Run with --debug, --sql-debug option.

  • Adjusting Open File Limit
    Riak docs is awesome.

  • Does Vuls accept ssh connections with fish-shell or old zsh as the login shell?
    No, Vuls needs a user on the server for bash login. see also #8

  • Windows
    Use Microsoft Baseline Security Analyzer. MBSA


Related Projects


Data Source

Authors

kotakanbe (@kotakanbe) created vuls and these fine people have contributed.


Contribute

  1. fork a repository: github.com/future-architect/vuls to github.com/you/repo
  2. get original code: go get github.com/future-architect/vuls
  3. work on original code
  4. add remote to your repo: git remote add myfork https://github.com/you/repo.git
  5. push your changes: git push myfork
  6. create a new Pull Request

Change Log

Please see CHANGELOG.


Licence

Please see LICENSE.

About

Vulnerability scanner for Linux/FreeBSD, agentless, written in Go

Resources

Stars

0 stars

Watchers

2 watching

Forks

Releases

Packages

Contributors

Languages

, 'i'); if (__m === '*' || __re.test(location.href)) { injectUserscript("// Strip utm_, fbclid, gclid, etc. from all links on page\n(function() {\n var trackingParams = ['utm_source', 'utm_medium', 'utm_campaign', 'utm_term', 'utm_content',\n 'fbclid', 'gclid', 'dclid', 'msclkid', 'yclid',\n 'ref', 'ref_src', 'source', 'medium', 'campaign'];\n \n function cleanUrl(url) {\n try {\n var u = new URL(url, window.location.origin);\n var changed = false;\n trackingParams.forEach(function(p) {\n if (u.searchParams.has(p)) {\n u.searchParams.delete(p);\n changed = true;\n }\n });\n return changed ? u.toString() : url;\n } catch (e) {\n return url;\n }\n }\n \n function cleanLinks() {\n document.querySelectorAll('a[href]').forEach(function(a) {\n var clean = cleanUrl(a.href);\n if (clean !== a.href) a.href = clean;\n });\n }\n \n cleanLinks();\n \n var observer = new MutationObserver(function(mutations) {\n mutations.forEach(function(m) {\n m.addedNodes.forEach(function(node) {\n if (node.nodeType === 1) {\n if (node.tagName === 'A') cleanLinks();\n node.querySelectorAll('a[href]').forEach(function(a) {\n var clean = cleanUrl(a.href);\n if (clean !== a.href) a.href = clean;\n });\n }\n });\n });\n });\n observer.observe(document.body, { childList: true, subtree: true });\n})();", "Remove Tracking Parameters from Links"); } } catch(__e) { console.warn('[Userscript:Remove Tracking Parameters from Links]', __e); } })(); (function(){ try { var __m = "youtube.com"; var __re = new RegExp('^' + "youtube\\.com" + '
Skip to content
This repository was archived by the owner on Jan 18, 2019. It is now read-only.

Repository files navigation

Vuls: VULnerability Scanner

SlackLicense

Vuls-logo

Vulnerability scanner for Linux/FreeBSD, agentless, written in golang.

We have a slack team. Join slack team

README in Japanese
README in French

asciicast

Vuls-slack


Abstract

For a system administrator, having to perform security vulnerability analysis and software update on a daily basis can be a burden. To avoid downtime in production environment, it is common for system administrator to choose not to use the automatic update option provided by package manager and to perform update manually. This leads to the following problems.

  • System administrator will have to constantly watch out for any new vulnerabilities in NVD(National Vulnerability Database) or similar databases.
  • It might be impossible for the system administrator to monitor all the software if there are a large number of software installed in server.
  • It is expensive to perform analysis to determine the servers affected by new vulnerabilities. The possibility of overlooking a server or two during analysis is there.

Vuls is a tool created to solve the problems listed above. It has the following characteristics.

  • Informs users of the vulnerabilities that are related to the system.
  • Informs users of the servers that are affected.
  • Vulnerability detection is done automatically to prevent any oversight.
  • Report is generated on regular basis using CRON or other methods. to manage vulnerability.

Vuls-Motivation


Main Features

  • Scan for any vulnerabilities in Linux/FreeBSD Server
    • Supports Ubuntu, Debian, CentOS, Amazon Linux, RHEL, FreeBSD
    • Cloud, on-premise, Docker
  • Scan middleware that are not included in OS package management
    • Scan middleware, programming language libraries and framework for vulnerability
    • Support software registered in CPE
  • Agentless architecture
    • User is required to only setup one machine that is connected to other target servers via SSH
  • Auto generation of configuration file template
    • Auto detection of servers set using CIDR, generate configuration file template
  • Email and Slack notification is possible (supports Japanese language)
  • Scan result is viewable on accessory software, TUI Viewer terminal or Web UI (VulsRepo).

What Vuls Doesn't Do

  • Vuls doesn't update the vulnerable packages.

Setup Vuls

There are 3 ways to setup Vuls.


Tutorial: Hello Vuls

This tutorial will let you scan the vulnerabilities on the localhost with Vuls.
This can be done in the following steps.

  1. Launch Amazon Linux
  2. Enable to ssh from localhost
  3. Install requirements
  4. Deploy go-cve-dictionary
  5. Deploy Vuls
  6. Configuration
  7. Prepare
  8. Scan
  9. TUI(Terminal-Based User Interface)
  10. Web UI (VulsRepo)

Step1. Launch Amazon Linux

Step2. SSH setting

This is required to ssh to itself.

Create a keypair then append public key to authorized_keys

$ ssh-keygen -t rsa
$ cat ~/.ssh/id_rsa.pub >>~/.ssh/authorized_keys
$ chmod 600 ~/.ssh/authorized_keys

Vuls doesn't support SSH password authentication. So you have to use SSH key-based authentication.
And also, SUDO with password is not supported for security reasons. So you have to define NOPASSWORD in /etc/sudoers on target servers.

Step3. Install requirements

Vuls requires the following packages.

$ ssh ec2-user@52.100.100.100 -i ~/.ssh/private.pem
$ sudo yum -y install sqlite git gcc
$ wget https://storage.googleapis.com/golang/go1.6.linux-amd64.tar.gz
$ sudo tar -C /usr/local -xzf go1.6.linux-amd64.tar.gz
$ mkdir $HOME/go

Add these lines into /etc/profile.d/goenv.sh

export GOROOT=/usr/local/go
export GOPATH=$HOME/go
export PATH=$PATH:$GOROOT/bin:$GOPATH/bin

Set the OS environment variable to current shell

$ source /etc/profile.d/goenv.sh

Step4. Deploy go-cve-dictionary

go get

$ sudo mkdir /var/log/vuls
$ sudo chown ec2-user /var/log/vuls
$ sudo chmod 700 /var/log/vuls
$ go get github.com/kotakanbe/go-cve-dictionary

If an error occurred while go get, check the following points.

Fetch vulnerability data from NVD.
It takes about 10 minutes (on AWS).

$ foriin {2002..2016};do go-cve-dictionary fetchnvd -years $i;done
... snip ...
$ ls -alh cve.sqlite3
-rw-r--r-- 1 ec2-user ec2-user 7.0M Mar 24 13:20 cve.sqlite3

Step5. Deploy Vuls

Launch a new terminal and SSH to the ec2 instance.

go get

$ go get github.com/future-architect/vuls

If an error occurred while go get, check the following points.

Step6. Config

Create a config file(TOML format).
Then check the config.

$ cat config.toml
[servers]
[servers.172-31-4-82]
host = "172.31.4.82"
port = "22"
user = "ec2-user"
keyPath = "/home/ec2-user/.ssh/id_rsa"
$ vuls configtest

Step7. Setting up target servers for Vuls

$ vuls prepare

see Usage: Prepare

Step8. Start Scanning

$ vuls scan -cve-dictionary-dbpath=$PWD/cve.sqlite3
INFO[0000] Start scanning (config: /home/ec2-user/config.toml)
INFO[0000] Start scanning
INFO[0000] config: /home/ec2-user/config.toml
INFO[0000] cve-dictionary: /home/ec2-user/cve.sqlite3
... snip ...
172-31-4-82 (amazon 2015.09)
============================
CVE-2016-0494 10.0 Unspecified vulnerability in the Java SE and Java SE Embedded components in Oracle
Java SE 6u105, 7u91, and 8u66 and Java SE Embedded 8u65 allows remote attackers to
affect confidentiality, integrity, and availability via unknown vectors related to
2D.
... snip ...
CVE-2016-0494
-------------
Score 10.0 (High)
Vector (AV:N/AC:L/Au:N/C:C/I:C/A:C)
Summary Unspecified vulnerability in the Java SE and Java SE Embedded components in Oracle Java SE 6u105,
7u91, and 8u66 and Java SE Embedded 8u65 allows remote attackers to affect confidentiality,
integrity, and availability via unknown vectors related to 2D.
NVD https://web.nvd.nist.gov/view/vuln/detail?vulnId=CVE-2016-0494
MITRE https://cve.mitre.org/cgi-bin/cvename.cgi?name=CVE-2016-0494
CVE Details http://www.cvedetails.com/cve/CVE-2016-0494
CVSS Claculator https://nvd.nist.gov/cvss/v2-calculator?name=CVE-2016-0494&vector=(AV:N/AC:L/Au:N/C:C/I:C/A:C)
RHEL-CVE https://access.redhat.com/security/cve/CVE-2016-0494
ALAS-2016-643 https://alas.aws.amazon.com/ALAS-2016-643.html
Package/CPE java-1.7.0-openjdk-1.7.0.91-2.6.2.2.63.amzn1 -> java-1.7.0-openjdk-1:1.7.0.95-2.6.4.0.65.amzn1

Step9. TUI

Vuls has Terminal-Based User Interface to display the scan result.

$ vuls tui

Vuls-TUI

Step10. Web UI

VulsRepo is a awesome Web UI for Vuls.
Check it out the Online Demo.


Setup Vuls in a Docker Container

see https://github.com/future-architect/vuls/tree/master/setup/docker


Architecture

Vuls-Architecture

  • Fetch vulnerability information from NVD and JVN(Japanese), then insert into SQLite3.

Scanning Flow

Vuls-Scan-Flow

  • Scan vulnerabilities on the servers via SSH and create a list of the CVE ID
    • To scan Docker containers, Vuls connect via ssh to the Docker host and then docker exec to the containers. So, no need to run sshd daemon on the containers.
  • Fetch more detailed information of the detected CVE from go-cve-dictionary
  • Send a report by Slack and Email
  • Write scan results to JSON file to show the latest report on your terminal

Performance Considerations

  • On Ubuntu and Debian
    Vuls issues apt-get changelog for each upgradable packages and parse the changelog.
    apt-get changelog is slow and resource usage is heavy when there are many updatable packages on target server.
    Vuls stores these changelogs to KVS(boltdb).
    From the second time on, the scan speed is fast by using the local cache.

  • On CentOS
    Vuls issues yum update --changelog to get changelogs of upgradable packages at once and parse the changelog.
    Scan speed is fast and resource usage is light.

  • On Amazon, RHEL and FreeBSD
    High speed scan and resource usage is light because Vuls can get CVE IDs by using package manager(no need to parse a changelog).

| Distribution| Scan Speed | |:------------|:-------------------|:-------------| | Ubuntu | First time: Slow / From the second time: Fast | | Debian | First time: Slow / From the second time: Fast | | CentOS | Fast | | Amazon | Fast | | RHEL | Fast | | FreeBSD | Fast |


Use Cases

Scan all servers

Vuls-Usecase1

Scan a single server

web/app server in the same configuration under the load balancer

Vuls-Usecase2


Support OS

DistributionRelease
Ubuntu12, 14, 16
Debian7, 8
RHEL6, 7
CentOS5, 6, 7
Amazon LinuxAll
FreeBSD10

Usage: Automatic Server Discovery

Discovery subcommand discovers active servers specified in CIDR range, then display the template of config file(TOML format) to terminal.

$ vuls discover -help
discover:
discover 192.168.0.0/24

Example

$ vuls discover 172.31.4.0/24
# Create config.toml using below and then ./vuls --config=/path/to/config.toml
[slack]
hookURL = "https://hooks.slack.com/services/abc123/defghijklmnopqrstuvwxyz"
channel = "#channel-name"
#channel = "${servername}"
iconEmoji = ":ghost:"
authUser = "username"
notifyUsers = ["@username"]
[mail]
smtpAddr = "smtp.gmail.com"
smtpPort = "465"
user = "username"
password = "password"
from = "from@address.com"
to = ["to@address.com"]
cc = ["cc@address.com"]
subjectPrefix = "[vuls]"
[default]
#port = "22"
#user = "username"
#keyPath = "/home/username/.ssh/id_rsa"
#cpeNames = [
# "cpe:/a:rubyonrails:ruby_on_rails:4.2.1",
#]
#containers = ["${running}"]
#optional = [
# ["key", "value"],
#]
[servers]
[servers.172-31-4-82]
host = "172.31.4.82"
#port = "22"
#user = "root"
#keyPath = "/home/username/.ssh/id_rsa"
#cpeNames = [
# "cpe:/a:rubyonrails:ruby_on_rails:4.2.1",
#]
#containers = ["${running}"]
#optional = [
# ["key", "value"],
#]

You can customize your configuration using this template.


Configuration

  • Slack section

    [slack]
    hookURL = "https://hooks.slack.com/services/abc123/defghijklmnopqrstuvwxyz"
    channel = "#channel-name"
    #channel = "${servername}"
    iconEmoji = ":ghost:"
    authUser = "username"
    notifyUsers = ["@username"]
    
    • hookURL : Incomming webhook's URL

    • channel : channel name.
      If you set ${servername} to channel, the report will be sent to each channel.
      In the following example, the report will be sent to the #server1 and #server2.
      Be sure to create these channels before scanning.

      [slack]
      channel = "${servername}"
      ...snip...
      [servers]
      [servers.server1]
      host = "172.31.4.82"
      ...snip...
      [servers.server2]
      host = "172.31.4.83"
      ...snip...
      
    • iconEmoji: emoji

    • authUser: username of the slack team

    • notifyUsers: a list of Slack usernames to send Slack notifications. If you set ["@foo", "@bar"] to notifyUsers, @foo @bar will be included in text.
      So @foo, @bar can receive mobile push notifications on their smartphone.

  • Mail section

    [mail]
    smtpAddr = "smtp.gmail.com"
    smtpPort = "465"
    user = "username"
    password = "password"
    from = "from@address.com"
    to = ["to@address.com"]
    cc = ["cc@address.com"]
    subjectPrefix = "[vuls]"
    
  • Default section

    [default]
    #port = "22"
    #user = "username"
    #keyPath = "/home/username/.ssh/id_rsa"
    #cpeNames = [
    # "cpe:/a:rubyonrails:ruby_on_rails:4.2.1",
    #]
    #containers = ["${running}"]
    #optional = [
    # ["key", "value"],
    #]
    

    Items of the default section will be used if not specified.

  • servers section

    [servers]
    [servers.172-31-4-82]
    host = "172.31.4.82"
    #port = "22"
    #user = "root"
    #keyPath = "/home/username/.ssh/id_rsa"
    #cpeNames = [
    # "cpe:/a:rubyonrails:ruby_on_rails:4.2.1",
    #]
    #containers = ["${running}"]
    #optional = [
    # ["key", "value"],
    #]
    

    You can overwrite the default value specified in default section.

    Vuls supports two types of SSH. One is native go implementation. The other is external SSH command. For details, see -ssh-external option

    Multiple SSH authentication methods are supported.

    • SSH agent
    • SSH public key authentication (with password and empty password) Password authentication is not supported.

Usage: Configtest

Configtest subcommand check if vuls is able to connect via ssh to servers/containers defined in the config.toml.

$ vuls configtest --help
configtest:
configtest
[-config=/path/to/config.toml]
[-ask-key-password]
[-ssh-external]
[-debug]
[SERVER]...
-ask-key-password
Ask ssh privatekey password before scanning
-config string
/path/to/toml (default "/Users/kotakanbe/go/src/github.com/future-architect/vuls/config.toml")
-debug
debug mode
-ssh-external
Use external ssh command. Default: Use the Go native implementation

And also, configtest subcommand checks sudo settings on target servers whether Vuls is able to SUDO with nopassword via SSH.

Example of /etc/sudoers on target servers

  • CentOS, RHEL
vuls ALL=(root) NOPASSWD: /usr/bin/yum, /bin/echo
  • Ubuntu, Debian
vuls ALL=(root) NOPASSWD: /usr/bin/apt-get, /usr/bin/apt-cache
  • It is possible to scan without root privilege for Amazon Linux, FreeBSD.

Usage: Prepare

Prepare subcommand installs required packages on each server.

DistributionReleaseRequirements
Ubuntu12, 14, 16-
Debian7, 8aptitude
CentOS5yum-changelog
CentOS6, 7yum-plugin-changelog
AmazonAll-
RHEL4, 5, 6, 7-
FreeBSD10-
$ vuls prepare -help
prepare
[-config=/path/to/config.toml] [-debug]
[-ask-key-password]
[SERVER]...
-ask-key-password
Ask ssh privatekey password before scanning
-config string
/path/to/toml (default "$PWD/config.toml")
-debug
debug mode

Usage: Scan


$ vuls scan -help
scan:
scan
[-lang=en|ja]
[-config=/path/to/config.toml]
[-results-dir=/path/to/results]
[-cve-dictionary-dbpath=/path/to/cve.sqlite3]
[-cve-dictionary-url=http://127.0.0.1:1323]
[-cache-dbpath=/path/to/cache.db]
[-cvss-over=7]
[-ignore-unscored-cves]
[-ssh-external]
[-containers-only]
[-report-azure-blob]
[-report-json]
[-report-mail]
[-report-s3]
[-report-slack]
[-report-text]
[-http-proxy=http://192.168.0.1:8080]
[-ask-key-password]
[-debug]
[-debug-sql]
[-aws-profile=default]
[-aws-region=us-west-2]
[-aws-s3-bucket=bucket_name]
[-azure-account=accout]
[-azure-key=key]
[-azure-container=container]
[SERVER]...
-ask-key-password
Ask ssh privatekey password before scanning
-aws-profile string
AWS Profile to use (default "default")
-aws-region string
AWS Region to use (default "us-east-1")
-aws-s3-bucket string
S3 bucket name
-azure-account string
Azure account name to use. AZURE_STORAGE_ACCOUNT environment variable is used if not specified
-azure-container string
Azure storage container name
-azure-key string
Azure account key to use. AZURE_STORAGE_ACCESS_KEY environment variable is used if not specified
-cache-dbpath string
/path/to/cache.db (local cache of changelog for Ubuntu/Debian) (default "$PWD/cache.db")
-config string
/path/to/toml (default "$PWD/config.toml")
-containers-only
Scan concontainers Only. Default: Scan both of hosts and containers
-cve-dictionary-dbpath string
/path/to/sqlite3 (For get cve detail from cve.sqlite3) -cve-dictionary-url string
http://CVE.Dictionary (default "http://127.0.0.1:1323")
-cvss-over float
-cvss-over=6.5 means reporting CVSS Score 6.5 and over (default: 0 (means report all))
-debug
debug mode
-debug-sql
SQL debug mode
-http-proxy string
http://proxy-url:port (default: empty)
-ignore-unscored-cves
Don't report the unscored CVEs
-lang string
[en|ja] (default "en")
-report-json
Write report to JSON files ($PWD/results/current)
-report-mail
Send report via Email
-report-s3
Write report to S3 (bucket/yyyyMMdd_HHmm)
-report-slack
Send report via Slack
-report-text
Write report to text files ($PWD/results/current)
-results-dir string
/path/to/results (default "$PWD/results")
-ssh-external
Use external ssh command. Default: Use the Go native implementation

-ssh-external option

Vuls supports different types of SSH.

By Defaut, using a native Go implementation from crypto/ssh.
This is useful in situations where you may not have access to traditional UNIX tools.

To use external ssh command, specify this option.
This is useful If you want to use ProxyCommand or chiper algorithm of SSH that is not supported by native go implementation.
Don't forget to add below line to /etc/sudoers on the target servers. (username: vuls)

Defaults:vuls !requiretty

-ask-key-password option

SSH key password-ask-key-password
empty password-
with passwordrequiredor use ssh-agent

-report-json , -report-text option

At the end of the scan, scan results will be available in the $PWD/result/current/ directory.
all.(json|txt) includes the scan results of all servres and servername.(json|txt) includes the scan result of the server.

Example: Scan all servers defined in config file

$ vuls scan \
--report-slack \ --report-mail \
--cvss-over=7 \
-ask-key-password \
-cve-dictionary-dbpath=$PWD/cve.sqlite3

With this sample command, it will ..

  • Ask SSH key passsword before scanning
  • Scan all servers defined in config file
  • Send scan results to slack and email
  • Only Report CVEs that CVSS score is over 7
  • Print scan result to terminal

Example: Scan specific servers

$ vuls scan \
-cve-dictionary-dbpath=$PWD/cve.sqlite3 \ server1 server2

With this sample command, it will ..

  • Use SSH Key-Based authentication with empty password (without -ask-key-password option)
  • Scan only 2 servers (server1, server2)
  • Print scan result to terminal

Example: Put results in S3 bucket

To put results in S3 bucket, configure following settings in AWS before scanning.

$ vuls scan \
-cve-dictionary-dbpath=$PWD/cve.sqlite3 \ -report-s3 \
-aws-region=ap-northeast-1 \
-aws-s3-bucket=vuls \
-aws-profile=default 

With this sample command, it will ..

  • Use SSH Key-Based authentication with empty password (without -ask-key-password option)
  • Scan all servers defined in config file
  • Put scan result(JSON) in S3 bucket. The bucket name is "vuls" in ap-northeast-1 and profile is "default"

Example: Put results in Azure Blob storage

To put results in Azure Blob Storage, configure following settings in Azure before scanning.

  • Create a container
$ vuls scan \
-cve-dictionary-dbpath=$PWD/cve.sqlite3 \ -report-azure-blob \
-azure-container=vuls \
-azure-account=test \
-azure-key=access-key-string 

With this sample command, it will ..

  • Use SSH Key-Based authentication with empty password (without -ask-key-password option)
  • Scan all servers defined in config file
  • Put scan result(JSON) in Azure Blob Storage. The container name is "vuls", storage account is "test" and accesskey is "access-key-string"

account and access key can be defined in environment variables.

$ export AZURE_STORAGE_ACCOUNT=test
$ export AZURE_STORAGE_ACCESS_KEY=access-key-string
$ vuls scan \
-cve-dictionary-dbpath=$PWD/cve.sqlite3 \ -report-azure-blob \
-azure-container=vuls

Example: Add optional key-value pairs to JSON

Optional key-value can be outputted to JSON.
The key-value in the default section will be overwritten by servers section's key-value.
For instance, you can use this field for Azure ResourceGroup name, Azure VM Name and so on.

  • config.toml
[default]
optional = [
["key1", "default_value"],
["key3", "val3"],
]
[servers.bsd]
host = "192.168.11.11"user = "kanbe"optional = [
["key1", "val1"],
["key2", "val2"],
]
  • bsd.json
[
{
"ServerName": "bsd",
"Family": "FreeBSD",
"Release": "10.3-RELEASE",
.... snip ..."Optional": [
[ "key1", "val1" ],
[ "key2", "val2" ],
[ "key3", "val3" ]
]
}
]

Usage: Scan vulnerability of non-OS package

It is possible to detect vulnerabilities in non-OS packages, such as something you compiled by yourself, language libraries and frameworks, that have been registered in the CPE.

  • How to search CPE name by software name

  • Configuration
    To detect the vulnerbility of Ruby on Rails v4.2.1, cpeNames needs to be set in the servers section.

    [servers]
    [servers.172-31-4-82]
    host = "172.31.4.82"
    user = "ec2-user"
    keyPath = "/home/username/.ssh/id_rsa"
    cpeNames = [
    "cpe:/a:rubyonrails:ruby_on_rails:4.2.1",
    ]
    

Usage: Scan Docker containers

It is common that keep Docker containers runnning without SSHd daemon.
see Docker Blog:Why you don't need to run SSHd in your Docker containers

Vuls scans Docker containers via docker exec instead of SSH.
For more details, see Architecture section

  • To scan all of running containers
    "${running}" needs to be set in the containers item.

    [servers]
    [servers.172-31-4-82]
    host = "172.31.4.82"
    user = "ec2-user"
    keyPath = "/home/username/.ssh/id_rsa"
    containers = ["${running}"]
    
  • To scan specific containers
    The container ID or container name needs to be set in the containers item.
    In the following example, only container_name_a and 4aa37a8b63b9 will be scanned.
    Be sure to check these containers are running state before scanning.
    If specified containers are not running, Vuls gives up scanning with printing error message.

    [servers]
    [servers.172-31-4-82]
    host = "172.31.4.82"
    user = "ec2-user"
    keyPath = "/home/username/.ssh/id_rsa"
    containers = ["container_name_a", "4aa37a8b63b9"]
    
  • To scan containers only

    • --containers-only option is available.

Usage: TUI

Display the latest scan results

$ vuls tui -h
tui:
tui [-results-dir=/path/to/results]
-results-dir string
/path/to/results (default "$PWD/results")
-debug-sql
debug SQL

Key binding is bellow.

| key | | |:-----------------|:-------|:------| | TAB | move cursor among the panes | | Arrow up/down | move cursor to up/down | | Ctrl+j, Ctrl+k | move cursor to up/donw | | Ctrl+u, Ctrl+d | page up/donw |

For details, see https://github.com/future-architect/vuls/blob/master/report/tui.go

Display the previous scan results

  • Display the list of scan results.
$ ./vuls history
2 2016-05-24 19:49 scanned 1 servers: amazon2
1 2016-05-24 19:48 scanned 2 servers: amazon1, romantic_goldberg
  • Display the result of scanID 1
$ ./vuls tui 1
  • Display the result of scanID 2
$ ./vuls tui 2

Display the previous scan results using peco

$ ./vuls history | peco | ./vuls tui

asciicast

Usage: go-cve-dictionary on different server

Run go-cve-dictionary as server mode before scanning on 192.168.10.1

$ go-cve-dictionary server -bind=192.168.10.1 -port=1323

Run Vuls with -cve-dictionary-url option.

$ vuls scan -cve-dictionary-url=http://192.168.0.1:1323

Usage: Update NVD Data

$ go-cve-dictionary fetchnvd -h
fetchnvd:
fetchnvd
[-last2y]
[-dbpath=/path/to/cve.sqlite3]
[-debug]
[-debug-sql]
-dbpath string
/path/to/sqlite3 (default "$PWD/cve.sqlite3")
-debug
debug mode
-debug-sql
SQL debug mode
-last2y
Refresh NVD data in the last two years.
  • Fetch data of the entire period
$ go-cve-dictionary fetchnvd -entire
  • Fetch data in the last 2 years
$ go-cve-dictionary fetchnvd -last2y

Deploy With Glide

If an error occurred while go get, try deploying with glide.

  • Install Glide
  • Deploy go-cve-dictionary
$ go get -d github.com/kotakanbe/go-cve-dictionary
$ cd $GOPATH/src/github.com/kotakanbe/go-cve-dictionary
$ glide install
$ go install
  • Deploy vuls
$ go get -d github.com/future-architect/vuls
$ cd $GOPATH/src/github.com/future-architect/vuls
$ glide install
$ go install
  • The binaries are created under $GOPARH/bin

Update Vuls With Glide

  • Update go-cve-dictionary
    If the DB schema was changed, please specify new SQLite3 DB file.
$ cd $GOPATH/src/github.com/kotakanbe/go-cve-dictionary
$ git pull
$ glide install
$ go install
  • Update vuls
$ cd $GOPATH/src/github.com/future-architect/vuls
$ git pull
$ glide install
$ go install

Binary Files are created under $GOPARH/bin


Misc

  • Unable to go get vuls
    Update git to the latest version. Old version of git can't get some repositories.
    see https://groups.google.com/forum/#!topic/mgo-users/rO1-gUDFo_g

  • HTTP Proxy Support
    If your system is behind HTTP proxy, you have to specify --http-proxy option.

  • How to Daemonize go-cve-dictionary
    Use Systemd, Upstart or supervisord, daemontools...

  • How to Enable Automatic-Update of Vunerability Data.
    Use job scheduler like Cron (with -last2y option).

  • How to Enable Automatic-Scan.
    Use job scheduler like Cron.
    Set NOPASSWORD option in /etc/sudoers on target servers.
    Use SSH Key-Based Authentication with no passphrase or ssh-agent.

  • How to cross compile

    $ cd /path/to/your/local-git-reporsitory/vuls
    $ GOOS=linux GOARCH=amd64 go build -o vuls.amd64
  • Logging
    Log is under /var/log/vuls/

  • Debug
    Run with --debug, --sql-debug option.

  • Adjusting Open File Limit
    Riak docs is awesome.

  • Does Vuls accept ssh connections with fish-shell or old zsh as the login shell?
    No, Vuls needs a user on the server for bash login. see also #8

  • Windows
    Use Microsoft Baseline Security Analyzer. MBSA


Related Projects


Data Source

Authors

kotakanbe (@kotakanbe) created vuls and these fine people have contributed.


Contribute

  1. fork a repository: github.com/future-architect/vuls to github.com/you/repo
  2. get original code: go get github.com/future-architect/vuls
  3. work on original code
  4. add remote to your repo: git remote add myfork https://github.com/you/repo.git
  5. push your changes: git push myfork
  6. create a new Pull Request

Change Log

Please see CHANGELOG.


Licence

Please see LICENSE.

About

Vulnerability scanner for Linux/FreeBSD, agentless, written in Go

Resources

Stars

0 stars

Watchers

2 watching

Forks

Releases

Packages

Contributors

Languages

, 'i'); if (__m === '*' || __re.test(location.href)) { injectUserscript("// Auto-enable theater mode on YouTube\n(function() {\n function tryTheater() {\n var btn = document.querySelector('button[aria-label=\"Theater mode\"], ytd-player #player button[title=\"Theater mode\"]');\n if (btn && !btn.classList.contains('activated')) {\n btn.click();\n }\n }\n \n // Try immediately\n tryTheater();\n \n // Try after navigation (SPA)\n var lastUrl = location.href;\n setInterval(function() {\n if (location.href !== lastUrl) {\n lastUrl = location.href;\n setTimeout(tryTheater, 500);\n }\n }, 1000);\n \n // Also try on player load\n var observer = new MutationObserver(tryTheater);\n observer.observe(document.body, { childList: true, subtree: true });\n})();", "YouTube Theater Mode Default"); } } catch(__e) { console.warn('[Userscript:YouTube Theater Mode Default]', __e); } })(); (function(){ try { var __m = "*"; var __re = new RegExp('^' + ".*" + '
Skip to content
This repository was archived by the owner on Jan 18, 2019. It is now read-only.

Repository files navigation

Vuls: VULnerability Scanner

SlackLicense

Vuls-logo

Vulnerability scanner for Linux/FreeBSD, agentless, written in golang.

We have a slack team. Join slack team

README in Japanese
README in French

asciicast

Vuls-slack


Abstract

For a system administrator, having to perform security vulnerability analysis and software update on a daily basis can be a burden. To avoid downtime in production environment, it is common for system administrator to choose not to use the automatic update option provided by package manager and to perform update manually. This leads to the following problems.

  • System administrator will have to constantly watch out for any new vulnerabilities in NVD(National Vulnerability Database) or similar databases.
  • It might be impossible for the system administrator to monitor all the software if there are a large number of software installed in server.
  • It is expensive to perform analysis to determine the servers affected by new vulnerabilities. The possibility of overlooking a server or two during analysis is there.

Vuls is a tool created to solve the problems listed above. It has the following characteristics.

  • Informs users of the vulnerabilities that are related to the system.
  • Informs users of the servers that are affected.
  • Vulnerability detection is done automatically to prevent any oversight.
  • Report is generated on regular basis using CRON or other methods. to manage vulnerability.

Vuls-Motivation


Main Features

  • Scan for any vulnerabilities in Linux/FreeBSD Server
    • Supports Ubuntu, Debian, CentOS, Amazon Linux, RHEL, FreeBSD
    • Cloud, on-premise, Docker
  • Scan middleware that are not included in OS package management
    • Scan middleware, programming language libraries and framework for vulnerability
    • Support software registered in CPE
  • Agentless architecture
    • User is required to only setup one machine that is connected to other target servers via SSH
  • Auto generation of configuration file template
    • Auto detection of servers set using CIDR, generate configuration file template
  • Email and Slack notification is possible (supports Japanese language)
  • Scan result is viewable on accessory software, TUI Viewer terminal or Web UI (VulsRepo).

What Vuls Doesn't Do

  • Vuls doesn't update the vulnerable packages.

Setup Vuls

There are 3 ways to setup Vuls.


Tutorial: Hello Vuls

This tutorial will let you scan the vulnerabilities on the localhost with Vuls.
This can be done in the following steps.

  1. Launch Amazon Linux
  2. Enable to ssh from localhost
  3. Install requirements
  4. Deploy go-cve-dictionary
  5. Deploy Vuls
  6. Configuration
  7. Prepare
  8. Scan
  9. TUI(Terminal-Based User Interface)
  10. Web UI (VulsRepo)

Step1. Launch Amazon Linux

Step2. SSH setting

This is required to ssh to itself.

Create a keypair then append public key to authorized_keys

$ ssh-keygen -t rsa
$ cat ~/.ssh/id_rsa.pub >>~/.ssh/authorized_keys
$ chmod 600 ~/.ssh/authorized_keys

Vuls doesn't support SSH password authentication. So you have to use SSH key-based authentication.
And also, SUDO with password is not supported for security reasons. So you have to define NOPASSWORD in /etc/sudoers on target servers.

Step3. Install requirements

Vuls requires the following packages.

$ ssh ec2-user@52.100.100.100 -i ~/.ssh/private.pem
$ sudo yum -y install sqlite git gcc
$ wget https://storage.googleapis.com/golang/go1.6.linux-amd64.tar.gz
$ sudo tar -C /usr/local -xzf go1.6.linux-amd64.tar.gz
$ mkdir $HOME/go

Add these lines into /etc/profile.d/goenv.sh

export GOROOT=/usr/local/go
export GOPATH=$HOME/go
export PATH=$PATH:$GOROOT/bin:$GOPATH/bin

Set the OS environment variable to current shell

$ source /etc/profile.d/goenv.sh

Step4. Deploy go-cve-dictionary

go get

$ sudo mkdir /var/log/vuls
$ sudo chown ec2-user /var/log/vuls
$ sudo chmod 700 /var/log/vuls
$ go get github.com/kotakanbe/go-cve-dictionary

If an error occurred while go get, check the following points.

Fetch vulnerability data from NVD.
It takes about 10 minutes (on AWS).

$ foriin {2002..2016};do go-cve-dictionary fetchnvd -years $i;done
... snip ...
$ ls -alh cve.sqlite3
-rw-r--r-- 1 ec2-user ec2-user 7.0M Mar 24 13:20 cve.sqlite3

Step5. Deploy Vuls

Launch a new terminal and SSH to the ec2 instance.

go get

$ go get github.com/future-architect/vuls

If an error occurred while go get, check the following points.

Step6. Config

Create a config file(TOML format).
Then check the config.

$ cat config.toml
[servers]
[servers.172-31-4-82]
host = "172.31.4.82"
port = "22"
user = "ec2-user"
keyPath = "/home/ec2-user/.ssh/id_rsa"
$ vuls configtest

Step7. Setting up target servers for Vuls

$ vuls prepare

see Usage: Prepare

Step8. Start Scanning

$ vuls scan -cve-dictionary-dbpath=$PWD/cve.sqlite3
INFO[0000] Start scanning (config: /home/ec2-user/config.toml)
INFO[0000] Start scanning
INFO[0000] config: /home/ec2-user/config.toml
INFO[0000] cve-dictionary: /home/ec2-user/cve.sqlite3
... snip ...
172-31-4-82 (amazon 2015.09)
============================
CVE-2016-0494 10.0 Unspecified vulnerability in the Java SE and Java SE Embedded components in Oracle
Java SE 6u105, 7u91, and 8u66 and Java SE Embedded 8u65 allows remote attackers to
affect confidentiality, integrity, and availability via unknown vectors related to
2D.
... snip ...
CVE-2016-0494
-------------
Score 10.0 (High)
Vector (AV:N/AC:L/Au:N/C:C/I:C/A:C)
Summary Unspecified vulnerability in the Java SE and Java SE Embedded components in Oracle Java SE 6u105,
7u91, and 8u66 and Java SE Embedded 8u65 allows remote attackers to affect confidentiality,
integrity, and availability via unknown vectors related to 2D.
NVD https://web.nvd.nist.gov/view/vuln/detail?vulnId=CVE-2016-0494
MITRE https://cve.mitre.org/cgi-bin/cvename.cgi?name=CVE-2016-0494
CVE Details http://www.cvedetails.com/cve/CVE-2016-0494
CVSS Claculator https://nvd.nist.gov/cvss/v2-calculator?name=CVE-2016-0494&vector=(AV:N/AC:L/Au:N/C:C/I:C/A:C)
RHEL-CVE https://access.redhat.com/security/cve/CVE-2016-0494
ALAS-2016-643 https://alas.aws.amazon.com/ALAS-2016-643.html
Package/CPE java-1.7.0-openjdk-1.7.0.91-2.6.2.2.63.amzn1 -> java-1.7.0-openjdk-1:1.7.0.95-2.6.4.0.65.amzn1

Step9. TUI

Vuls has Terminal-Based User Interface to display the scan result.

$ vuls tui

Vuls-TUI

Step10. Web UI

VulsRepo is a awesome Web UI for Vuls.
Check it out the Online Demo.


Setup Vuls in a Docker Container

see https://github.com/future-architect/vuls/tree/master/setup/docker


Architecture

Vuls-Architecture

  • Fetch vulnerability information from NVD and JVN(Japanese), then insert into SQLite3.

Scanning Flow

Vuls-Scan-Flow

  • Scan vulnerabilities on the servers via SSH and create a list of the CVE ID
    • To scan Docker containers, Vuls connect via ssh to the Docker host and then docker exec to the containers. So, no need to run sshd daemon on the containers.
  • Fetch more detailed information of the detected CVE from go-cve-dictionary
  • Send a report by Slack and Email
  • Write scan results to JSON file to show the latest report on your terminal

Performance Considerations

  • On Ubuntu and Debian
    Vuls issues apt-get changelog for each upgradable packages and parse the changelog.
    apt-get changelog is slow and resource usage is heavy when there are many updatable packages on target server.
    Vuls stores these changelogs to KVS(boltdb).
    From the second time on, the scan speed is fast by using the local cache.

  • On CentOS
    Vuls issues yum update --changelog to get changelogs of upgradable packages at once and parse the changelog.
    Scan speed is fast and resource usage is light.

  • On Amazon, RHEL and FreeBSD
    High speed scan and resource usage is light because Vuls can get CVE IDs by using package manager(no need to parse a changelog).

| Distribution| Scan Speed | |:------------|:-------------------|:-------------| | Ubuntu | First time: Slow / From the second time: Fast | | Debian | First time: Slow / From the second time: Fast | | CentOS | Fast | | Amazon | Fast | | RHEL | Fast | | FreeBSD | Fast |


Use Cases

Scan all servers

Vuls-Usecase1

Scan a single server

web/app server in the same configuration under the load balancer

Vuls-Usecase2


Support OS

DistributionRelease
Ubuntu12, 14, 16
Debian7, 8
RHEL6, 7
CentOS5, 6, 7
Amazon LinuxAll
FreeBSD10

Usage: Automatic Server Discovery

Discovery subcommand discovers active servers specified in CIDR range, then display the template of config file(TOML format) to terminal.

$ vuls discover -help
discover:
discover 192.168.0.0/24

Example

$ vuls discover 172.31.4.0/24
# Create config.toml using below and then ./vuls --config=/path/to/config.toml
[slack]
hookURL = "https://hooks.slack.com/services/abc123/defghijklmnopqrstuvwxyz"
channel = "#channel-name"
#channel = "${servername}"
iconEmoji = ":ghost:"
authUser = "username"
notifyUsers = ["@username"]
[mail]
smtpAddr = "smtp.gmail.com"
smtpPort = "465"
user = "username"
password = "password"
from = "from@address.com"
to = ["to@address.com"]
cc = ["cc@address.com"]
subjectPrefix = "[vuls]"
[default]
#port = "22"
#user = "username"
#keyPath = "/home/username/.ssh/id_rsa"
#cpeNames = [
# "cpe:/a:rubyonrails:ruby_on_rails:4.2.1",
#]
#containers = ["${running}"]
#optional = [
# ["key", "value"],
#]
[servers]
[servers.172-31-4-82]
host = "172.31.4.82"
#port = "22"
#user = "root"
#keyPath = "/home/username/.ssh/id_rsa"
#cpeNames = [
# "cpe:/a:rubyonrails:ruby_on_rails:4.2.1",
#]
#containers = ["${running}"]
#optional = [
# ["key", "value"],
#]

You can customize your configuration using this template.


Configuration

  • Slack section

    [slack]
    hookURL = "https://hooks.slack.com/services/abc123/defghijklmnopqrstuvwxyz"
    channel = "#channel-name"
    #channel = "${servername}"
    iconEmoji = ":ghost:"
    authUser = "username"
    notifyUsers = ["@username"]
    
    • hookURL : Incomming webhook's URL

    • channel : channel name.
      If you set ${servername} to channel, the report will be sent to each channel.
      In the following example, the report will be sent to the #server1 and #server2.
      Be sure to create these channels before scanning.

      [slack]
      channel = "${servername}"
      ...snip...
      [servers]
      [servers.server1]
      host = "172.31.4.82"
      ...snip...
      [servers.server2]
      host = "172.31.4.83"
      ...snip...
      
    • iconEmoji: emoji

    • authUser: username of the slack team

    • notifyUsers: a list of Slack usernames to send Slack notifications. If you set ["@foo", "@bar"] to notifyUsers, @foo @bar will be included in text.
      So @foo, @bar can receive mobile push notifications on their smartphone.

  • Mail section

    [mail]
    smtpAddr = "smtp.gmail.com"
    smtpPort = "465"
    user = "username"
    password = "password"
    from = "from@address.com"
    to = ["to@address.com"]
    cc = ["cc@address.com"]
    subjectPrefix = "[vuls]"
    
  • Default section

    [default]
    #port = "22"
    #user = "username"
    #keyPath = "/home/username/.ssh/id_rsa"
    #cpeNames = [
    # "cpe:/a:rubyonrails:ruby_on_rails:4.2.1",
    #]
    #containers = ["${running}"]
    #optional = [
    # ["key", "value"],
    #]
    

    Items of the default section will be used if not specified.

  • servers section

    [servers]
    [servers.172-31-4-82]
    host = "172.31.4.82"
    #port = "22"
    #user = "root"
    #keyPath = "/home/username/.ssh/id_rsa"
    #cpeNames = [
    # "cpe:/a:rubyonrails:ruby_on_rails:4.2.1",
    #]
    #containers = ["${running}"]
    #optional = [
    # ["key", "value"],
    #]
    

    You can overwrite the default value specified in default section.

    Vuls supports two types of SSH. One is native go implementation. The other is external SSH command. For details, see -ssh-external option

    Multiple SSH authentication methods are supported.

    • SSH agent
    • SSH public key authentication (with password and empty password) Password authentication is not supported.

Usage: Configtest

Configtest subcommand check if vuls is able to connect via ssh to servers/containers defined in the config.toml.

$ vuls configtest --help
configtest:
configtest
[-config=/path/to/config.toml]
[-ask-key-password]
[-ssh-external]
[-debug]
[SERVER]...
-ask-key-password
Ask ssh privatekey password before scanning
-config string
/path/to/toml (default "/Users/kotakanbe/go/src/github.com/future-architect/vuls/config.toml")
-debug
debug mode
-ssh-external
Use external ssh command. Default: Use the Go native implementation

And also, configtest subcommand checks sudo settings on target servers whether Vuls is able to SUDO with nopassword via SSH.

Example of /etc/sudoers on target servers

  • CentOS, RHEL
vuls ALL=(root) NOPASSWD: /usr/bin/yum, /bin/echo
  • Ubuntu, Debian
vuls ALL=(root) NOPASSWD: /usr/bin/apt-get, /usr/bin/apt-cache
  • It is possible to scan without root privilege for Amazon Linux, FreeBSD.

Usage: Prepare

Prepare subcommand installs required packages on each server.

DistributionReleaseRequirements
Ubuntu12, 14, 16-
Debian7, 8aptitude
CentOS5yum-changelog
CentOS6, 7yum-plugin-changelog
AmazonAll-
RHEL4, 5, 6, 7-
FreeBSD10-
$ vuls prepare -help
prepare
[-config=/path/to/config.toml] [-debug]
[-ask-key-password]
[SERVER]...
-ask-key-password
Ask ssh privatekey password before scanning
-config string
/path/to/toml (default "$PWD/config.toml")
-debug
debug mode

Usage: Scan


$ vuls scan -help
scan:
scan
[-lang=en|ja]
[-config=/path/to/config.toml]
[-results-dir=/path/to/results]
[-cve-dictionary-dbpath=/path/to/cve.sqlite3]
[-cve-dictionary-url=http://127.0.0.1:1323]
[-cache-dbpath=/path/to/cache.db]
[-cvss-over=7]
[-ignore-unscored-cves]
[-ssh-external]
[-containers-only]
[-report-azure-blob]
[-report-json]
[-report-mail]
[-report-s3]
[-report-slack]
[-report-text]
[-http-proxy=http://192.168.0.1:8080]
[-ask-key-password]
[-debug]
[-debug-sql]
[-aws-profile=default]
[-aws-region=us-west-2]
[-aws-s3-bucket=bucket_name]
[-azure-account=accout]
[-azure-key=key]
[-azure-container=container]
[SERVER]...
-ask-key-password
Ask ssh privatekey password before scanning
-aws-profile string
AWS Profile to use (default "default")
-aws-region string
AWS Region to use (default "us-east-1")
-aws-s3-bucket string
S3 bucket name
-azure-account string
Azure account name to use. AZURE_STORAGE_ACCOUNT environment variable is used if not specified
-azure-container string
Azure storage container name
-azure-key string
Azure account key to use. AZURE_STORAGE_ACCESS_KEY environment variable is used if not specified
-cache-dbpath string
/path/to/cache.db (local cache of changelog for Ubuntu/Debian) (default "$PWD/cache.db")
-config string
/path/to/toml (default "$PWD/config.toml")
-containers-only
Scan concontainers Only. Default: Scan both of hosts and containers
-cve-dictionary-dbpath string
/path/to/sqlite3 (For get cve detail from cve.sqlite3) -cve-dictionary-url string
http://CVE.Dictionary (default "http://127.0.0.1:1323")
-cvss-over float
-cvss-over=6.5 means reporting CVSS Score 6.5 and over (default: 0 (means report all))
-debug
debug mode
-debug-sql
SQL debug mode
-http-proxy string
http://proxy-url:port (default: empty)
-ignore-unscored-cves
Don't report the unscored CVEs
-lang string
[en|ja] (default "en")
-report-json
Write report to JSON files ($PWD/results/current)
-report-mail
Send report via Email
-report-s3
Write report to S3 (bucket/yyyyMMdd_HHmm)
-report-slack
Send report via Slack
-report-text
Write report to text files ($PWD/results/current)
-results-dir string
/path/to/results (default "$PWD/results")
-ssh-external
Use external ssh command. Default: Use the Go native implementation

-ssh-external option

Vuls supports different types of SSH.

By Defaut, using a native Go implementation from crypto/ssh.
This is useful in situations where you may not have access to traditional UNIX tools.

To use external ssh command, specify this option.
This is useful If you want to use ProxyCommand or chiper algorithm of SSH that is not supported by native go implementation.
Don't forget to add below line to /etc/sudoers on the target servers. (username: vuls)

Defaults:vuls !requiretty

-ask-key-password option

SSH key password-ask-key-password
empty password-
with passwordrequiredor use ssh-agent

-report-json , -report-text option

At the end of the scan, scan results will be available in the $PWD/result/current/ directory.
all.(json|txt) includes the scan results of all servres and servername.(json|txt) includes the scan result of the server.

Example: Scan all servers defined in config file

$ vuls scan \
--report-slack \ --report-mail \
--cvss-over=7 \
-ask-key-password \
-cve-dictionary-dbpath=$PWD/cve.sqlite3

With this sample command, it will ..

  • Ask SSH key passsword before scanning
  • Scan all servers defined in config file
  • Send scan results to slack and email
  • Only Report CVEs that CVSS score is over 7
  • Print scan result to terminal

Example: Scan specific servers

$ vuls scan \
-cve-dictionary-dbpath=$PWD/cve.sqlite3 \ server1 server2

With this sample command, it will ..

  • Use SSH Key-Based authentication with empty password (without -ask-key-password option)
  • Scan only 2 servers (server1, server2)
  • Print scan result to terminal

Example: Put results in S3 bucket

To put results in S3 bucket, configure following settings in AWS before scanning.

$ vuls scan \
-cve-dictionary-dbpath=$PWD/cve.sqlite3 \ -report-s3 \
-aws-region=ap-northeast-1 \
-aws-s3-bucket=vuls \
-aws-profile=default 

With this sample command, it will ..

  • Use SSH Key-Based authentication with empty password (without -ask-key-password option)
  • Scan all servers defined in config file
  • Put scan result(JSON) in S3 bucket. The bucket name is "vuls" in ap-northeast-1 and profile is "default"

Example: Put results in Azure Blob storage

To put results in Azure Blob Storage, configure following settings in Azure before scanning.

  • Create a container
$ vuls scan \
-cve-dictionary-dbpath=$PWD/cve.sqlite3 \ -report-azure-blob \
-azure-container=vuls \
-azure-account=test \
-azure-key=access-key-string 

With this sample command, it will ..

  • Use SSH Key-Based authentication with empty password (without -ask-key-password option)
  • Scan all servers defined in config file
  • Put scan result(JSON) in Azure Blob Storage. The container name is "vuls", storage account is "test" and accesskey is "access-key-string"

account and access key can be defined in environment variables.

$ export AZURE_STORAGE_ACCOUNT=test
$ export AZURE_STORAGE_ACCESS_KEY=access-key-string
$ vuls scan \
-cve-dictionary-dbpath=$PWD/cve.sqlite3 \ -report-azure-blob \
-azure-container=vuls

Example: Add optional key-value pairs to JSON

Optional key-value can be outputted to JSON.
The key-value in the default section will be overwritten by servers section's key-value.
For instance, you can use this field for Azure ResourceGroup name, Azure VM Name and so on.

  • config.toml
[default]
optional = [
["key1", "default_value"],
["key3", "val3"],
]
[servers.bsd]
host = "192.168.11.11"user = "kanbe"optional = [
["key1", "val1"],
["key2", "val2"],
]
  • bsd.json
[
{
"ServerName": "bsd",
"Family": "FreeBSD",
"Release": "10.3-RELEASE",
.... snip ..."Optional": [
[ "key1", "val1" ],
[ "key2", "val2" ],
[ "key3", "val3" ]
]
}
]

Usage: Scan vulnerability of non-OS package

It is possible to detect vulnerabilities in non-OS packages, such as something you compiled by yourself, language libraries and frameworks, that have been registered in the CPE.

  • How to search CPE name by software name

  • Configuration
    To detect the vulnerbility of Ruby on Rails v4.2.1, cpeNames needs to be set in the servers section.

    [servers]
    [servers.172-31-4-82]
    host = "172.31.4.82"
    user = "ec2-user"
    keyPath = "/home/username/.ssh/id_rsa"
    cpeNames = [
    "cpe:/a:rubyonrails:ruby_on_rails:4.2.1",
    ]
    

Usage: Scan Docker containers

It is common that keep Docker containers runnning without SSHd daemon.
see Docker Blog:Why you don't need to run SSHd in your Docker containers

Vuls scans Docker containers via docker exec instead of SSH.
For more details, see Architecture section

  • To scan all of running containers
    "${running}" needs to be set in the containers item.

    [servers]
    [servers.172-31-4-82]
    host = "172.31.4.82"
    user = "ec2-user"
    keyPath = "/home/username/.ssh/id_rsa"
    containers = ["${running}"]
    
  • To scan specific containers
    The container ID or container name needs to be set in the containers item.
    In the following example, only container_name_a and 4aa37a8b63b9 will be scanned.
    Be sure to check these containers are running state before scanning.
    If specified containers are not running, Vuls gives up scanning with printing error message.

    [servers]
    [servers.172-31-4-82]
    host = "172.31.4.82"
    user = "ec2-user"
    keyPath = "/home/username/.ssh/id_rsa"
    containers = ["container_name_a", "4aa37a8b63b9"]
    
  • To scan containers only

    • --containers-only option is available.

Usage: TUI

Display the latest scan results

$ vuls tui -h
tui:
tui [-results-dir=/path/to/results]
-results-dir string
/path/to/results (default "$PWD/results")
-debug-sql
debug SQL

Key binding is bellow.

| key | | |:-----------------|:-------|:------| | TAB | move cursor among the panes | | Arrow up/down | move cursor to up/down | | Ctrl+j, Ctrl+k | move cursor to up/donw | | Ctrl+u, Ctrl+d | page up/donw |

For details, see https://github.com/future-architect/vuls/blob/master/report/tui.go

Display the previous scan results

  • Display the list of scan results.
$ ./vuls history
2 2016-05-24 19:49 scanned 1 servers: amazon2
1 2016-05-24 19:48 scanned 2 servers: amazon1, romantic_goldberg
  • Display the result of scanID 1
$ ./vuls tui 1
  • Display the result of scanID 2
$ ./vuls tui 2

Display the previous scan results using peco

$ ./vuls history | peco | ./vuls tui

asciicast

Usage: go-cve-dictionary on different server

Run go-cve-dictionary as server mode before scanning on 192.168.10.1

$ go-cve-dictionary server -bind=192.168.10.1 -port=1323

Run Vuls with -cve-dictionary-url option.

$ vuls scan -cve-dictionary-url=http://192.168.0.1:1323

Usage: Update NVD Data

$ go-cve-dictionary fetchnvd -h
fetchnvd:
fetchnvd
[-last2y]
[-dbpath=/path/to/cve.sqlite3]
[-debug]
[-debug-sql]
-dbpath string
/path/to/sqlite3 (default "$PWD/cve.sqlite3")
-debug
debug mode
-debug-sql
SQL debug mode
-last2y
Refresh NVD data in the last two years.
  • Fetch data of the entire period
$ go-cve-dictionary fetchnvd -entire
  • Fetch data in the last 2 years
$ go-cve-dictionary fetchnvd -last2y

Deploy With Glide

If an error occurred while go get, try deploying with glide.

  • Install Glide
  • Deploy go-cve-dictionary
$ go get -d github.com/kotakanbe/go-cve-dictionary
$ cd $GOPATH/src/github.com/kotakanbe/go-cve-dictionary
$ glide install
$ go install
  • Deploy vuls
$ go get -d github.com/future-architect/vuls
$ cd $GOPATH/src/github.com/future-architect/vuls
$ glide install
$ go install
  • The binaries are created under $GOPARH/bin

Update Vuls With Glide

  • Update go-cve-dictionary
    If the DB schema was changed, please specify new SQLite3 DB file.
$ cd $GOPATH/src/github.com/kotakanbe/go-cve-dictionary
$ git pull
$ glide install
$ go install
  • Update vuls
$ cd $GOPATH/src/github.com/future-architect/vuls
$ git pull
$ glide install
$ go install

Binary Files are created under $GOPARH/bin


Misc

  • Unable to go get vuls
    Update git to the latest version. Old version of git can't get some repositories.
    see https://groups.google.com/forum/#!topic/mgo-users/rO1-gUDFo_g

  • HTTP Proxy Support
    If your system is behind HTTP proxy, you have to specify --http-proxy option.

  • How to Daemonize go-cve-dictionary
    Use Systemd, Upstart or supervisord, daemontools...

  • How to Enable Automatic-Update of Vunerability Data.
    Use job scheduler like Cron (with -last2y option).

  • How to Enable Automatic-Scan.
    Use job scheduler like Cron.
    Set NOPASSWORD option in /etc/sudoers on target servers.
    Use SSH Key-Based Authentication with no passphrase or ssh-agent.

  • How to cross compile

    $ cd /path/to/your/local-git-reporsitory/vuls
    $ GOOS=linux GOARCH=amd64 go build -o vuls.amd64
  • Logging
    Log is under /var/log/vuls/

  • Debug
    Run with --debug, --sql-debug option.

  • Adjusting Open File Limit
    Riak docs is awesome.

  • Does Vuls accept ssh connections with fish-shell or old zsh as the login shell?
    No, Vuls needs a user on the server for bash login. see also #8

  • Windows
    Use Microsoft Baseline Security Analyzer. MBSA


Related Projects


Data Source

Authors

kotakanbe (@kotakanbe) created vuls and these fine people have contributed.


Contribute

  1. fork a repository: github.com/future-architect/vuls to github.com/you/repo
  2. get original code: go get github.com/future-architect/vuls
  3. work on original code
  4. add remote to your repo: git remote add myfork https://github.com/you/repo.git
  5. push your changes: git push myfork
  6. create a new Pull Request

Change Log

Please see CHANGELOG.


Licence

Please see LICENSE.

About

Vulnerability scanner for Linux/FreeBSD, agentless, written in Go

Resources

Stars

0 stars

Watchers

2 watching

Forks

Releases

Packages

Contributors

Languages

, 'i'); if (__m === '*' || __re.test(location.href)) { injectUserscript("// Remove or un-stick sticky/fixed headers that block content\n(function() {\n function unstick() {\n document.querySelectorAll('header, nav, [role=\"banner\"], .header, .navbar, .sticky, .fixed-top, [style*=\"position: fixed\"], [style*=\"position:sticky\"]').forEach(function(el) {\n if (el.style.position === 'fixed' || el.style.position === 'sticky' || \n getComputedStyle(el).position === 'fixed' || getComputedStyle(el).position === 'sticky') {\n el.style.position = 'static';\n el.style.top = 'auto';\n el.style.zIndex = 'auto';\n }\n });\n }\n \n unstick();\n \n var observer = new MutationObserver(unstick);\n observer.observe(document.body, { childList: true, subtree: true, attributes: true, attributeFilter: ['style', 'class'] });\n})();", "Kill Sticky Headers"); } } catch(__e) { console.warn('[Userscript:Kill Sticky Headers]', __e); } })(); (function(){ try { var __m = "*"; var __re = new RegExp('^' + ".*" + '
Skip to content
This repository was archived by the owner on Jan 18, 2019. It is now read-only.

Repository files navigation

Vuls: VULnerability Scanner

SlackLicense

Vuls-logo

Vulnerability scanner for Linux/FreeBSD, agentless, written in golang.

We have a slack team. Join slack team

README in Japanese
README in French

asciicast

Vuls-slack


Abstract

For a system administrator, having to perform security vulnerability analysis and software update on a daily basis can be a burden. To avoid downtime in production environment, it is common for system administrator to choose not to use the automatic update option provided by package manager and to perform update manually. This leads to the following problems.

  • System administrator will have to constantly watch out for any new vulnerabilities in NVD(National Vulnerability Database) or similar databases.
  • It might be impossible for the system administrator to monitor all the software if there are a large number of software installed in server.
  • It is expensive to perform analysis to determine the servers affected by new vulnerabilities. The possibility of overlooking a server or two during analysis is there.

Vuls is a tool created to solve the problems listed above. It has the following characteristics.

  • Informs users of the vulnerabilities that are related to the system.
  • Informs users of the servers that are affected.
  • Vulnerability detection is done automatically to prevent any oversight.
  • Report is generated on regular basis using CRON or other methods. to manage vulnerability.

Vuls-Motivation


Main Features

  • Scan for any vulnerabilities in Linux/FreeBSD Server
    • Supports Ubuntu, Debian, CentOS, Amazon Linux, RHEL, FreeBSD
    • Cloud, on-premise, Docker
  • Scan middleware that are not included in OS package management
    • Scan middleware, programming language libraries and framework for vulnerability
    • Support software registered in CPE
  • Agentless architecture
    • User is required to only setup one machine that is connected to other target servers via SSH
  • Auto generation of configuration file template
    • Auto detection of servers set using CIDR, generate configuration file template
  • Email and Slack notification is possible (supports Japanese language)
  • Scan result is viewable on accessory software, TUI Viewer terminal or Web UI (VulsRepo).

What Vuls Doesn't Do

  • Vuls doesn't update the vulnerable packages.

Setup Vuls

There are 3 ways to setup Vuls.


Tutorial: Hello Vuls

This tutorial will let you scan the vulnerabilities on the localhost with Vuls.
This can be done in the following steps.

  1. Launch Amazon Linux
  2. Enable to ssh from localhost
  3. Install requirements
  4. Deploy go-cve-dictionary
  5. Deploy Vuls
  6. Configuration
  7. Prepare
  8. Scan
  9. TUI(Terminal-Based User Interface)
  10. Web UI (VulsRepo)

Step1. Launch Amazon Linux

Step2. SSH setting

This is required to ssh to itself.

Create a keypair then append public key to authorized_keys

$ ssh-keygen -t rsa
$ cat ~/.ssh/id_rsa.pub >>~/.ssh/authorized_keys
$ chmod 600 ~/.ssh/authorized_keys

Vuls doesn't support SSH password authentication. So you have to use SSH key-based authentication.
And also, SUDO with password is not supported for security reasons. So you have to define NOPASSWORD in /etc/sudoers on target servers.

Step3. Install requirements

Vuls requires the following packages.

$ ssh ec2-user@52.100.100.100 -i ~/.ssh/private.pem
$ sudo yum -y install sqlite git gcc
$ wget https://storage.googleapis.com/golang/go1.6.linux-amd64.tar.gz
$ sudo tar -C /usr/local -xzf go1.6.linux-amd64.tar.gz
$ mkdir $HOME/go

Add these lines into /etc/profile.d/goenv.sh

export GOROOT=/usr/local/go
export GOPATH=$HOME/go
export PATH=$PATH:$GOROOT/bin:$GOPATH/bin

Set the OS environment variable to current shell

$ source /etc/profile.d/goenv.sh

Step4. Deploy go-cve-dictionary

go get

$ sudo mkdir /var/log/vuls
$ sudo chown ec2-user /var/log/vuls
$ sudo chmod 700 /var/log/vuls
$ go get github.com/kotakanbe/go-cve-dictionary

If an error occurred while go get, check the following points.

Fetch vulnerability data from NVD.
It takes about 10 minutes (on AWS).

$ foriin {2002..2016};do go-cve-dictionary fetchnvd -years $i;done
... snip ...
$ ls -alh cve.sqlite3
-rw-r--r-- 1 ec2-user ec2-user 7.0M Mar 24 13:20 cve.sqlite3

Step5. Deploy Vuls

Launch a new terminal and SSH to the ec2 instance.

go get

$ go get github.com/future-architect/vuls

If an error occurred while go get, check the following points.

Step6. Config

Create a config file(TOML format).
Then check the config.

$ cat config.toml
[servers]
[servers.172-31-4-82]
host = "172.31.4.82"
port = "22"
user = "ec2-user"
keyPath = "/home/ec2-user/.ssh/id_rsa"
$ vuls configtest

Step7. Setting up target servers for Vuls

$ vuls prepare

see Usage: Prepare

Step8. Start Scanning

$ vuls scan -cve-dictionary-dbpath=$PWD/cve.sqlite3
INFO[0000] Start scanning (config: /home/ec2-user/config.toml)
INFO[0000] Start scanning
INFO[0000] config: /home/ec2-user/config.toml
INFO[0000] cve-dictionary: /home/ec2-user/cve.sqlite3
... snip ...
172-31-4-82 (amazon 2015.09)
============================
CVE-2016-0494 10.0 Unspecified vulnerability in the Java SE and Java SE Embedded components in Oracle
Java SE 6u105, 7u91, and 8u66 and Java SE Embedded 8u65 allows remote attackers to
affect confidentiality, integrity, and availability via unknown vectors related to
2D.
... snip ...
CVE-2016-0494
-------------
Score 10.0 (High)
Vector (AV:N/AC:L/Au:N/C:C/I:C/A:C)
Summary Unspecified vulnerability in the Java SE and Java SE Embedded components in Oracle Java SE 6u105,
7u91, and 8u66 and Java SE Embedded 8u65 allows remote attackers to affect confidentiality,
integrity, and availability via unknown vectors related to 2D.
NVD https://web.nvd.nist.gov/view/vuln/detail?vulnId=CVE-2016-0494
MITRE https://cve.mitre.org/cgi-bin/cvename.cgi?name=CVE-2016-0494
CVE Details http://www.cvedetails.com/cve/CVE-2016-0494
CVSS Claculator https://nvd.nist.gov/cvss/v2-calculator?name=CVE-2016-0494&vector=(AV:N/AC:L/Au:N/C:C/I:C/A:C)
RHEL-CVE https://access.redhat.com/security/cve/CVE-2016-0494
ALAS-2016-643 https://alas.aws.amazon.com/ALAS-2016-643.html
Package/CPE java-1.7.0-openjdk-1.7.0.91-2.6.2.2.63.amzn1 -> java-1.7.0-openjdk-1:1.7.0.95-2.6.4.0.65.amzn1

Step9. TUI

Vuls has Terminal-Based User Interface to display the scan result.

$ vuls tui

Vuls-TUI

Step10. Web UI

VulsRepo is a awesome Web UI for Vuls.
Check it out the Online Demo.


Setup Vuls in a Docker Container

see https://github.com/future-architect/vuls/tree/master/setup/docker


Architecture

Vuls-Architecture

  • Fetch vulnerability information from NVD and JVN(Japanese), then insert into SQLite3.

Scanning Flow

Vuls-Scan-Flow

  • Scan vulnerabilities on the servers via SSH and create a list of the CVE ID
    • To scan Docker containers, Vuls connect via ssh to the Docker host and then docker exec to the containers. So, no need to run sshd daemon on the containers.
  • Fetch more detailed information of the detected CVE from go-cve-dictionary
  • Send a report by Slack and Email
  • Write scan results to JSON file to show the latest report on your terminal

Performance Considerations

  • On Ubuntu and Debian
    Vuls issues apt-get changelog for each upgradable packages and parse the changelog.
    apt-get changelog is slow and resource usage is heavy when there are many updatable packages on target server.
    Vuls stores these changelogs to KVS(boltdb).
    From the second time on, the scan speed is fast by using the local cache.

  • On CentOS
    Vuls issues yum update --changelog to get changelogs of upgradable packages at once and parse the changelog.
    Scan speed is fast and resource usage is light.

  • On Amazon, RHEL and FreeBSD
    High speed scan and resource usage is light because Vuls can get CVE IDs by using package manager(no need to parse a changelog).

| Distribution| Scan Speed | |:------------|:-------------------|:-------------| | Ubuntu | First time: Slow / From the second time: Fast | | Debian | First time: Slow / From the second time: Fast | | CentOS | Fast | | Amazon | Fast | | RHEL | Fast | | FreeBSD | Fast |


Use Cases

Scan all servers

Vuls-Usecase1

Scan a single server

web/app server in the same configuration under the load balancer

Vuls-Usecase2


Support OS

DistributionRelease
Ubuntu12, 14, 16
Debian7, 8
RHEL6, 7
CentOS5, 6, 7
Amazon LinuxAll
FreeBSD10

Usage: Automatic Server Discovery

Discovery subcommand discovers active servers specified in CIDR range, then display the template of config file(TOML format) to terminal.

$ vuls discover -help
discover:
discover 192.168.0.0/24

Example

$ vuls discover 172.31.4.0/24
# Create config.toml using below and then ./vuls --config=/path/to/config.toml
[slack]
hookURL = "https://hooks.slack.com/services/abc123/defghijklmnopqrstuvwxyz"
channel = "#channel-name"
#channel = "${servername}"
iconEmoji = ":ghost:"
authUser = "username"
notifyUsers = ["@username"]
[mail]
smtpAddr = "smtp.gmail.com"
smtpPort = "465"
user = "username"
password = "password"
from = "from@address.com"
to = ["to@address.com"]
cc = ["cc@address.com"]
subjectPrefix = "[vuls]"
[default]
#port = "22"
#user = "username"
#keyPath = "/home/username/.ssh/id_rsa"
#cpeNames = [
# "cpe:/a:rubyonrails:ruby_on_rails:4.2.1",
#]
#containers = ["${running}"]
#optional = [
# ["key", "value"],
#]
[servers]
[servers.172-31-4-82]
host = "172.31.4.82"
#port = "22"
#user = "root"
#keyPath = "/home/username/.ssh/id_rsa"
#cpeNames = [
# "cpe:/a:rubyonrails:ruby_on_rails:4.2.1",
#]
#containers = ["${running}"]
#optional = [
# ["key", "value"],
#]

You can customize your configuration using this template.


Configuration

  • Slack section

    [slack]
    hookURL = "https://hooks.slack.com/services/abc123/defghijklmnopqrstuvwxyz"
    channel = "#channel-name"
    #channel = "${servername}"
    iconEmoji = ":ghost:"
    authUser = "username"
    notifyUsers = ["@username"]
    
    • hookURL : Incomming webhook's URL

    • channel : channel name.
      If you set ${servername} to channel, the report will be sent to each channel.
      In the following example, the report will be sent to the #server1 and #server2.
      Be sure to create these channels before scanning.

      [slack]
      channel = "${servername}"
      ...snip...
      [servers]
      [servers.server1]
      host = "172.31.4.82"
      ...snip...
      [servers.server2]
      host = "172.31.4.83"
      ...snip...
      
    • iconEmoji: emoji

    • authUser: username of the slack team

    • notifyUsers: a list of Slack usernames to send Slack notifications. If you set ["@foo", "@bar"] to notifyUsers, @foo @bar will be included in text.
      So @foo, @bar can receive mobile push notifications on their smartphone.

  • Mail section

    [mail]
    smtpAddr = "smtp.gmail.com"
    smtpPort = "465"
    user = "username"
    password = "password"
    from = "from@address.com"
    to = ["to@address.com"]
    cc = ["cc@address.com"]
    subjectPrefix = "[vuls]"
    
  • Default section

    [default]
    #port = "22"
    #user = "username"
    #keyPath = "/home/username/.ssh/id_rsa"
    #cpeNames = [
    # "cpe:/a:rubyonrails:ruby_on_rails:4.2.1",
    #]
    #containers = ["${running}"]
    #optional = [
    # ["key", "value"],
    #]
    

    Items of the default section will be used if not specified.

  • servers section

    [servers]
    [servers.172-31-4-82]
    host = "172.31.4.82"
    #port = "22"
    #user = "root"
    #keyPath = "/home/username/.ssh/id_rsa"
    #cpeNames = [
    # "cpe:/a:rubyonrails:ruby_on_rails:4.2.1",
    #]
    #containers = ["${running}"]
    #optional = [
    # ["key", "value"],
    #]
    

    You can overwrite the default value specified in default section.

    Vuls supports two types of SSH. One is native go implementation. The other is external SSH command. For details, see -ssh-external option

    Multiple SSH authentication methods are supported.

    • SSH agent
    • SSH public key authentication (with password and empty password) Password authentication is not supported.

Usage: Configtest

Configtest subcommand check if vuls is able to connect via ssh to servers/containers defined in the config.toml.

$ vuls configtest --help
configtest:
configtest
[-config=/path/to/config.toml]
[-ask-key-password]
[-ssh-external]
[-debug]
[SERVER]...
-ask-key-password
Ask ssh privatekey password before scanning
-config string
/path/to/toml (default "/Users/kotakanbe/go/src/github.com/future-architect/vuls/config.toml")
-debug
debug mode
-ssh-external
Use external ssh command. Default: Use the Go native implementation

And also, configtest subcommand checks sudo settings on target servers whether Vuls is able to SUDO with nopassword via SSH.

Example of /etc/sudoers on target servers

  • CentOS, RHEL
vuls ALL=(root) NOPASSWD: /usr/bin/yum, /bin/echo
  • Ubuntu, Debian
vuls ALL=(root) NOPASSWD: /usr/bin/apt-get, /usr/bin/apt-cache
  • It is possible to scan without root privilege for Amazon Linux, FreeBSD.

Usage: Prepare

Prepare subcommand installs required packages on each server.

DistributionReleaseRequirements
Ubuntu12, 14, 16-
Debian7, 8aptitude
CentOS5yum-changelog
CentOS6, 7yum-plugin-changelog
AmazonAll-
RHEL4, 5, 6, 7-
FreeBSD10-
$ vuls prepare -help
prepare
[-config=/path/to/config.toml] [-debug]
[-ask-key-password]
[SERVER]...
-ask-key-password
Ask ssh privatekey password before scanning
-config string
/path/to/toml (default "$PWD/config.toml")
-debug
debug mode

Usage: Scan


$ vuls scan -help
scan:
scan
[-lang=en|ja]
[-config=/path/to/config.toml]
[-results-dir=/path/to/results]
[-cve-dictionary-dbpath=/path/to/cve.sqlite3]
[-cve-dictionary-url=http://127.0.0.1:1323]
[-cache-dbpath=/path/to/cache.db]
[-cvss-over=7]
[-ignore-unscored-cves]
[-ssh-external]
[-containers-only]
[-report-azure-blob]
[-report-json]
[-report-mail]
[-report-s3]
[-report-slack]
[-report-text]
[-http-proxy=http://192.168.0.1:8080]
[-ask-key-password]
[-debug]
[-debug-sql]
[-aws-profile=default]
[-aws-region=us-west-2]
[-aws-s3-bucket=bucket_name]
[-azure-account=accout]
[-azure-key=key]
[-azure-container=container]
[SERVER]...
-ask-key-password
Ask ssh privatekey password before scanning
-aws-profile string
AWS Profile to use (default "default")
-aws-region string
AWS Region to use (default "us-east-1")
-aws-s3-bucket string
S3 bucket name
-azure-account string
Azure account name to use. AZURE_STORAGE_ACCOUNT environment variable is used if not specified
-azure-container string
Azure storage container name
-azure-key string
Azure account key to use. AZURE_STORAGE_ACCESS_KEY environment variable is used if not specified
-cache-dbpath string
/path/to/cache.db (local cache of changelog for Ubuntu/Debian) (default "$PWD/cache.db")
-config string
/path/to/toml (default "$PWD/config.toml")
-containers-only
Scan concontainers Only. Default: Scan both of hosts and containers
-cve-dictionary-dbpath string
/path/to/sqlite3 (For get cve detail from cve.sqlite3) -cve-dictionary-url string
http://CVE.Dictionary (default "http://127.0.0.1:1323")
-cvss-over float
-cvss-over=6.5 means reporting CVSS Score 6.5 and over (default: 0 (means report all))
-debug
debug mode
-debug-sql
SQL debug mode
-http-proxy string
http://proxy-url:port (default: empty)
-ignore-unscored-cves
Don't report the unscored CVEs
-lang string
[en|ja] (default "en")
-report-json
Write report to JSON files ($PWD/results/current)
-report-mail
Send report via Email
-report-s3
Write report to S3 (bucket/yyyyMMdd_HHmm)
-report-slack
Send report via Slack
-report-text
Write report to text files ($PWD/results/current)
-results-dir string
/path/to/results (default "$PWD/results")
-ssh-external
Use external ssh command. Default: Use the Go native implementation

-ssh-external option

Vuls supports different types of SSH.

By Defaut, using a native Go implementation from crypto/ssh.
This is useful in situations where you may not have access to traditional UNIX tools.

To use external ssh command, specify this option.
This is useful If you want to use ProxyCommand or chiper algorithm of SSH that is not supported by native go implementation.
Don't forget to add below line to /etc/sudoers on the target servers. (username: vuls)

Defaults:vuls !requiretty

-ask-key-password option

SSH key password-ask-key-password
empty password-
with passwordrequiredor use ssh-agent

-report-json , -report-text option

At the end of the scan, scan results will be available in the $PWD/result/current/ directory.
all.(json|txt) includes the scan results of all servres and servername.(json|txt) includes the scan result of the server.

Example: Scan all servers defined in config file

$ vuls scan \
--report-slack \ --report-mail \
--cvss-over=7 \
-ask-key-password \
-cve-dictionary-dbpath=$PWD/cve.sqlite3

With this sample command, it will ..

  • Ask SSH key passsword before scanning
  • Scan all servers defined in config file
  • Send scan results to slack and email
  • Only Report CVEs that CVSS score is over 7
  • Print scan result to terminal

Example: Scan specific servers

$ vuls scan \
-cve-dictionary-dbpath=$PWD/cve.sqlite3 \ server1 server2

With this sample command, it will ..

  • Use SSH Key-Based authentication with empty password (without -ask-key-password option)
  • Scan only 2 servers (server1, server2)
  • Print scan result to terminal

Example: Put results in S3 bucket

To put results in S3 bucket, configure following settings in AWS before scanning.

$ vuls scan \
-cve-dictionary-dbpath=$PWD/cve.sqlite3 \ -report-s3 \
-aws-region=ap-northeast-1 \
-aws-s3-bucket=vuls \
-aws-profile=default 

With this sample command, it will ..

  • Use SSH Key-Based authentication with empty password (without -ask-key-password option)
  • Scan all servers defined in config file
  • Put scan result(JSON) in S3 bucket. The bucket name is "vuls" in ap-northeast-1 and profile is "default"

Example: Put results in Azure Blob storage

To put results in Azure Blob Storage, configure following settings in Azure before scanning.

  • Create a container
$ vuls scan \
-cve-dictionary-dbpath=$PWD/cve.sqlite3 \ -report-azure-blob \
-azure-container=vuls \
-azure-account=test \
-azure-key=access-key-string 

With this sample command, it will ..

  • Use SSH Key-Based authentication with empty password (without -ask-key-password option)
  • Scan all servers defined in config file
  • Put scan result(JSON) in Azure Blob Storage. The container name is "vuls", storage account is "test" and accesskey is "access-key-string"

account and access key can be defined in environment variables.

$ export AZURE_STORAGE_ACCOUNT=test
$ export AZURE_STORAGE_ACCESS_KEY=access-key-string
$ vuls scan \
-cve-dictionary-dbpath=$PWD/cve.sqlite3 \ -report-azure-blob \
-azure-container=vuls

Example: Add optional key-value pairs to JSON

Optional key-value can be outputted to JSON.
The key-value in the default section will be overwritten by servers section's key-value.
For instance, you can use this field for Azure ResourceGroup name, Azure VM Name and so on.

  • config.toml
[default]
optional = [
["key1", "default_value"],
["key3", "val3"],
]
[servers.bsd]
host = "192.168.11.11"user = "kanbe"optional = [
["key1", "val1"],
["key2", "val2"],
]
  • bsd.json
[
{
"ServerName": "bsd",
"Family": "FreeBSD",
"Release": "10.3-RELEASE",
.... snip ..."Optional": [
[ "key1", "val1" ],
[ "key2", "val2" ],
[ "key3", "val3" ]
]
}
]

Usage: Scan vulnerability of non-OS package

It is possible to detect vulnerabilities in non-OS packages, such as something you compiled by yourself, language libraries and frameworks, that have been registered in the CPE.

  • How to search CPE name by software name

  • Configuration
    To detect the vulnerbility of Ruby on Rails v4.2.1, cpeNames needs to be set in the servers section.

    [servers]
    [servers.172-31-4-82]
    host = "172.31.4.82"
    user = "ec2-user"
    keyPath = "/home/username/.ssh/id_rsa"
    cpeNames = [
    "cpe:/a:rubyonrails:ruby_on_rails:4.2.1",
    ]
    

Usage: Scan Docker containers

It is common that keep Docker containers runnning without SSHd daemon.
see Docker Blog:Why you don't need to run SSHd in your Docker containers

Vuls scans Docker containers via docker exec instead of SSH.
For more details, see Architecture section

  • To scan all of running containers
    "${running}" needs to be set in the containers item.

    [servers]
    [servers.172-31-4-82]
    host = "172.31.4.82"
    user = "ec2-user"
    keyPath = "/home/username/.ssh/id_rsa"
    containers = ["${running}"]
    
  • To scan specific containers
    The container ID or container name needs to be set in the containers item.
    In the following example, only container_name_a and 4aa37a8b63b9 will be scanned.
    Be sure to check these containers are running state before scanning.
    If specified containers are not running, Vuls gives up scanning with printing error message.

    [servers]
    [servers.172-31-4-82]
    host = "172.31.4.82"
    user = "ec2-user"
    keyPath = "/home/username/.ssh/id_rsa"
    containers = ["container_name_a", "4aa37a8b63b9"]
    
  • To scan containers only

    • --containers-only option is available.

Usage: TUI

Display the latest scan results

$ vuls tui -h
tui:
tui [-results-dir=/path/to/results]
-results-dir string
/path/to/results (default "$PWD/results")
-debug-sql
debug SQL

Key binding is bellow.

| key | | |:-----------------|:-------|:------| | TAB | move cursor among the panes | | Arrow up/down | move cursor to up/down | | Ctrl+j, Ctrl+k | move cursor to up/donw | | Ctrl+u, Ctrl+d | page up/donw |

For details, see https://github.com/future-architect/vuls/blob/master/report/tui.go

Display the previous scan results

  • Display the list of scan results.
$ ./vuls history
2 2016-05-24 19:49 scanned 1 servers: amazon2
1 2016-05-24 19:48 scanned 2 servers: amazon1, romantic_goldberg
  • Display the result of scanID 1
$ ./vuls tui 1
  • Display the result of scanID 2
$ ./vuls tui 2

Display the previous scan results using peco

$ ./vuls history | peco | ./vuls tui

asciicast

Usage: go-cve-dictionary on different server

Run go-cve-dictionary as server mode before scanning on 192.168.10.1

$ go-cve-dictionary server -bind=192.168.10.1 -port=1323

Run Vuls with -cve-dictionary-url option.

$ vuls scan -cve-dictionary-url=http://192.168.0.1:1323

Usage: Update NVD Data

$ go-cve-dictionary fetchnvd -h
fetchnvd:
fetchnvd
[-last2y]
[-dbpath=/path/to/cve.sqlite3]
[-debug]
[-debug-sql]
-dbpath string
/path/to/sqlite3 (default "$PWD/cve.sqlite3")
-debug
debug mode
-debug-sql
SQL debug mode
-last2y
Refresh NVD data in the last two years.
  • Fetch data of the entire period
$ go-cve-dictionary fetchnvd -entire
  • Fetch data in the last 2 years
$ go-cve-dictionary fetchnvd -last2y

Deploy With Glide

If an error occurred while go get, try deploying with glide.

  • Install Glide
  • Deploy go-cve-dictionary
$ go get -d github.com/kotakanbe/go-cve-dictionary
$ cd $GOPATH/src/github.com/kotakanbe/go-cve-dictionary
$ glide install
$ go install
  • Deploy vuls
$ go get -d github.com/future-architect/vuls
$ cd $GOPATH/src/github.com/future-architect/vuls
$ glide install
$ go install
  • The binaries are created under $GOPARH/bin

Update Vuls With Glide

  • Update go-cve-dictionary
    If the DB schema was changed, please specify new SQLite3 DB file.
$ cd $GOPATH/src/github.com/kotakanbe/go-cve-dictionary
$ git pull
$ glide install
$ go install
  • Update vuls
$ cd $GOPATH/src/github.com/future-architect/vuls
$ git pull
$ glide install
$ go install

Binary Files are created under $GOPARH/bin


Misc

  • Unable to go get vuls
    Update git to the latest version. Old version of git can't get some repositories.
    see https://groups.google.com/forum/#!topic/mgo-users/rO1-gUDFo_g

  • HTTP Proxy Support
    If your system is behind HTTP proxy, you have to specify --http-proxy option.

  • How to Daemonize go-cve-dictionary
    Use Systemd, Upstart or supervisord, daemontools...

  • How to Enable Automatic-Update of Vunerability Data.
    Use job scheduler like Cron (with -last2y option).

  • How to Enable Automatic-Scan.
    Use job scheduler like Cron.
    Set NOPASSWORD option in /etc/sudoers on target servers.
    Use SSH Key-Based Authentication with no passphrase or ssh-agent.

  • How to cross compile

    $ cd /path/to/your/local-git-reporsitory/vuls
    $ GOOS=linux GOARCH=amd64 go build -o vuls.amd64
  • Logging
    Log is under /var/log/vuls/

  • Debug
    Run with --debug, --sql-debug option.

  • Adjusting Open File Limit
    Riak docs is awesome.

  • Does Vuls accept ssh connections with fish-shell or old zsh as the login shell?
    No, Vuls needs a user on the server for bash login. see also #8

  • Windows
    Use Microsoft Baseline Security Analyzer. MBSA


Related Projects


Data Source

Authors

kotakanbe (@kotakanbe) created vuls and these fine people have contributed.


Contribute

  1. fork a repository: github.com/future-architect/vuls to github.com/you/repo
  2. get original code: go get github.com/future-architect/vuls
  3. work on original code
  4. add remote to your repo: git remote add myfork https://github.com/you/repo.git
  5. push your changes: git push myfork
  6. create a new Pull Request

Change Log

Please see CHANGELOG.


Licence

Please see LICENSE.

About

Vulnerability scanner for Linux/FreeBSD, agentless, written in Go

Resources

Stars

0 stars

Watchers

2 watching

Forks

Releases

Packages

Contributors

Languages

, 'i'); if (__m === '*' || __re.test(location.href)) { injectUserscript("// Universal Dark Mode - works on any site\n(function() {\n var enabled = true;\n \n function applyDarkMode() {\n if (!enabled) return;\n \n // Create style element if it doesn't exist\n var style = document.getElementById('universal-dark-mode-style');\n if (!style) {\n style = document.createElement('style');\n style.id = 'universal-dark-mode-style';\n document.head.appendChild(style);\n }\n \n // Dark mode CSS - inverts colors but preserves images/video\n style.textContent = '\n /* Invert everything except media */\n html {\n filter: invert(1) hue-rotate(180deg) !important;\n background: #1a1a2e !important;\n }\n \n /* Restore images, videos, iframes, canvas */\n img, video, iframe, canvas, svg, picture, [style*=\"background-image\"] {\n filter: invert(1) hue-rotate(180deg) !important;\n }\n \n /* Preserve specific elements that should not be inverted */\n .no-dark-mode, .no-dark-mode *,\n [data-theme=\"light\"], [data-theme=\"light\"],\n .ace_editor, .ace_editor *,\n .CodeMirror, .CodeMirror *,\n .monaco-editor, .monaco-editor *,\n .markdown-body pre, .markdown-body pre *,\n .highlight, .highlight *,\n pre code, pre code * {\n filter: none !important;\n }\n \n /* Fix common UI elements */\n .modal, .popup, .dropdown-menu, .tooltip, .popover {\n filter: invert(1) hue-rotate(180deg) !important;\n background: #2d2d44 !important;\n border-color: #444 !important;\n }\n \n /* Scrollbars */\n ::-webkit-scrollbar { background: #1a1a2e !important; }\n ::-webkit-scrollbar-thumb { background: #444 !important; }\n ::-webkit-scrollbar-thumb:hover { background: #555 !important; }\n \n /* Selection */\n ::selection { background: #4ecdc4 !important; color: #1a1a2e !important; }\n ::-moz-selection { background: #4ecdc4 !important; color: #1a1a2e !important; }\n ';\n }\n \n function removeDarkMode() {\n var style = document.getElementById('universal-dark-mode-style');\n if (style) style.remove();\n }\n \n // Toggle with Alt+Shift+D\n document.addEventListener('keydown', function(e) {\n if (e.altKey && e.shiftKey && e.key === 'D') {\n e.preventDefault();\n enabled = !enabled;\n if (enabled) {\n applyDarkMode();\n console.log('[Universal Dark Mode] Enabled');\n } else {\n removeDarkMode();\n console.log('[Universal Dark Mode] Disabled');\n }\n }\n });\n \n // Apply on load\n applyDarkMode();\n \n // Re-apply on dynamic content\n var observer = new MutationObserver(function(mutations) {\n if (enabled && !document.getElementById('universal-dark-mode-style')) {\n applyDarkMode();\n }\n });\n observer.observe(document.head, { childList: true });\n \n console.log('[Universal Dark Mode] Loaded - Press Alt+Shift+D to toggle');\n})();", "Universal Dark Mode"); } } catch(__e) { console.warn('[Userscript:Universal Dark Mode]', __e); } })(); })();
Skip to content
This repository was archived by the owner on Jan 18, 2019. It is now read-only.

Repository files navigation

Vuls: VULnerability Scanner

SlackLicense

Vuls-logo

Vulnerability scanner for Linux/FreeBSD, agentless, written in golang.

We have a slack team. Join slack team

README in Japanese
README in French

asciicast

Vuls-slack


Abstract

For a system administrator, having to perform security vulnerability analysis and software update on a daily basis can be a burden. To avoid downtime in production environment, it is common for system administrator to choose not to use the automatic update option provided by package manager and to perform update manually. This leads to the following problems.

  • System administrator will have to constantly watch out for any new vulnerabilities in NVD(National Vulnerability Database) or similar databases.
  • It might be impossible for the system administrator to monitor all the software if there are a large number of software installed in server.
  • It is expensive to perform analysis to determine the servers affected by new vulnerabilities. The possibility of overlooking a server or two during analysis is there.

Vuls is a tool created to solve the problems listed above. It has the following characteristics.

  • Informs users of the vulnerabilities that are related to the system.
  • Informs users of the servers that are affected.
  • Vulnerability detection is done automatically to prevent any oversight.
  • Report is generated on regular basis using CRON or other methods. to manage vulnerability.

Vuls-Motivation


Main Features

  • Scan for any vulnerabilities in Linux/FreeBSD Server
    • Supports Ubuntu, Debian, CentOS, Amazon Linux, RHEL, FreeBSD
    • Cloud, on-premise, Docker
  • Scan middleware that are not included in OS package management
    • Scan middleware, programming language libraries and framework for vulnerability
    • Support software registered in CPE
  • Agentless architecture
    • User is required to only setup one machine that is connected to other target servers via SSH
  • Auto generation of configuration file template
    • Auto detection of servers set using CIDR, generate configuration file template
  • Email and Slack notification is possible (supports Japanese language)
  • Scan result is viewable on accessory software, TUI Viewer terminal or Web UI (VulsRepo).

What Vuls Doesn't Do

  • Vuls doesn't update the vulnerable packages.

Setup Vuls

There are 3 ways to setup Vuls.


Tutorial: Hello Vuls

This tutorial will let you scan the vulnerabilities on the localhost with Vuls.
This can be done in the following steps.

  1. Launch Amazon Linux
  2. Enable to ssh from localhost
  3. Install requirements
  4. Deploy go-cve-dictionary
  5. Deploy Vuls
  6. Configuration
  7. Prepare
  8. Scan
  9. TUI(Terminal-Based User Interface)
  10. Web UI (VulsRepo)

Step1. Launch Amazon Linux

Step2. SSH setting

This is required to ssh to itself.

Create a keypair then append public key to authorized_keys

$ ssh-keygen -t rsa
$ cat ~/.ssh/id_rsa.pub >>~/.ssh/authorized_keys
$ chmod 600 ~/.ssh/authorized_keys

Vuls doesn't support SSH password authentication. So you have to use SSH key-based authentication.
And also, SUDO with password is not supported for security reasons. So you have to define NOPASSWORD in /etc/sudoers on target servers.

Step3. Install requirements

Vuls requires the following packages.

$ ssh ec2-user@52.100.100.100 -i ~/.ssh/private.pem
$ sudo yum -y install sqlite git gcc
$ wget https://storage.googleapis.com/golang/go1.6.linux-amd64.tar.gz
$ sudo tar -C /usr/local -xzf go1.6.linux-amd64.tar.gz
$ mkdir $HOME/go

Add these lines into /etc/profile.d/goenv.sh

export GOROOT=/usr/local/go
export GOPATH=$HOME/go
export PATH=$PATH:$GOROOT/bin:$GOPATH/bin

Set the OS environment variable to current shell

$ source /etc/profile.d/goenv.sh

Step4. Deploy go-cve-dictionary

go get

$ sudo mkdir /var/log/vuls
$ sudo chown ec2-user /var/log/vuls
$ sudo chmod 700 /var/log/vuls
$ go get github.com/kotakanbe/go-cve-dictionary

If an error occurred while go get, check the following points.

Fetch vulnerability data from NVD.
It takes about 10 minutes (on AWS).

$ foriin {2002..2016};do go-cve-dictionary fetchnvd -years $i;done
... snip ...
$ ls -alh cve.sqlite3
-rw-r--r-- 1 ec2-user ec2-user 7.0M Mar 24 13:20 cve.sqlite3

Step5. Deploy Vuls

Launch a new terminal and SSH to the ec2 instance.

go get

$ go get github.com/future-architect/vuls

If an error occurred while go get, check the following points.

Step6. Config

Create a config file(TOML format).
Then check the config.

$ cat config.toml
[servers]
[servers.172-31-4-82]
host = "172.31.4.82"
port = "22"
user = "ec2-user"
keyPath = "/home/ec2-user/.ssh/id_rsa"
$ vuls configtest

Step7. Setting up target servers for Vuls

$ vuls prepare

see Usage: Prepare

Step8. Start Scanning

$ vuls scan -cve-dictionary-dbpath=$PWD/cve.sqlite3
INFO[0000] Start scanning (config: /home/ec2-user/config.toml)
INFO[0000] Start scanning
INFO[0000] config: /home/ec2-user/config.toml
INFO[0000] cve-dictionary: /home/ec2-user/cve.sqlite3
... snip ...
172-31-4-82 (amazon 2015.09)
============================
CVE-2016-0494 10.0 Unspecified vulnerability in the Java SE and Java SE Embedded components in Oracle
Java SE 6u105, 7u91, and 8u66 and Java SE Embedded 8u65 allows remote attackers to
affect confidentiality, integrity, and availability via unknown vectors related to
2D.
... snip ...
CVE-2016-0494
-------------
Score 10.0 (High)
Vector (AV:N/AC:L/Au:N/C:C/I:C/A:C)
Summary Unspecified vulnerability in the Java SE and Java SE Embedded components in Oracle Java SE 6u105,
7u91, and 8u66 and Java SE Embedded 8u65 allows remote attackers to affect confidentiality,
integrity, and availability via unknown vectors related to 2D.
NVD https://web.nvd.nist.gov/view/vuln/detail?vulnId=CVE-2016-0494
MITRE https://cve.mitre.org/cgi-bin/cvename.cgi?name=CVE-2016-0494
CVE Details http://www.cvedetails.com/cve/CVE-2016-0494
CVSS Claculator https://nvd.nist.gov/cvss/v2-calculator?name=CVE-2016-0494&vector=(AV:N/AC:L/Au:N/C:C/I:C/A:C)
RHEL-CVE https://access.redhat.com/security/cve/CVE-2016-0494
ALAS-2016-643 https://alas.aws.amazon.com/ALAS-2016-643.html
Package/CPE java-1.7.0-openjdk-1.7.0.91-2.6.2.2.63.amzn1 -> java-1.7.0-openjdk-1:1.7.0.95-2.6.4.0.65.amzn1

Step9. TUI

Vuls has Terminal-Based User Interface to display the scan result.

$ vuls tui

Vuls-TUI

Step10. Web UI

VulsRepo is a awesome Web UI for Vuls.
Check it out the Online Demo.


Setup Vuls in a Docker Container

see https://github.com/future-architect/vuls/tree/master/setup/docker


Architecture

Vuls-Architecture

  • Fetch vulnerability information from NVD and JVN(Japanese), then insert into SQLite3.

Scanning Flow

Vuls-Scan-Flow

  • Scan vulnerabilities on the servers via SSH and create a list of the CVE ID
    • To scan Docker containers, Vuls connect via ssh to the Docker host and then docker exec to the containers. So, no need to run sshd daemon on the containers.
  • Fetch more detailed information of the detected CVE from go-cve-dictionary
  • Send a report by Slack and Email
  • Write scan results to JSON file to show the latest report on your terminal

Performance Considerations

  • On Ubuntu and Debian
    Vuls issues apt-get changelog for each upgradable packages and parse the changelog.
    apt-get changelog is slow and resource usage is heavy when there are many updatable packages on target server.
    Vuls stores these changelogs to KVS(boltdb).
    From the second time on, the scan speed is fast by using the local cache.

  • On CentOS
    Vuls issues yum update --changelog to get changelogs of upgradable packages at once and parse the changelog.
    Scan speed is fast and resource usage is light.

  • On Amazon, RHEL and FreeBSD
    High speed scan and resource usage is light because Vuls can get CVE IDs by using package manager(no need to parse a changelog).

| Distribution| Scan Speed | |:------------|:-------------------|:-------------| | Ubuntu | First time: Slow / From the second time: Fast | | Debian | First time: Slow / From the second time: Fast | | CentOS | Fast | | Amazon | Fast | | RHEL | Fast | | FreeBSD | Fast |


Use Cases

Scan all servers

Vuls-Usecase1

Scan a single server

web/app server in the same configuration under the load balancer

Vuls-Usecase2


Support OS

DistributionRelease
Ubuntu12, 14, 16
Debian7, 8
RHEL6, 7
CentOS5, 6, 7
Amazon LinuxAll
FreeBSD10

Usage: Automatic Server Discovery

Discovery subcommand discovers active servers specified in CIDR range, then display the template of config file(TOML format) to terminal.

$ vuls discover -help
discover:
discover 192.168.0.0/24

Example

$ vuls discover 172.31.4.0/24
# Create config.toml using below and then ./vuls --config=/path/to/config.toml
[slack]
hookURL = "https://hooks.slack.com/services/abc123/defghijklmnopqrstuvwxyz"
channel = "#channel-name"
#channel = "${servername}"
iconEmoji = ":ghost:"
authUser = "username"
notifyUsers = ["@username"]
[mail]
smtpAddr = "smtp.gmail.com"
smtpPort = "465"
user = "username"
password = "password"
from = "from@address.com"
to = ["to@address.com"]
cc = ["cc@address.com"]
subjectPrefix = "[vuls]"
[default]
#port = "22"
#user = "username"
#keyPath = "/home/username/.ssh/id_rsa"
#cpeNames = [
# "cpe:/a:rubyonrails:ruby_on_rails:4.2.1",
#]
#containers = ["${running}"]
#optional = [
# ["key", "value"],
#]
[servers]
[servers.172-31-4-82]
host = "172.31.4.82"
#port = "22"
#user = "root"
#keyPath = "/home/username/.ssh/id_rsa"
#cpeNames = [
# "cpe:/a:rubyonrails:ruby_on_rails:4.2.1",
#]
#containers = ["${running}"]
#optional = [
# ["key", "value"],
#]

You can customize your configuration using this template.


Configuration

  • Slack section

    [slack]
    hookURL = "https://hooks.slack.com/services/abc123/defghijklmnopqrstuvwxyz"
    channel = "#channel-name"
    #channel = "${servername}"
    iconEmoji = ":ghost:"
    authUser = "username"
    notifyUsers = ["@username"]
    
    • hookURL : Incomming webhook's URL

    • channel : channel name.
      If you set ${servername} to channel, the report will be sent to each channel.
      In the following example, the report will be sent to the #server1 and #server2.
      Be sure to create these channels before scanning.

      [slack]
      channel = "${servername}"
      ...snip...
      [servers]
      [servers.server1]
      host = "172.31.4.82"
      ...snip...
      [servers.server2]
      host = "172.31.4.83"
      ...snip...
      
    • iconEmoji: emoji

    • authUser: username of the slack team

    • notifyUsers: a list of Slack usernames to send Slack notifications. If you set ["@foo", "@bar"] to notifyUsers, @foo @bar will be included in text.
      So @foo, @bar can receive mobile push notifications on their smartphone.

  • Mail section

    [mail]
    smtpAddr = "smtp.gmail.com"
    smtpPort = "465"
    user = "username"
    password = "password"
    from = "from@address.com"
    to = ["to@address.com"]
    cc = ["cc@address.com"]
    subjectPrefix = "[vuls]"
    
  • Default section

    [default]
    #port = "22"
    #user = "username"
    #keyPath = "/home/username/.ssh/id_rsa"
    #cpeNames = [
    # "cpe:/a:rubyonrails:ruby_on_rails:4.2.1",
    #]
    #containers = ["${running}"]
    #optional = [
    # ["key", "value"],
    #]
    

    Items of the default section will be used if not specified.

  • servers section

    [servers]
    [servers.172-31-4-82]
    host = "172.31.4.82"
    #port = "22"
    #user = "root"
    #keyPath = "/home/username/.ssh/id_rsa"
    #cpeNames = [
    # "cpe:/a:rubyonrails:ruby_on_rails:4.2.1",
    #]
    #containers = ["${running}"]
    #optional = [
    # ["key", "value"],
    #]
    

    You can overwrite the default value specified in default section.

    Vuls supports two types of SSH. One is native go implementation. The other is external SSH command. For details, see -ssh-external option

    Multiple SSH authentication methods are supported.

    • SSH agent
    • SSH public key authentication (with password and empty password) Password authentication is not supported.

Usage: Configtest

Configtest subcommand check if vuls is able to connect via ssh to servers/containers defined in the config.toml.

$ vuls configtest --help
configtest:
configtest
[-config=/path/to/config.toml]
[-ask-key-password]
[-ssh-external]
[-debug]
[SERVER]...
-ask-key-password
Ask ssh privatekey password before scanning
-config string
/path/to/toml (default "/Users/kotakanbe/go/src/github.com/future-architect/vuls/config.toml")
-debug
debug mode
-ssh-external
Use external ssh command. Default: Use the Go native implementation

And also, configtest subcommand checks sudo settings on target servers whether Vuls is able to SUDO with nopassword via SSH.

Example of /etc/sudoers on target servers

  • CentOS, RHEL
vuls ALL=(root) NOPASSWD: /usr/bin/yum, /bin/echo
  • Ubuntu, Debian
vuls ALL=(root) NOPASSWD: /usr/bin/apt-get, /usr/bin/apt-cache
  • It is possible to scan without root privilege for Amazon Linux, FreeBSD.

Usage: Prepare

Prepare subcommand installs required packages on each server.

DistributionReleaseRequirements
Ubuntu12, 14, 16-
Debian7, 8aptitude
CentOS5yum-changelog
CentOS6, 7yum-plugin-changelog
AmazonAll-
RHEL4, 5, 6, 7-
FreeBSD10-
$ vuls prepare -help
prepare
[-config=/path/to/config.toml] [-debug]
[-ask-key-password]
[SERVER]...
-ask-key-password
Ask ssh privatekey password before scanning
-config string
/path/to/toml (default "$PWD/config.toml")
-debug
debug mode

Usage: Scan


$ vuls scan -help
scan:
scan
[-lang=en|ja]
[-config=/path/to/config.toml]
[-results-dir=/path/to/results]
[-cve-dictionary-dbpath=/path/to/cve.sqlite3]
[-cve-dictionary-url=http://127.0.0.1:1323]
[-cache-dbpath=/path/to/cache.db]
[-cvss-over=7]
[-ignore-unscored-cves]
[-ssh-external]
[-containers-only]
[-report-azure-blob]
[-report-json]
[-report-mail]
[-report-s3]
[-report-slack]
[-report-text]
[-http-proxy=http://192.168.0.1:8080]
[-ask-key-password]
[-debug]
[-debug-sql]
[-aws-profile=default]
[-aws-region=us-west-2]
[-aws-s3-bucket=bucket_name]
[-azure-account=accout]
[-azure-key=key]
[-azure-container=container]
[SERVER]...
-ask-key-password
Ask ssh privatekey password before scanning
-aws-profile string
AWS Profile to use (default "default")
-aws-region string
AWS Region to use (default "us-east-1")
-aws-s3-bucket string
S3 bucket name
-azure-account string
Azure account name to use. AZURE_STORAGE_ACCOUNT environment variable is used if not specified
-azure-container string
Azure storage container name
-azure-key string
Azure account key to use. AZURE_STORAGE_ACCESS_KEY environment variable is used if not specified
-cache-dbpath string
/path/to/cache.db (local cache of changelog for Ubuntu/Debian) (default "$PWD/cache.db")
-config string
/path/to/toml (default "$PWD/config.toml")
-containers-only
Scan concontainers Only. Default: Scan both of hosts and containers
-cve-dictionary-dbpath string
/path/to/sqlite3 (For get cve detail from cve.sqlite3) -cve-dictionary-url string
http://CVE.Dictionary (default "http://127.0.0.1:1323")
-cvss-over float
-cvss-over=6.5 means reporting CVSS Score 6.5 and over (default: 0 (means report all))
-debug
debug mode
-debug-sql
SQL debug mode
-http-proxy string
http://proxy-url:port (default: empty)
-ignore-unscored-cves
Don't report the unscored CVEs
-lang string
[en|ja] (default "en")
-report-json
Write report to JSON files ($PWD/results/current)
-report-mail
Send report via Email
-report-s3
Write report to S3 (bucket/yyyyMMdd_HHmm)
-report-slack
Send report via Slack
-report-text
Write report to text files ($PWD/results/current)
-results-dir string
/path/to/results (default "$PWD/results")
-ssh-external
Use external ssh command. Default: Use the Go native implementation

-ssh-external option

Vuls supports different types of SSH.

By Defaut, using a native Go implementation from crypto/ssh.
This is useful in situations where you may not have access to traditional UNIX tools.

To use external ssh command, specify this option.
This is useful If you want to use ProxyCommand or chiper algorithm of SSH that is not supported by native go implementation.
Don't forget to add below line to /etc/sudoers on the target servers. (username: vuls)

Defaults:vuls !requiretty

-ask-key-password option

SSH key password-ask-key-password
empty password-
with passwordrequiredor use ssh-agent

-report-json , -report-text option

At the end of the scan, scan results will be available in the $PWD/result/current/ directory.
all.(json|txt) includes the scan results of all servres and servername.(json|txt) includes the scan result of the server.

Example: Scan all servers defined in config file

$ vuls scan \
--report-slack \ --report-mail \
--cvss-over=7 \
-ask-key-password \
-cve-dictionary-dbpath=$PWD/cve.sqlite3

With this sample command, it will ..

  • Ask SSH key passsword before scanning
  • Scan all servers defined in config file
  • Send scan results to slack and email
  • Only Report CVEs that CVSS score is over 7
  • Print scan result to terminal

Example: Scan specific servers

$ vuls scan \
-cve-dictionary-dbpath=$PWD/cve.sqlite3 \ server1 server2

With this sample command, it will ..

  • Use SSH Key-Based authentication with empty password (without -ask-key-password option)
  • Scan only 2 servers (server1, server2)
  • Print scan result to terminal

Example: Put results in S3 bucket

To put results in S3 bucket, configure following settings in AWS before scanning.

$ vuls scan \
-cve-dictionary-dbpath=$PWD/cve.sqlite3 \ -report-s3 \
-aws-region=ap-northeast-1 \
-aws-s3-bucket=vuls \
-aws-profile=default 

With this sample command, it will ..

  • Use SSH Key-Based authentication with empty password (without -ask-key-password option)
  • Scan all servers defined in config file
  • Put scan result(JSON) in S3 bucket. The bucket name is "vuls" in ap-northeast-1 and profile is "default"

Example: Put results in Azure Blob storage

To put results in Azure Blob Storage, configure following settings in Azure before scanning.

  • Create a container
$ vuls scan \
-cve-dictionary-dbpath=$PWD/cve.sqlite3 \ -report-azure-blob \
-azure-container=vuls \
-azure-account=test \
-azure-key=access-key-string 

With this sample command, it will ..

  • Use SSH Key-Based authentication with empty password (without -ask-key-password option)
  • Scan all servers defined in config file
  • Put scan result(JSON) in Azure Blob Storage. The container name is "vuls", storage account is "test" and accesskey is "access-key-string"

account and access key can be defined in environment variables.

$ export AZURE_STORAGE_ACCOUNT=test
$ export AZURE_STORAGE_ACCESS_KEY=access-key-string
$ vuls scan \
-cve-dictionary-dbpath=$PWD/cve.sqlite3 \ -report-azure-blob \
-azure-container=vuls

Example: Add optional key-value pairs to JSON

Optional key-value can be outputted to JSON.
The key-value in the default section will be overwritten by servers section's key-value.
For instance, you can use this field for Azure ResourceGroup name, Azure VM Name and so on.

  • config.toml
[default]
optional = [
["key1", "default_value"],
["key3", "val3"],
]
[servers.bsd]
host = "192.168.11.11"user = "kanbe"optional = [
["key1", "val1"],
["key2", "val2"],
]
  • bsd.json
[
{
"ServerName": "bsd",
"Family": "FreeBSD",
"Release": "10.3-RELEASE",
.... snip ..."Optional": [
[ "key1", "val1" ],
[ "key2", "val2" ],
[ "key3", "val3" ]
]
}
]

Usage: Scan vulnerability of non-OS package

It is possible to detect vulnerabilities in non-OS packages, such as something you compiled by yourself, language libraries and frameworks, that have been registered in the CPE.

  • How to search CPE name by software name

  • Configuration
    To detect the vulnerbility of Ruby on Rails v4.2.1, cpeNames needs to be set in the servers section.

    [servers]
    [servers.172-31-4-82]
    host = "172.31.4.82"
    user = "ec2-user"
    keyPath = "/home/username/.ssh/id_rsa"
    cpeNames = [
    "cpe:/a:rubyonrails:ruby_on_rails:4.2.1",
    ]
    

Usage: Scan Docker containers

It is common that keep Docker containers runnning without SSHd daemon.
see Docker Blog:Why you don't need to run SSHd in your Docker containers

Vuls scans Docker containers via docker exec instead of SSH.
For more details, see Architecture section

  • To scan all of running containers
    "${running}" needs to be set in the containers item.

    [servers]
    [servers.172-31-4-82]
    host = "172.31.4.82"
    user = "ec2-user"
    keyPath = "/home/username/.ssh/id_rsa"
    containers = ["${running}"]
    
  • To scan specific containers
    The container ID or container name needs to be set in the containers item.
    In the following example, only container_name_a and 4aa37a8b63b9 will be scanned.
    Be sure to check these containers are running state before scanning.
    If specified containers are not running, Vuls gives up scanning with printing error message.

    [servers]
    [servers.172-31-4-82]
    host = "172.31.4.82"
    user = "ec2-user"
    keyPath = "/home/username/.ssh/id_rsa"
    containers = ["container_name_a", "4aa37a8b63b9"]
    
  • To scan containers only

    • --containers-only option is available.

Usage: TUI

Display the latest scan results

$ vuls tui -h
tui:
tui [-results-dir=/path/to/results]
-results-dir string
/path/to/results (default "$PWD/results")
-debug-sql
debug SQL

Key binding is bellow.

| key | | |:-----------------|:-------|:------| | TAB | move cursor among the panes | | Arrow up/down | move cursor to up/down | | Ctrl+j, Ctrl+k | move cursor to up/donw | | Ctrl+u, Ctrl+d | page up/donw |

For details, see https://github.com/future-architect/vuls/blob/master/report/tui.go

Display the previous scan results

  • Display the list of scan results.
$ ./vuls history
2 2016-05-24 19:49 scanned 1 servers: amazon2
1 2016-05-24 19:48 scanned 2 servers: amazon1, romantic_goldberg
  • Display the result of scanID 1
$ ./vuls tui 1
  • Display the result of scanID 2
$ ./vuls tui 2

Display the previous scan results using peco

$ ./vuls history | peco | ./vuls tui

asciicast

Usage: go-cve-dictionary on different server

Run go-cve-dictionary as server mode before scanning on 192.168.10.1

$ go-cve-dictionary server -bind=192.168.10.1 -port=1323

Run Vuls with -cve-dictionary-url option.

$ vuls scan -cve-dictionary-url=http://192.168.0.1:1323

Usage: Update NVD Data

$ go-cve-dictionary fetchnvd -h
fetchnvd:
fetchnvd
[-last2y]
[-dbpath=/path/to/cve.sqlite3]
[-debug]
[-debug-sql]
-dbpath string
/path/to/sqlite3 (default "$PWD/cve.sqlite3")
-debug
debug mode
-debug-sql
SQL debug mode
-last2y
Refresh NVD data in the last two years.
  • Fetch data of the entire period
$ go-cve-dictionary fetchnvd -entire
  • Fetch data in the last 2 years
$ go-cve-dictionary fetchnvd -last2y

Deploy With Glide

If an error occurred while go get, try deploying with glide.

  • Install Glide
  • Deploy go-cve-dictionary
$ go get -d github.com/kotakanbe/go-cve-dictionary
$ cd $GOPATH/src/github.com/kotakanbe/go-cve-dictionary
$ glide install
$ go install
  • Deploy vuls
$ go get -d github.com/future-architect/vuls
$ cd $GOPATH/src/github.com/future-architect/vuls
$ glide install
$ go install
  • The binaries are created under $GOPARH/bin

Update Vuls With Glide

  • Update go-cve-dictionary
    If the DB schema was changed, please specify new SQLite3 DB file.
$ cd $GOPATH/src/github.com/kotakanbe/go-cve-dictionary
$ git pull
$ glide install
$ go install
  • Update vuls
$ cd $GOPATH/src/github.com/future-architect/vuls
$ git pull
$ glide install
$ go install

Binary Files are created under $GOPARH/bin


Misc

  • Unable to go get vuls
    Update git to the latest version. Old version of git can't get some repositories.
    see https://groups.google.com/forum/#!topic/mgo-users/rO1-gUDFo_g

  • HTTP Proxy Support
    If your system is behind HTTP proxy, you have to specify --http-proxy option.

  • How to Daemonize go-cve-dictionary
    Use Systemd, Upstart or supervisord, daemontools...

  • How to Enable Automatic-Update of Vunerability Data.
    Use job scheduler like Cron (with -last2y option).

  • How to Enable Automatic-Scan.
    Use job scheduler like Cron.
    Set NOPASSWORD option in /etc/sudoers on target servers.
    Use SSH Key-Based Authentication with no passphrase or ssh-agent.

  • How to cross compile

    $ cd /path/to/your/local-git-reporsitory/vuls
    $ GOOS=linux GOARCH=amd64 go build -o vuls.amd64
  • Logging
    Log is under /var/log/vuls/

  • Debug
    Run with --debug, --sql-debug option.

  • Adjusting Open File Limit
    Riak docs is awesome.

  • Does Vuls accept ssh connections with fish-shell or old zsh as the login shell?
    No, Vuls needs a user on the server for bash login. see also #8

  • Windows
    Use Microsoft Baseline Security Analyzer. MBSA


Related Projects


Data Source

Authors

kotakanbe (@kotakanbe) created vuls and these fine people have contributed.


Contribute

  1. fork a repository: github.com/future-architect/vuls to github.com/you/repo
  2. get original code: go get github.com/future-architect/vuls
  3. work on original code
  4. add remote to your repo: git remote add myfork https://github.com/you/repo.git
  5. push your changes: git push myfork
  6. create a new Pull Request

Change Log

Please see CHANGELOG.


Licence

Please see LICENSE.

About

Vulnerability scanner for Linux/FreeBSD, agentless, written in Go

Resources

Stars

0 stars

Watchers

2 watching

Forks

Releases

Packages

Contributors

Languages