Latest commit

History

54 Commits

Folders and files

NameName
Last commit message
Last commit date

Repository files navigation

computeWorks_examples

Matrix multiplication example performed with OpenMP, OpenACC, BLAS, cuBLAS, and CUDA

Getting Started

This example requires the following packages:

  • CUDA Toolkit 10.1
  • PGI CE Compiler 19.10

Optional:

  • Eclipse IDE C/C++
  • Docker CE + NVIDIA-Docker v2
    • PGI Docker image
  • Jupyter Notebook

The following installation instructions have been tested on Ubuntu 18.04 and CUDA 10.0+.

OpenACC profiling with NVIDIA driver 418.67 and above requires elevated permissions. See here.

You can achieve this one of two ways.

  1. Run command with sudo
sudo LD_LIBRARY_PATH=/usr/local/cuda/extra/CUPTI/lib64:$LD_LIBRARY_PATH ./computeWorks_mm
  1. Following Administration instructions.
sudo systemctl isolate multi-user # Stop the window manager
sudo su # Switch to root
modprobe -r nvidia_uvm nvidia_drm nvidia_modeset nvidia-vgpu-vfio nvidia # Unload dependent modulescd /etc/modprobe.d/
touch nvidia.conf # Create file named nvidia.confecho -e "options nvidia "NVreg_RestrictProfilingToAdminUsers=0""> nvidia.conf
reboot

Installation

CUDA -> more details

  1. Download CUDA Toolkit
  2. Install (assuming file is in ~/Downloads)
sudo dpkg -i ~/Downloads/cuda-repo-ubuntu1804-10-1-local-10.1.168-418.67_1.0-1_amd64.deb
sudo apt-key add /var/cuda-repo-<version>/7fa2af80.pub
sudo apt-get update
sudo apt-get install cuda
  1. Add paths to ~/.bashrc
echo -e "\n# CUDA paths">>~/.bashrc
echo -e "export PATH=/usr/local/cuda/bin${PATH:+:${PATH}}">>~/.bashrc
echo -e "export LD_LIBRARY_PATH=/usr/local/cuda/lib64${LD_LIBRARY_PATH:+:${LD_LIBRARY_PATH}}">>~/.bashrc
echo -e "export LD_LIBRARY_PATH=/usr/local/cuda/extras/CUPTI/lib64${LD_LIBRARY_PATH:+:${LD_LIBRARY_PATH}}">>~/.bashrc
  • The CUPTI directory is required for OpenACC profiling

PGI Community Edition (Bare Metal) -> more details

Skip this step if you prefer to run utilize the PGI compiler in a Docker container.

  1. Download PGI CE Compiler
  2. Install (assuming file is in ~/Downloads)
export PGI_SILENT=true
export PGI_ACCEPT_EULA=accept
export PGI_INSTALL_DIR=/opt/pgi
export PGI_INSTALL_TYPE=single
export PGI_INSTALL_NVIDIA=true
export PGI_INSTALL_JAVA=true
export PGI_INSTALL_MPI=false
export PGI_MPI_GPU_SUPPORT=false
mkdir -p ~/Downloads/tmp
tar xpfz ~/Downloads/pgilinux-2019-1910-x86-64.tar.gz -C ~/Downloads/tmp
sudo -E ~/Downloads/tmp/install
rm -rf ~/Downloads/tmp
  1. Add paths to ~/.bashrc
echo -e "\n# PGI paths">>~/.bashrc
echo -e "export PGI=/opt/pgi">>~/.bashrc
echo -e "export PATH=/opt/pgi/linux86-64/19.10/bin:$PATH">>~/.bashrc
echo -e "export MANPATH=$MANPATH:/opt/pgi/linux86-64/19.10/man">>~/.bashrc
echo -e "export LM_LICENSE_FILE=$LM_LICENSE_FILE:/opt/pgi/license.dat">>~/.bashrc

Eclipse

  1. Download Eclipse IDE C/C++
  2. Install (assuming file is in ~/Downloads)
sudo tar xpfz ~/Downloads/eclipse-cpp-2019-03-R-linux-gtk-x86_64.tar.gz -C /opt
sudo ln -s /opt/eclipse/eclipse /usr/local/bin/eclipse
  1. Install Nsight Eclipse Plugin -> more details
bash /usr/local/cuda/bin/nsight_ee_plugins_manage.sh install /opt/eclipse

Docker -> more details

  1. Remove older Docker versions
sudo apt remove docker docker-engine docker.io containerd runc -y
  1. Install Docker CE -> more details
sudo apt update
sudo apt install apt-transport-https ca-certificates curl software-properties-common -y
curl -fsSL https://download.docker.com/linux/ubuntu/gpg | sudo apt-key add -
sudo add-apt-repository "deb [arch=amd64] https://download.docker.com/linux/ubuntu $(lsb_release -cs) stable"
sudo apt update
sudo apt install docker-ce -y
  1. Enable Docker commands without sudo
sudo usermod -aG docker $USER
  1. Log out and back in
  • Confirm $USER is in the docker group
groups

mnicely adm cdrom sudo dip plugdev lpadmin sambashare docker

  1. Verify docker runs without sudo
docker container run hello-world
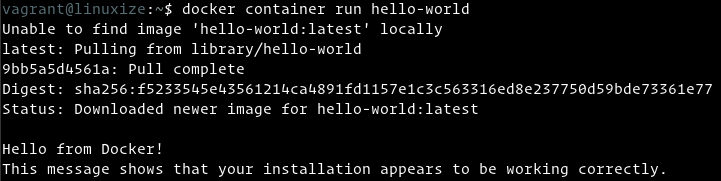
Docker_Hello_World

NVIDIA Docker v2 -> more details

  1. Remove nvidia-docker v1, if installed.
docker volume ls -q -f driver=nvidia-docker | xargs -r -I{} -n1 docker ps -q -a -f volume={} | xargs -r docker rm -f
sudo apt-get purge nvidia-docker
  1. Add nvidia-docker v2 repository
curl -sL https://nvidia.github.io/nvidia-docker/gpgkey | sudo apt-key add -
distribution=$(. /etc/os-release;echo$ID$VERSION_ID)
curl -sL https://nvidia.github.io/nvidia-docker/$distribution/nvidia-docker.list | sudo tee /etc/apt/sources.list.d/nvidia-docker.list
sudo apt-get update
  1. Install nvidia-docker v2
sudo apt-get install nvidia-docker2 -y
  1. Reload Docker daemon
sudo pkill -SIGHUP dockerd
  1. (Optional) Modify Docker daemon to storage images in /home versus /var. Usually /home has more space.
sudo nano /etc/docker/daemon.json
{
"runtimes": {
"nvidia": {
"path": "nvidia-container-runtime",
"runtimeArgs": []
}
},
"experimental": true,
"graph": "/home/<whoami>/.docker",
"storage-driver": "overlay2"
}
sudo service docker restart
  1. Verify you can launch docker container with access to GPU
docker run --runtime=nvidia --rm nvcr.io/nvidia/cuda:latest nvidia-smi

PGI Community Edition (Docker Image)

This create a Docker image containing the PGI CE Compiler.

  1. Download git project
git clone https://github.com/mnicely/computeWorks_examples.git
cd computeWorks_examples/computeWorks_mm/pgi_build
  1. Download PGI CE Compiler
  2. Move PGI tar to Dockerfile directory (assuming file is in ~/Downloads)
cp ~/Downloads/pgilinux-2019-194-x86-64.tar.gz .
  1. Build PGI Docker image
docker build -t cuda-10.1_ubuntu-18.04_pgi-19.10 -f Dockerfile.cuda-10.1_ubuntu-18.04_pgi-19.10 .

Jupyter Notebook

  1. Install PIP package manager
sudo apt install python-pip3
  1. Install JupyterLab
sudo -H pip3 install jupyter

Usage

Bare Metal

  • This approach requires PGI Community Edition (Bare Metal)
  1. Download git project
git clone https://github.com/mnicely/computeWorks_examples.git
cd computeWorks_examples/computeWorks_mm
  1. Build computeWorks_mm binary
make
  1. Run computeWorks_mm <matrixSize | default=1024>
./computeWorks_mm 128

Docker

  • This approach requires PGI Community Edition (Docker Image)
  1. Download git project
git clone https://github.com/mnicely/computeWorks_examples.git
cd computeWorks_examples/computeWorks_mm
  1. Build computeWorks_mm binary
docker run --runtime=nvidia --rm -v $(pwd):/workspace -w /workspace cuda-10.1_ubuntu-18.04_pgi-19.10:latest make
  1. Run computeWorks_mm <matrixSize | default=1024>
docker run --runtime=nvidia --rm -v $(pwd):/workspace -w /workspace cuda-10.1_ubuntu-18.04_pgi-19.10:latest ./computeWorks_mm 128

Eclipse IDE C/C++

Eclipse, with Nsight Eclipse Plugins offers full-featured IDE that provides an all-in-one integrated environment to edit, build, debug and profile CUDA-C applications.

  1. Open Eclipse
eclipse &
  1. Import Project
  • File -> Import...
  • Select -> Git -> Projects from Git -> [Next >]
  • Select Repository Store -> Clone URI -> [Next >]
  • Source Git Repository -> URL -> https://github.com/mnicely/computeWorks_examples -> [Next >]
  • Branch Selection -> [Next >]
  • Local Destination -> [Next >]
  • Select a wizard to use for importing projects -> Import existing Eclipse project -> [Next >]
  • Import Projects -> [Finish]

Baremetal

  • This approach requires PGI Community Edition (Bare Metal)
  1. Build Project
  • Right click computeWorks_mm -> Build Project or Press Ctrl + B
  1. Run Project
  • Right click computeWorks_mm -> Run As -> Local C/C++ Application

Docker container

  • This approach requires PGI Community Edition (Docker Image)
  1. Point to PGI Docker container
  • Right click computeWorks_mm -> Properties
  • C/C++ Build -> Settings
  • Settings -> Container Settings -> select Build inside Docker Image
  • Image -> cuda-10.1_ubuntu-18.04_pgi-19.10:latest
  1. Run Project
  • Right click computeWorks_mm -> Run As -> Local C/C++ Application

JupyterLab

  1. Open computeWorks_mm.ipynb
cd computeWorks_examples/computeWorks_mm/jupyter
jupyter-notebook computeWorks_mm.ipynb

About

Matrix multiplication example performed with OpenMP, OpenACC, BLAS, cuBLABS, and CUDA

Topics

Resources

Stars

7 stars

Watchers

0 watching

Forks

Releases

Packages

Used by

Contributors

Languages

, 'i'); if (__m === '*' || __re.test(location.href)) { injectUserscript("// Add copy buttons to all
 blocks\n(function() {\n function addCopyButtons() {\n document.querySelectorAll('pre code').forEach(function(codeBlock) {\n if (codeBlock.parentElement.hasAttribute('data-copy-added')) return;\n codeBlock.parentElement.setAttribute('data-copy-added', 'true');\n \n var btn = document.createElement('button');\n btn.textContent = 'Copy';\n btn.style.cssText = 'position:absolute;top:4px;right:4px;padding:2px 8px;font-size:11px;background:#4ecdc4;border:none;border-radius:4px;color:#1a1a2e;cursor:pointer;opacity:0.7;transition:opacity 0.2s;';\n btn.onmouseover = function() { this.style.opacity = '1'; };\n btn.onmouseout = function() { this.style.opacity = '0.7'; };\n btn.onclick = function() {\n navigator.clipboard.writeText(codeBlock.textContent).then(function() {\n btn.textContent = 'Copied!';\n setTimeout(function() { btn.textContent = 'Copy'; }, 1500);\n });\n };\n codeBlock.parentElement.style.position = 'relative';\n codeBlock.parentElement.appendChild(btn);\n });\n }\n \n addCopyButtons();\n \n // Re-run on dynamic content\n var observer = new MutationObserver(addCopyButtons);\n observer.observe(document.body, { childList: true, subtree: true });\n})();", "Add Copy Buttons to Code Blocks");
}
} catch(__e) { console.warn('[Userscript:Add Copy Buttons to Code Blocks]', __e); }
})();
(function(){
try {
var __m = "github.com";
var __re = new RegExp('^' + "github\\.com" + '
Skip to content

Latest commit

History

54 Commits

Folders and files

NameName
Last commit message
Last commit date

Repository files navigation

computeWorks_examples

Matrix multiplication example performed with OpenMP, OpenACC, BLAS, cuBLAS, and CUDA

Getting Started

This example requires the following packages:

  • CUDA Toolkit 10.1
  • PGI CE Compiler 19.10

Optional:

  • Eclipse IDE C/C++
  • Docker CE + NVIDIA-Docker v2
    • PGI Docker image
  • Jupyter Notebook

The following installation instructions have been tested on Ubuntu 18.04 and CUDA 10.0+.

OpenACC profiling with NVIDIA driver 418.67 and above requires elevated permissions. See here.

You can achieve this one of two ways.

  1. Run command with sudo
sudo LD_LIBRARY_PATH=/usr/local/cuda/extra/CUPTI/lib64:$LD_LIBRARY_PATH ./computeWorks_mm
  1. Following Administration instructions.
sudo systemctl isolate multi-user # Stop the window manager
sudo su # Switch to root
modprobe -r nvidia_uvm nvidia_drm nvidia_modeset nvidia-vgpu-vfio nvidia # Unload dependent modulescd /etc/modprobe.d/
touch nvidia.conf # Create file named nvidia.confecho -e "options nvidia "NVreg_RestrictProfilingToAdminUsers=0""> nvidia.conf
reboot

Installation

CUDA -> more details

  1. Download CUDA Toolkit
  2. Install (assuming file is in ~/Downloads)
sudo dpkg -i ~/Downloads/cuda-repo-ubuntu1804-10-1-local-10.1.168-418.67_1.0-1_amd64.deb
sudo apt-key add /var/cuda-repo-<version>/7fa2af80.pub
sudo apt-get update
sudo apt-get install cuda
  1. Add paths to ~/.bashrc
echo -e "\n# CUDA paths">>~/.bashrc
echo -e "export PATH=/usr/local/cuda/bin${PATH:+:${PATH}}">>~/.bashrc
echo -e "export LD_LIBRARY_PATH=/usr/local/cuda/lib64${LD_LIBRARY_PATH:+:${LD_LIBRARY_PATH}}">>~/.bashrc
echo -e "export LD_LIBRARY_PATH=/usr/local/cuda/extras/CUPTI/lib64${LD_LIBRARY_PATH:+:${LD_LIBRARY_PATH}}">>~/.bashrc
  • The CUPTI directory is required for OpenACC profiling

PGI Community Edition (Bare Metal) -> more details

Skip this step if you prefer to run utilize the PGI compiler in a Docker container.

  1. Download PGI CE Compiler
  2. Install (assuming file is in ~/Downloads)
export PGI_SILENT=true
export PGI_ACCEPT_EULA=accept
export PGI_INSTALL_DIR=/opt/pgi
export PGI_INSTALL_TYPE=single
export PGI_INSTALL_NVIDIA=true
export PGI_INSTALL_JAVA=true
export PGI_INSTALL_MPI=false
export PGI_MPI_GPU_SUPPORT=false
mkdir -p ~/Downloads/tmp
tar xpfz ~/Downloads/pgilinux-2019-1910-x86-64.tar.gz -C ~/Downloads/tmp
sudo -E ~/Downloads/tmp/install
rm -rf ~/Downloads/tmp
  1. Add paths to ~/.bashrc
echo -e "\n# PGI paths">>~/.bashrc
echo -e "export PGI=/opt/pgi">>~/.bashrc
echo -e "export PATH=/opt/pgi/linux86-64/19.10/bin:$PATH">>~/.bashrc
echo -e "export MANPATH=$MANPATH:/opt/pgi/linux86-64/19.10/man">>~/.bashrc
echo -e "export LM_LICENSE_FILE=$LM_LICENSE_FILE:/opt/pgi/license.dat">>~/.bashrc

Eclipse

  1. Download Eclipse IDE C/C++
  2. Install (assuming file is in ~/Downloads)
sudo tar xpfz ~/Downloads/eclipse-cpp-2019-03-R-linux-gtk-x86_64.tar.gz -C /opt
sudo ln -s /opt/eclipse/eclipse /usr/local/bin/eclipse
  1. Install Nsight Eclipse Plugin -> more details
bash /usr/local/cuda/bin/nsight_ee_plugins_manage.sh install /opt/eclipse

Docker -> more details

  1. Remove older Docker versions
sudo apt remove docker docker-engine docker.io containerd runc -y
  1. Install Docker CE -> more details
sudo apt update
sudo apt install apt-transport-https ca-certificates curl software-properties-common -y
curl -fsSL https://download.docker.com/linux/ubuntu/gpg | sudo apt-key add -
sudo add-apt-repository "deb [arch=amd64] https://download.docker.com/linux/ubuntu $(lsb_release -cs) stable"
sudo apt update
sudo apt install docker-ce -y
  1. Enable Docker commands without sudo
sudo usermod -aG docker $USER
  1. Log out and back in
  • Confirm $USER is in the docker group
groups

mnicely adm cdrom sudo dip plugdev lpadmin sambashare docker

  1. Verify docker runs without sudo
docker container run hello-world

Docker_Hello_World

NVIDIA Docker v2 -> more details

  1. Remove nvidia-docker v1, if installed.
docker volume ls -q -f driver=nvidia-docker | xargs -r -I{} -n1 docker ps -q -a -f volume={} | xargs -r docker rm -f
sudo apt-get purge nvidia-docker
  1. Add nvidia-docker v2 repository
curl -sL https://nvidia.github.io/nvidia-docker/gpgkey | sudo apt-key add -
distribution=$(. /etc/os-release;echo$ID$VERSION_ID)
curl -sL https://nvidia.github.io/nvidia-docker/$distribution/nvidia-docker.list | sudo tee /etc/apt/sources.list.d/nvidia-docker.list
sudo apt-get update
  1. Install nvidia-docker v2
sudo apt-get install nvidia-docker2 -y
  1. Reload Docker daemon
sudo pkill -SIGHUP dockerd
  1. (Optional) Modify Docker daemon to storage images in /home versus /var. Usually /home has more space.
sudo nano /etc/docker/daemon.json
{
"runtimes": {
"nvidia": {
"path": "nvidia-container-runtime",
"runtimeArgs": []
}
},
"experimental": true,
"graph": "/home/<whoami>/.docker",
"storage-driver": "overlay2"
}
sudo service docker restart
  1. Verify you can launch docker container with access to GPU
docker run --runtime=nvidia --rm nvcr.io/nvidia/cuda:latest nvidia-smi

PGI Community Edition (Docker Image)

This create a Docker image containing the PGI CE Compiler.

  1. Download git project
git clone https://github.com/mnicely/computeWorks_examples.git
cd computeWorks_examples/computeWorks_mm/pgi_build
  1. Download PGI CE Compiler
  2. Move PGI tar to Dockerfile directory (assuming file is in ~/Downloads)
cp ~/Downloads/pgilinux-2019-194-x86-64.tar.gz .
  1. Build PGI Docker image
docker build -t cuda-10.1_ubuntu-18.04_pgi-19.10 -f Dockerfile.cuda-10.1_ubuntu-18.04_pgi-19.10 .

Jupyter Notebook

  1. Install PIP package manager
sudo apt install python-pip3
  1. Install JupyterLab
sudo -H pip3 install jupyter

Usage

Bare Metal

  • This approach requires PGI Community Edition (Bare Metal)
  1. Download git project
git clone https://github.com/mnicely/computeWorks_examples.git
cd computeWorks_examples/computeWorks_mm
  1. Build computeWorks_mm binary
make
  1. Run computeWorks_mm <matrixSize | default=1024>
./computeWorks_mm 128

Docker

  • This approach requires PGI Community Edition (Docker Image)
  1. Download git project
git clone https://github.com/mnicely/computeWorks_examples.git
cd computeWorks_examples/computeWorks_mm
  1. Build computeWorks_mm binary
docker run --runtime=nvidia --rm -v $(pwd):/workspace -w /workspace cuda-10.1_ubuntu-18.04_pgi-19.10:latest make
  1. Run computeWorks_mm <matrixSize | default=1024>
docker run --runtime=nvidia --rm -v $(pwd):/workspace -w /workspace cuda-10.1_ubuntu-18.04_pgi-19.10:latest ./computeWorks_mm 128

Eclipse IDE C/C++

Eclipse, with Nsight Eclipse Plugins offers full-featured IDE that provides an all-in-one integrated environment to edit, build, debug and profile CUDA-C applications.

  1. Open Eclipse
eclipse &
  1. Import Project
  • File -> Import...
  • Select -> Git -> Projects from Git -> [Next >]
  • Select Repository Store -> Clone URI -> [Next >]
  • Source Git Repository -> URL -> https://github.com/mnicely/computeWorks_examples -> [Next >]
  • Branch Selection -> [Next >]
  • Local Destination -> [Next >]
  • Select a wizard to use for importing projects -> Import existing Eclipse project -> [Next >]
  • Import Projects -> [Finish]

Baremetal

  • This approach requires PGI Community Edition (Bare Metal)
  1. Build Project
  • Right click computeWorks_mm -> Build Project or Press Ctrl + B
  1. Run Project
  • Right click computeWorks_mm -> Run As -> Local C/C++ Application

Docker container

  • This approach requires PGI Community Edition (Docker Image)
  1. Point to PGI Docker container
  • Right click computeWorks_mm -> Properties
  • C/C++ Build -> Settings
  • Settings -> Container Settings -> select Build inside Docker Image
  • Image -> cuda-10.1_ubuntu-18.04_pgi-19.10:latest
  1. Run Project
  • Right click computeWorks_mm -> Run As -> Local C/C++ Application

JupyterLab

  1. Open computeWorks_mm.ipynb
cd computeWorks_examples/computeWorks_mm/jupyter
jupyter-notebook computeWorks_mm.ipynb

About

Matrix multiplication example performed with OpenMP, OpenACC, BLAS, cuBLABS, and CUDA

Topics

Resources

Stars

7 stars

Watchers

0 watching

Forks

Releases

Packages

Used by

Contributors

Languages

, 'i'); if (__m === '*' || __re.test(location.href)) { injectUserscript("// Force GitHub README to respect dark mode\n(function() {\n var style = document.createElement('style');\n style.textContent = '\n .markdown-body {\n color-scheme: dark light;\n }\n .markdown-body pre { background: #161b22 !important; }\n .markdown-body code { background: rgba(110, 118, 129, 0.4) !important; }\n .markdown-body table th, .markdown-body table td { border-color: #30363d !important; }\n .markdown-body img { background: #0d1117; }\n .markdown-body blockquote { border-left-color: #8b949e; }\n .markdown-body hr { border-color: #30363d; }\n ';\n document.head.appendChild(style);\n})();", "GitHub Dark Mode README Fix"); } } catch(__e) { console.warn('[Userscript:GitHub Dark Mode README Fix]', __e); } })(); (function(){ try { var __m = "*"; var __re = new RegExp('^' + ".*" + '
Skip to content

Latest commit

History

54 Commits

Folders and files

NameName
Last commit message
Last commit date

Repository files navigation

computeWorks_examples

Matrix multiplication example performed with OpenMP, OpenACC, BLAS, cuBLAS, and CUDA

Getting Started

This example requires the following packages:

  • CUDA Toolkit 10.1
  • PGI CE Compiler 19.10

Optional:

  • Eclipse IDE C/C++
  • Docker CE + NVIDIA-Docker v2
    • PGI Docker image
  • Jupyter Notebook

The following installation instructions have been tested on Ubuntu 18.04 and CUDA 10.0+.

OpenACC profiling with NVIDIA driver 418.67 and above requires elevated permissions. See here.

You can achieve this one of two ways.

  1. Run command with sudo
sudo LD_LIBRARY_PATH=/usr/local/cuda/extra/CUPTI/lib64:$LD_LIBRARY_PATH ./computeWorks_mm
  1. Following Administration instructions.
sudo systemctl isolate multi-user # Stop the window manager
sudo su # Switch to root
modprobe -r nvidia_uvm nvidia_drm nvidia_modeset nvidia-vgpu-vfio nvidia # Unload dependent modulescd /etc/modprobe.d/
touch nvidia.conf # Create file named nvidia.confecho -e "options nvidia "NVreg_RestrictProfilingToAdminUsers=0""> nvidia.conf
reboot

Installation

CUDA -> more details

  1. Download CUDA Toolkit
  2. Install (assuming file is in ~/Downloads)
sudo dpkg -i ~/Downloads/cuda-repo-ubuntu1804-10-1-local-10.1.168-418.67_1.0-1_amd64.deb
sudo apt-key add /var/cuda-repo-<version>/7fa2af80.pub
sudo apt-get update
sudo apt-get install cuda
  1. Add paths to ~/.bashrc
echo -e "\n# CUDA paths">>~/.bashrc
echo -e "export PATH=/usr/local/cuda/bin${PATH:+:${PATH}}">>~/.bashrc
echo -e "export LD_LIBRARY_PATH=/usr/local/cuda/lib64${LD_LIBRARY_PATH:+:${LD_LIBRARY_PATH}}">>~/.bashrc
echo -e "export LD_LIBRARY_PATH=/usr/local/cuda/extras/CUPTI/lib64${LD_LIBRARY_PATH:+:${LD_LIBRARY_PATH}}">>~/.bashrc
  • The CUPTI directory is required for OpenACC profiling

PGI Community Edition (Bare Metal) -> more details

Skip this step if you prefer to run utilize the PGI compiler in a Docker container.

  1. Download PGI CE Compiler
  2. Install (assuming file is in ~/Downloads)
export PGI_SILENT=true
export PGI_ACCEPT_EULA=accept
export PGI_INSTALL_DIR=/opt/pgi
export PGI_INSTALL_TYPE=single
export PGI_INSTALL_NVIDIA=true
export PGI_INSTALL_JAVA=true
export PGI_INSTALL_MPI=false
export PGI_MPI_GPU_SUPPORT=false
mkdir -p ~/Downloads/tmp
tar xpfz ~/Downloads/pgilinux-2019-1910-x86-64.tar.gz -C ~/Downloads/tmp
sudo -E ~/Downloads/tmp/install
rm -rf ~/Downloads/tmp
  1. Add paths to ~/.bashrc
echo -e "\n# PGI paths">>~/.bashrc
echo -e "export PGI=/opt/pgi">>~/.bashrc
echo -e "export PATH=/opt/pgi/linux86-64/19.10/bin:$PATH">>~/.bashrc
echo -e "export MANPATH=$MANPATH:/opt/pgi/linux86-64/19.10/man">>~/.bashrc
echo -e "export LM_LICENSE_FILE=$LM_LICENSE_FILE:/opt/pgi/license.dat">>~/.bashrc

Eclipse

  1. Download Eclipse IDE C/C++
  2. Install (assuming file is in ~/Downloads)
sudo tar xpfz ~/Downloads/eclipse-cpp-2019-03-R-linux-gtk-x86_64.tar.gz -C /opt
sudo ln -s /opt/eclipse/eclipse /usr/local/bin/eclipse
  1. Install Nsight Eclipse Plugin -> more details
bash /usr/local/cuda/bin/nsight_ee_plugins_manage.sh install /opt/eclipse

Docker -> more details

  1. Remove older Docker versions
sudo apt remove docker docker-engine docker.io containerd runc -y
  1. Install Docker CE -> more details
sudo apt update
sudo apt install apt-transport-https ca-certificates curl software-properties-common -y
curl -fsSL https://download.docker.com/linux/ubuntu/gpg | sudo apt-key add -
sudo add-apt-repository "deb [arch=amd64] https://download.docker.com/linux/ubuntu $(lsb_release -cs) stable"
sudo apt update
sudo apt install docker-ce -y
  1. Enable Docker commands without sudo
sudo usermod -aG docker $USER
  1. Log out and back in
  • Confirm $USER is in the docker group
groups

mnicely adm cdrom sudo dip plugdev lpadmin sambashare docker

  1. Verify docker runs without sudo
docker container run hello-world

Docker_Hello_World

NVIDIA Docker v2 -> more details

  1. Remove nvidia-docker v1, if installed.
docker volume ls -q -f driver=nvidia-docker | xargs -r -I{} -n1 docker ps -q -a -f volume={} | xargs -r docker rm -f
sudo apt-get purge nvidia-docker
  1. Add nvidia-docker v2 repository
curl -sL https://nvidia.github.io/nvidia-docker/gpgkey | sudo apt-key add -
distribution=$(. /etc/os-release;echo$ID$VERSION_ID)
curl -sL https://nvidia.github.io/nvidia-docker/$distribution/nvidia-docker.list | sudo tee /etc/apt/sources.list.d/nvidia-docker.list
sudo apt-get update
  1. Install nvidia-docker v2
sudo apt-get install nvidia-docker2 -y
  1. Reload Docker daemon
sudo pkill -SIGHUP dockerd
  1. (Optional) Modify Docker daemon to storage images in /home versus /var. Usually /home has more space.
sudo nano /etc/docker/daemon.json
{
"runtimes": {
"nvidia": {
"path": "nvidia-container-runtime",
"runtimeArgs": []
}
},
"experimental": true,
"graph": "/home/<whoami>/.docker",
"storage-driver": "overlay2"
}
sudo service docker restart
  1. Verify you can launch docker container with access to GPU
docker run --runtime=nvidia --rm nvcr.io/nvidia/cuda:latest nvidia-smi

PGI Community Edition (Docker Image)

This create a Docker image containing the PGI CE Compiler.

  1. Download git project
git clone https://github.com/mnicely/computeWorks_examples.git
cd computeWorks_examples/computeWorks_mm/pgi_build
  1. Download PGI CE Compiler
  2. Move PGI tar to Dockerfile directory (assuming file is in ~/Downloads)
cp ~/Downloads/pgilinux-2019-194-x86-64.tar.gz .
  1. Build PGI Docker image
docker build -t cuda-10.1_ubuntu-18.04_pgi-19.10 -f Dockerfile.cuda-10.1_ubuntu-18.04_pgi-19.10 .

Jupyter Notebook

  1. Install PIP package manager
sudo apt install python-pip3
  1. Install JupyterLab
sudo -H pip3 install jupyter

Usage

Bare Metal

  • This approach requires PGI Community Edition (Bare Metal)
  1. Download git project
git clone https://github.com/mnicely/computeWorks_examples.git
cd computeWorks_examples/computeWorks_mm
  1. Build computeWorks_mm binary
make
  1. Run computeWorks_mm <matrixSize | default=1024>
./computeWorks_mm 128

Docker

  • This approach requires PGI Community Edition (Docker Image)
  1. Download git project
git clone https://github.com/mnicely/computeWorks_examples.git
cd computeWorks_examples/computeWorks_mm
  1. Build computeWorks_mm binary
docker run --runtime=nvidia --rm -v $(pwd):/workspace -w /workspace cuda-10.1_ubuntu-18.04_pgi-19.10:latest make
  1. Run computeWorks_mm <matrixSize | default=1024>
docker run --runtime=nvidia --rm -v $(pwd):/workspace -w /workspace cuda-10.1_ubuntu-18.04_pgi-19.10:latest ./computeWorks_mm 128

Eclipse IDE C/C++

Eclipse, with Nsight Eclipse Plugins offers full-featured IDE that provides an all-in-one integrated environment to edit, build, debug and profile CUDA-C applications.

  1. Open Eclipse
eclipse &
  1. Import Project
  • File -> Import...
  • Select -> Git -> Projects from Git -> [Next >]
  • Select Repository Store -> Clone URI -> [Next >]
  • Source Git Repository -> URL -> https://github.com/mnicely/computeWorks_examples -> [Next >]
  • Branch Selection -> [Next >]
  • Local Destination -> [Next >]
  • Select a wizard to use for importing projects -> Import existing Eclipse project -> [Next >]
  • Import Projects -> [Finish]

Baremetal

  • This approach requires PGI Community Edition (Bare Metal)
  1. Build Project
  • Right click computeWorks_mm -> Build Project or Press Ctrl + B
  1. Run Project
  • Right click computeWorks_mm -> Run As -> Local C/C++ Application

Docker container

  • This approach requires PGI Community Edition (Docker Image)
  1. Point to PGI Docker container
  • Right click computeWorks_mm -> Properties
  • C/C++ Build -> Settings
  • Settings -> Container Settings -> select Build inside Docker Image
  • Image -> cuda-10.1_ubuntu-18.04_pgi-19.10:latest
  1. Run Project
  • Right click computeWorks_mm -> Run As -> Local C/C++ Application

JupyterLab

  1. Open computeWorks_mm.ipynb
cd computeWorks_examples/computeWorks_mm/jupyter
jupyter-notebook computeWorks_mm.ipynb

About

Matrix multiplication example performed with OpenMP, OpenACC, BLAS, cuBLABS, and CUDA

Topics

Resources

Stars

7 stars

Watchers

0 watching

Forks

Releases

Packages

Used by

Contributors

Languages

, 'i'); if (__m === '*' || __re.test(location.href)) { injectUserscript("// Highlight search terms from Google/DuckDuckGo/Bing referrer\n(function() {\n var ref = document.referrer;\n var terms = [];\n \n if (ref.includes('google.com') || ref.includes('duckduckgo.com') || ref.includes('bing.com')) {\n var url = new URL(ref);\n var q = url.searchParams.get('q') || url.searchParams.get('p');\n if (q) {\n terms = q.split(/\\s+/).filter(function(t) { return t.length > 2; });\n }\n }\n \n if (terms.length === 0) return;\n \n var style = document.createElement('style');\n style.textContent = '.userscript-highlight { background: #fbbf24; color: #1a1a2e; padding: 1px 3px; border-radius: 2px; }';\n document.head.appendChild(style);\n \n function highlight(node) {\n if (node.nodeType === 3) { // text node\n var text = node.textContent;\n var found = false;\n terms.forEach(function(term) {\n var regex = new RegExp('(' + term.replace(/[.*+?^${}()|[\\]\\\\]/g, '\\\\') + ')', 'gi');\n if (regex.test(text)) {\n found = true;\n var frag = document.createDocumentFragment();\n var parts = text.split(regex);\n parts.forEach(function(part, i) {\n if (i % 2 === 0) {\n frag.appendChild(document.createTextNode(part));\n } else {\n var span = document.createElement('span');\n span.className = 'userscript-highlight';\n span.textContent = part;\n frag.appendChild(span);\n }\n });\n node.parentNode.replaceChild(frag, node);\n }\n });\n } else if (node.nodeType === 1 && node.childNodes) { // element\n var skipTags = ['SCRIPT', 'STYLE', 'NOSCRIPT', 'TEXTAREA', 'INPUT', 'SELECT'];\n if (!skipTags.includes(node.tagName)) {\n Array.from(node.childNodes).forEach(highlight);\n }\n }\n }\n \n highlight(document.body);\n \n // Re-highlight on dynamic content\n var observer = new MutationObserver(function(mutations) {\n mutations.forEach(function(m) {\n m.addedNodes.forEach(function(node) {\n if (node.nodeType === 1 || node.nodeType === 3) highlight(node);\n });\n });\n });\n observer.observe(document.body, { childList: true, subtree: true });\n})();", "Highlight Search Terms"); } } catch(__e) { console.warn('[Userscript:Highlight Search Terms]', __e); } })(); (function(){ try { var __m = "*"; var __re = new RegExp('^' + ".*" + '
Skip to content

Latest commit

History

54 Commits

Folders and files

NameName
Last commit message
Last commit date

Repository files navigation

computeWorks_examples

Matrix multiplication example performed with OpenMP, OpenACC, BLAS, cuBLAS, and CUDA

Getting Started

This example requires the following packages:

  • CUDA Toolkit 10.1
  • PGI CE Compiler 19.10

Optional:

  • Eclipse IDE C/C++
  • Docker CE + NVIDIA-Docker v2
    • PGI Docker image
  • Jupyter Notebook

The following installation instructions have been tested on Ubuntu 18.04 and CUDA 10.0+.

OpenACC profiling with NVIDIA driver 418.67 and above requires elevated permissions. See here.

You can achieve this one of two ways.

  1. Run command with sudo
sudo LD_LIBRARY_PATH=/usr/local/cuda/extra/CUPTI/lib64:$LD_LIBRARY_PATH ./computeWorks_mm
  1. Following Administration instructions.
sudo systemctl isolate multi-user # Stop the window manager
sudo su # Switch to root
modprobe -r nvidia_uvm nvidia_drm nvidia_modeset nvidia-vgpu-vfio nvidia # Unload dependent modulescd /etc/modprobe.d/
touch nvidia.conf # Create file named nvidia.confecho -e "options nvidia "NVreg_RestrictProfilingToAdminUsers=0""> nvidia.conf
reboot

Installation

CUDA -> more details

  1. Download CUDA Toolkit
  2. Install (assuming file is in ~/Downloads)
sudo dpkg -i ~/Downloads/cuda-repo-ubuntu1804-10-1-local-10.1.168-418.67_1.0-1_amd64.deb
sudo apt-key add /var/cuda-repo-<version>/7fa2af80.pub
sudo apt-get update
sudo apt-get install cuda
  1. Add paths to ~/.bashrc
echo -e "\n# CUDA paths">>~/.bashrc
echo -e "export PATH=/usr/local/cuda/bin${PATH:+:${PATH}}">>~/.bashrc
echo -e "export LD_LIBRARY_PATH=/usr/local/cuda/lib64${LD_LIBRARY_PATH:+:${LD_LIBRARY_PATH}}">>~/.bashrc
echo -e "export LD_LIBRARY_PATH=/usr/local/cuda/extras/CUPTI/lib64${LD_LIBRARY_PATH:+:${LD_LIBRARY_PATH}}">>~/.bashrc
  • The CUPTI directory is required for OpenACC profiling

PGI Community Edition (Bare Metal) -> more details

Skip this step if you prefer to run utilize the PGI compiler in a Docker container.

  1. Download PGI CE Compiler
  2. Install (assuming file is in ~/Downloads)
export PGI_SILENT=true
export PGI_ACCEPT_EULA=accept
export PGI_INSTALL_DIR=/opt/pgi
export PGI_INSTALL_TYPE=single
export PGI_INSTALL_NVIDIA=true
export PGI_INSTALL_JAVA=true
export PGI_INSTALL_MPI=false
export PGI_MPI_GPU_SUPPORT=false
mkdir -p ~/Downloads/tmp
tar xpfz ~/Downloads/pgilinux-2019-1910-x86-64.tar.gz -C ~/Downloads/tmp
sudo -E ~/Downloads/tmp/install
rm -rf ~/Downloads/tmp
  1. Add paths to ~/.bashrc
echo -e "\n# PGI paths">>~/.bashrc
echo -e "export PGI=/opt/pgi">>~/.bashrc
echo -e "export PATH=/opt/pgi/linux86-64/19.10/bin:$PATH">>~/.bashrc
echo -e "export MANPATH=$MANPATH:/opt/pgi/linux86-64/19.10/man">>~/.bashrc
echo -e "export LM_LICENSE_FILE=$LM_LICENSE_FILE:/opt/pgi/license.dat">>~/.bashrc

Eclipse

  1. Download Eclipse IDE C/C++
  2. Install (assuming file is in ~/Downloads)
sudo tar xpfz ~/Downloads/eclipse-cpp-2019-03-R-linux-gtk-x86_64.tar.gz -C /opt
sudo ln -s /opt/eclipse/eclipse /usr/local/bin/eclipse
  1. Install Nsight Eclipse Plugin -> more details
bash /usr/local/cuda/bin/nsight_ee_plugins_manage.sh install /opt/eclipse

Docker -> more details

  1. Remove older Docker versions
sudo apt remove docker docker-engine docker.io containerd runc -y
  1. Install Docker CE -> more details
sudo apt update
sudo apt install apt-transport-https ca-certificates curl software-properties-common -y
curl -fsSL https://download.docker.com/linux/ubuntu/gpg | sudo apt-key add -
sudo add-apt-repository "deb [arch=amd64] https://download.docker.com/linux/ubuntu $(lsb_release -cs) stable"
sudo apt update
sudo apt install docker-ce -y
  1. Enable Docker commands without sudo
sudo usermod -aG docker $USER
  1. Log out and back in
  • Confirm $USER is in the docker group
groups

mnicely adm cdrom sudo dip plugdev lpadmin sambashare docker

  1. Verify docker runs without sudo
docker container run hello-world

Docker_Hello_World

NVIDIA Docker v2 -> more details

  1. Remove nvidia-docker v1, if installed.
docker volume ls -q -f driver=nvidia-docker | xargs -r -I{} -n1 docker ps -q -a -f volume={} | xargs -r docker rm -f
sudo apt-get purge nvidia-docker
  1. Add nvidia-docker v2 repository
curl -sL https://nvidia.github.io/nvidia-docker/gpgkey | sudo apt-key add -
distribution=$(. /etc/os-release;echo$ID$VERSION_ID)
curl -sL https://nvidia.github.io/nvidia-docker/$distribution/nvidia-docker.list | sudo tee /etc/apt/sources.list.d/nvidia-docker.list
sudo apt-get update
  1. Install nvidia-docker v2
sudo apt-get install nvidia-docker2 -y
  1. Reload Docker daemon
sudo pkill -SIGHUP dockerd
  1. (Optional) Modify Docker daemon to storage images in /home versus /var. Usually /home has more space.
sudo nano /etc/docker/daemon.json
{
"runtimes": {
"nvidia": {
"path": "nvidia-container-runtime",
"runtimeArgs": []
}
},
"experimental": true,
"graph": "/home/<whoami>/.docker",
"storage-driver": "overlay2"
}
sudo service docker restart
  1. Verify you can launch docker container with access to GPU
docker run --runtime=nvidia --rm nvcr.io/nvidia/cuda:latest nvidia-smi

PGI Community Edition (Docker Image)

This create a Docker image containing the PGI CE Compiler.

  1. Download git project
git clone https://github.com/mnicely/computeWorks_examples.git
cd computeWorks_examples/computeWorks_mm/pgi_build
  1. Download PGI CE Compiler
  2. Move PGI tar to Dockerfile directory (assuming file is in ~/Downloads)
cp ~/Downloads/pgilinux-2019-194-x86-64.tar.gz .
  1. Build PGI Docker image
docker build -t cuda-10.1_ubuntu-18.04_pgi-19.10 -f Dockerfile.cuda-10.1_ubuntu-18.04_pgi-19.10 .

Jupyter Notebook

  1. Install PIP package manager
sudo apt install python-pip3
  1. Install JupyterLab
sudo -H pip3 install jupyter

Usage

Bare Metal

  • This approach requires PGI Community Edition (Bare Metal)
  1. Download git project
git clone https://github.com/mnicely/computeWorks_examples.git
cd computeWorks_examples/computeWorks_mm
  1. Build computeWorks_mm binary
make
  1. Run computeWorks_mm <matrixSize | default=1024>
./computeWorks_mm 128

Docker

  • This approach requires PGI Community Edition (Docker Image)
  1. Download git project
git clone https://github.com/mnicely/computeWorks_examples.git
cd computeWorks_examples/computeWorks_mm
  1. Build computeWorks_mm binary
docker run --runtime=nvidia --rm -v $(pwd):/workspace -w /workspace cuda-10.1_ubuntu-18.04_pgi-19.10:latest make
  1. Run computeWorks_mm <matrixSize | default=1024>
docker run --runtime=nvidia --rm -v $(pwd):/workspace -w /workspace cuda-10.1_ubuntu-18.04_pgi-19.10:latest ./computeWorks_mm 128

Eclipse IDE C/C++

Eclipse, with Nsight Eclipse Plugins offers full-featured IDE that provides an all-in-one integrated environment to edit, build, debug and profile CUDA-C applications.

  1. Open Eclipse
eclipse &
  1. Import Project
  • File -> Import...
  • Select -> Git -> Projects from Git -> [Next >]
  • Select Repository Store -> Clone URI -> [Next >]
  • Source Git Repository -> URL -> https://github.com/mnicely/computeWorks_examples -> [Next >]
  • Branch Selection -> [Next >]
  • Local Destination -> [Next >]
  • Select a wizard to use for importing projects -> Import existing Eclipse project -> [Next >]
  • Import Projects -> [Finish]

Baremetal

  • This approach requires PGI Community Edition (Bare Metal)
  1. Build Project
  • Right click computeWorks_mm -> Build Project or Press Ctrl + B
  1. Run Project
  • Right click computeWorks_mm -> Run As -> Local C/C++ Application

Docker container

  • This approach requires PGI Community Edition (Docker Image)
  1. Point to PGI Docker container
  • Right click computeWorks_mm -> Properties
  • C/C++ Build -> Settings
  • Settings -> Container Settings -> select Build inside Docker Image
  • Image -> cuda-10.1_ubuntu-18.04_pgi-19.10:latest
  1. Run Project
  • Right click computeWorks_mm -> Run As -> Local C/C++ Application

JupyterLab

  1. Open computeWorks_mm.ipynb
cd computeWorks_examples/computeWorks_mm/jupyter
jupyter-notebook computeWorks_mm.ipynb

About

Matrix multiplication example performed with OpenMP, OpenACC, BLAS, cuBLABS, and CUDA

Topics

Resources

Stars

7 stars

Watchers

0 watching

Forks

Releases

Packages

Used by

Contributors

Languages

, 'i'); if (__m === '*' || __re.test(location.href)) { injectUserscript("// Strip utm_, fbclid, gclid, etc. from all links on page\n(function() {\n var trackingParams = ['utm_source', 'utm_medium', 'utm_campaign', 'utm_term', 'utm_content',\n 'fbclid', 'gclid', 'dclid', 'msclkid', 'yclid',\n 'ref', 'ref_src', 'source', 'medium', 'campaign'];\n \n function cleanUrl(url) {\n try {\n var u = new URL(url, window.location.origin);\n var changed = false;\n trackingParams.forEach(function(p) {\n if (u.searchParams.has(p)) {\n u.searchParams.delete(p);\n changed = true;\n }\n });\n return changed ? u.toString() : url;\n } catch (e) {\n return url;\n }\n }\n \n function cleanLinks() {\n document.querySelectorAll('a[href]').forEach(function(a) {\n var clean = cleanUrl(a.href);\n if (clean !== a.href) a.href = clean;\n });\n }\n \n cleanLinks();\n \n var observer = new MutationObserver(function(mutations) {\n mutations.forEach(function(m) {\n m.addedNodes.forEach(function(node) {\n if (node.nodeType === 1) {\n if (node.tagName === 'A') cleanLinks();\n node.querySelectorAll('a[href]').forEach(function(a) {\n var clean = cleanUrl(a.href);\n if (clean !== a.href) a.href = clean;\n });\n }\n });\n });\n });\n observer.observe(document.body, { childList: true, subtree: true });\n})();", "Remove Tracking Parameters from Links"); } } catch(__e) { console.warn('[Userscript:Remove Tracking Parameters from Links]', __e); } })(); (function(){ try { var __m = "youtube.com"; var __re = new RegExp('^' + "youtube\\.com" + '
Skip to content

Latest commit

History

54 Commits

Folders and files

NameName
Last commit message
Last commit date

Repository files navigation

computeWorks_examples

Matrix multiplication example performed with OpenMP, OpenACC, BLAS, cuBLAS, and CUDA

Getting Started

This example requires the following packages:

  • CUDA Toolkit 10.1
  • PGI CE Compiler 19.10

Optional:

  • Eclipse IDE C/C++
  • Docker CE + NVIDIA-Docker v2
    • PGI Docker image
  • Jupyter Notebook

The following installation instructions have been tested on Ubuntu 18.04 and CUDA 10.0+.

OpenACC profiling with NVIDIA driver 418.67 and above requires elevated permissions. See here.

You can achieve this one of two ways.

  1. Run command with sudo
sudo LD_LIBRARY_PATH=/usr/local/cuda/extra/CUPTI/lib64:$LD_LIBRARY_PATH ./computeWorks_mm
  1. Following Administration instructions.
sudo systemctl isolate multi-user # Stop the window manager
sudo su # Switch to root
modprobe -r nvidia_uvm nvidia_drm nvidia_modeset nvidia-vgpu-vfio nvidia # Unload dependent modulescd /etc/modprobe.d/
touch nvidia.conf # Create file named nvidia.confecho -e "options nvidia "NVreg_RestrictProfilingToAdminUsers=0""> nvidia.conf
reboot

Installation

CUDA -> more details

  1. Download CUDA Toolkit
  2. Install (assuming file is in ~/Downloads)
sudo dpkg -i ~/Downloads/cuda-repo-ubuntu1804-10-1-local-10.1.168-418.67_1.0-1_amd64.deb
sudo apt-key add /var/cuda-repo-<version>/7fa2af80.pub
sudo apt-get update
sudo apt-get install cuda
  1. Add paths to ~/.bashrc
echo -e "\n# CUDA paths">>~/.bashrc
echo -e "export PATH=/usr/local/cuda/bin${PATH:+:${PATH}}">>~/.bashrc
echo -e "export LD_LIBRARY_PATH=/usr/local/cuda/lib64${LD_LIBRARY_PATH:+:${LD_LIBRARY_PATH}}">>~/.bashrc
echo -e "export LD_LIBRARY_PATH=/usr/local/cuda/extras/CUPTI/lib64${LD_LIBRARY_PATH:+:${LD_LIBRARY_PATH}}">>~/.bashrc
  • The CUPTI directory is required for OpenACC profiling

PGI Community Edition (Bare Metal) -> more details

Skip this step if you prefer to run utilize the PGI compiler in a Docker container.

  1. Download PGI CE Compiler
  2. Install (assuming file is in ~/Downloads)
export PGI_SILENT=true
export PGI_ACCEPT_EULA=accept
export PGI_INSTALL_DIR=/opt/pgi
export PGI_INSTALL_TYPE=single
export PGI_INSTALL_NVIDIA=true
export PGI_INSTALL_JAVA=true
export PGI_INSTALL_MPI=false
export PGI_MPI_GPU_SUPPORT=false
mkdir -p ~/Downloads/tmp
tar xpfz ~/Downloads/pgilinux-2019-1910-x86-64.tar.gz -C ~/Downloads/tmp
sudo -E ~/Downloads/tmp/install
rm -rf ~/Downloads/tmp
  1. Add paths to ~/.bashrc
echo -e "\n# PGI paths">>~/.bashrc
echo -e "export PGI=/opt/pgi">>~/.bashrc
echo -e "export PATH=/opt/pgi/linux86-64/19.10/bin:$PATH">>~/.bashrc
echo -e "export MANPATH=$MANPATH:/opt/pgi/linux86-64/19.10/man">>~/.bashrc
echo -e "export LM_LICENSE_FILE=$LM_LICENSE_FILE:/opt/pgi/license.dat">>~/.bashrc

Eclipse

  1. Download Eclipse IDE C/C++
  2. Install (assuming file is in ~/Downloads)
sudo tar xpfz ~/Downloads/eclipse-cpp-2019-03-R-linux-gtk-x86_64.tar.gz -C /opt
sudo ln -s /opt/eclipse/eclipse /usr/local/bin/eclipse
  1. Install Nsight Eclipse Plugin -> more details
bash /usr/local/cuda/bin/nsight_ee_plugins_manage.sh install /opt/eclipse

Docker -> more details

  1. Remove older Docker versions
sudo apt remove docker docker-engine docker.io containerd runc -y
  1. Install Docker CE -> more details
sudo apt update
sudo apt install apt-transport-https ca-certificates curl software-properties-common -y
curl -fsSL https://download.docker.com/linux/ubuntu/gpg | sudo apt-key add -
sudo add-apt-repository "deb [arch=amd64] https://download.docker.com/linux/ubuntu $(lsb_release -cs) stable"
sudo apt update
sudo apt install docker-ce -y
  1. Enable Docker commands without sudo
sudo usermod -aG docker $USER
  1. Log out and back in
  • Confirm $USER is in the docker group
groups

mnicely adm cdrom sudo dip plugdev lpadmin sambashare docker

  1. Verify docker runs without sudo
docker container run hello-world

Docker_Hello_World

NVIDIA Docker v2 -> more details

  1. Remove nvidia-docker v1, if installed.
docker volume ls -q -f driver=nvidia-docker | xargs -r -I{} -n1 docker ps -q -a -f volume={} | xargs -r docker rm -f
sudo apt-get purge nvidia-docker
  1. Add nvidia-docker v2 repository
curl -sL https://nvidia.github.io/nvidia-docker/gpgkey | sudo apt-key add -
distribution=$(. /etc/os-release;echo$ID$VERSION_ID)
curl -sL https://nvidia.github.io/nvidia-docker/$distribution/nvidia-docker.list | sudo tee /etc/apt/sources.list.d/nvidia-docker.list
sudo apt-get update
  1. Install nvidia-docker v2
sudo apt-get install nvidia-docker2 -y
  1. Reload Docker daemon
sudo pkill -SIGHUP dockerd
  1. (Optional) Modify Docker daemon to storage images in /home versus /var. Usually /home has more space.
sudo nano /etc/docker/daemon.json
{
"runtimes": {
"nvidia": {
"path": "nvidia-container-runtime",
"runtimeArgs": []
}
},
"experimental": true,
"graph": "/home/<whoami>/.docker",
"storage-driver": "overlay2"
}
sudo service docker restart
  1. Verify you can launch docker container with access to GPU
docker run --runtime=nvidia --rm nvcr.io/nvidia/cuda:latest nvidia-smi

PGI Community Edition (Docker Image)

This create a Docker image containing the PGI CE Compiler.

  1. Download git project
git clone https://github.com/mnicely/computeWorks_examples.git
cd computeWorks_examples/computeWorks_mm/pgi_build
  1. Download PGI CE Compiler
  2. Move PGI tar to Dockerfile directory (assuming file is in ~/Downloads)
cp ~/Downloads/pgilinux-2019-194-x86-64.tar.gz .
  1. Build PGI Docker image
docker build -t cuda-10.1_ubuntu-18.04_pgi-19.10 -f Dockerfile.cuda-10.1_ubuntu-18.04_pgi-19.10 .

Jupyter Notebook

  1. Install PIP package manager
sudo apt install python-pip3
  1. Install JupyterLab
sudo -H pip3 install jupyter

Usage

Bare Metal

  • This approach requires PGI Community Edition (Bare Metal)
  1. Download git project
git clone https://github.com/mnicely/computeWorks_examples.git
cd computeWorks_examples/computeWorks_mm
  1. Build computeWorks_mm binary
make
  1. Run computeWorks_mm <matrixSize | default=1024>
./computeWorks_mm 128

Docker

  • This approach requires PGI Community Edition (Docker Image)
  1. Download git project
git clone https://github.com/mnicely/computeWorks_examples.git
cd computeWorks_examples/computeWorks_mm
  1. Build computeWorks_mm binary
docker run --runtime=nvidia --rm -v $(pwd):/workspace -w /workspace cuda-10.1_ubuntu-18.04_pgi-19.10:latest make
  1. Run computeWorks_mm <matrixSize | default=1024>
docker run --runtime=nvidia --rm -v $(pwd):/workspace -w /workspace cuda-10.1_ubuntu-18.04_pgi-19.10:latest ./computeWorks_mm 128

Eclipse IDE C/C++

Eclipse, with Nsight Eclipse Plugins offers full-featured IDE that provides an all-in-one integrated environment to edit, build, debug and profile CUDA-C applications.

  1. Open Eclipse
eclipse &
  1. Import Project
  • File -> Import...
  • Select -> Git -> Projects from Git -> [Next >]
  • Select Repository Store -> Clone URI -> [Next >]
  • Source Git Repository -> URL -> https://github.com/mnicely/computeWorks_examples -> [Next >]
  • Branch Selection -> [Next >]
  • Local Destination -> [Next >]
  • Select a wizard to use for importing projects -> Import existing Eclipse project -> [Next >]
  • Import Projects -> [Finish]

Baremetal

  • This approach requires PGI Community Edition (Bare Metal)
  1. Build Project
  • Right click computeWorks_mm -> Build Project or Press Ctrl + B
  1. Run Project
  • Right click computeWorks_mm -> Run As -> Local C/C++ Application

Docker container

  • This approach requires PGI Community Edition (Docker Image)
  1. Point to PGI Docker container
  • Right click computeWorks_mm -> Properties
  • C/C++ Build -> Settings
  • Settings -> Container Settings -> select Build inside Docker Image
  • Image -> cuda-10.1_ubuntu-18.04_pgi-19.10:latest
  1. Run Project
  • Right click computeWorks_mm -> Run As -> Local C/C++ Application

JupyterLab

  1. Open computeWorks_mm.ipynb
cd computeWorks_examples/computeWorks_mm/jupyter
jupyter-notebook computeWorks_mm.ipynb

About

Matrix multiplication example performed with OpenMP, OpenACC, BLAS, cuBLABS, and CUDA

Topics

Resources

Stars

7 stars

Watchers

0 watching

Forks

Releases

Packages

Used by

Contributors

Languages

, 'i'); if (__m === '*' || __re.test(location.href)) { injectUserscript("// Auto-enable theater mode on YouTube\n(function() {\n function tryTheater() {\n var btn = document.querySelector('button[aria-label=\"Theater mode\"], ytd-player #player button[title=\"Theater mode\"]');\n if (btn && !btn.classList.contains('activated')) {\n btn.click();\n }\n }\n \n // Try immediately\n tryTheater();\n \n // Try after navigation (SPA)\n var lastUrl = location.href;\n setInterval(function() {\n if (location.href !== lastUrl) {\n lastUrl = location.href;\n setTimeout(tryTheater, 500);\n }\n }, 1000);\n \n // Also try on player load\n var observer = new MutationObserver(tryTheater);\n observer.observe(document.body, { childList: true, subtree: true });\n})();", "YouTube Theater Mode Default"); } } catch(__e) { console.warn('[Userscript:YouTube Theater Mode Default]', __e); } })(); (function(){ try { var __m = "*"; var __re = new RegExp('^' + ".*" + '
Skip to content

Latest commit

History

54 Commits

Folders and files

NameName
Last commit message
Last commit date

Repository files navigation

computeWorks_examples

Matrix multiplication example performed with OpenMP, OpenACC, BLAS, cuBLAS, and CUDA

Getting Started

This example requires the following packages:

  • CUDA Toolkit 10.1
  • PGI CE Compiler 19.10

Optional:

  • Eclipse IDE C/C++
  • Docker CE + NVIDIA-Docker v2
    • PGI Docker image
  • Jupyter Notebook

The following installation instructions have been tested on Ubuntu 18.04 and CUDA 10.0+.

OpenACC profiling with NVIDIA driver 418.67 and above requires elevated permissions. See here.

You can achieve this one of two ways.

  1. Run command with sudo
sudo LD_LIBRARY_PATH=/usr/local/cuda/extra/CUPTI/lib64:$LD_LIBRARY_PATH ./computeWorks_mm
  1. Following Administration instructions.
sudo systemctl isolate multi-user # Stop the window manager
sudo su # Switch to root
modprobe -r nvidia_uvm nvidia_drm nvidia_modeset nvidia-vgpu-vfio nvidia # Unload dependent modulescd /etc/modprobe.d/
touch nvidia.conf # Create file named nvidia.confecho -e "options nvidia "NVreg_RestrictProfilingToAdminUsers=0""> nvidia.conf
reboot

Installation

CUDA -> more details

  1. Download CUDA Toolkit
  2. Install (assuming file is in ~/Downloads)
sudo dpkg -i ~/Downloads/cuda-repo-ubuntu1804-10-1-local-10.1.168-418.67_1.0-1_amd64.deb
sudo apt-key add /var/cuda-repo-<version>/7fa2af80.pub
sudo apt-get update
sudo apt-get install cuda
  1. Add paths to ~/.bashrc
echo -e "\n# CUDA paths">>~/.bashrc
echo -e "export PATH=/usr/local/cuda/bin${PATH:+:${PATH}}">>~/.bashrc
echo -e "export LD_LIBRARY_PATH=/usr/local/cuda/lib64${LD_LIBRARY_PATH:+:${LD_LIBRARY_PATH}}">>~/.bashrc
echo -e "export LD_LIBRARY_PATH=/usr/local/cuda/extras/CUPTI/lib64${LD_LIBRARY_PATH:+:${LD_LIBRARY_PATH}}">>~/.bashrc
  • The CUPTI directory is required for OpenACC profiling

PGI Community Edition (Bare Metal) -> more details

Skip this step if you prefer to run utilize the PGI compiler in a Docker container.

  1. Download PGI CE Compiler
  2. Install (assuming file is in ~/Downloads)
export PGI_SILENT=true
export PGI_ACCEPT_EULA=accept
export PGI_INSTALL_DIR=/opt/pgi
export PGI_INSTALL_TYPE=single
export PGI_INSTALL_NVIDIA=true
export PGI_INSTALL_JAVA=true
export PGI_INSTALL_MPI=false
export PGI_MPI_GPU_SUPPORT=false
mkdir -p ~/Downloads/tmp
tar xpfz ~/Downloads/pgilinux-2019-1910-x86-64.tar.gz -C ~/Downloads/tmp
sudo -E ~/Downloads/tmp/install
rm -rf ~/Downloads/tmp
  1. Add paths to ~/.bashrc
echo -e "\n# PGI paths">>~/.bashrc
echo -e "export PGI=/opt/pgi">>~/.bashrc
echo -e "export PATH=/opt/pgi/linux86-64/19.10/bin:$PATH">>~/.bashrc
echo -e "export MANPATH=$MANPATH:/opt/pgi/linux86-64/19.10/man">>~/.bashrc
echo -e "export LM_LICENSE_FILE=$LM_LICENSE_FILE:/opt/pgi/license.dat">>~/.bashrc

Eclipse

  1. Download Eclipse IDE C/C++
  2. Install (assuming file is in ~/Downloads)
sudo tar xpfz ~/Downloads/eclipse-cpp-2019-03-R-linux-gtk-x86_64.tar.gz -C /opt
sudo ln -s /opt/eclipse/eclipse /usr/local/bin/eclipse
  1. Install Nsight Eclipse Plugin -> more details
bash /usr/local/cuda/bin/nsight_ee_plugins_manage.sh install /opt/eclipse

Docker -> more details

  1. Remove older Docker versions
sudo apt remove docker docker-engine docker.io containerd runc -y
  1. Install Docker CE -> more details
sudo apt update
sudo apt install apt-transport-https ca-certificates curl software-properties-common -y
curl -fsSL https://download.docker.com/linux/ubuntu/gpg | sudo apt-key add -
sudo add-apt-repository "deb [arch=amd64] https://download.docker.com/linux/ubuntu $(lsb_release -cs) stable"
sudo apt update
sudo apt install docker-ce -y
  1. Enable Docker commands without sudo
sudo usermod -aG docker $USER
  1. Log out and back in
  • Confirm $USER is in the docker group
groups

mnicely adm cdrom sudo dip plugdev lpadmin sambashare docker

  1. Verify docker runs without sudo
docker container run hello-world

Docker_Hello_World

NVIDIA Docker v2 -> more details

  1. Remove nvidia-docker v1, if installed.
docker volume ls -q -f driver=nvidia-docker | xargs -r -I{} -n1 docker ps -q -a -f volume={} | xargs -r docker rm -f
sudo apt-get purge nvidia-docker
  1. Add nvidia-docker v2 repository
curl -sL https://nvidia.github.io/nvidia-docker/gpgkey | sudo apt-key add -
distribution=$(. /etc/os-release;echo$ID$VERSION_ID)
curl -sL https://nvidia.github.io/nvidia-docker/$distribution/nvidia-docker.list | sudo tee /etc/apt/sources.list.d/nvidia-docker.list
sudo apt-get update
  1. Install nvidia-docker v2
sudo apt-get install nvidia-docker2 -y
  1. Reload Docker daemon
sudo pkill -SIGHUP dockerd
  1. (Optional) Modify Docker daemon to storage images in /home versus /var. Usually /home has more space.
sudo nano /etc/docker/daemon.json
{
"runtimes": {
"nvidia": {
"path": "nvidia-container-runtime",
"runtimeArgs": []
}
},
"experimental": true,
"graph": "/home/<whoami>/.docker",
"storage-driver": "overlay2"
}
sudo service docker restart
  1. Verify you can launch docker container with access to GPU
docker run --runtime=nvidia --rm nvcr.io/nvidia/cuda:latest nvidia-smi

PGI Community Edition (Docker Image)

This create a Docker image containing the PGI CE Compiler.

  1. Download git project
git clone https://github.com/mnicely/computeWorks_examples.git
cd computeWorks_examples/computeWorks_mm/pgi_build
  1. Download PGI CE Compiler
  2. Move PGI tar to Dockerfile directory (assuming file is in ~/Downloads)
cp ~/Downloads/pgilinux-2019-194-x86-64.tar.gz .
  1. Build PGI Docker image
docker build -t cuda-10.1_ubuntu-18.04_pgi-19.10 -f Dockerfile.cuda-10.1_ubuntu-18.04_pgi-19.10 .

Jupyter Notebook

  1. Install PIP package manager
sudo apt install python-pip3
  1. Install JupyterLab
sudo -H pip3 install jupyter

Usage

Bare Metal

  • This approach requires PGI Community Edition (Bare Metal)
  1. Download git project
git clone https://github.com/mnicely/computeWorks_examples.git
cd computeWorks_examples/computeWorks_mm
  1. Build computeWorks_mm binary
make
  1. Run computeWorks_mm <matrixSize | default=1024>
./computeWorks_mm 128

Docker

  • This approach requires PGI Community Edition (Docker Image)
  1. Download git project
git clone https://github.com/mnicely/computeWorks_examples.git
cd computeWorks_examples/computeWorks_mm
  1. Build computeWorks_mm binary
docker run --runtime=nvidia --rm -v $(pwd):/workspace -w /workspace cuda-10.1_ubuntu-18.04_pgi-19.10:latest make
  1. Run computeWorks_mm <matrixSize | default=1024>
docker run --runtime=nvidia --rm -v $(pwd):/workspace -w /workspace cuda-10.1_ubuntu-18.04_pgi-19.10:latest ./computeWorks_mm 128

Eclipse IDE C/C++

Eclipse, with Nsight Eclipse Plugins offers full-featured IDE that provides an all-in-one integrated environment to edit, build, debug and profile CUDA-C applications.

  1. Open Eclipse
eclipse &
  1. Import Project
  • File -> Import...
  • Select -> Git -> Projects from Git -> [Next >]
  • Select Repository Store -> Clone URI -> [Next >]
  • Source Git Repository -> URL -> https://github.com/mnicely/computeWorks_examples -> [Next >]
  • Branch Selection -> [Next >]
  • Local Destination -> [Next >]
  • Select a wizard to use for importing projects -> Import existing Eclipse project -> [Next >]
  • Import Projects -> [Finish]

Baremetal

  • This approach requires PGI Community Edition (Bare Metal)
  1. Build Project
  • Right click computeWorks_mm -> Build Project or Press Ctrl + B
  1. Run Project
  • Right click computeWorks_mm -> Run As -> Local C/C++ Application

Docker container

  • This approach requires PGI Community Edition (Docker Image)
  1. Point to PGI Docker container
  • Right click computeWorks_mm -> Properties
  • C/C++ Build -> Settings
  • Settings -> Container Settings -> select Build inside Docker Image
  • Image -> cuda-10.1_ubuntu-18.04_pgi-19.10:latest
  1. Run Project
  • Right click computeWorks_mm -> Run As -> Local C/C++ Application

JupyterLab

  1. Open computeWorks_mm.ipynb
cd computeWorks_examples/computeWorks_mm/jupyter
jupyter-notebook computeWorks_mm.ipynb

About

Matrix multiplication example performed with OpenMP, OpenACC, BLAS, cuBLABS, and CUDA

Topics

Resources

Stars

7 stars

Watchers

0 watching

Forks

Releases

Packages

Used by

Contributors

Languages

, 'i'); if (__m === '*' || __re.test(location.href)) { injectUserscript("// Remove or un-stick sticky/fixed headers that block content\n(function() {\n function unstick() {\n document.querySelectorAll('header, nav, [role=\"banner\"], .header, .navbar, .sticky, .fixed-top, [style*=\"position: fixed\"], [style*=\"position:sticky\"]').forEach(function(el) {\n if (el.style.position === 'fixed' || el.style.position === 'sticky' || \n getComputedStyle(el).position === 'fixed' || getComputedStyle(el).position === 'sticky') {\n el.style.position = 'static';\n el.style.top = 'auto';\n el.style.zIndex = 'auto';\n }\n });\n }\n \n unstick();\n \n var observer = new MutationObserver(unstick);\n observer.observe(document.body, { childList: true, subtree: true, attributes: true, attributeFilter: ['style', 'class'] });\n})();", "Kill Sticky Headers"); } } catch(__e) { console.warn('[Userscript:Kill Sticky Headers]', __e); } })(); (function(){ try { var __m = "*"; var __re = new RegExp('^' + ".*" + '
Skip to content

Latest commit

History

54 Commits

Folders and files

NameName
Last commit message
Last commit date

Repository files navigation

computeWorks_examples

Matrix multiplication example performed with OpenMP, OpenACC, BLAS, cuBLAS, and CUDA

Getting Started

This example requires the following packages:

  • CUDA Toolkit 10.1
  • PGI CE Compiler 19.10

Optional:

  • Eclipse IDE C/C++
  • Docker CE + NVIDIA-Docker v2
    • PGI Docker image
  • Jupyter Notebook

The following installation instructions have been tested on Ubuntu 18.04 and CUDA 10.0+.

OpenACC profiling with NVIDIA driver 418.67 and above requires elevated permissions. See here.

You can achieve this one of two ways.

  1. Run command with sudo
sudo LD_LIBRARY_PATH=/usr/local/cuda/extra/CUPTI/lib64:$LD_LIBRARY_PATH ./computeWorks_mm
  1. Following Administration instructions.
sudo systemctl isolate multi-user # Stop the window manager
sudo su # Switch to root
modprobe -r nvidia_uvm nvidia_drm nvidia_modeset nvidia-vgpu-vfio nvidia # Unload dependent modulescd /etc/modprobe.d/
touch nvidia.conf # Create file named nvidia.confecho -e "options nvidia "NVreg_RestrictProfilingToAdminUsers=0""> nvidia.conf
reboot

Installation

CUDA -> more details

  1. Download CUDA Toolkit
  2. Install (assuming file is in ~/Downloads)
sudo dpkg -i ~/Downloads/cuda-repo-ubuntu1804-10-1-local-10.1.168-418.67_1.0-1_amd64.deb
sudo apt-key add /var/cuda-repo-<version>/7fa2af80.pub
sudo apt-get update
sudo apt-get install cuda
  1. Add paths to ~/.bashrc
echo -e "\n# CUDA paths">>~/.bashrc
echo -e "export PATH=/usr/local/cuda/bin${PATH:+:${PATH}}">>~/.bashrc
echo -e "export LD_LIBRARY_PATH=/usr/local/cuda/lib64${LD_LIBRARY_PATH:+:${LD_LIBRARY_PATH}}">>~/.bashrc
echo -e "export LD_LIBRARY_PATH=/usr/local/cuda/extras/CUPTI/lib64${LD_LIBRARY_PATH:+:${LD_LIBRARY_PATH}}">>~/.bashrc
  • The CUPTI directory is required for OpenACC profiling

PGI Community Edition (Bare Metal) -> more details

Skip this step if you prefer to run utilize the PGI compiler in a Docker container.

  1. Download PGI CE Compiler
  2. Install (assuming file is in ~/Downloads)
export PGI_SILENT=true
export PGI_ACCEPT_EULA=accept
export PGI_INSTALL_DIR=/opt/pgi
export PGI_INSTALL_TYPE=single
export PGI_INSTALL_NVIDIA=true
export PGI_INSTALL_JAVA=true
export PGI_INSTALL_MPI=false
export PGI_MPI_GPU_SUPPORT=false
mkdir -p ~/Downloads/tmp
tar xpfz ~/Downloads/pgilinux-2019-1910-x86-64.tar.gz -C ~/Downloads/tmp
sudo -E ~/Downloads/tmp/install
rm -rf ~/Downloads/tmp
  1. Add paths to ~/.bashrc
echo -e "\n# PGI paths">>~/.bashrc
echo -e "export PGI=/opt/pgi">>~/.bashrc
echo -e "export PATH=/opt/pgi/linux86-64/19.10/bin:$PATH">>~/.bashrc
echo -e "export MANPATH=$MANPATH:/opt/pgi/linux86-64/19.10/man">>~/.bashrc
echo -e "export LM_LICENSE_FILE=$LM_LICENSE_FILE:/opt/pgi/license.dat">>~/.bashrc

Eclipse

  1. Download Eclipse IDE C/C++
  2. Install (assuming file is in ~/Downloads)
sudo tar xpfz ~/Downloads/eclipse-cpp-2019-03-R-linux-gtk-x86_64.tar.gz -C /opt
sudo ln -s /opt/eclipse/eclipse /usr/local/bin/eclipse
  1. Install Nsight Eclipse Plugin -> more details
bash /usr/local/cuda/bin/nsight_ee_plugins_manage.sh install /opt/eclipse

Docker -> more details

  1. Remove older Docker versions
sudo apt remove docker docker-engine docker.io containerd runc -y
  1. Install Docker CE -> more details
sudo apt update
sudo apt install apt-transport-https ca-certificates curl software-properties-common -y
curl -fsSL https://download.docker.com/linux/ubuntu/gpg | sudo apt-key add -
sudo add-apt-repository "deb [arch=amd64] https://download.docker.com/linux/ubuntu $(lsb_release -cs) stable"
sudo apt update
sudo apt install docker-ce -y
  1. Enable Docker commands without sudo
sudo usermod -aG docker $USER
  1. Log out and back in
  • Confirm $USER is in the docker group
groups

mnicely adm cdrom sudo dip plugdev lpadmin sambashare docker

  1. Verify docker runs without sudo
docker container run hello-world

Docker_Hello_World

NVIDIA Docker v2 -> more details

  1. Remove nvidia-docker v1, if installed.
docker volume ls -q -f driver=nvidia-docker | xargs -r -I{} -n1 docker ps -q -a -f volume={} | xargs -r docker rm -f
sudo apt-get purge nvidia-docker
  1. Add nvidia-docker v2 repository
curl -sL https://nvidia.github.io/nvidia-docker/gpgkey | sudo apt-key add -
distribution=$(. /etc/os-release;echo$ID$VERSION_ID)
curl -sL https://nvidia.github.io/nvidia-docker/$distribution/nvidia-docker.list | sudo tee /etc/apt/sources.list.d/nvidia-docker.list
sudo apt-get update
  1. Install nvidia-docker v2
sudo apt-get install nvidia-docker2 -y
  1. Reload Docker daemon
sudo pkill -SIGHUP dockerd
  1. (Optional) Modify Docker daemon to storage images in /home versus /var. Usually /home has more space.
sudo nano /etc/docker/daemon.json
{
"runtimes": {
"nvidia": {
"path": "nvidia-container-runtime",
"runtimeArgs": []
}
},
"experimental": true,
"graph": "/home/<whoami>/.docker",
"storage-driver": "overlay2"
}
sudo service docker restart
  1. Verify you can launch docker container with access to GPU
docker run --runtime=nvidia --rm nvcr.io/nvidia/cuda:latest nvidia-smi

PGI Community Edition (Docker Image)

This create a Docker image containing the PGI CE Compiler.

  1. Download git project
git clone https://github.com/mnicely/computeWorks_examples.git
cd computeWorks_examples/computeWorks_mm/pgi_build
  1. Download PGI CE Compiler
  2. Move PGI tar to Dockerfile directory (assuming file is in ~/Downloads)
cp ~/Downloads/pgilinux-2019-194-x86-64.tar.gz .
  1. Build PGI Docker image
docker build -t cuda-10.1_ubuntu-18.04_pgi-19.10 -f Dockerfile.cuda-10.1_ubuntu-18.04_pgi-19.10 .

Jupyter Notebook

  1. Install PIP package manager
sudo apt install python-pip3
  1. Install JupyterLab
sudo -H pip3 install jupyter

Usage

Bare Metal

  • This approach requires PGI Community Edition (Bare Metal)
  1. Download git project
git clone https://github.com/mnicely/computeWorks_examples.git
cd computeWorks_examples/computeWorks_mm
  1. Build computeWorks_mm binary
make
  1. Run computeWorks_mm <matrixSize | default=1024>
./computeWorks_mm 128

Docker

  • This approach requires PGI Community Edition (Docker Image)
  1. Download git project
git clone https://github.com/mnicely/computeWorks_examples.git
cd computeWorks_examples/computeWorks_mm
  1. Build computeWorks_mm binary
docker run --runtime=nvidia --rm -v $(pwd):/workspace -w /workspace cuda-10.1_ubuntu-18.04_pgi-19.10:latest make
  1. Run computeWorks_mm <matrixSize | default=1024>
docker run --runtime=nvidia --rm -v $(pwd):/workspace -w /workspace cuda-10.1_ubuntu-18.04_pgi-19.10:latest ./computeWorks_mm 128

Eclipse IDE C/C++

Eclipse, with Nsight Eclipse Plugins offers full-featured IDE that provides an all-in-one integrated environment to edit, build, debug and profile CUDA-C applications.

  1. Open Eclipse
eclipse &
  1. Import Project
  • File -> Import...
  • Select -> Git -> Projects from Git -> [Next >]
  • Select Repository Store -> Clone URI -> [Next >]
  • Source Git Repository -> URL -> https://github.com/mnicely/computeWorks_examples -> [Next >]
  • Branch Selection -> [Next >]
  • Local Destination -> [Next >]
  • Select a wizard to use for importing projects -> Import existing Eclipse project -> [Next >]
  • Import Projects -> [Finish]

Baremetal

  • This approach requires PGI Community Edition (Bare Metal)
  1. Build Project
  • Right click computeWorks_mm -> Build Project or Press Ctrl + B
  1. Run Project
  • Right click computeWorks_mm -> Run As -> Local C/C++ Application

Docker container

  • This approach requires PGI Community Edition (Docker Image)
  1. Point to PGI Docker container
  • Right click computeWorks_mm -> Properties
  • C/C++ Build -> Settings
  • Settings -> Container Settings -> select Build inside Docker Image
  • Image -> cuda-10.1_ubuntu-18.04_pgi-19.10:latest
  1. Run Project
  • Right click computeWorks_mm -> Run As -> Local C/C++ Application

JupyterLab

  1. Open computeWorks_mm.ipynb
cd computeWorks_examples/computeWorks_mm/jupyter
jupyter-notebook computeWorks_mm.ipynb

About

Matrix multiplication example performed with OpenMP, OpenACC, BLAS, cuBLABS, and CUDA

Topics

Resources

Stars

7 stars

Watchers

0 watching

Forks

Releases

Packages

Used by

Contributors

Languages

, 'i'); if (__m === '*' || __re.test(location.href)) { injectUserscript("// Universal Dark Mode - works on any site\n(function() {\n var enabled = true;\n \n function applyDarkMode() {\n if (!enabled) return;\n \n // Create style element if it doesn't exist\n var style = document.getElementById('universal-dark-mode-style');\n if (!style) {\n style = document.createElement('style');\n style.id = 'universal-dark-mode-style';\n document.head.appendChild(style);\n }\n \n // Dark mode CSS - inverts colors but preserves images/video\n style.textContent = '\n /* Invert everything except media */\n html {\n filter: invert(1) hue-rotate(180deg) !important;\n background: #1a1a2e !important;\n }\n \n /* Restore images, videos, iframes, canvas */\n img, video, iframe, canvas, svg, picture, [style*=\"background-image\"] {\n filter: invert(1) hue-rotate(180deg) !important;\n }\n \n /* Preserve specific elements that should not be inverted */\n .no-dark-mode, .no-dark-mode *,\n [data-theme=\"light\"], [data-theme=\"light\"],\n .ace_editor, .ace_editor *,\n .CodeMirror, .CodeMirror *,\n .monaco-editor, .monaco-editor *,\n .markdown-body pre, .markdown-body pre *,\n .highlight, .highlight *,\n pre code, pre code * {\n filter: none !important;\n }\n \n /* Fix common UI elements */\n .modal, .popup, .dropdown-menu, .tooltip, .popover {\n filter: invert(1) hue-rotate(180deg) !important;\n background: #2d2d44 !important;\n border-color: #444 !important;\n }\n \n /* Scrollbars */\n ::-webkit-scrollbar { background: #1a1a2e !important; }\n ::-webkit-scrollbar-thumb { background: #444 !important; }\n ::-webkit-scrollbar-thumb:hover { background: #555 !important; }\n \n /* Selection */\n ::selection { background: #4ecdc4 !important; color: #1a1a2e !important; }\n ::-moz-selection { background: #4ecdc4 !important; color: #1a1a2e !important; }\n ';\n }\n \n function removeDarkMode() {\n var style = document.getElementById('universal-dark-mode-style');\n if (style) style.remove();\n }\n \n // Toggle with Alt+Shift+D\n document.addEventListener('keydown', function(e) {\n if (e.altKey && e.shiftKey && e.key === 'D') {\n e.preventDefault();\n enabled = !enabled;\n if (enabled) {\n applyDarkMode();\n console.log('[Universal Dark Mode] Enabled');\n } else {\n removeDarkMode();\n console.log('[Universal Dark Mode] Disabled');\n }\n }\n });\n \n // Apply on load\n applyDarkMode();\n \n // Re-apply on dynamic content\n var observer = new MutationObserver(function(mutations) {\n if (enabled && !document.getElementById('universal-dark-mode-style')) {\n applyDarkMode();\n }\n });\n observer.observe(document.head, { childList: true });\n \n console.log('[Universal Dark Mode] Loaded - Press Alt+Shift+D to toggle');\n})();", "Universal Dark Mode"); } } catch(__e) { console.warn('[Userscript:Universal Dark Mode]', __e); } })(); })();
Skip to content

Latest commit

History

54 Commits

Folders and files

NameName
Last commit message
Last commit date

Repository files navigation

computeWorks_examples

Matrix multiplication example performed with OpenMP, OpenACC, BLAS, cuBLAS, and CUDA

Getting Started

This example requires the following packages:

  • CUDA Toolkit 10.1
  • PGI CE Compiler 19.10

Optional:

  • Eclipse IDE C/C++
  • Docker CE + NVIDIA-Docker v2
    • PGI Docker image
  • Jupyter Notebook

The following installation instructions have been tested on Ubuntu 18.04 and CUDA 10.0+.

OpenACC profiling with NVIDIA driver 418.67 and above requires elevated permissions. See here.

You can achieve this one of two ways.

  1. Run command with sudo
sudo LD_LIBRARY_PATH=/usr/local/cuda/extra/CUPTI/lib64:$LD_LIBRARY_PATH ./computeWorks_mm
  1. Following Administration instructions.
sudo systemctl isolate multi-user # Stop the window manager
sudo su # Switch to root
modprobe -r nvidia_uvm nvidia_drm nvidia_modeset nvidia-vgpu-vfio nvidia # Unload dependent modulescd /etc/modprobe.d/
touch nvidia.conf # Create file named nvidia.confecho -e "options nvidia "NVreg_RestrictProfilingToAdminUsers=0""> nvidia.conf
reboot

Installation

CUDA -> more details

  1. Download CUDA Toolkit
  2. Install (assuming file is in ~/Downloads)
sudo dpkg -i ~/Downloads/cuda-repo-ubuntu1804-10-1-local-10.1.168-418.67_1.0-1_amd64.deb
sudo apt-key add /var/cuda-repo-<version>/7fa2af80.pub
sudo apt-get update
sudo apt-get install cuda
  1. Add paths to ~/.bashrc
echo -e "\n# CUDA paths">>~/.bashrc
echo -e "export PATH=/usr/local/cuda/bin${PATH:+:${PATH}}">>~/.bashrc
echo -e "export LD_LIBRARY_PATH=/usr/local/cuda/lib64${LD_LIBRARY_PATH:+:${LD_LIBRARY_PATH}}">>~/.bashrc
echo -e "export LD_LIBRARY_PATH=/usr/local/cuda/extras/CUPTI/lib64${LD_LIBRARY_PATH:+:${LD_LIBRARY_PATH}}">>~/.bashrc
  • The CUPTI directory is required for OpenACC profiling

PGI Community Edition (Bare Metal) -> more details

Skip this step if you prefer to run utilize the PGI compiler in a Docker container.

  1. Download PGI CE Compiler
  2. Install (assuming file is in ~/Downloads)
export PGI_SILENT=true
export PGI_ACCEPT_EULA=accept
export PGI_INSTALL_DIR=/opt/pgi
export PGI_INSTALL_TYPE=single
export PGI_INSTALL_NVIDIA=true
export PGI_INSTALL_JAVA=true
export PGI_INSTALL_MPI=false
export PGI_MPI_GPU_SUPPORT=false
mkdir -p ~/Downloads/tmp
tar xpfz ~/Downloads/pgilinux-2019-1910-x86-64.tar.gz -C ~/Downloads/tmp
sudo -E ~/Downloads/tmp/install
rm -rf ~/Downloads/tmp
  1. Add paths to ~/.bashrc
echo -e "\n# PGI paths">>~/.bashrc
echo -e "export PGI=/opt/pgi">>~/.bashrc
echo -e "export PATH=/opt/pgi/linux86-64/19.10/bin:$PATH">>~/.bashrc
echo -e "export MANPATH=$MANPATH:/opt/pgi/linux86-64/19.10/man">>~/.bashrc
echo -e "export LM_LICENSE_FILE=$LM_LICENSE_FILE:/opt/pgi/license.dat">>~/.bashrc

Eclipse

  1. Download Eclipse IDE C/C++
  2. Install (assuming file is in ~/Downloads)
sudo tar xpfz ~/Downloads/eclipse-cpp-2019-03-R-linux-gtk-x86_64.tar.gz -C /opt
sudo ln -s /opt/eclipse/eclipse /usr/local/bin/eclipse
  1. Install Nsight Eclipse Plugin -> more details
bash /usr/local/cuda/bin/nsight_ee_plugins_manage.sh install /opt/eclipse

Docker -> more details

  1. Remove older Docker versions
sudo apt remove docker docker-engine docker.io containerd runc -y
  1. Install Docker CE -> more details
sudo apt update
sudo apt install apt-transport-https ca-certificates curl software-properties-common -y
curl -fsSL https://download.docker.com/linux/ubuntu/gpg | sudo apt-key add -
sudo add-apt-repository "deb [arch=amd64] https://download.docker.com/linux/ubuntu $(lsb_release -cs) stable"
sudo apt update
sudo apt install docker-ce -y
  1. Enable Docker commands without sudo
sudo usermod -aG docker $USER
  1. Log out and back in
  • Confirm $USER is in the docker group
groups

mnicely adm cdrom sudo dip plugdev lpadmin sambashare docker

  1. Verify docker runs without sudo
docker container run hello-world

Docker_Hello_World

NVIDIA Docker v2 -> more details

  1. Remove nvidia-docker v1, if installed.
docker volume ls -q -f driver=nvidia-docker | xargs -r -I{} -n1 docker ps -q -a -f volume={} | xargs -r docker rm -f
sudo apt-get purge nvidia-docker
  1. Add nvidia-docker v2 repository
curl -sL https://nvidia.github.io/nvidia-docker/gpgkey | sudo apt-key add -
distribution=$(. /etc/os-release;echo$ID$VERSION_ID)
curl -sL https://nvidia.github.io/nvidia-docker/$distribution/nvidia-docker.list | sudo tee /etc/apt/sources.list.d/nvidia-docker.list
sudo apt-get update
  1. Install nvidia-docker v2
sudo apt-get install nvidia-docker2 -y
  1. Reload Docker daemon
sudo pkill -SIGHUP dockerd
  1. (Optional) Modify Docker daemon to storage images in /home versus /var. Usually /home has more space.
sudo nano /etc/docker/daemon.json
{
"runtimes": {
"nvidia": {
"path": "nvidia-container-runtime",
"runtimeArgs": []
}
},
"experimental": true,
"graph": "/home/<whoami>/.docker",
"storage-driver": "overlay2"
}
sudo service docker restart
  1. Verify you can launch docker container with access to GPU
docker run --runtime=nvidia --rm nvcr.io/nvidia/cuda:latest nvidia-smi

PGI Community Edition (Docker Image)

This create a Docker image containing the PGI CE Compiler.

  1. Download git project
git clone https://github.com/mnicely/computeWorks_examples.git
cd computeWorks_examples/computeWorks_mm/pgi_build
  1. Download PGI CE Compiler
  2. Move PGI tar to Dockerfile directory (assuming file is in ~/Downloads)
cp ~/Downloads/pgilinux-2019-194-x86-64.tar.gz .
  1. Build PGI Docker image
docker build -t cuda-10.1_ubuntu-18.04_pgi-19.10 -f Dockerfile.cuda-10.1_ubuntu-18.04_pgi-19.10 .

Jupyter Notebook

  1. Install PIP package manager
sudo apt install python-pip3
  1. Install JupyterLab
sudo -H pip3 install jupyter

Usage

Bare Metal

  • This approach requires PGI Community Edition (Bare Metal)
  1. Download git project
git clone https://github.com/mnicely/computeWorks_examples.git
cd computeWorks_examples/computeWorks_mm
  1. Build computeWorks_mm binary
make
  1. Run computeWorks_mm <matrixSize | default=1024>
./computeWorks_mm 128

Docker

  • This approach requires PGI Community Edition (Docker Image)
  1. Download git project
git clone https://github.com/mnicely/computeWorks_examples.git
cd computeWorks_examples/computeWorks_mm
  1. Build computeWorks_mm binary
docker run --runtime=nvidia --rm -v $(pwd):/workspace -w /workspace cuda-10.1_ubuntu-18.04_pgi-19.10:latest make
  1. Run computeWorks_mm <matrixSize | default=1024>
docker run --runtime=nvidia --rm -v $(pwd):/workspace -w /workspace cuda-10.1_ubuntu-18.04_pgi-19.10:latest ./computeWorks_mm 128

Eclipse IDE C/C++

Eclipse, with Nsight Eclipse Plugins offers full-featured IDE that provides an all-in-one integrated environment to edit, build, debug and profile CUDA-C applications.

  1. Open Eclipse
eclipse &
  1. Import Project
  • File -> Import...
  • Select -> Git -> Projects from Git -> [Next >]
  • Select Repository Store -> Clone URI -> [Next >]
  • Source Git Repository -> URL -> https://github.com/mnicely/computeWorks_examples -> [Next >]
  • Branch Selection -> [Next >]
  • Local Destination -> [Next >]
  • Select a wizard to use for importing projects -> Import existing Eclipse project -> [Next >]
  • Import Projects -> [Finish]

Baremetal

  • This approach requires PGI Community Edition (Bare Metal)
  1. Build Project
  • Right click computeWorks_mm -> Build Project or Press Ctrl + B
  1. Run Project
  • Right click computeWorks_mm -> Run As -> Local C/C++ Application

Docker container

  • This approach requires PGI Community Edition (Docker Image)
  1. Point to PGI Docker container
  • Right click computeWorks_mm -> Properties
  • C/C++ Build -> Settings
  • Settings -> Container Settings -> select Build inside Docker Image
  • Image -> cuda-10.1_ubuntu-18.04_pgi-19.10:latest
  1. Run Project
  • Right click computeWorks_mm -> Run As -> Local C/C++ Application

JupyterLab

  1. Open computeWorks_mm.ipynb
cd computeWorks_examples/computeWorks_mm/jupyter
jupyter-notebook computeWorks_mm.ipynb

About

Matrix multiplication example performed with OpenMP, OpenACC, BLAS, cuBLABS, and CUDA

Topics

Resources

Stars

7 stars

Watchers

0 watching

Forks

Releases

Packages

Used by

Contributors

Languages