Unofficial/free multi tenant whatsapp messaging API with user-controlled encryption & account ban mitigation
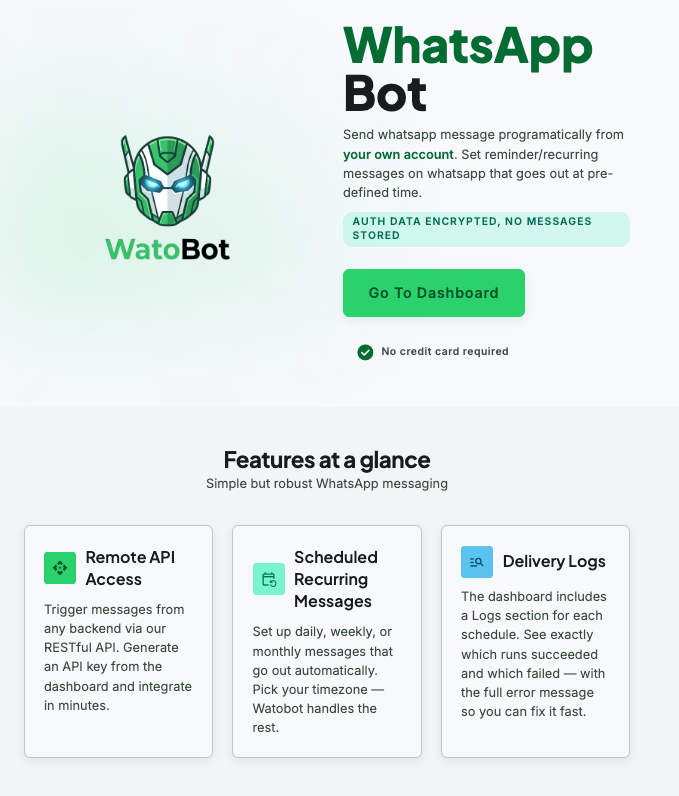
A self-hosted WhatsApp message automation platform built using Mudslide. Connect your WhatsApp account via QR code, then schedule automated messages or trigger them on demand via a REST API.
All user data is encrypted using your personal auth token as the key. There is no shared server secret — even the server owner cannot read your data.
The server routes your connection through a residential IP in your city and queues messages sequentially, reducing ban risks.
Live website: watobot.xyz . The website is running on a 4GB RAM AWS VM & is fully functional. You can signup, use the API to send messages, schedule automated recurring messages to any of your groups & even create FAQ from chat backup of a whatsapp group. Logging out of account disconnect your whatsapp & removes encrypted auth data.
P.S. there will be 15-20 seconds delay in connecting your account & sending messages due to Residential Proxy setup & encryption + decryption on every request. The whatsapp device adding via QR code step takes a few iterations sometime.
Disclaimer: This project is for educational purposes only. The author takes no liability for WhatsApp banning your account or the accounts of your users if you choose to deploy this as a public web service. Use of unofficial WhatsApp automation may violate WhatsApp's Terms of Service. You assume all responsibility for how you use this software.
- Auth: passwordless magic link sent to your email. Your email is never stored. Clicking the link gives you a 64-character hex auth token that lives only in your browser (
localStorage). - Storage: all user data lives under
users/as AES-256 encrypted files. The token is the encryption key — the server only holds a one-way hash of it (sha256(token)) for authentication. - Scheduling: cron jobs invoke
scripts/run-schedule.js, which carries a self-contained encrypted payload in the cron entry itself. No secrets need to be present on the server at run time beyond what is already inusers/. - WhatsApp session: after QR scan, the
.mudslide/credentials directory is AES-256 encrypted into.mudslide.encusingsha256(token). The plaintext directory is immediately deleted.
| What | Stored as | Who can read it |
|---|---|---|
| Your email | Never stored | Nobody |
| Auth token | Browser localStorage only |
Only you |
token_hash (sha256(token)) |
users/<dir>/token_hash |
Public-safe — one-way hash, useless without the token |
Schedule files (schedule.json) |
AES-256, key = token | Only you (token required to decrypt) |
WhatsApp session (.mudslide.enc) |
AES-256, key = sha256(token) |
Only you |
| Cron payload | AES-256, key = token_hash, embedded in system crontab |
Only accessible with server shell access |
API key hash (api_key_hash) |
sha256(apiKey) |
Public-safe — one-way hash |
Calendly OAuth tokens (calendly.json) |
AES-256, key = token | Only you (token required to decrypt) — never touches Firestore |
calendly_key_hash (sha256(calendlyKey)) |
users/<dir>/calendly_key_hash |
Public-safe — one-way hash, useless without the key |
Calendly connection status + meetings (calendlyConfig field, Firestore) |
Plaintext, access-controlled by Firestore Security Rules | Only you — the VM holds no Firebase credential at all; see Calendly Integration |
Leads (users/{userDir}/leads Firestore subcollection) |
Plaintext, access-controlled by Firestore Security Rules | Only you — same as above |
The entire users/ directory — including token_hash, encrypted schedules, and the encrypted WhatsApp session — can be committed to a public repository safely. There is no SERVER_SECRET. There is no tokens.json. Nothing in the repo can be used to decrypt user data without the token that only the user holds.
Re-registering with the same email generates a new token and overwrites
token_hash. The old token is immediately invalidated and old encrypted files become inaccessible. You will need to re-link your WhatsApp account.
- Linux or macOS (Windows not supported)
- Node.js 18+
curlavailable on the system
git clone https://github.com/pocha/mudbot
cd watobot
chmod +x install.sh
./install.sh
install.sh will:
- Install Node.js + npm if not present
- Install project dependencies (
npm install) - Download and install the
mudslidebinary to/usr/local/bin/mudslide - Create
.envwith default values if one does not exist
.env.example documents every variable — copy it to .env (install.sh does this automatically) and edit:
PORT=3000

# SMTP settings for magic link emails
SMTP_HOST=localhost
SMTP_PORT=1025
SMTP_SECURE=false
SMTP_USER=
SMTP_PASS=
EMAIL_FROM=noreply@watobot.local
BASE_URL=http://localhost:3000

# Path to the mudslide binary
MUDSLIDE_PATH=/usr/local/bin/mudslide
For production, point SMTP_* at a real mail provider (e.g. SendGrid, SES) and set BASE_URL to your public domain. Also set DISABLE_PUBLIC_STATIC=true — the real frontend is served from GitHub Pages in production, not this VM, so there's no reason for the API server to also serve public/. Set FRONTEND_BASE_URL to the frontend's own domain (e.g. https://watobot.xyz) — this is where registration emails link to (verify.html), which is separate from BASE_URL (the VM's own domain) precisely because of DISABLE_PUBLIC_STATIC: once the VM stops serving public/, an emailed link pointing at the VM's own domain would 404. Neither FRONTEND_BASE_URL nor DISABLE_PUBLIC_STATIC need to be set for local development — see .env.example for the full list and defaults.
For local development, MailDev is started automatically by the test suite (see Running tests).
WhatsApp flags accounts that behave like bots or spam operations — both by where a connection comes from and by how messages are sent. Watobot addresses both angles: a residential proxy so linked devices look like real phones on home networks, and a per-account message queue so sends never fire in the kind of rapid-fire bursts that trip spam detection.
When multiple users connect WhatsApp from the same server IP, WhatsApp can detect that many accounts share one IP address and flag them as bots or spam operations. To prevent this, Watobot routes each user's WhatsApp connection through a dedicated residential IP address near their geographic location.
- Server IP protection: Your server's real IP is never exposed to WhatsApp. If WhatsApp blacklists a residential IP, only that one user is affected — your server IP stays clean.
- Account authenticity: WhatsApp sees a local residential connection (like a home router) rather than a data-centre IP. This makes the linked device look like a real phone on a home network.
- Per-user isolation: Each user is assigned a unique proxy port, so no two users share the same residential IP. One user's behaviour cannot affect another's account standing.
- Sign up at dataimpulse.com and purchase a premium residential proxy plan (city/ZIP-level targeting is gated behind premium — the free/standard tier only supports country-level targeting).
- Add the following to your
.env:
DATAIMPULSE_USERNAME=your_username
DATAIMPULSE_PASSWORD=your_password
DATAIMPULSE_HTTP_GATEWAY=gw.dataimpulse.com
DATAIMPULSE_GATEWAY=74.81.81.81   # legacy, unused now that traffic routes through the relay
DATAIMPULSE_PORT=10000 # Starting port — each user gets the next port in sequence- Ensure
proxychains4is installed (the install script handles this automatically). - Set
PROXYCHAINS_PATHin.envto the proxychains4 binary path (the install script fills this in).
When DATAIMPULSE_USERNAME is not set, Watobot falls back to unproxied connections — all features still work, but WhatsApp connections originate from your server's IP.
Instead of asking users for a PIN/postal code, Watobot auto-detects their country and city from their IP address on first connect (shown to them, with a "not right? change it" link for VPN users or misdetections). Both the geolocation lookup (ipwho.is) and, for manual overrides, city validation (OpenStreetMap's Nominatim) happen directly in the browser rather than server-side — this reflects the user's real IP rather than the server's view of it, and Nominatim's canonical resolved city name is used rather than whatever the user typed, since DataImpulse's own city database doesn't recognize aliases/old names (e.g. "Bangalore" vs "Bengaluru"). This gets stored per-user and used to target DataImpulse's proxy to a matching residential IP.
DataImpulse's city/ZIP targeting syntax embeds a literal ; in the proxy login string (e.g. user__cr.in;city.bengaluru). Node's URL parser — used internally by global-agent, which mudslide's own --proxy flag depends on — silently percent-encodes that ; into %3B before it ever reaches DataImpulse, corrupting the targeting request. services/dataimpulseRelay.js sits between proxychains and DataImpulse, building the Proxy-Authorization header itself from the raw, un-encoded credential string, sidestepping the bug entirely. It also retries once with country-only targeting if DataImpulse can't find a match for the requested city (city/ZIP-level availability is intermittent even on premium plans).
services/proxyRelayManager.js manages one relay per active user, started lazily on their first mudslide operation and stopped once they have no more queued jobs — mirroring the existing per-user job queue in services/mudslideService.js. Nothing needs installing or supervising separately; it's part of the running app process.
To sanity-check the whole chain (proxychains → relay → DataImpulse → WhatsApp) independent of the running app:
npm run test-mudslide-proxy -- --country=in --city=bengaluru --recipient=<your-number>DataImpulse maps each port in the range 10000–20000 to a distinct sticky residential session. Watobot allocates one port per user at registration time (stored in their encrypted proxy.json) — the local relay reuses that same port number bound to 127.0.0.1 (no collision, since one is a loopback bind and the other is remote). The allocation counter is persisted in users/.proxy_port_counter.
Sending several messages back-to-back in rapid succession is a pattern WhatsApp's spam detection watches for, independent of where the connection comes from. Watobot serializes all outgoing operations (sendMessage, sendMedia, group fetches, disconnects) per WhatsApp account through a strict, promise-chained queue (withSession in services/mudslideService.js) — so a user's messages are always sent one at a time, never concurrently, no matter how many requests hit the API at once (a burst of scheduled sends, several manual API calls, etc.).
This queue also drives the lifecycle of the per-user proxy relay and WhatsApp session cache: both are lazily acquired the moment the first job for a user starts, and released the moment their queue drains back to zero — so a user with no pending work has no lingering open connections.
Connect your Calendly account and Watobot will automatically send a WhatsApp message to every person who books a meeting through it. The dashboard's Calendly page presents this as two connected boxes, Zapier-style — a Calendly box (connect your account, pick which calendars to wire up, verify the integration end-to-end) and a Watobot box (connect WhatsApp, configure the message per calendar, test it) — each opening a step-by-step popup on click.
Your Calendly OAuth app (in the Calendly developer console) needs the scheduled_events:read and event_types:read scopes — the former to look up booking/invitee details when a lead comes in, the latter for both the dashboard's calendar picker and phone-field detection (below). No write scopes are needed: nothing is ever created or modified on Calendly's side.
Phone-number detection is automatic, not manually typed. Calendly's Event Type API exposes each event type's custom questions with a real type field — including a dedicated phone_number type — and a required flag. The dashboard checks for a question with type: "phone_number" on each calendar you add; if none exists, it tells you to add one (and mark it required) in that event type's settings before you can proceed. This also means the whole onboarding flow is gated: you can't get past the "select calendars" step until every calendar you've added has a usable phone field, and the final step of the Calendly box only turns green after you've pasted the real embed snippet on your live site, made a real (dummy) booking, and the dashboard has confirmed a lead actually landed — not just that the OAuth connection is valid.
Once a calendar is added, embed its one-line script on that event type's booking page, before your existing Calendly embed code (each calendar has its own snippet, shown in the dashboard):
<script src="https://<domain>/api/calendly/code?token=<your-calendly-key>&meetingId=<meeting-id>"></script>The <your-calendly-key> is a separate integration key (not your API key or auth token) generated the first time you connect Calendly — it's scoped only to the Calendly runtime script and webhook-style route, so a leaked key can't be used against /api/message or any other endpoint. Every confirmed booking on that page then triggers a WhatsApp message automatically, using that calendar's message template — configurable per calendar in the Watobot box, along with a toggle for whether to send automatically at all. A booking on a calendar with auto-send off still gets logged as a lead (status: "pending") for manual follow-up.
Calendly's OAuth tokens never leave the VM. accessToken/refreshToken/expiresAt (plus the connected account's own URIs, used for an ownership check on each booking) live in the same AES-256-encrypted, token-keyed local file every other per-user secret in this app uses (calendly.json — see the Security model table above) — this is deliberate: it preserves the zero-knowledge property those files already have (the server owner can't read them without your live session token) that moving them into Firestore would have quietly given up.
Everything else about a Calendly connection is not secret, and lives directly in Firestore instead — connection status, the embed-script calendlyKey, and each calendar's config (event type, detected phone question, message template, auto-send toggle), all under one document per user, users/{userDir} (with leads as a subcollection underneath, users/{userDir}/leads/{leadId}). The dashboard reads and writes this data directly, governed by firestore.rules (access is scoped by the {userDir} path segment itself, matched against a custom claim on your Firebase Auth token — not a field trusted inside each document). There's no VM route for any of this (no meeting CRUD endpoints, no leads endpoints) — it's exactly as debuggable as opening the Firebase console.
Getting a Firebase identity to sign in with works the same way for any of this:
- Your browser calls
GET /api/firebase-tokenwith your normal session token. - The VM verifies that token exactly as it does for every other authenticated route (
userService.verifyToken), then calls a Cloud Function,mintFirebaseToken, to mint a Firebase custom token — the VM itself holds no Firebase credential, only the Function does. - Your browser signs in to Firebase with that token and talks to Firestore directly from then on.
Two things genuinely can't move to the frontend, because they need something only the VM has: the Calendly client secret (shared across all users of this app, can never reach a browser) is needed to exchange an OAuth code for tokens and to refresh an expired access token — so GET /api/calendly/authorize, the OAuth callback, GET /api/calendly/event-types, and the WhatsApp test-send action all stay VM routes. And the Calendly webhook itself (POST /api/calendly/:meetingId/lead, called by the embedded script on a real booking) has no legitimate browser session behind it at all — it's fired by whoever's booking the meeting, not you — so it can't use your Firestore Security Rules the way every other lead-management action does. For that one case, the VM reads a calendar's config server-side via a third, read-only Cloud Function, getCalendlyMeetingConfig. All three Cloud Functions live in functions/ and are restricted to only accept requests from the VM's static IP (ALLOWED_VM_IP in functions/.env — see functions/.env.example), rather than GCP IAM: simpler to operate, and gives the same practical protection for this threat model (it stops outside callers; like IAM, it does not protect against the VM itself being compromised, since compromised code there would still originate from the allowed IP).
The Watobot box's "Test Message" action reuses this exact webhook route rather than a separate test endpoint — same calendlyKey auth the real embed script uses, an added test: true flag that sends to your own WhatsApp ('me') instead of the prospect and skips the Firestore write entirely, so a repeat test can never overwrite a real lead's send history.
Before the Calendly integration works, the Cloud Functions, Firestore Security Rules, and Firestore indexes all need to be deployed to the wato-bot Firebase project:
npm install -g firebase-tools   # if you don't already have it
firebase login
cd functions && cp .env.example .env   # then fill in ALLOWED_VM_IP with the VM's static IP
cd ..
firebase deploy --only functions,firestore:rules,firestore:indexes
This deploys all three Cloud Functions (mintFirebaseToken, createLead, getCalendlyMeetingConfig) together. Re-run firebase deploy --only functions after any change to functions/index.js or functions/.env, and firebase deploy --only firestore:rules (or firestore:indexes) after editing firestore.rules / firestore.indexes.json — none of these are picked up automatically, unlike the VM's own code.
The three Cloud Functions above are IP-allowlisted to the production VM's static address (ALLOWED_VM_IP) — deliberately, since it's the security boundary that lets the VM hold zero Firebase credentials of its own. That also means anything on the dashboard needing a Firebase sign-in (which is most of it) gets a 502 when run from a local machine (npm start), since the local server's calls to those functions get rejected.
npm start works around this automatically for local dev: it starts the Cloud Functions emulator (firebase emulators:start --only functions) and points mintFirebaseToken/createLead/getCalendlyMeetingConfig calls at it instead — the real, deployed functions and their IP allowlist are untouched. One-time setup:
- Firebase Console → Project Settings → Service Accounts → Generate new private key, for the
wato-botproject. - Save it as
functions/.serviceAccountKey.json(gitignored — this is a real credential, keep it local).
With that key present, npm start picks it up automatically: createCustomToken signs locally using the key's real private key (no IAM signBlob call needed — see the comment on mintFirebaseToken in functions/index.js for why that matters), and the resulting tokens/Firestore access are indistinguishable from the real deployed functions', since it's the same project's real credential — just running the function code on your machine instead of Google's. No Firestore or Auth emulation involved; local runs read/write the real Firestore.
Without that key present, npm start just logs a warning and falls back to the real deployed functions (so local dev still works for everything not needing a Firebase sign-in). Never runs in production (NODE_ENV=production skips it entirely) or if SKIP_FUNCTIONS_EMULATOR=true is set.
npm startServer starts on http://localhost:3000 (or the PORT in .env).
- Open
http://localhost:3000and click Try Now - Enter your email — you'll receive a one-time magic link (your email is not stored)
- Click the link to open your dashboard
- Click Connect WhatsApp to generate a QR code
- Scan the QR code with WhatsApp on your phone (Linked Devices → Link a Device)
- Wait until a new device named Google Chrome appears in your Linked Devices list, then click Continue
- Your WhatsApp session is encrypted and stored — you're ready to schedule or send messages
All endpoints (except /api/register and /api/verify/:token) require authentication via:
Authorization: Bearer <token>
or
x-api-key: <api-key>
Generate an API key from the dashboard. The API key embeds the same user directory as the token, so it resolves to the same account.
API keys expire after 1 hour and are intended for testing. To make a key permanent, the server owner SSHes in and runs:
echo "permanent" > users/<userDir>/api_key_expiryThe userDir is the 10-character prefix shown in the dashboard's API key section. Users should email the server owner with their use case to request a permanent key.
Registration, login, API key, and WhatsApp connection lifecycle.
| Method | Path | Description |
|---|---|---|
POST |
/api/register |
Send magic link to email. Accepts an optional next (a same-origin relative path) — verify.html redirects there after verifying instead of the default whatsapp-connect.html |
GET |
/api/verify/:token |
Verify a magic-link token is valid |
POST |
/api/apikey/generate |
Generate a 1-hour API key |
GET |
/api/apikey/status |
Check if a key exists and whether it has expired |
GET |
/api/whatsapp/status |
Check WhatsApp connection status (local file check only — cheap, safe to poll) |
GET |
/api/whatsapp |
Actually verify the connection with WhatsApp's servers (costs a real round trip — use for one-off checks, not polling) |
GET |
/api/whatsapp/ip |
Fetch the residential IP/location currently proxying this account's connection |
GET |
/api/whatsapp/qr |
Get QR code for WhatsApp login |
POST |
/api/whatsapp/notify-user-connected |
Confirm QR scan is complete (re-verifies the connection server-side before notifying) |
POST |
/api/whatsapp/logout |
Clean up session after manual device removal |
| Method | Path | Description |
|---|---|---|
POST |
/api/message |
Send a message immediately |
GET |
/api/whatsapp/groups |
List WhatsApp groups linked to your connected account |
Send a message to an individual:
curl -X POST https://<domain>/api/message \
  -H "x-api-key: <your-api-key>" \
  -H "Content-Type: application/json" \
  -d '{"to": "919538384545", "message": "Hello!"}'
To message a WhatsApp group instead, first fetch your groups to get its JID, then send to that JID:
curl https://<domain>/api/whatsapp/groups \
  -H "x-api-key: <your-api-key>"
# => {"groups": [{"name": "Family", "id": "919876543210-1234567890@g.us"}, ...]}

curl -X POST https://<domain>/api/message \
  -H "x-api-key: <your-api-key>" \
  -H "Content-Type: application/json" \
-d '{"to": "919876543210-1234567890@g.us", "message": "Hello, everyone!"}'Schedules are automated, recurring messages sent at a time you specify — set one up once and it keeps firing on its own (daily, weekly, monthly, or a single future date), with no need to keep anything running yourself.
| Method | Path | Description |
|---|---|---|
GET |
/api/schedules |
List all schedules |
POST |
/api/schedules |
Create a schedule |
GET |
/api/schedules/:id |
Get a schedule |
PUT |
/api/schedules/:id |
Update a schedule |
DELETE |
/api/schedules/:id |
Delete a schedule |
GET |
/api/usage/logs |
Get recent send logs, including scheduled runs |
curl -X POST https://<domain>/api/schedules \
  -H "x-api-key: <your-api-key>" \
  -H "Content-Type: application/json" \
  -d '{
    "name": "Daily reminder",
    "recipients": ["919876543210"],
    "message": "Good morning!",
    "timezone": "Asia/Kolkata",
    "localTime": "09:00",
    "frequency": "Daily"
  }'
The backend converts localTime + timezone to a UTC cron expression automatically. Supported frequency values: Daily, Weekly, Monthly, Once (requires localDate: "YYYY-MM-DD").
Meeting (calendar) CRUD, connection status, and leads are all direct Firestore access from the dashboard now — no REST surface for any of that (see How Calendly data is stored and accessed). The remaining VM routes cover only what needs the Calendly client secret, the account's access token, or the WhatsApp session — none of which the frontend can hold. All of these require the regular Authorization: Bearer <token> / x-api-key auth except POST /api/calendly/:meetingId/lead, which is authenticated separately via an x-calendly-key header or a ?token= query param (the integration key from calendlyConfig.calendlyKey in Firestore) — this is deliberately scoped so a leaked key can't be used against any other endpoint.
| Method | Path | Description |
|---|---|---|
GET |
/api/calendly/authorize |
Get the Calendly OAuth consent URL to start connecting |
GET |
/api/calendly/oauth/callback |
OAuth redirect target — completes the connection, no auth (session comes from a pending-connect nonce) |
GET |
/api/calendly/status |
Get {connected, calendlyKey} from the VM's local encrypted store, so the dashboard can self-heal its Firestore mirror of these two fields |
GET |
/api/calendly/event-types |
List the connected account's Calendly event types, each with phone-detection fields (phoneQuestionName, phoneDetectionStatus) computed from that event type's custom_questions |
POST |
/api/calendly/disconnect |
Disconnect the linked Calendly account |
GET |
/api/calendly/code |
Serves the embeddable runtime script for one calendar |
POST |
/api/calendly/:meetingId/lead |
Called by the embedded script on every real booking; sends the WhatsApp message and records a lead. Also reused by the dashboard's "Test Message" action with test: true in the body — sends to your own WhatsApp instead, and skips the lead write |
curl https://<domain>/api/calendly/status \
  -H "x-api-key: <your-api-key>"
# => {"connected": true, "calendlyKey": "<calendly-key>"}

curl https://<domain>/api/calendly/event-types \
  -H "x-api-key: <your-api-key>"
# => {"eventTypes": [{"uri": "...", "name": "30 Minute Meeting", "schedulingUrl": "...", "phoneQuestionName": "WhatsApp number", "phoneDetectionStatus": "found_required"}]}

curl -X POST https://<domain>/api/calendly/<meetingId>/lead \
  -H "x-calendly-key: <your-calendly-key>" \
  -H "Content-Type: application/json" \
  -d '{
    "event_uri": "https://api.calendly.com/scheduled_events/AAAAAAAAAAAAAAAA",
    "invitee_uri": "https://api.calendly.com/scheduled_events/AAAAAAAAAAAAAAAA/invitees/BBBBBBBBBBBBBBBB"
  }'
# => {"success": true, "status": "sent"}
status in the response is one of sent, failed (send attempted but errored), no_phone (no phone number on this booking), or pending (auto-send is off for this calendar — the lead is still logged). A request for an unknown :meetingId, or for an event that doesn't belong to the connected Calendly account, returns 404/403 respectively instead of a body with status. Every successful non-test call to POST /api/calendly/:meetingId/lead also writes/updates a lead in Firestore.
Every real Calendly booking is recorded as a lead. Listing, editing notes, deleting, and manually adding leads all happen client-side, directly against Firestore (see How Calendly data is stored and accessed) — there's no /api/leads REST surface for that. One small server route remains:
| Method | Path | Description |
|---|---|---|
GET |
/api/firebase-token |
Mint a Firebase custom token + return your userDir, so the dashboard can sign in to Firestore directly |
curl https://<domain>/api/firebase-token \
  -H "x-api-key: <your-api-key>"
# => {"firebaseToken": "...", "userDir": "..."}
Sending a WhatsApp message to a lead on demand (the dashboard's "Send" button) reuses the existing POST /api/message endpoint (see above) — no dedicated leads-send route.
MailDev is started and stopped automatically by the test suite — no manual setup needed.
npm testnpm test runs two suites:
test/flow.test.js (Node's built-in test runner) covers:
- Register → verify → API key generation
- Token structure (
token.slice(0,10) === sha256(email).slice(0,10)) token_hashwritten to disk;tokens.jsondoes not exist- Schedule CRUD with timezone-aware cron expression assertion
- Encrypted-at-rest verification (schedule files are not plaintext)
- Re-registration: new token, same user directory, old token invalidated
test/calendly.test.js (Jest) covers the happy path of services/calendlyService.js's exported functions directly — OAuth connect, listing calendars with phone-detection fields, message-template placeholder resolution, the embed snippet, and a full webhook-style lead creation (mocked WhatsApp send + mocked Calendly API responses, real local per-user encrypted storage). Meeting CRUD and leads have no server-side surface to test anymore (frontend-direct Firestore, see How Calendly data is stored and accessed).
Because all secrets are derived from the user's token (which only they hold), moving to a new server is straightforward:
- Copy the
users/directory to the new server - Start the app — no
.envchanges needed beyond SMTP andBASE_URL - Each user's first dashboard load after migration will automatically re-register their cron jobs via
syncCronJobs
No data loss. No re-encryption. No secret rotation.