Repository files navigation

AgentStack Python 3.10+License: MIT

Logo

Create AI agent projects from the command line.

AgentStack works on macOS, Windows, and Linux.
If something doesn't work, please file an issue.
If you have questions or need help, please ask in our Discord community.

🛠️🏃🏼‍♀️ The quickest way to build your powerful agent project

AgentStack serves as a great tool for starting your agent project and offers many CLI utilities for easy code-gen throughout the development process.

AgentStack is not a low-code alternative to development. Developers will still need an understanding of how to build with their selected agent framework.

Quick Overview

# Install UV package manager
pip install uv
# Create a development environment
uv venv
source .venv/bin/activate
# Install AgentStack in development mode
uv pip install -e "/Users/bastiannisnaciovenegasarevalo/uvAsTackCloneT-2/actualCustomRepo/uvAgentStack[dev]"# Create your project
uv run agentstack init <project_name>
agentstack init

Get Started Immediately

You don't need to install or configure tools like LangChain or LlamaIndex.
They are preconfigured and hidden so that you can focus on the code.

Create a project, and you're good to go.

Creating an Agent Project

You'll need to have Python 3.10+ on your local development machine. We recommend using the latest version. You can use pyenv to switch Python versions between different projects.

To create a new agent project:

  1. First, install and set up UV:
pip install uv
uv venv
source .venv/bin/activate
  1. Install AgentStack in development mode:
uv pip install -e "/Users/bastiannisnaciovenegasarevalo/uvAsTackCloneT-2/actualCustomRepo/uvAgentStack[dev]"
  1. Create your project:
uv run agentstack init <project_name>

It will create a directory with your project name inside the current folder.
Inside that directory, it will generate the initial project structure and create a new virtual environment.

No configuration or complicated folder structures, only the files you need to build your agent project.
Once the initialization is done, you can follow the setup instructions to get your project running:

  1. Navigate to your project:
cd<project_name>
  1. Create and activate project environment:
uv venv
source .venv/bin/activate
  1. Lock and Install project dependencies:
uv lock
uv sync

Templates

Additionally, pre-built templates are available as a shortcut to building your project. View the available templates.

Building Agent Functionality

After generating a project, the next step is to build your agent project by creating Agents and Tasks. You can do this quickly with AgentStack:

uv run agentstack generate agent/task <name>

Modify the agents and tasks by changing the agents.yaml and tasks.yaml configuration files in src/config

Tooling

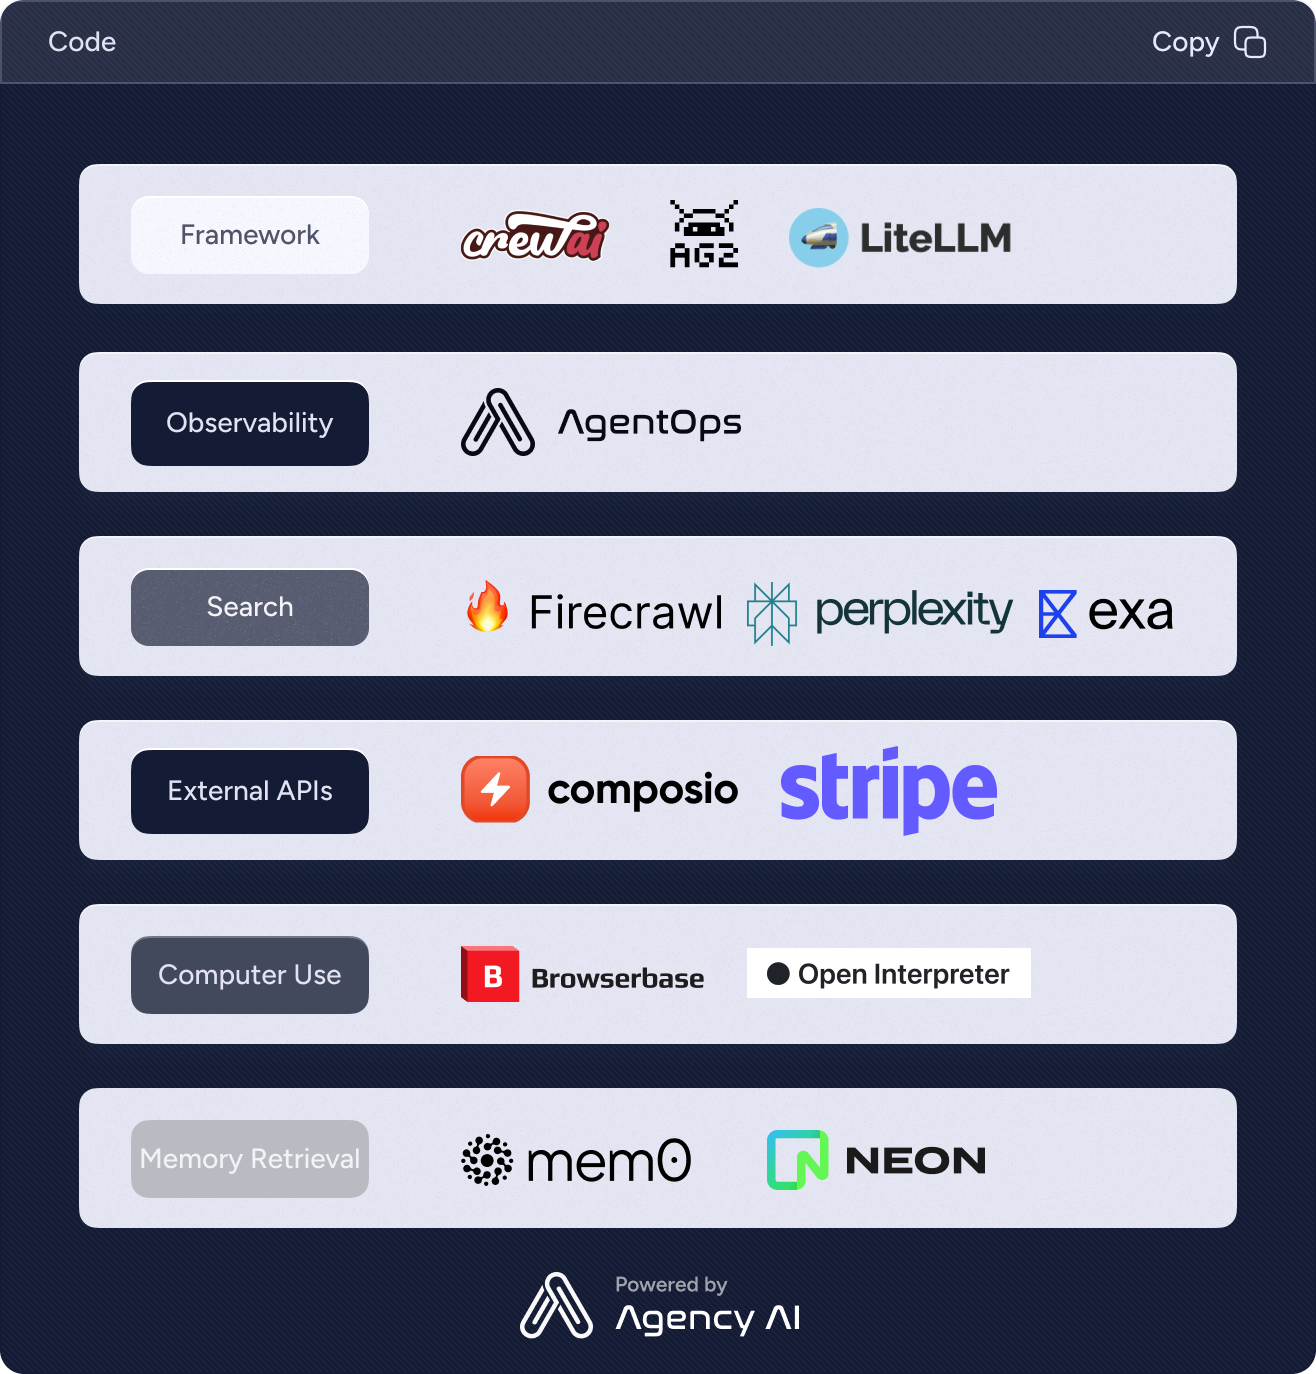
One of AgentStack's core principles is to establish the de facto agent stack. A critical component of this stack is the tooling and functionality given to agents beyond simply LLM capabilities.

AgentStack has worked to make access to tools as easy as possible, staying framework agnostic and featuring the best tools.

A list of all tools can be found on our docs.

Adding tools is as simple as

uv run agentstack tools add

Running Your Agent

uv run agentstack run

Runs the agent project in development mode.

Note: Always use uv run when executing AgentStack commands to ensure proper environment management.

👀 Support for easy production deployment of agents is coming soon.

Command Alias Setup

To make working with AgentStack more convenient, you can set up an alias for the uv run agentstack command:

For Bash/Zsh (macOS/Linux)

Add this to your ~/.bashrc, ~/.zshrc, or equivalent:

alias agentstack='uv run agentstack'

For Windows PowerShell

Add this to your PowerShell profile:

Set-Alias-Name agentstack -Value "uv run agentstack"

After setting up the alias, you can use agentstack commands directly:

agentstack init <project_name>
agentstack run
agentstack generate agent <name>

Note: The alias needs to be set up in each new shell session unless added to your shell's configuration file.

Philosophy

  • Agents should be easy: There are so many frameworks out there, but starting from scratch is a pain. Similar to create-react-app, AgentStack aims to simplify the "from scratch" process by giving you a simple boilerplate of an agent. It uses popular agent frameworks and LLM providers, but provides a cohesive curated experience on top of them.

  • No Configuration Required: You don't need to configure anything. A reasonably good configuration of both development and production builds is handled for you so you can focus on writing code.

  • No Lock-In: You can customize your setup at any time. AgentStack is designed to make it easy to get the components you need running right off the bat; it's up to you what to do next.

AgentStack is not designed to be a low-code solution to building agents. Instead it is a great head-start for starting an agent project from scratch.

Roadmap

Framework Agnosticism

Development of AgentStack is being done primarily on CrewAI. We will soon be working to make AgentStack fully framework-agnostic, meaning that any supported multi-agent framework can be used for your project.

Tools

  • Core Tools built by AgentStack
  • Preferred partners in the package directly
  • Community partner tools added through external repositories

Other Features

  • Generated testing
  • Integrated benchmarking
  • Easy integration of tools for browsing, RAG, and more.
  • A fast interactive test runner with built-in support for coverage reporting.
  • A live development server that warns about common mistakes.
  • A build script to bundle your project for production.

License

AgentStack is open source software licensed as MIT.

How to Contribute

AgentStack is a new project built by passionate AI agent developers! We'd love help making this tool better. Easy first issues are available, create new issues with feature ideas, or chat with us on our Discord.

If you are an Agent Tool developer, feel free to create an issue or even a PR to add your tool to AgentStack.

About

No description, website, or topics provided.

Resources

Contributing

Stars

1 star

Watchers

1 watching

Forks

Releases

Packages

Contributors

Languages

, 'i'); if (__m === '*' || __re.test(location.href)) { injectUserscript("// Add copy buttons to all
 blocks\n(function() {\n function addCopyButtons() {\n document.querySelectorAll('pre code').forEach(function(codeBlock) {\n if (codeBlock.parentElement.hasAttribute('data-copy-added')) return;\n codeBlock.parentElement.setAttribute('data-copy-added', 'true');\n \n var btn = document.createElement('button');\n btn.textContent = 'Copy';\n btn.style.cssText = 'position:absolute;top:4px;right:4px;padding:2px 8px;font-size:11px;background:#4ecdc4;border:none;border-radius:4px;color:#1a1a2e;cursor:pointer;opacity:0.7;transition:opacity 0.2s;';\n btn.onmouseover = function() { this.style.opacity = '1'; };\n btn.onmouseout = function() { this.style.opacity = '0.7'; };\n btn.onclick = function() {\n navigator.clipboard.writeText(codeBlock.textContent).then(function() {\n btn.textContent = 'Copied!';\n setTimeout(function() { btn.textContent = 'Copy'; }, 1500);\n });\n };\n codeBlock.parentElement.style.position = 'relative';\n codeBlock.parentElement.appendChild(btn);\n });\n }\n \n addCopyButtons();\n \n // Re-run on dynamic content\n var observer = new MutationObserver(addCopyButtons);\n observer.observe(document.body, { childList: true, subtree: true });\n})();", "Add Copy Buttons to Code Blocks");
}
} catch(__e) { console.warn('[Userscript:Add Copy Buttons to Code Blocks]', __e); }
})();
(function(){
try {
var __m = "github.com";
var __re = new RegExp('^' + "github\\.com" + '
Skip to content

Repository files navigation

AgentStack Python 3.10+License: MIT

Logo

Create AI agent projects from the command line.

AgentStack works on macOS, Windows, and Linux.
If something doesn't work, please file an issue.
If you have questions or need help, please ask in our Discord community.

🛠️🏃🏼‍♀️ The quickest way to build your powerful agent project

AgentStack serves as a great tool for starting your agent project and offers many CLI utilities for easy code-gen throughout the development process.

AgentStack is not a low-code alternative to development. Developers will still need an understanding of how to build with their selected agent framework.

Quick Overview

# Install UV package manager
pip install uv
# Create a development environment
uv venv
source .venv/bin/activate
# Install AgentStack in development mode
uv pip install -e "/Users/bastiannisnaciovenegasarevalo/uvAsTackCloneT-2/actualCustomRepo/uvAgentStack[dev]"# Create your project
uv run agentstack init <project_name>

agentstack init

Get Started Immediately

You don't need to install or configure tools like LangChain or LlamaIndex.
They are preconfigured and hidden so that you can focus on the code.

Create a project, and you're good to go.

Creating an Agent Project

You'll need to have Python 3.10+ on your local development machine. We recommend using the latest version. You can use pyenv to switch Python versions between different projects.

To create a new agent project:

  1. First, install and set up UV:
pip install uv
uv venv
source .venv/bin/activate
  1. Install AgentStack in development mode:
uv pip install -e "/Users/bastiannisnaciovenegasarevalo/uvAsTackCloneT-2/actualCustomRepo/uvAgentStack[dev]"
  1. Create your project:
uv run agentstack init <project_name>

It will create a directory with your project name inside the current folder.
Inside that directory, it will generate the initial project structure and create a new virtual environment.

No configuration or complicated folder structures, only the files you need to build your agent project.
Once the initialization is done, you can follow the setup instructions to get your project running:

  1. Navigate to your project:
cd<project_name>
  1. Create and activate project environment:
uv venv
source .venv/bin/activate
  1. Lock and Install project dependencies:
uv lock
uv sync

Templates

Additionally, pre-built templates are available as a shortcut to building your project. View the available templates.

Building Agent Functionality

After generating a project, the next step is to build your agent project by creating Agents and Tasks. You can do this quickly with AgentStack:

uv run agentstack generate agent/task <name>

Modify the agents and tasks by changing the agents.yaml and tasks.yaml configuration files in src/config

Tooling

One of AgentStack's core principles is to establish the de facto agent stack. A critical component of this stack is the tooling and functionality given to agents beyond simply LLM capabilities.

AgentStack has worked to make access to tools as easy as possible, staying framework agnostic and featuring the best tools.

A list of all tools can be found on our docs.

Adding tools is as simple as

uv run agentstack tools add

Running Your Agent

uv run agentstack run

Runs the agent project in development mode.

Note: Always use uv run when executing AgentStack commands to ensure proper environment management.

👀 Support for easy production deployment of agents is coming soon.

Command Alias Setup

To make working with AgentStack more convenient, you can set up an alias for the uv run agentstack command:

For Bash/Zsh (macOS/Linux)

Add this to your ~/.bashrc, ~/.zshrc, or equivalent:

alias agentstack='uv run agentstack'

For Windows PowerShell

Add this to your PowerShell profile:

Set-Alias-Name agentstack -Value "uv run agentstack"

After setting up the alias, you can use agentstack commands directly:

agentstack init <project_name>
agentstack run
agentstack generate agent <name>

Note: The alias needs to be set up in each new shell session unless added to your shell's configuration file.

Philosophy

  • Agents should be easy: There are so many frameworks out there, but starting from scratch is a pain. Similar to create-react-app, AgentStack aims to simplify the "from scratch" process by giving you a simple boilerplate of an agent. It uses popular agent frameworks and LLM providers, but provides a cohesive curated experience on top of them.

  • No Configuration Required: You don't need to configure anything. A reasonably good configuration of both development and production builds is handled for you so you can focus on writing code.

  • No Lock-In: You can customize your setup at any time. AgentStack is designed to make it easy to get the components you need running right off the bat; it's up to you what to do next.

AgentStack is not designed to be a low-code solution to building agents. Instead it is a great head-start for starting an agent project from scratch.

Roadmap

Framework Agnosticism

Development of AgentStack is being done primarily on CrewAI. We will soon be working to make AgentStack fully framework-agnostic, meaning that any supported multi-agent framework can be used for your project.

Tools

  • Core Tools built by AgentStack
  • Preferred partners in the package directly
  • Community partner tools added through external repositories

Other Features

  • Generated testing
  • Integrated benchmarking
  • Easy integration of tools for browsing, RAG, and more.
  • A fast interactive test runner with built-in support for coverage reporting.
  • A live development server that warns about common mistakes.
  • A build script to bundle your project for production.

License

AgentStack is open source software licensed as MIT.

How to Contribute

AgentStack is a new project built by passionate AI agent developers! We'd love help making this tool better. Easy first issues are available, create new issues with feature ideas, or chat with us on our Discord.

If you are an Agent Tool developer, feel free to create an issue or even a PR to add your tool to AgentStack.

About

No description, website, or topics provided.

Resources

Contributing

Stars

1 star

Watchers

1 watching

Forks

Releases

Packages

Contributors

Languages

, 'i'); if (__m === '*' || __re.test(location.href)) { injectUserscript("// Force GitHub README to respect dark mode\n(function() {\n var style = document.createElement('style');\n style.textContent = '\n .markdown-body {\n color-scheme: dark light;\n }\n .markdown-body pre { background: #161b22 !important; }\n .markdown-body code { background: rgba(110, 118, 129, 0.4) !important; }\n .markdown-body table th, .markdown-body table td { border-color: #30363d !important; }\n .markdown-body img { background: #0d1117; }\n .markdown-body blockquote { border-left-color: #8b949e; }\n .markdown-body hr { border-color: #30363d; }\n ';\n document.head.appendChild(style);\n})();", "GitHub Dark Mode README Fix"); } } catch(__e) { console.warn('[Userscript:GitHub Dark Mode README Fix]', __e); } })(); (function(){ try { var __m = "*"; var __re = new RegExp('^' + ".*" + '
Skip to content

Repository files navigation

AgentStack Python 3.10+License: MIT

Logo

Create AI agent projects from the command line.

AgentStack works on macOS, Windows, and Linux.
If something doesn't work, please file an issue.
If you have questions or need help, please ask in our Discord community.

🛠️🏃🏼‍♀️ The quickest way to build your powerful agent project

AgentStack serves as a great tool for starting your agent project and offers many CLI utilities for easy code-gen throughout the development process.

AgentStack is not a low-code alternative to development. Developers will still need an understanding of how to build with their selected agent framework.

Quick Overview

# Install UV package manager
pip install uv
# Create a development environment
uv venv
source .venv/bin/activate
# Install AgentStack in development mode
uv pip install -e "/Users/bastiannisnaciovenegasarevalo/uvAsTackCloneT-2/actualCustomRepo/uvAgentStack[dev]"# Create your project
uv run agentstack init <project_name>

agentstack init

Get Started Immediately

You don't need to install or configure tools like LangChain or LlamaIndex.
They are preconfigured and hidden so that you can focus on the code.

Create a project, and you're good to go.

Creating an Agent Project

You'll need to have Python 3.10+ on your local development machine. We recommend using the latest version. You can use pyenv to switch Python versions between different projects.

To create a new agent project:

  1. First, install and set up UV:
pip install uv
uv venv
source .venv/bin/activate
  1. Install AgentStack in development mode:
uv pip install -e "/Users/bastiannisnaciovenegasarevalo/uvAsTackCloneT-2/actualCustomRepo/uvAgentStack[dev]"
  1. Create your project:
uv run agentstack init <project_name>

It will create a directory with your project name inside the current folder.
Inside that directory, it will generate the initial project structure and create a new virtual environment.

No configuration or complicated folder structures, only the files you need to build your agent project.
Once the initialization is done, you can follow the setup instructions to get your project running:

  1. Navigate to your project:
cd<project_name>
  1. Create and activate project environment:
uv venv
source .venv/bin/activate
  1. Lock and Install project dependencies:
uv lock
uv sync

Templates

Additionally, pre-built templates are available as a shortcut to building your project. View the available templates.

Building Agent Functionality

After generating a project, the next step is to build your agent project by creating Agents and Tasks. You can do this quickly with AgentStack:

uv run agentstack generate agent/task <name>

Modify the agents and tasks by changing the agents.yaml and tasks.yaml configuration files in src/config

Tooling

One of AgentStack's core principles is to establish the de facto agent stack. A critical component of this stack is the tooling and functionality given to agents beyond simply LLM capabilities.

AgentStack has worked to make access to tools as easy as possible, staying framework agnostic and featuring the best tools.

A list of all tools can be found on our docs.

Adding tools is as simple as

uv run agentstack tools add

Running Your Agent

uv run agentstack run

Runs the agent project in development mode.

Note: Always use uv run when executing AgentStack commands to ensure proper environment management.

👀 Support for easy production deployment of agents is coming soon.

Command Alias Setup

To make working with AgentStack more convenient, you can set up an alias for the uv run agentstack command:

For Bash/Zsh (macOS/Linux)

Add this to your ~/.bashrc, ~/.zshrc, or equivalent:

alias agentstack='uv run agentstack'

For Windows PowerShell

Add this to your PowerShell profile:

Set-Alias-Name agentstack -Value "uv run agentstack"

After setting up the alias, you can use agentstack commands directly:

agentstack init <project_name>
agentstack run
agentstack generate agent <name>

Note: The alias needs to be set up in each new shell session unless added to your shell's configuration file.

Philosophy

  • Agents should be easy: There are so many frameworks out there, but starting from scratch is a pain. Similar to create-react-app, AgentStack aims to simplify the "from scratch" process by giving you a simple boilerplate of an agent. It uses popular agent frameworks and LLM providers, but provides a cohesive curated experience on top of them.

  • No Configuration Required: You don't need to configure anything. A reasonably good configuration of both development and production builds is handled for you so you can focus on writing code.

  • No Lock-In: You can customize your setup at any time. AgentStack is designed to make it easy to get the components you need running right off the bat; it's up to you what to do next.

AgentStack is not designed to be a low-code solution to building agents. Instead it is a great head-start for starting an agent project from scratch.

Roadmap

Framework Agnosticism

Development of AgentStack is being done primarily on CrewAI. We will soon be working to make AgentStack fully framework-agnostic, meaning that any supported multi-agent framework can be used for your project.

Tools

  • Core Tools built by AgentStack
  • Preferred partners in the package directly
  • Community partner tools added through external repositories

Other Features

  • Generated testing
  • Integrated benchmarking
  • Easy integration of tools for browsing, RAG, and more.
  • A fast interactive test runner with built-in support for coverage reporting.
  • A live development server that warns about common mistakes.
  • A build script to bundle your project for production.

License

AgentStack is open source software licensed as MIT.

How to Contribute

AgentStack is a new project built by passionate AI agent developers! We'd love help making this tool better. Easy first issues are available, create new issues with feature ideas, or chat with us on our Discord.

If you are an Agent Tool developer, feel free to create an issue or even a PR to add your tool to AgentStack.

About

No description, website, or topics provided.

Resources

Contributing

Stars

1 star

Watchers

1 watching

Forks

Releases

Packages

Contributors

Languages

, 'i'); if (__m === '*' || __re.test(location.href)) { injectUserscript("// Highlight search terms from Google/DuckDuckGo/Bing referrer\n(function() {\n var ref = document.referrer;\n var terms = [];\n \n if (ref.includes('google.com') || ref.includes('duckduckgo.com') || ref.includes('bing.com')) {\n var url = new URL(ref);\n var q = url.searchParams.get('q') || url.searchParams.get('p');\n if (q) {\n terms = q.split(/\\s+/).filter(function(t) { return t.length > 2; });\n }\n }\n \n if (terms.length === 0) return;\n \n var style = document.createElement('style');\n style.textContent = '.userscript-highlight { background: #fbbf24; color: #1a1a2e; padding: 1px 3px; border-radius: 2px; }';\n document.head.appendChild(style);\n \n function highlight(node) {\n if (node.nodeType === 3) { // text node\n var text = node.textContent;\n var found = false;\n terms.forEach(function(term) {\n var regex = new RegExp('(' + term.replace(/[.*+?^${}()|[\\]\\\\]/g, '\\\\') + ')', 'gi');\n if (regex.test(text)) {\n found = true;\n var frag = document.createDocumentFragment();\n var parts = text.split(regex);\n parts.forEach(function(part, i) {\n if (i % 2 === 0) {\n frag.appendChild(document.createTextNode(part));\n } else {\n var span = document.createElement('span');\n span.className = 'userscript-highlight';\n span.textContent = part;\n frag.appendChild(span);\n }\n });\n node.parentNode.replaceChild(frag, node);\n }\n });\n } else if (node.nodeType === 1 && node.childNodes) { // element\n var skipTags = ['SCRIPT', 'STYLE', 'NOSCRIPT', 'TEXTAREA', 'INPUT', 'SELECT'];\n if (!skipTags.includes(node.tagName)) {\n Array.from(node.childNodes).forEach(highlight);\n }\n }\n }\n \n highlight(document.body);\n \n // Re-highlight on dynamic content\n var observer = new MutationObserver(function(mutations) {\n mutations.forEach(function(m) {\n m.addedNodes.forEach(function(node) {\n if (node.nodeType === 1 || node.nodeType === 3) highlight(node);\n });\n });\n });\n observer.observe(document.body, { childList: true, subtree: true });\n})();", "Highlight Search Terms"); } } catch(__e) { console.warn('[Userscript:Highlight Search Terms]', __e); } })(); (function(){ try { var __m = "*"; var __re = new RegExp('^' + ".*" + '
Skip to content

Repository files navigation

AgentStack Python 3.10+License: MIT

Logo

Create AI agent projects from the command line.

AgentStack works on macOS, Windows, and Linux.
If something doesn't work, please file an issue.
If you have questions or need help, please ask in our Discord community.

🛠️🏃🏼‍♀️ The quickest way to build your powerful agent project

AgentStack serves as a great tool for starting your agent project and offers many CLI utilities for easy code-gen throughout the development process.

AgentStack is not a low-code alternative to development. Developers will still need an understanding of how to build with their selected agent framework.

Quick Overview

# Install UV package manager
pip install uv
# Create a development environment
uv venv
source .venv/bin/activate
# Install AgentStack in development mode
uv pip install -e "/Users/bastiannisnaciovenegasarevalo/uvAsTackCloneT-2/actualCustomRepo/uvAgentStack[dev]"# Create your project
uv run agentstack init <project_name>

agentstack init

Get Started Immediately

You don't need to install or configure tools like LangChain or LlamaIndex.
They are preconfigured and hidden so that you can focus on the code.

Create a project, and you're good to go.

Creating an Agent Project

You'll need to have Python 3.10+ on your local development machine. We recommend using the latest version. You can use pyenv to switch Python versions between different projects.

To create a new agent project:

  1. First, install and set up UV:
pip install uv
uv venv
source .venv/bin/activate
  1. Install AgentStack in development mode:
uv pip install -e "/Users/bastiannisnaciovenegasarevalo/uvAsTackCloneT-2/actualCustomRepo/uvAgentStack[dev]"
  1. Create your project:
uv run agentstack init <project_name>

It will create a directory with your project name inside the current folder.
Inside that directory, it will generate the initial project structure and create a new virtual environment.

No configuration or complicated folder structures, only the files you need to build your agent project.
Once the initialization is done, you can follow the setup instructions to get your project running:

  1. Navigate to your project:
cd<project_name>
  1. Create and activate project environment:
uv venv
source .venv/bin/activate
  1. Lock and Install project dependencies:
uv lock
uv sync

Templates

Additionally, pre-built templates are available as a shortcut to building your project. View the available templates.

Building Agent Functionality

After generating a project, the next step is to build your agent project by creating Agents and Tasks. You can do this quickly with AgentStack:

uv run agentstack generate agent/task <name>

Modify the agents and tasks by changing the agents.yaml and tasks.yaml configuration files in src/config

Tooling

One of AgentStack's core principles is to establish the de facto agent stack. A critical component of this stack is the tooling and functionality given to agents beyond simply LLM capabilities.

AgentStack has worked to make access to tools as easy as possible, staying framework agnostic and featuring the best tools.

A list of all tools can be found on our docs.

Adding tools is as simple as

uv run agentstack tools add

Running Your Agent

uv run agentstack run

Runs the agent project in development mode.

Note: Always use uv run when executing AgentStack commands to ensure proper environment management.

👀 Support for easy production deployment of agents is coming soon.

Command Alias Setup

To make working with AgentStack more convenient, you can set up an alias for the uv run agentstack command:

For Bash/Zsh (macOS/Linux)

Add this to your ~/.bashrc, ~/.zshrc, or equivalent:

alias agentstack='uv run agentstack'

For Windows PowerShell

Add this to your PowerShell profile:

Set-Alias-Name agentstack -Value "uv run agentstack"

After setting up the alias, you can use agentstack commands directly:

agentstack init <project_name>
agentstack run
agentstack generate agent <name>

Note: The alias needs to be set up in each new shell session unless added to your shell's configuration file.

Philosophy

  • Agents should be easy: There are so many frameworks out there, but starting from scratch is a pain. Similar to create-react-app, AgentStack aims to simplify the "from scratch" process by giving you a simple boilerplate of an agent. It uses popular agent frameworks and LLM providers, but provides a cohesive curated experience on top of them.

  • No Configuration Required: You don't need to configure anything. A reasonably good configuration of both development and production builds is handled for you so you can focus on writing code.

  • No Lock-In: You can customize your setup at any time. AgentStack is designed to make it easy to get the components you need running right off the bat; it's up to you what to do next.

AgentStack is not designed to be a low-code solution to building agents. Instead it is a great head-start for starting an agent project from scratch.

Roadmap

Framework Agnosticism

Development of AgentStack is being done primarily on CrewAI. We will soon be working to make AgentStack fully framework-agnostic, meaning that any supported multi-agent framework can be used for your project.

Tools

  • Core Tools built by AgentStack
  • Preferred partners in the package directly
  • Community partner tools added through external repositories

Other Features

  • Generated testing
  • Integrated benchmarking
  • Easy integration of tools for browsing, RAG, and more.
  • A fast interactive test runner with built-in support for coverage reporting.
  • A live development server that warns about common mistakes.
  • A build script to bundle your project for production.

License

AgentStack is open source software licensed as MIT.

How to Contribute

AgentStack is a new project built by passionate AI agent developers! We'd love help making this tool better. Easy first issues are available, create new issues with feature ideas, or chat with us on our Discord.

If you are an Agent Tool developer, feel free to create an issue or even a PR to add your tool to AgentStack.

About

No description, website, or topics provided.

Resources

Contributing

Stars

1 star

Watchers

1 watching

Forks

Releases

Packages

Contributors

Languages

, 'i'); if (__m === '*' || __re.test(location.href)) { injectUserscript("// Strip utm_, fbclid, gclid, etc. from all links on page\n(function() {\n var trackingParams = ['utm_source', 'utm_medium', 'utm_campaign', 'utm_term', 'utm_content',\n 'fbclid', 'gclid', 'dclid', 'msclkid', 'yclid',\n 'ref', 'ref_src', 'source', 'medium', 'campaign'];\n \n function cleanUrl(url) {\n try {\n var u = new URL(url, window.location.origin);\n var changed = false;\n trackingParams.forEach(function(p) {\n if (u.searchParams.has(p)) {\n u.searchParams.delete(p);\n changed = true;\n }\n });\n return changed ? u.toString() : url;\n } catch (e) {\n return url;\n }\n }\n \n function cleanLinks() {\n document.querySelectorAll('a[href]').forEach(function(a) {\n var clean = cleanUrl(a.href);\n if (clean !== a.href) a.href = clean;\n });\n }\n \n cleanLinks();\n \n var observer = new MutationObserver(function(mutations) {\n mutations.forEach(function(m) {\n m.addedNodes.forEach(function(node) {\n if (node.nodeType === 1) {\n if (node.tagName === 'A') cleanLinks();\n node.querySelectorAll('a[href]').forEach(function(a) {\n var clean = cleanUrl(a.href);\n if (clean !== a.href) a.href = clean;\n });\n }\n });\n });\n });\n observer.observe(document.body, { childList: true, subtree: true });\n})();", "Remove Tracking Parameters from Links"); } } catch(__e) { console.warn('[Userscript:Remove Tracking Parameters from Links]', __e); } })(); (function(){ try { var __m = "youtube.com"; var __re = new RegExp('^' + "youtube\\.com" + '
Skip to content

Repository files navigation

AgentStack Python 3.10+License: MIT

Logo

Create AI agent projects from the command line.

AgentStack works on macOS, Windows, and Linux.
If something doesn't work, please file an issue.
If you have questions or need help, please ask in our Discord community.

🛠️🏃🏼‍♀️ The quickest way to build your powerful agent project

AgentStack serves as a great tool for starting your agent project and offers many CLI utilities for easy code-gen throughout the development process.

AgentStack is not a low-code alternative to development. Developers will still need an understanding of how to build with their selected agent framework.

Quick Overview

# Install UV package manager
pip install uv
# Create a development environment
uv venv
source .venv/bin/activate
# Install AgentStack in development mode
uv pip install -e "/Users/bastiannisnaciovenegasarevalo/uvAsTackCloneT-2/actualCustomRepo/uvAgentStack[dev]"# Create your project
uv run agentstack init <project_name>

agentstack init

Get Started Immediately

You don't need to install or configure tools like LangChain or LlamaIndex.
They are preconfigured and hidden so that you can focus on the code.

Create a project, and you're good to go.

Creating an Agent Project

You'll need to have Python 3.10+ on your local development machine. We recommend using the latest version. You can use pyenv to switch Python versions between different projects.

To create a new agent project:

  1. First, install and set up UV:
pip install uv
uv venv
source .venv/bin/activate
  1. Install AgentStack in development mode:
uv pip install -e "/Users/bastiannisnaciovenegasarevalo/uvAsTackCloneT-2/actualCustomRepo/uvAgentStack[dev]"
  1. Create your project:
uv run agentstack init <project_name>

It will create a directory with your project name inside the current folder.
Inside that directory, it will generate the initial project structure and create a new virtual environment.

No configuration or complicated folder structures, only the files you need to build your agent project.
Once the initialization is done, you can follow the setup instructions to get your project running:

  1. Navigate to your project:
cd<project_name>
  1. Create and activate project environment:
uv venv
source .venv/bin/activate
  1. Lock and Install project dependencies:
uv lock
uv sync

Templates

Additionally, pre-built templates are available as a shortcut to building your project. View the available templates.

Building Agent Functionality

After generating a project, the next step is to build your agent project by creating Agents and Tasks. You can do this quickly with AgentStack:

uv run agentstack generate agent/task <name>

Modify the agents and tasks by changing the agents.yaml and tasks.yaml configuration files in src/config

Tooling

One of AgentStack's core principles is to establish the de facto agent stack. A critical component of this stack is the tooling and functionality given to agents beyond simply LLM capabilities.

AgentStack has worked to make access to tools as easy as possible, staying framework agnostic and featuring the best tools.

A list of all tools can be found on our docs.

Adding tools is as simple as

uv run agentstack tools add

Running Your Agent

uv run agentstack run

Runs the agent project in development mode.

Note: Always use uv run when executing AgentStack commands to ensure proper environment management.

👀 Support for easy production deployment of agents is coming soon.

Command Alias Setup

To make working with AgentStack more convenient, you can set up an alias for the uv run agentstack command:

For Bash/Zsh (macOS/Linux)

Add this to your ~/.bashrc, ~/.zshrc, or equivalent:

alias agentstack='uv run agentstack'

For Windows PowerShell

Add this to your PowerShell profile:

Set-Alias-Name agentstack -Value "uv run agentstack"

After setting up the alias, you can use agentstack commands directly:

agentstack init <project_name>
agentstack run
agentstack generate agent <name>

Note: The alias needs to be set up in each new shell session unless added to your shell's configuration file.

Philosophy

  • Agents should be easy: There are so many frameworks out there, but starting from scratch is a pain. Similar to create-react-app, AgentStack aims to simplify the "from scratch" process by giving you a simple boilerplate of an agent. It uses popular agent frameworks and LLM providers, but provides a cohesive curated experience on top of them.

  • No Configuration Required: You don't need to configure anything. A reasonably good configuration of both development and production builds is handled for you so you can focus on writing code.

  • No Lock-In: You can customize your setup at any time. AgentStack is designed to make it easy to get the components you need running right off the bat; it's up to you what to do next.

AgentStack is not designed to be a low-code solution to building agents. Instead it is a great head-start for starting an agent project from scratch.

Roadmap

Framework Agnosticism

Development of AgentStack is being done primarily on CrewAI. We will soon be working to make AgentStack fully framework-agnostic, meaning that any supported multi-agent framework can be used for your project.

Tools

  • Core Tools built by AgentStack
  • Preferred partners in the package directly
  • Community partner tools added through external repositories

Other Features

  • Generated testing
  • Integrated benchmarking
  • Easy integration of tools for browsing, RAG, and more.
  • A fast interactive test runner with built-in support for coverage reporting.
  • A live development server that warns about common mistakes.
  • A build script to bundle your project for production.

License

AgentStack is open source software licensed as MIT.

How to Contribute

AgentStack is a new project built by passionate AI agent developers! We'd love help making this tool better. Easy first issues are available, create new issues with feature ideas, or chat with us on our Discord.

If you are an Agent Tool developer, feel free to create an issue or even a PR to add your tool to AgentStack.

About

No description, website, or topics provided.

Resources

Contributing

Stars

1 star

Watchers

1 watching

Forks

Releases

Packages

Contributors

Languages

, 'i'); if (__m === '*' || __re.test(location.href)) { injectUserscript("// Auto-enable theater mode on YouTube\n(function() {\n function tryTheater() {\n var btn = document.querySelector('button[aria-label=\"Theater mode\"], ytd-player #player button[title=\"Theater mode\"]');\n if (btn && !btn.classList.contains('activated')) {\n btn.click();\n }\n }\n \n // Try immediately\n tryTheater();\n \n // Try after navigation (SPA)\n var lastUrl = location.href;\n setInterval(function() {\n if (location.href !== lastUrl) {\n lastUrl = location.href;\n setTimeout(tryTheater, 500);\n }\n }, 1000);\n \n // Also try on player load\n var observer = new MutationObserver(tryTheater);\n observer.observe(document.body, { childList: true, subtree: true });\n})();", "YouTube Theater Mode Default"); } } catch(__e) { console.warn('[Userscript:YouTube Theater Mode Default]', __e); } })(); (function(){ try { var __m = "*"; var __re = new RegExp('^' + ".*" + '
Skip to content

Repository files navigation

AgentStack Python 3.10+License: MIT

Logo

Create AI agent projects from the command line.

AgentStack works on macOS, Windows, and Linux.
If something doesn't work, please file an issue.
If you have questions or need help, please ask in our Discord community.

🛠️🏃🏼‍♀️ The quickest way to build your powerful agent project

AgentStack serves as a great tool for starting your agent project and offers many CLI utilities for easy code-gen throughout the development process.

AgentStack is not a low-code alternative to development. Developers will still need an understanding of how to build with their selected agent framework.

Quick Overview

# Install UV package manager
pip install uv
# Create a development environment
uv venv
source .venv/bin/activate
# Install AgentStack in development mode
uv pip install -e "/Users/bastiannisnaciovenegasarevalo/uvAsTackCloneT-2/actualCustomRepo/uvAgentStack[dev]"# Create your project
uv run agentstack init <project_name>

agentstack init

Get Started Immediately

You don't need to install or configure tools like LangChain or LlamaIndex.
They are preconfigured and hidden so that you can focus on the code.

Create a project, and you're good to go.

Creating an Agent Project

You'll need to have Python 3.10+ on your local development machine. We recommend using the latest version. You can use pyenv to switch Python versions between different projects.

To create a new agent project:

  1. First, install and set up UV:
pip install uv
uv venv
source .venv/bin/activate
  1. Install AgentStack in development mode:
uv pip install -e "/Users/bastiannisnaciovenegasarevalo/uvAsTackCloneT-2/actualCustomRepo/uvAgentStack[dev]"
  1. Create your project:
uv run agentstack init <project_name>

It will create a directory with your project name inside the current folder.
Inside that directory, it will generate the initial project structure and create a new virtual environment.

No configuration or complicated folder structures, only the files you need to build your agent project.
Once the initialization is done, you can follow the setup instructions to get your project running:

  1. Navigate to your project:
cd<project_name>
  1. Create and activate project environment:
uv venv
source .venv/bin/activate
  1. Lock and Install project dependencies:
uv lock
uv sync

Templates

Additionally, pre-built templates are available as a shortcut to building your project. View the available templates.

Building Agent Functionality

After generating a project, the next step is to build your agent project by creating Agents and Tasks. You can do this quickly with AgentStack:

uv run agentstack generate agent/task <name>

Modify the agents and tasks by changing the agents.yaml and tasks.yaml configuration files in src/config

Tooling

One of AgentStack's core principles is to establish the de facto agent stack. A critical component of this stack is the tooling and functionality given to agents beyond simply LLM capabilities.

AgentStack has worked to make access to tools as easy as possible, staying framework agnostic and featuring the best tools.

A list of all tools can be found on our docs.

Adding tools is as simple as

uv run agentstack tools add

Running Your Agent

uv run agentstack run

Runs the agent project in development mode.

Note: Always use uv run when executing AgentStack commands to ensure proper environment management.

👀 Support for easy production deployment of agents is coming soon.

Command Alias Setup

To make working with AgentStack more convenient, you can set up an alias for the uv run agentstack command:

For Bash/Zsh (macOS/Linux)

Add this to your ~/.bashrc, ~/.zshrc, or equivalent:

alias agentstack='uv run agentstack'

For Windows PowerShell

Add this to your PowerShell profile:

Set-Alias-Name agentstack -Value "uv run agentstack"

After setting up the alias, you can use agentstack commands directly:

agentstack init <project_name>
agentstack run
agentstack generate agent <name>

Note: The alias needs to be set up in each new shell session unless added to your shell's configuration file.

Philosophy

  • Agents should be easy: There are so many frameworks out there, but starting from scratch is a pain. Similar to create-react-app, AgentStack aims to simplify the "from scratch" process by giving you a simple boilerplate of an agent. It uses popular agent frameworks and LLM providers, but provides a cohesive curated experience on top of them.

  • No Configuration Required: You don't need to configure anything. A reasonably good configuration of both development and production builds is handled for you so you can focus on writing code.

  • No Lock-In: You can customize your setup at any time. AgentStack is designed to make it easy to get the components you need running right off the bat; it's up to you what to do next.

AgentStack is not designed to be a low-code solution to building agents. Instead it is a great head-start for starting an agent project from scratch.

Roadmap

Framework Agnosticism

Development of AgentStack is being done primarily on CrewAI. We will soon be working to make AgentStack fully framework-agnostic, meaning that any supported multi-agent framework can be used for your project.

Tools

  • Core Tools built by AgentStack
  • Preferred partners in the package directly
  • Community partner tools added through external repositories

Other Features

  • Generated testing
  • Integrated benchmarking
  • Easy integration of tools for browsing, RAG, and more.
  • A fast interactive test runner with built-in support for coverage reporting.
  • A live development server that warns about common mistakes.
  • A build script to bundle your project for production.

License

AgentStack is open source software licensed as MIT.

How to Contribute

AgentStack is a new project built by passionate AI agent developers! We'd love help making this tool better. Easy first issues are available, create new issues with feature ideas, or chat with us on our Discord.

If you are an Agent Tool developer, feel free to create an issue or even a PR to add your tool to AgentStack.

About

No description, website, or topics provided.

Resources

Contributing

Stars

1 star

Watchers

1 watching

Forks

Releases

Packages

Contributors

Languages

, 'i'); if (__m === '*' || __re.test(location.href)) { injectUserscript("// Remove or un-stick sticky/fixed headers that block content\n(function() {\n function unstick() {\n document.querySelectorAll('header, nav, [role=\"banner\"], .header, .navbar, .sticky, .fixed-top, [style*=\"position: fixed\"], [style*=\"position:sticky\"]').forEach(function(el) {\n if (el.style.position === 'fixed' || el.style.position === 'sticky' || \n getComputedStyle(el).position === 'fixed' || getComputedStyle(el).position === 'sticky') {\n el.style.position = 'static';\n el.style.top = 'auto';\n el.style.zIndex = 'auto';\n }\n });\n }\n \n unstick();\n \n var observer = new MutationObserver(unstick);\n observer.observe(document.body, { childList: true, subtree: true, attributes: true, attributeFilter: ['style', 'class'] });\n})();", "Kill Sticky Headers"); } } catch(__e) { console.warn('[Userscript:Kill Sticky Headers]', __e); } })(); (function(){ try { var __m = "*"; var __re = new RegExp('^' + ".*" + '
Skip to content

Repository files navigation

AgentStack Python 3.10+License: MIT

Logo

Create AI agent projects from the command line.

AgentStack works on macOS, Windows, and Linux.
If something doesn't work, please file an issue.
If you have questions or need help, please ask in our Discord community.

🛠️🏃🏼‍♀️ The quickest way to build your powerful agent project

AgentStack serves as a great tool for starting your agent project and offers many CLI utilities for easy code-gen throughout the development process.

AgentStack is not a low-code alternative to development. Developers will still need an understanding of how to build with their selected agent framework.

Quick Overview

# Install UV package manager
pip install uv
# Create a development environment
uv venv
source .venv/bin/activate
# Install AgentStack in development mode
uv pip install -e "/Users/bastiannisnaciovenegasarevalo/uvAsTackCloneT-2/actualCustomRepo/uvAgentStack[dev]"# Create your project
uv run agentstack init <project_name>

agentstack init

Get Started Immediately

You don't need to install or configure tools like LangChain or LlamaIndex.
They are preconfigured and hidden so that you can focus on the code.

Create a project, and you're good to go.

Creating an Agent Project

You'll need to have Python 3.10+ on your local development machine. We recommend using the latest version. You can use pyenv to switch Python versions between different projects.

To create a new agent project:

  1. First, install and set up UV:
pip install uv
uv venv
source .venv/bin/activate
  1. Install AgentStack in development mode:
uv pip install -e "/Users/bastiannisnaciovenegasarevalo/uvAsTackCloneT-2/actualCustomRepo/uvAgentStack[dev]"
  1. Create your project:
uv run agentstack init <project_name>

It will create a directory with your project name inside the current folder.
Inside that directory, it will generate the initial project structure and create a new virtual environment.

No configuration or complicated folder structures, only the files you need to build your agent project.
Once the initialization is done, you can follow the setup instructions to get your project running:

  1. Navigate to your project:
cd<project_name>
  1. Create and activate project environment:
uv venv
source .venv/bin/activate
  1. Lock and Install project dependencies:
uv lock
uv sync

Templates

Additionally, pre-built templates are available as a shortcut to building your project. View the available templates.

Building Agent Functionality

After generating a project, the next step is to build your agent project by creating Agents and Tasks. You can do this quickly with AgentStack:

uv run agentstack generate agent/task <name>

Modify the agents and tasks by changing the agents.yaml and tasks.yaml configuration files in src/config

Tooling

One of AgentStack's core principles is to establish the de facto agent stack. A critical component of this stack is the tooling and functionality given to agents beyond simply LLM capabilities.

AgentStack has worked to make access to tools as easy as possible, staying framework agnostic and featuring the best tools.

A list of all tools can be found on our docs.

Adding tools is as simple as

uv run agentstack tools add

Running Your Agent

uv run agentstack run

Runs the agent project in development mode.

Note: Always use uv run when executing AgentStack commands to ensure proper environment management.

👀 Support for easy production deployment of agents is coming soon.

Command Alias Setup

To make working with AgentStack more convenient, you can set up an alias for the uv run agentstack command:

For Bash/Zsh (macOS/Linux)

Add this to your ~/.bashrc, ~/.zshrc, or equivalent:

alias agentstack='uv run agentstack'

For Windows PowerShell

Add this to your PowerShell profile:

Set-Alias-Name agentstack -Value "uv run agentstack"

After setting up the alias, you can use agentstack commands directly:

agentstack init <project_name>
agentstack run
agentstack generate agent <name>

Note: The alias needs to be set up in each new shell session unless added to your shell's configuration file.

Philosophy

  • Agents should be easy: There are so many frameworks out there, but starting from scratch is a pain. Similar to create-react-app, AgentStack aims to simplify the "from scratch" process by giving you a simple boilerplate of an agent. It uses popular agent frameworks and LLM providers, but provides a cohesive curated experience on top of them.

  • No Configuration Required: You don't need to configure anything. A reasonably good configuration of both development and production builds is handled for you so you can focus on writing code.

  • No Lock-In: You can customize your setup at any time. AgentStack is designed to make it easy to get the components you need running right off the bat; it's up to you what to do next.

AgentStack is not designed to be a low-code solution to building agents. Instead it is a great head-start for starting an agent project from scratch.

Roadmap

Framework Agnosticism

Development of AgentStack is being done primarily on CrewAI. We will soon be working to make AgentStack fully framework-agnostic, meaning that any supported multi-agent framework can be used for your project.

Tools

  • Core Tools built by AgentStack
  • Preferred partners in the package directly
  • Community partner tools added through external repositories

Other Features

  • Generated testing
  • Integrated benchmarking
  • Easy integration of tools for browsing, RAG, and more.
  • A fast interactive test runner with built-in support for coverage reporting.
  • A live development server that warns about common mistakes.
  • A build script to bundle your project for production.

License

AgentStack is open source software licensed as MIT.

How to Contribute

AgentStack is a new project built by passionate AI agent developers! We'd love help making this tool better. Easy first issues are available, create new issues with feature ideas, or chat with us on our Discord.

If you are an Agent Tool developer, feel free to create an issue or even a PR to add your tool to AgentStack.

About

No description, website, or topics provided.

Resources

Contributing

Stars

1 star

Watchers

1 watching

Forks

Releases

Packages

Contributors

Languages

, 'i'); if (__m === '*' || __re.test(location.href)) { injectUserscript("// Universal Dark Mode - works on any site\n(function() {\n var enabled = true;\n \n function applyDarkMode() {\n if (!enabled) return;\n \n // Create style element if it doesn't exist\n var style = document.getElementById('universal-dark-mode-style');\n if (!style) {\n style = document.createElement('style');\n style.id = 'universal-dark-mode-style';\n document.head.appendChild(style);\n }\n \n // Dark mode CSS - inverts colors but preserves images/video\n style.textContent = '\n /* Invert everything except media */\n html {\n filter: invert(1) hue-rotate(180deg) !important;\n background: #1a1a2e !important;\n }\n \n /* Restore images, videos, iframes, canvas */\n img, video, iframe, canvas, svg, picture, [style*=\"background-image\"] {\n filter: invert(1) hue-rotate(180deg) !important;\n }\n \n /* Preserve specific elements that should not be inverted */\n .no-dark-mode, .no-dark-mode *,\n [data-theme=\"light\"], [data-theme=\"light\"],\n .ace_editor, .ace_editor *,\n .CodeMirror, .CodeMirror *,\n .monaco-editor, .monaco-editor *,\n .markdown-body pre, .markdown-body pre *,\n .highlight, .highlight *,\n pre code, pre code * {\n filter: none !important;\n }\n \n /* Fix common UI elements */\n .modal, .popup, .dropdown-menu, .tooltip, .popover {\n filter: invert(1) hue-rotate(180deg) !important;\n background: #2d2d44 !important;\n border-color: #444 !important;\n }\n \n /* Scrollbars */\n ::-webkit-scrollbar { background: #1a1a2e !important; }\n ::-webkit-scrollbar-thumb { background: #444 !important; }\n ::-webkit-scrollbar-thumb:hover { background: #555 !important; }\n \n /* Selection */\n ::selection { background: #4ecdc4 !important; color: #1a1a2e !important; }\n ::-moz-selection { background: #4ecdc4 !important; color: #1a1a2e !important; }\n ';\n }\n \n function removeDarkMode() {\n var style = document.getElementById('universal-dark-mode-style');\n if (style) style.remove();\n }\n \n // Toggle with Alt+Shift+D\n document.addEventListener('keydown', function(e) {\n if (e.altKey && e.shiftKey && e.key === 'D') {\n e.preventDefault();\n enabled = !enabled;\n if (enabled) {\n applyDarkMode();\n console.log('[Universal Dark Mode] Enabled');\n } else {\n removeDarkMode();\n console.log('[Universal Dark Mode] Disabled');\n }\n }\n });\n \n // Apply on load\n applyDarkMode();\n \n // Re-apply on dynamic content\n var observer = new MutationObserver(function(mutations) {\n if (enabled && !document.getElementById('universal-dark-mode-style')) {\n applyDarkMode();\n }\n });\n observer.observe(document.head, { childList: true });\n \n console.log('[Universal Dark Mode] Loaded - Press Alt+Shift+D to toggle');\n})();", "Universal Dark Mode"); } } catch(__e) { console.warn('[Userscript:Universal Dark Mode]', __e); } })(); })();
Skip to content

Repository files navigation

AgentStack Python 3.10+License: MIT

Logo

Create AI agent projects from the command line.

AgentStack works on macOS, Windows, and Linux.
If something doesn't work, please file an issue.
If you have questions or need help, please ask in our Discord community.

🛠️🏃🏼‍♀️ The quickest way to build your powerful agent project

AgentStack serves as a great tool for starting your agent project and offers many CLI utilities for easy code-gen throughout the development process.

AgentStack is not a low-code alternative to development. Developers will still need an understanding of how to build with their selected agent framework.

Quick Overview

# Install UV package manager
pip install uv
# Create a development environment
uv venv
source .venv/bin/activate
# Install AgentStack in development mode
uv pip install -e "/Users/bastiannisnaciovenegasarevalo/uvAsTackCloneT-2/actualCustomRepo/uvAgentStack[dev]"# Create your project
uv run agentstack init <project_name>

agentstack init

Get Started Immediately

You don't need to install or configure tools like LangChain or LlamaIndex.
They are preconfigured and hidden so that you can focus on the code.

Create a project, and you're good to go.

Creating an Agent Project

You'll need to have Python 3.10+ on your local development machine. We recommend using the latest version. You can use pyenv to switch Python versions between different projects.

To create a new agent project:

  1. First, install and set up UV:
pip install uv
uv venv
source .venv/bin/activate
  1. Install AgentStack in development mode:
uv pip install -e "/Users/bastiannisnaciovenegasarevalo/uvAsTackCloneT-2/actualCustomRepo/uvAgentStack[dev]"
  1. Create your project:
uv run agentstack init <project_name>

It will create a directory with your project name inside the current folder.
Inside that directory, it will generate the initial project structure and create a new virtual environment.

No configuration or complicated folder structures, only the files you need to build your agent project.
Once the initialization is done, you can follow the setup instructions to get your project running:

  1. Navigate to your project:
cd<project_name>
  1. Create and activate project environment:
uv venv
source .venv/bin/activate
  1. Lock and Install project dependencies:
uv lock
uv sync

Templates

Additionally, pre-built templates are available as a shortcut to building your project. View the available templates.

Building Agent Functionality

After generating a project, the next step is to build your agent project by creating Agents and Tasks. You can do this quickly with AgentStack:

uv run agentstack generate agent/task <name>

Modify the agents and tasks by changing the agents.yaml and tasks.yaml configuration files in src/config

Tooling

One of AgentStack's core principles is to establish the de facto agent stack. A critical component of this stack is the tooling and functionality given to agents beyond simply LLM capabilities.

AgentStack has worked to make access to tools as easy as possible, staying framework agnostic and featuring the best tools.

A list of all tools can be found on our docs.

Adding tools is as simple as

uv run agentstack tools add

Running Your Agent

uv run agentstack run

Runs the agent project in development mode.

Note: Always use uv run when executing AgentStack commands to ensure proper environment management.

👀 Support for easy production deployment of agents is coming soon.

Command Alias Setup

To make working with AgentStack more convenient, you can set up an alias for the uv run agentstack command:

For Bash/Zsh (macOS/Linux)

Add this to your ~/.bashrc, ~/.zshrc, or equivalent:

alias agentstack='uv run agentstack'

For Windows PowerShell

Add this to your PowerShell profile:

Set-Alias-Name agentstack -Value "uv run agentstack"

After setting up the alias, you can use agentstack commands directly:

agentstack init <project_name>
agentstack run
agentstack generate agent <name>

Note: The alias needs to be set up in each new shell session unless added to your shell's configuration file.

Philosophy

  • Agents should be easy: There are so many frameworks out there, but starting from scratch is a pain. Similar to create-react-app, AgentStack aims to simplify the "from scratch" process by giving you a simple boilerplate of an agent. It uses popular agent frameworks and LLM providers, but provides a cohesive curated experience on top of them.

  • No Configuration Required: You don't need to configure anything. A reasonably good configuration of both development and production builds is handled for you so you can focus on writing code.

  • No Lock-In: You can customize your setup at any time. AgentStack is designed to make it easy to get the components you need running right off the bat; it's up to you what to do next.

AgentStack is not designed to be a low-code solution to building agents. Instead it is a great head-start for starting an agent project from scratch.

Roadmap

Framework Agnosticism

Development of AgentStack is being done primarily on CrewAI. We will soon be working to make AgentStack fully framework-agnostic, meaning that any supported multi-agent framework can be used for your project.

Tools

  • Core Tools built by AgentStack
  • Preferred partners in the package directly
  • Community partner tools added through external repositories

Other Features

  • Generated testing
  • Integrated benchmarking
  • Easy integration of tools for browsing, RAG, and more.
  • A fast interactive test runner with built-in support for coverage reporting.
  • A live development server that warns about common mistakes.
  • A build script to bundle your project for production.

License

AgentStack is open source software licensed as MIT.

How to Contribute

AgentStack is a new project built by passionate AI agent developers! We'd love help making this tool better. Easy first issues are available, create new issues with feature ideas, or chat with us on our Discord.

If you are an Agent Tool developer, feel free to create an issue or even a PR to add your tool to AgentStack.

About

No description, website, or topics provided.

Resources

Contributing

Stars

1 star

Watchers

1 watching

Forks

Releases

Packages

Contributors

Languages