Read OMR sheets fast and accurately using a scanner 🖨 or your phone 🤳.
OMR stands for Optical Mark Recognition, used to detect and interpret human-marked data on documents. OMR refers to the process of reading and evaluating OMR sheets, commonly used in exams, surveys, and other forms.







A full-fledged OMR checking software that can read and evaluate OMR sheets scanned at any angle and having any color.
| Specs |
  |
|---|---|
| 💯 Accurate | Currently nearly 100% accurate on good quality document scans; and about 90% accurate on mobile images. |
| 💪🏿 Robust | Supports low resolution, xeroxed sheets. See Robustness for more. |
| ⏩ Fast | Current processing speed without any optimization is 200 OMRs/minute. |
| ✅ Customizable | Easily apply to custom OMR layouts, surveys, etc. |
| 📊 Visually Rich | Get insights to configure and debug easily. |
| 🎈 Lightweight | Very minimal core code size. |
| 🏫 Large Scale | Tested on a large scale at Technothlon. |
| 👩🏿💻 Dev Friendly | Pylinted and Black formatted code. Also has a developer community on discord. |
Note: For solving interesting challenges, developers can check out TODOs.
See the complete guide and details at Project Wiki.
Once you configure the OMR layout, just throw images of the sheets at the software; and you'll get back the marked responses in an excel sheet!
Images can be taken from various angles as shown below-
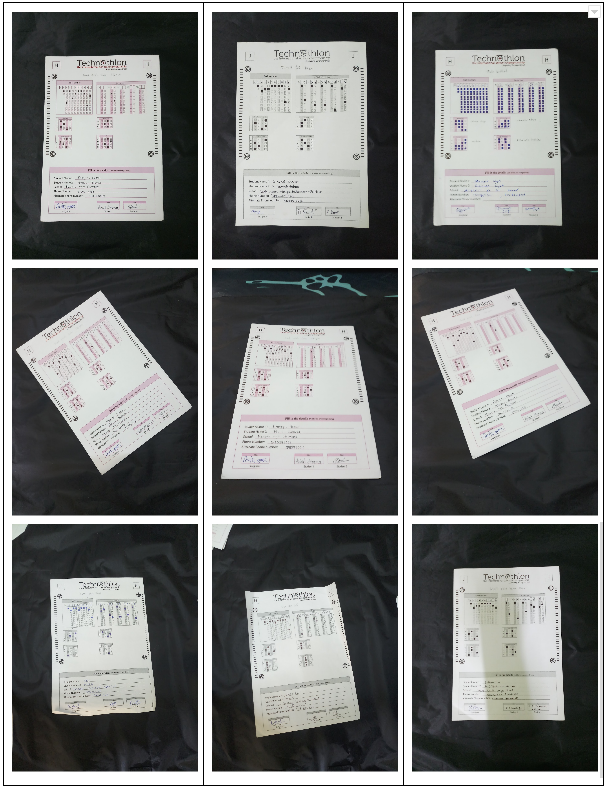
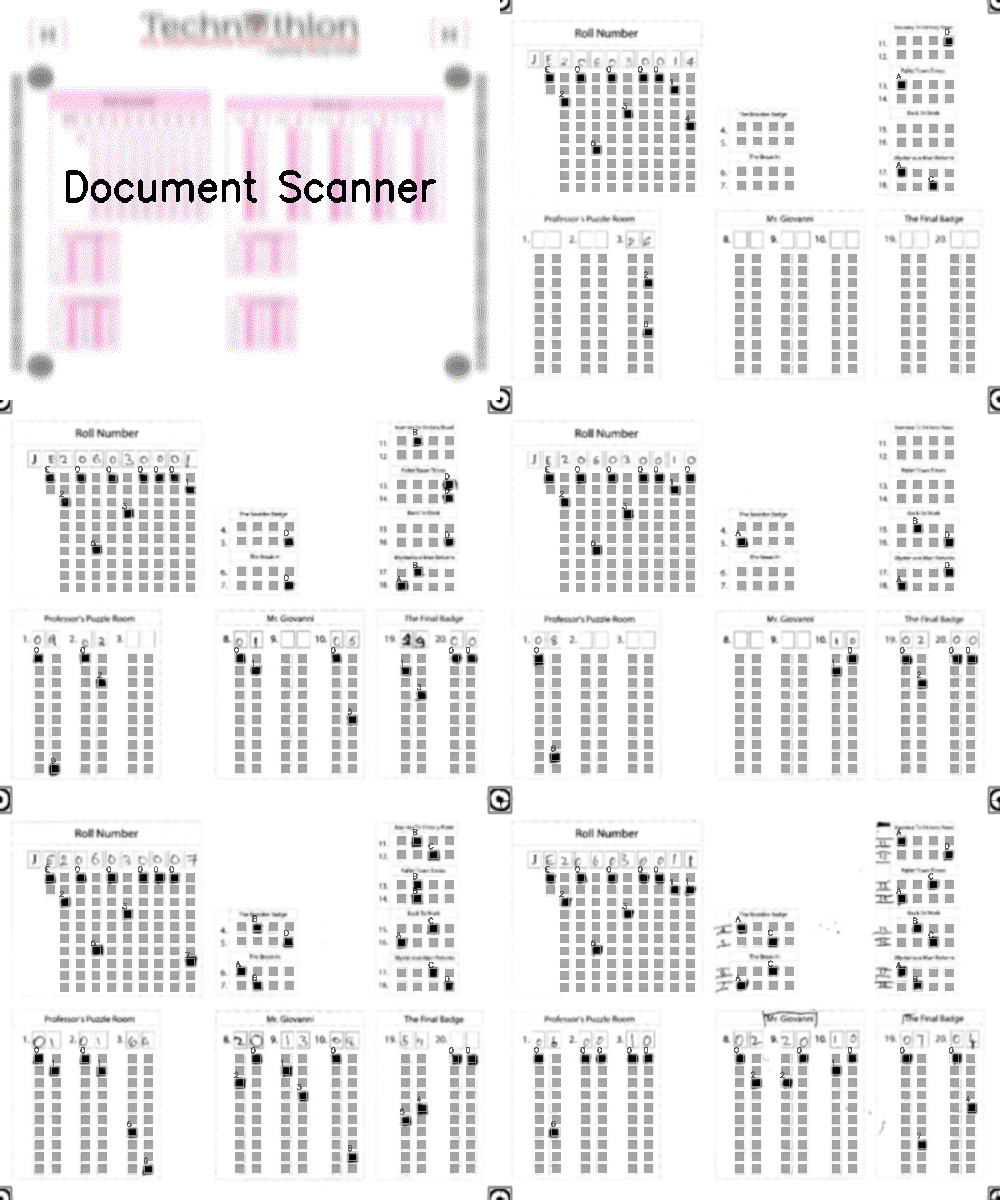
See step-by-step processing of any OMR sheet:

*Note: This image is generated by the code itself!*
Get a CSV sheet containing the detected responses and evaluated scores:

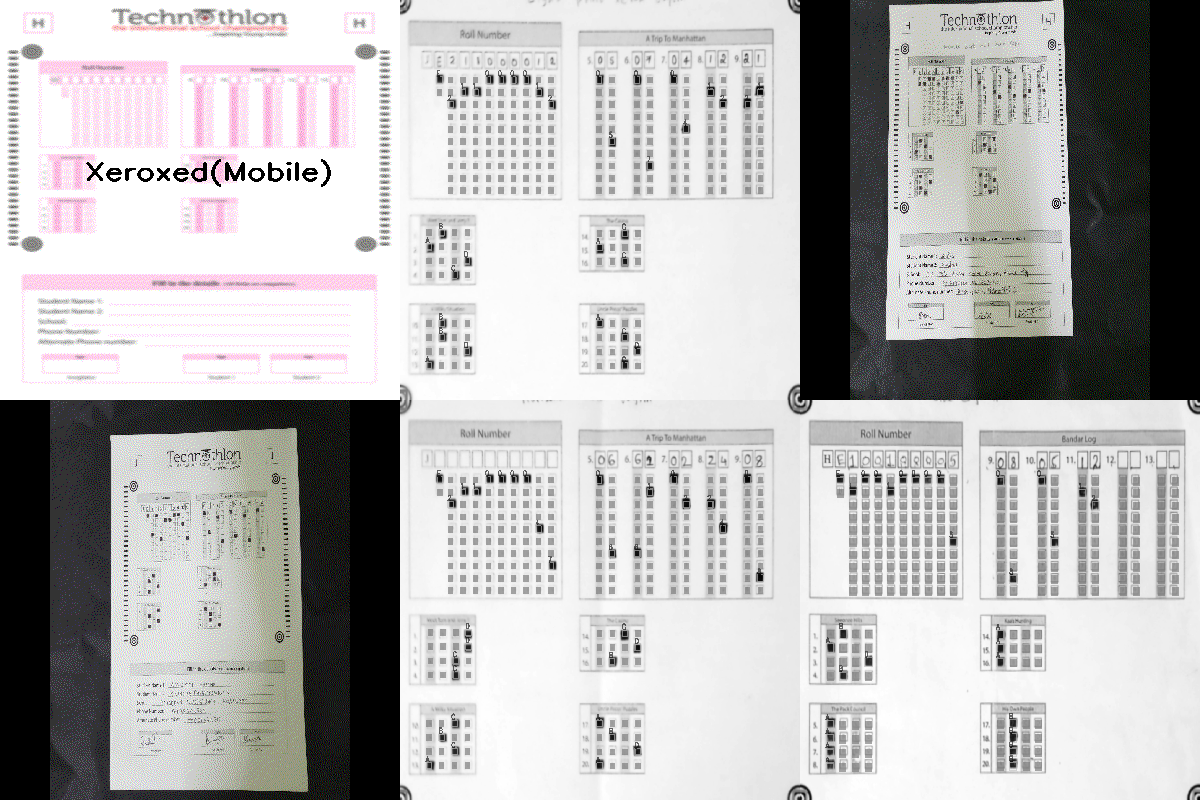
We now support colored outputs as well. Here's a sample output on another image -

There are many more visuals in the wiki. Check them out here!

Operating system: OSX or Linux is recommended although Windows is also supported.


To check if python3 and pip is already installed:
python3 --version
python3 -m pip --version
Install Python3
To install python3 follow instructions here
To install pip - follow instructions here
Install OpenCV
Any installation method is fine.
Recommended:
python3 -m pip install --user --upgrade pip
python3 -m pip install --user opencv-python
python3 -m pip install --user opencv-contrib-python
More details on pip install openCV here.
Extra steps(for Linux users only)
Installing missing libraries(if any):
On a fresh computer, some of the libraries may get missing in event after a successful pip install. Install them using following commands(ref):
sudo apt-get install -y build-essential cmake unzip pkg-config
sudo apt-get install -y libjpeg-dev libpng-dev libtiff-dev
sudo apt-get install -y libavcodec-dev libavformat-dev libswscale-dev libv4l-dev
sudo apt-get install -y libatlas-base-dev gfortranClone the repo
git clone https://github.com/Udayraj123/OMRChecker
cd OMRChecker/
Install pip requirements
python3 -m pip install --user -r requirements.txtNote: If you face a distutils error in pip, use --ignore-installed flag in above command.
- First copy and examine the sample data to know how to structure your inputs:
cp -r ./samples/sample1 inputs/
# Note: you may remove previous inputs (if any) with `mv inputs/* ~/.trash`
# Change the number N in sampleN to see more examples
- Run OMRChecker:
python3 main.py
Alternatively you can also use python3 main.py -i ./samples/sample1.
Each example in the samples folder demonstrates different ways in which OMRChecker can be used.
1. [Windows] ERROR: Could not open requirements file
Command: python3 -m pip install --user -r requirements.txt
Link to Solution: #54
2. [Linux] ERROR: No module named pip
Command: python3 -m pip install --user --upgrade pip
Link to Solution: #70
- First, create your own template.json.
- Configure the tuning parameters.
- Run OMRChecker with appropriate arguments (See full usage).
python3 main.py [--setLayout] [--inputDir dir1] [--outputDir dir1]
Explanation for the arguments:
--setLayout: Set up OMR template layout - modify your json file and run again until the template is set.
--inputDir: Specify an input directory.
--outputDir: Specify an output directory.
Deprecation logs
- The old
--noCroppingflag has been replaced with the 'CropPage' plugin in "preProcessors" of the template.json(see samples). - The
--autoAlignflag is deprecated due to low performance on a generic OMR sheet - The
--templateflag is deprecated and instead it's recommended to keep the template file at the parent folder containing folders of different images
Why is this software free?
This project was born out of a student-led organization called as Technothlon. It is a logic-based international school championship organized by students of IIT Guwahati. Being a non-profit organization, and after seeing it work fabulously at such a large scale we decided to share this tool with the world. The OMR checking processes still involves so much tediousness which we aim to reduce dramatically.
We believe in the power of open source! Currently, OMRChecker is in an intermediate stage where only developers can use it. We hope to see it become more user-friendly as well as robust from exposure to different inputs from you all!

Can I use this code in my (public) work?
OMRChecker can be forked and modified. You are encouraged to play with it and we would love to see your own projects in action!
It is published under the MIT license.
What are the ways to contribute?
A Huge thanks to: Adrian Rosebrock for his exemplary blog: https://pyimagesearch.com
Harrison Kinsley aka sentdex for his video tutorials and many other resources.
Satya Mallic for his resourceful blog: https://www.learnopencv.com
And to other amazing people from all over the globe who've made significant improvements in this project.
Thank you!
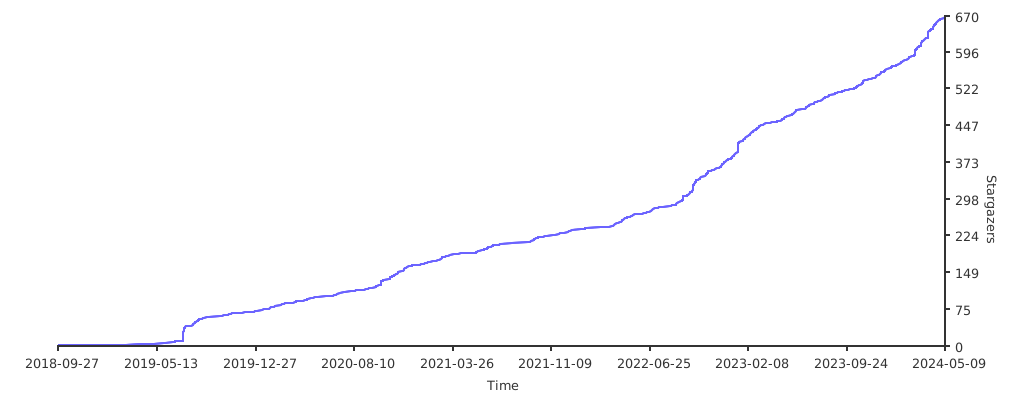
Here's a snapshot of the Android OMR Helper App (archived):


For more details see LICENSE.


Find OMRChecker on Product Hunt | Reddit | Discord | Linkedin | goodfirstissue.dev | codepeak.tech | fossoverflow.dev | Interview on Console by CodeSee | Open Source Hub
API REST cho dự án OMRChecker, cho phép xử lý các sheet OMR thông qua HTTP requests.
pip install -r requirements.txtTrên Windows:
python run_api.py
# hoặc
start_api.bat
Trên Linux/Mac:
python3 run_api.py
# hoặc
./start_api.sh# Build Docker image
docker build -t omrchecker-api .
# Chạy container
docker run -d --name omrchecker-api -p 5000:5000 omrchecker-apiMáy chủ API sẽ khởi động tại địa chỉ mặc định: http://localhost:5000
- Giao Diện Web: http://localhost:5000/
- Swagger UI Nâng Cao: http://localhost:5000/swagger
- Tài Liệu Flask-RestX: http://localhost:5000/api/docs
API đã được điều chỉnh để lưu trữ và xử lý các tệp theo cấu trúc thư mục của OMRChecker gốc:
OMRChecker/
│
├── inputs/                 # Thư mục đầu vào, API sẽ lưu template và ảnh tại đây
│   ├── directory_name_1/   # Mỗi bộ OMR sẽ được lưu trong một thư mục riêng biệt
│   │   ├── template.json   # Tệp template cho bộ OMR
│   │   ├── marker.jpg      # Tệp ảnh marker (tùy chọn)
│   │   └── image1.jpg      # Các ảnh OMR được quét
│   │   └── image2.jpg
│   │
│   └── directory_name_2/   # Một bộ OMR khác
│       ├── template.json
│       ├── marker.png      # Có thể có hoặc không
│       └── image3.jpg
│
├── outputs/                # Thư mục đầu ra, kết quả xử lý OMR sẽ được lưu ở đây
│   ├── directory_name_1/   # Kết quả tương ứng với thư mục đầu vào
│   │   └── Results/        # Thư mục kết quả
│   │       └── Results_05AM.csv    # Tệp kết quả chính với dữ liệu OMR đã xử lý
│   │   └── CheckedOMRs/    # Thư mục OMR đã xử lý
│   │
│   └── directory_name_2/
│
└── api_server.py           # Máy chủ API
Tất cả API endpoints đều có tiền tố /api.
Endpoint: POST /api/process-omr
Mô tả: Upload tệp template JSON và ảnh OMR để xử lý. API sẽ lưu các tệp này vào thư mục inputs/{directory_name} và trả về kết quả xử lý.
Parameters:
template_file(required): Tệp JSON định nghĩa bố cục OMRmarker_file(optional): Tệp ảnh marker dùng để đánh dấu vị trí, lưu cùng thư mục với templateimage_files(required): Các tệp ảnh OMR (định dạng PNG, JPG, JPEG) hoặc PDF, có thể chọn nhiều filedirectory_name(required): Tên thư mục sẽ được tạo trong thư mục inputs (không được chứa dấu / hoặc )include_images(optional, default: false): Có kèm theo hình ảnh đã xử lý dưới dạng base64 hay khôngclean_before(optional, default: true): Xóa thư mục inputs và outputs trước khi xử lý nếu đã tồn tạiclean_after(optional, default: false): Xóa thư mục inputs và outputs sau khi xử lý và lưu kết quả
Ví dụ sử dụng curl:
curl -X POST "http://localhost:5000/api/process-omr" \
  -H "Content-Type: multipart/form-data" \
  -F "template_file=@/path/to/template.json" \
  -F "marker_file=@/path/to/marker_image.jpg" \
  -F "image_files=@/path/to/image1.jpg" \
  -F "image_files=@/path/to/image2.jpg" \
  -F "directory_name=my_omr_test" \
  -F "clean_before=true" \
  -F "clean_after=false"
Phản hồi:
{
  "message": "OMR processing completed successfully",
  "result_id": "f47ac10b-58cc-4372-a567-0e02b2c3d479",
  "input_dir": "inputs/my_omr_test",
  "output_dir": "outputs/my_omr_test",
  "csv_file": "Results_05AM.csv",
  "results": [
    {
      "file_id": "image1.jpg",
      "score": 0,
      "public_input_image": "http://localhost:5000/public_images/input_1695432145_a7bc1234.jpg",
      "public_output_image": "http://localhost:5000/public_images/output_1695432145_a7bc1234.jpg",
      "answers": [
        {"key": "q1", "value": "A"},
        {"key": "q2", "value": "B"},
        {"key": "q3", "value": "C"}
      ]
    },
    {
      "file_id": "image2.jpg",
      "public_input_image": "http://localhost:5000/public_images/input_1695432146_b8de5678.jpg",
      "public_output_image": "http://localhost:5000/public_images/output_1695432146_b8de5678.jpg",
      "score": 0,
      "answers": [
        {"key": "q1", "value": "C"},
        {"key": "q2", "value": "D"}
      ]
    }
  ]
}Endpoint: GET /api/results/{result_id}
Mô tả: Lấy kết quả cho một OMR sheet đã xử lý trước đó.
Parameters:
result_id: ID của bộ kết quả (nhận được từ endpoint process-omr)
Ví dụ sử dụng curl:
curl -X GET "http://localhost:5000/api/results/f47ac10b-58cc-4372-a567-0e02b2c3d479"Phản hồi:
{
  "result_id": "f47ac10b-58cc-4372-a567-0e02b2c3d479",
  "csv_file": "Results_05AM.csv",
  "result": {
    "file_id": "omr_image.jpg",
    "input_path": "...",
    "output_path": "...",
    "score": 0,
    "answers": [
      {"key": "q1", "value": "A"},
      {"key": "q2", "value": "B"},
      {"key": "q3", "value": "C"}
    ]
  }
}Endpoint: GET /api/download/{result_id}/{filename}
Mô tả: Tải xuống một tệp (CSV, hình ảnh, v.v.) từ bộ kết quả.
Parameters:
result_id: ID của bộ kết quảfilename: Đường dẫn của tệp cần tải xuống
Ví dụ sử dụng curl:
curl -X GET "http://localhost:5000/api/download/f47ac10b-58cc-4372-a567-0e02b2c3d479/Results_05AM.csv" --output results.csvEndpoint: GET /api/health
Mô tả: Kiểm tra xem máy chủ API có đang chạy không.
Ví dụ sử dụng curl:
curl -X GET "http://localhost:5000/api/health"API hỗ trợ hai giao diện Swagger khác nhau:
- Enhanced Swagger UI tại
/swagger- Giao diện Swagger phong phú với khả năng hiển thị và kiểm thử tốt hơn - Flask-RestX Docs tại
/api/docs- Giao diện Swagger tiêu chuẩn của Flask-RestX
Cả hai đều cung cấp:
- Tài liệu tương tác
- Ví dụ request/response
- Chức năng thử nghiệm trực tiếp
- Mô hình và định nghĩa schema
Template JSON cần tuân thủ cấu trúc của OMRChecker. Dưới đây là một mẫu đơn giản:
{
  "pageDimensions": {
    "width": 1654,
    "height": 2339
  },
  "bubbleDimensions": {
    "width": 20,
    "height": 20
  },
  "preProcessors": [
    {
      "name": "CropPage",
      "options": {
        "relativePath": "crop_coordinates.json",
        "morphologySize": 5
      }
    }
  ],
  "fieldBlocks": {
    "Roll": {
      "fieldType": "QTYPE_ROLL",
      "origin": {"x": 700, "y": 400},
      "fieldLabels": ["R1", "R2", "R3", "R4", "R5", "R6", "R7"],
      "directions": {"horizontal": 7, "vertical": 10},
      "fieldArea": {"x": 35, "y": 35},
      "options": {"A": 0, "B": 1, "C": 2, "D": 3, "E": 4, "F": 5, "G": 6, "H": 7, "I": 8, "J": 9}
    },
    "Q": {
      "fieldType": "QTYPE_MCQ",
      "origin": {"x": 800, "y": 650},
      "fieldLabels": ["Q1", "Q2", "Q3", "Q4", "Q5"],
      "directions": {"horizontal": 5, "vertical": 1},
      "fieldArea": {"x": 60, "y": 30},
      "options": {"A": 0, "B": 1, "C": 2, "D": 3, "E": 4}
    }
  },
  "customLabels": {},
  "outputColumns": [],
  "emptyValue": "0",
  "options": {}
}import requests
import os
# Đường dẫn đến template và ảnh
template_path = "path/to/template.json"
marker_path = "path/to/marker_image.jpg" # Tùy chọn
image_paths = ["path/to/image1.jpg", "path/to/image2.jpg"]
directory_name = "test_omr_batch"
# Gửi yêu cầu xử lý OMR
url = "http://localhost:5000/api/process-omr"
files = {
'template_file': open(template_path, 'rb')
}
# Thêm marker file nếu có
if os.path.exists(marker_path):
files['marker_file'] = open(marker_path, 'rb')
# Thêm nhiều file ảnh với cùng một key
for i, image_path in enumerate(image_paths):
files[f'image_files'] = open(image_path, 'rb')
data = {
'directory_name': directory_name,
'include_images': True,
'clean_before': True, # Xóa thư mục trước khi xử lý
'clean_after': False # Giữ lại thư mục sau khi xử lý
}
response = requests.post(url, files=files, data=data)
result = response.json()
print(f"Kết quả xử lý OMR:")
print(f"- ID kết quả: {result['result_id']}")
print(f"- Thư mục đầu vào: {result['input_dir']}")
print(f"- Thư mục đầu ra: {result['output_dir']}")
print(f"- Tệp CSV: {result['csv_file']}")
print(f"- Số kết quả: {len(result['results'])}")
# Tải xuống tệp CSV kết quả
if 'result_id' in result:
csv_url = f"http://localhost:5000/api/download/{result['result_id']}/Results_05AM.csv"
csv_response = requests.get(csv_url)
with open('downloaded_results.csv', 'wb') as f:
f.write(csv_response.content)
print(f"Đã tải xuống kết quả vào tệp downloaded_results.csv")// Using fetch API
async function processOMR() {
const formData = new FormData();
formData.append('template_file', document.getElementById('templateFile').files[0]);
formData.append('image_files', document.getElementById('imageFiles').files);
formData.append('directory_name', 'js_test');
const response = await fetch('http://localhost:5000/api/process-omr', {
method: 'POST',
body: formData
});
const result = await response.json();
console.log(result);
// Download results
if (result.result_id) {
window.location.href = `http://localhost:5000/api/download/${result.result_id}/Results_05AM.csv`;
}
}-
API đã được điều chỉnh để lưu trữ template.json và ảnh vào thư mục
inputs/{directory_name}, phù hợp với cấu trúc thư mục của OMRChecker. -
Kết quả xử lý được lưu vào thư mục
outputs/{directory_name}và API sẽ tìm theo thứ tự:- Đầu tiên trong thư mục
CheckedOMRs/*.csv - Sau đó trong thư mục
Results/*.csv - Tiếp theo là các file
Results_*.csvở bất kì vị trí nào - Cuối cùng sẽ sử dụng bất kỳ file CSV nào không phải là ErrorFiles.csv
- Đầu tiên trong thư mục
-
Kết quả JSON trả về được chuyển đổi sang định dạng có mảng
answersđể dễ dàng xử lý. API trả về mảng kết quả với mỗi kết quả tương ứng với một file ảnh đã xử lý:{ "results": [ { "file_id": "image1.jpg", "score": 0, "answers": [ {"key": "q1", "value": "A"}, {"key": "q2", "value": "B"} ] }, { "file_id": "image2.jpg", "score": 0, "answers": [ {"key": "q1", "value": "C"}, {"key": "q2", "value": "D"} ] } ] } -
API hỗ trợ xử lý file PDF đầu vào, mỗi trang của file PDF sẽ được chuyển đổi thành một ảnh riêng biệt và được xử lý như các file ảnh OMR thông thường. Điều này rất hữu ích khi bạn có nhiều phiếu trả lời đã được scan thành một file PDF.
-
Bạn có thể chọn xóa thư mục đầu vào và đầu ra trước khi xử lý (để tránh trùng lặp) và sau khi xử lý (để tiết kiệm không gian) bằng cách sử dụng tham số
clean_beforevàclean_after. -
Các tệp đã tải lên sẽ vẫn còn trong thư mục
inputsnếu bạn không sử dụng tham sốclean_after=true. Bạn có thể chạy lại quá trình xử lý trực tiếp với OMRChecker bằng cách sử dụng lệnh:python main.py -i inputs/{directory_name} -
Đối với Docker, kết quả xử lý sẽ mất đi khi container bị xóa nếu không mount volumes. Khi cần lưu trữ lâu dài, hãy sử dụng:
docker run -d --name omrchecker-api -p 5000:5000 -v ./inputs:/app/inputs -v ./outputs:/app/outputs -v ./static:/app/static omrchecker-api -
Đối với môi trường sản xuất, nên bổ sung xác thực và giới hạn tốc độ yêu cầu.
API tự động lưu bản sao của tất cả ảnh đầu vào và đầu ra trong thư mục public_images với tên file duy nhất. Những ảnh này có thể được truy cập trực tiếp thông qua URL mà không cần xác thực.
URLs cho ảnh public được trả về trong response của API dưới dạng:
public_input_image: URL của ảnh đầu vào gốcpublic_output_image: URL của ảnh đã được xử lý (có các đánh dấu)
Ví dụ URL:
http://localhost:5000/public_images/input_1695432145_a7bc1234.jpg
http://localhost:5000/public_images/output_1695432145_a7bc1234.jpg
Bạn có thể thiết lập host URL trong Docker bằng cách sử dụng biến môi trường API_HOST:
docker run -d --name omrchecker-api -p 5000:5000 -e API_HOST=https://your-domain.com omrchecker-apiNếu không được thiết lập, URL mặc định sẽ là http://localhost:5000.
The OMRChecker project provides a RESTful API that allows you to process OMR sheets programmatically. This section provides details on how to use the API endpoints and access public images.
To start the API server:
- Windows: Run
start_api.batscript - Linux/macOS: Run
./start_api.shscript
The API server will start on port 5000 by default: http://localhost:5000
-
Endpoint:
/api/process-omr -
Method: POST
-
Content-Type: multipart/form-data
-
Parameters:
template_file(required): JSON template file for OMR processingmarker_file(optional): Marker image file (JPG/PNG)image_files(required): One or more image files to process (JPG/PNG/PDF)directory_name(required): Name for the input/output directoryinclude_images(optional): Whether to include base64 encoded images in response (default: false)clean_before(optional): Whether to clean existing directories before processing (default: true)clean_after(optional): Whether to clean directories after processing (default: false)
-
Example Request:
curl -X POST "http://localhost:5000/api/process-omr" \
  -F "template_file=@template.json" \
  -F "marker_file=@marker.jpg" \
  -F "image_files=@sample1.jpg" \
  -F "image_files=@sample2.jpg" \
  -F "directory_name=test-batch" \
  -F "include_images=false"
-
Example Response:
{
  "message": "OMR processing completed successfully",
  "result_id": "f7e6d5c4-b3a2-41a0-9a8b-8c7d6e5f4e3d",
  "input_dir": "/path/to/workspace/inputs/test-batch",
  "output_dir": "/path/to/workspace/outputs/test-batch",
  "csv_file": "Results_11AM.csv",
  "results": [
    {
      "file_id": "sample1.jpg",
      "score": 85,
      "answers": [
        {"key": "q1", "value": "A"},
        {"key": "q2", "value": "C"},
        {"key": "q3", "value": "B"}
      ],
      "public_input_image": "http://localhost:5000/public_images/input_1628347294_a1b2c3d4.jpg",
      "public_output_image": "http://localhost:5000/public_images/output_1628347294_a1b2c3d4.jpg"
    },
    {
      "file_id": "sample2.jpg",
      "score": 92,
      "answers": [
        {"key": "q1", "value": "B"},
        {"key": "q2", "value": "A"},
        {"key": "q3", "value": "D"}
      ],
      "public_input_image": "http://localhost:5000/public_images/input_1628347295_e5f6g7h8.jpg",
      "public_output_image": "http://localhost:5000/public_images/output_1628347295_e5f6g7h8.jpg"
    }
  ]
}
The API saves copies of all input and output images in a public_images directory, making them accessible via URL without authentication. These URLs are included in the API response for each processed image.
- Original Images:
http://localhost:5000/public_images/input_[timestamp]_[uuid].jpg - Processed Images:
http://localhost:5000/public_images/output_[timestamp]_[uuid].jpg
When running in Docker, you can set the host URL using the API_HOST environment variable:
docker run -e API_HOST=https://your-domain.com -p 5000:5000 omrchecker-api
Note: For production environments, it's recommended to implement authentication and rate limiting for the API endpoints and public image access.