


Gemini is a WPF framework designed specifically for building IDE-like applications. It builds on some excellent libraries:
- AvalonDock (specifically Dirkster99's fork, because it supports .NET Core)
- Caliburn Micro
Gemini ships with two themes: a Light theme and a Blue theme. There is also an in-development Dark theme.
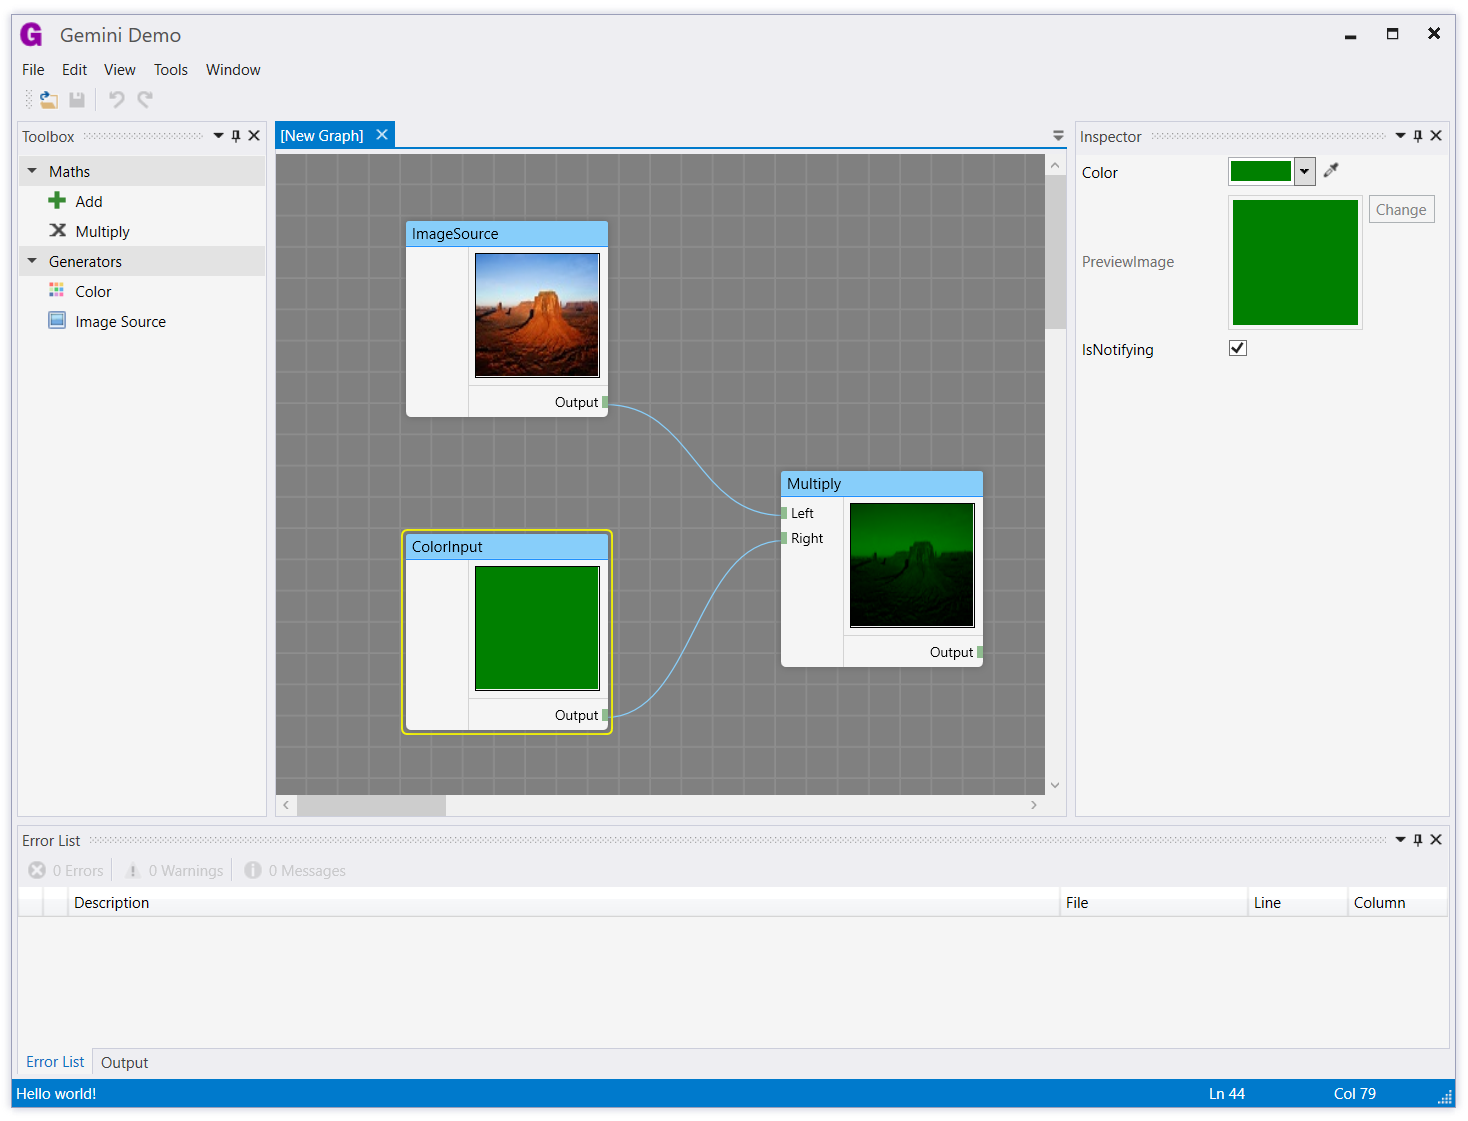
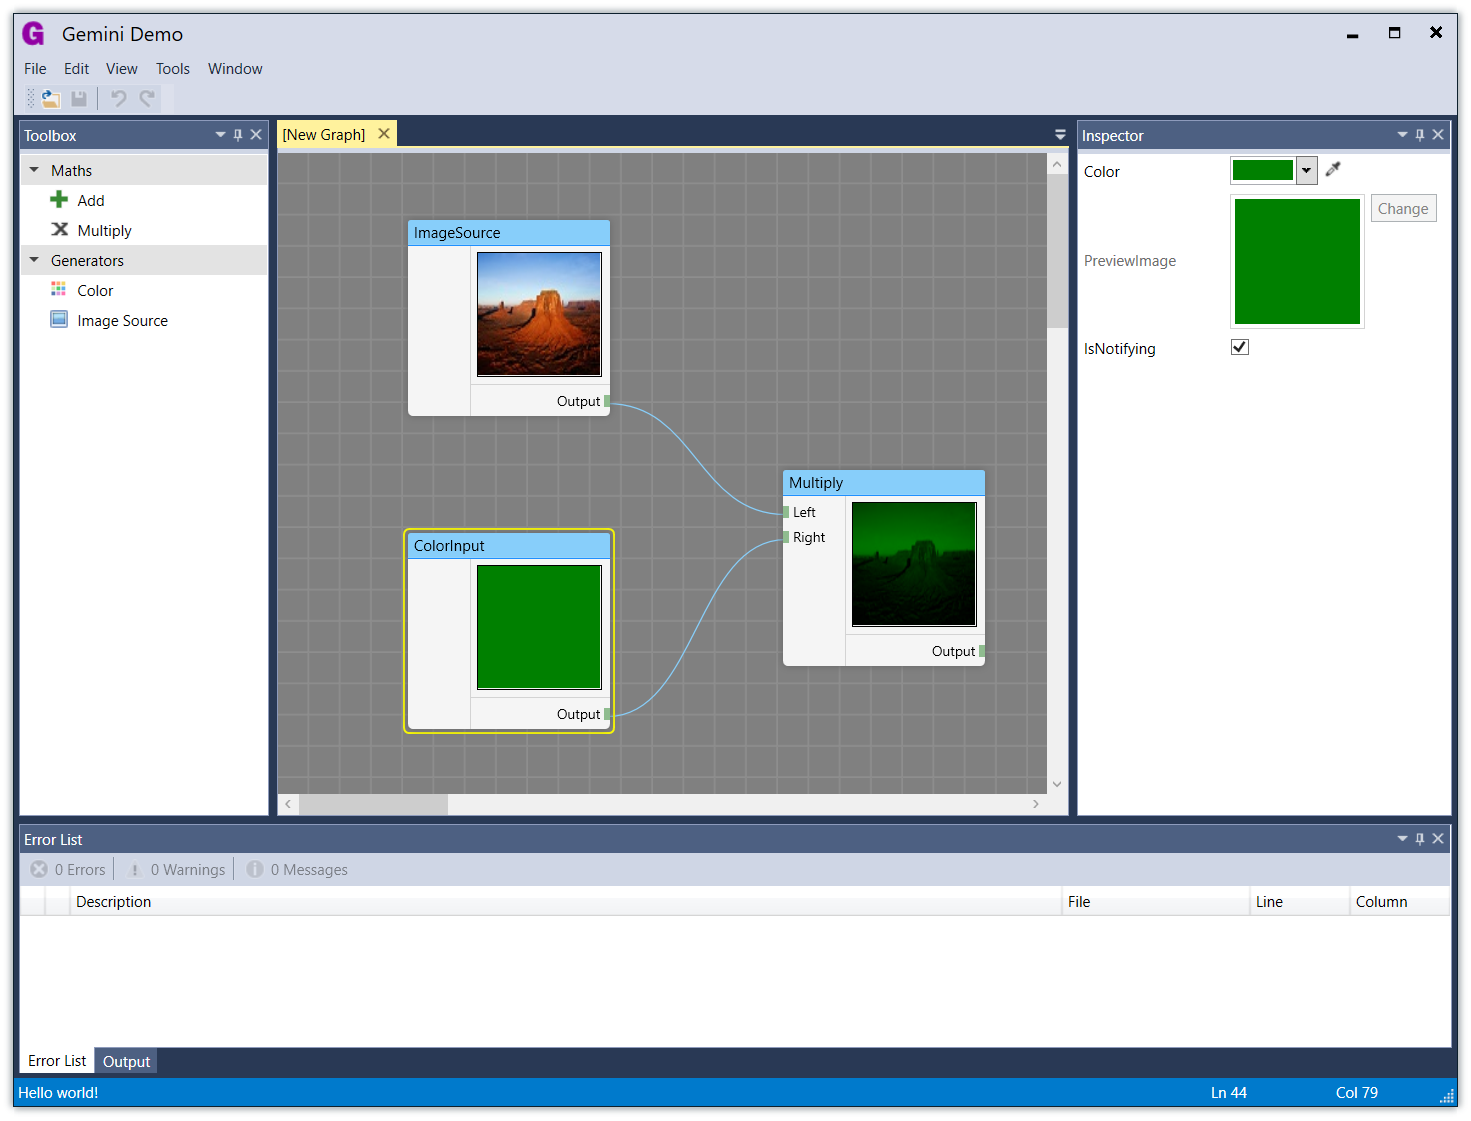
If you are creating a new WPF application, follow these steps:
- Install the Gemini NuGet package.
- Delete
MainWindow.xaml- you don't need it. - Open
App.xamland delete theStartupUri="MainWindow.xaml"attribute. - Add
xmlns:gemini="http://schemas.timjones.tw/gemini"toApp.xaml. - Add
<gemini:AppBootstrapper x:Key="bootstrapper" />to aResourceDictionarywithin<Application.Resources>.
So the whole App.xaml should look something like this:
<Applicationx:Class="Gemini.Demo.App"xmlns="http://schemas.microsoft.com/winfx/2006/xaml/presentation"xmlns:x="http://schemas.microsoft.com/winfx/2006/xaml"xmlns:gemini="http://schemas.timjones.tw/gemini">
<Application.Resources>
<ResourceDictionary>
<ResourceDictionary.MergedDictionaries>
<ResourceDictionary>
<gemini:AppBootstrapperx:Key="bootstrapper" />
</ResourceDictionary>
</ResourceDictionary.MergedDictionaries>
</ResourceDictionary>
</Application.Resources>
</Application>
Now hit F5 and see a very empty application!
By far the easiest way to get started with Gemini is to use the various NuGet packages.
First, install the base Gemini package (note that the package ID is GeminiWpf, to
distinguish it from another NuGet package with the same name):
Then add any other modules you are interested in (note that some modules have dependencies on other modules, but this is taken care of by the NuGet package dependency system):
- Gemini.Modules.CodeCompiler
- Gemini.Modules.CodeEditor
- Gemini.Modules.ErrorList
- Gemini.Modules.GraphEditor
- Gemini.Modules.Inspector
- Gemini.Modules.Output
- Gemini.Modules.PropertyGrid
We use AppVeyor to build Gemini after every commit to the master branch, and also to generate pre-release NuGet packages so you can try out new features immediately.
To access the pre-release NuGet packages, you'll need to add a custom package source in Visual Studio, pointing to this URL:
https://ci.appveyor.com/nuget/gemini-g84phgw340sm
Make sure you select "Include Prerelease" when searching for NuGet packages.
Gemini allows you to build your WPF application by composing separate modules. This provides a nice way of separating out the code for each part of your application. For example, here is a very simple module:
[Export(typeof(IModule))]publicclassModule:ModuleBase{[Import]privateIPropertyGrid_propertyGrid;publicoverrideIEnumerable<Type>DefaultTools{get{yieldreturntypeof(IInspectorTool);}}publicoverridevoidInitialize(){varhomeViewModel=IoC.Get<HomeViewModel>();Shell.OpenDocument(homeViewModel);_propertyGrid.SelectedObject=homeViewModel;}privateIEnumerable<IResult>OpenHome(){yieldreturnShow.Document<HomeViewModel>();}}Documents are (usually) displayed in the main area in the middle of the window. To create a new document
type, simply inherit from the Document class:
publicclassSceneViewModel:Document{publicoverridestringDisplayName{get{return"3D Scene";}}privateVector3_position;publicVector3Position{get{return_position;}set{_position=value;NotifyOfPropertyChange(()=>Position);}}}To open a document, call OpenDocument on the shell (Shell is defined in ModuleBase, but you can also
retrieve it from the IoC container with IoC.Get<IShell>()):
Shell.OpenDocument(newSceneViewModel());You can then create a SceneView view, and Caliburn Micro will use a convention-based lookup to find the correct view.
If you have a document that needs to be loaded from, and saved to, a file, you can use the PersistedDocument
base class, to remove a lot of the boilerplate code that you would usually have to write. You only need to
implement the DoNew, DoLoad, and DoSave methods.
publicclassEditorViewModel:PersistedDocument{privateEditorView_view;privatestring_originalText;protectedoverrideTaskDoNew(){_originalText=string.Empty;ApplyOriginalText();returnTaskUtility.Completed;}protectedoverrideTaskDoLoad(stringfilePath){_originalText=File.ReadAllText(filePath);ApplyOriginalText();returnTaskUtility.Completed;}protectedoverrideTaskDoSave(stringfilePath){varnewText=_view.textBox.Text;File.WriteAllText(filePath,newText);_originalText=newText;returnTaskUtility.Completed;}privatevoidApplyOriginalText(){_view.textBox.Text=_originalText;_view.textBox.TextChanged+=delegate{IsDirty=string.Compare(_originalText,_view.textBox.Text)!=0;};}protectedoverridevoidOnViewLoaded(objectview){_view=(EditorView)view;}}Tools are usually docked to the sides of the window, although they can also be dragged free to become floating windows. Most of the modules (ErrorList, Output, Toolbox, etc.) primarily provide tools. For example, here is the property grid tool class:
[Export(typeof(IPropertyGrid))]publicclassPropertyGridViewModel:Tool,IPropertyGrid{publicPropertyGridViewModel(){DisplayName="Properties";}publicoverridePaneLocationPreferredLocation{get{returnPaneLocation.Right;}}privateobject_selectedObject;publicobjectSelectedObject{get{return_selectedObject;}set{_selectedObject=value;NotifyOfPropertyChange(()=>SelectedObject);}}}For more details on creating documents and tools, look at the demo program and the source code for the built-in modules.
Commands are one of the core concepts in Gemini. Commands help you to avoid duplicating code by letting you define command handlers in a single place, regardless of whether the command is invoked through a menu item, toolbar item, or other trigger. Gemini's commands are conceptually similar to WPF commands, but they are more powerful.
First, create a command definition. Here's Gemini command definition for opening files:
[CommandDefinition]publicclassOpenFileCommandDefinition:CommandDefinition{publicconststringCommandName="File.OpenFile";publicoverridestringName{get{returnCommandName;}}publicoverridestringText{get{return"_Open";}}publicoverridestringToolTip{get{return"Open";}}publicoverrideUriIconSource{get{returnnewUri("pack://application:,,,/Gemini;component/Resources/Icons/Open.png");}}[Export]publicstaticCommandKeyboardShortcutKeyGesture=newCommandKeyboardShortcut<OpenFileCommandDefinition>(newKeyGesture(Key.O,ModifierKeys.Control));}Then, provide a command handler. You can do this in one of two ways. For global commands, that don't depend on a document context, create a global handler:
[CommandHandler]publicclassOpenFileCommandHandler:CommandHandlerBase<OpenFileCommandDefinition>{publicoverridevoidUpdate(Commandcommand){// You can enable / disable the command here with:// command.Enabled = true;// You can also modify the command text / icon, which will affect// any menu items or toolbar items bound to this command.}publicoverrideasyncTaskRun(Commandcommand){// ... implement command handling here}}For commands that depend on a document context, and should be disabled when there is no active document or the active document is not of the correct type, define the command in the document class:
publicclassMyDocument:Document,ICommandHandler<ClearTextCommandDefinition>{voidICommandHandler<ClearTextCommandDefinition>.Update(Commandcommand){command.Enabled=this.Text.Any();}TaskICommandHandler<ClearTextCommandDefinition>.Run(Commandcommand){this.Text=string.Empty;returnTaskUtility.Completed;}}To remove built-in keyboard shortcuts, you can exclude them declaratively:
[Export]publicstaticExcludeCommandKeyboardShortcutExcludeFileOpenShortcut=new ExcludeCommandKeyboardShortcut(OpenFileCommandDefinition.KeyGesture);To find out how to bind commands to menus or toolbars, see the "MainMenu" and "ToolBars" modules below.
Gemini itself is built out of seven core modules:
- MainWindow
- Shell
- MainMenu
- StatusBar
- ToolBars
- Toolbox
- UndoRedo
Several more modules ship with Gemini, and are available as NuGet packages as described above:
- CodeCompiler
- CodeEditor
- ErrorList
- GraphEditor
- Inspector
- Output
- PropertyGrid
For more information about these modules, see below. In general, each module adds some combination of menu items, tool window, document types and services.
The main window module:
- manages the overall window
IMainWindowinterface
- None
The IMainWindow interface exposes a number of useful properties to control
aspects of the main application window.
publicinterfaceIMainWindow{WindowStateWindowState{get;set;}doubleWidth{get;set;}doubleHeight{get;set;}stringTitle{get;set;}ImageSourceIcon{get;set;}IShellShell{get;}}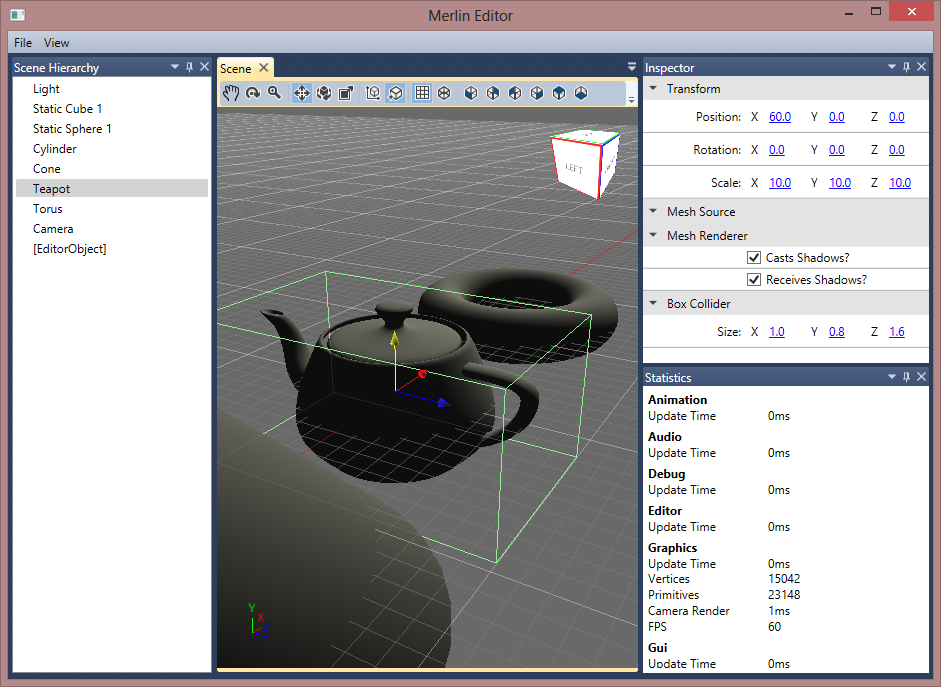
The shell module:
- manages placement of the document and tool windows
- persists and loads the size and position of tool windows
- manages the links between AvalonDock and Caliburn.Micro
IShellinterface
- None
The IShell interface exposes a number of useful properties and methods. It is the main way
to control Gemini's behaviour.
publicinterfaceIShell{eventEventHandlerActiveDocumentChanging;eventEventHandlerActiveDocumentChanged;boolShowFloatingWindowsInTaskbar{get;set;}IMenuMainMenu{get;}IToolBarsToolBars{get;}IStatusBarStatusBar{get;}IDocumentActiveItem{get;}IObservableCollection<IDocument>Documents{get;}IObservableCollection<ITool>Tools{get;}voidShowTool<TTool>()whereTTool:ITool;voidShowTool(IToolmodel);voidOpenDocument(IDocumentmodel);voidCloseDocument(IDocumentdocument);voidClose();}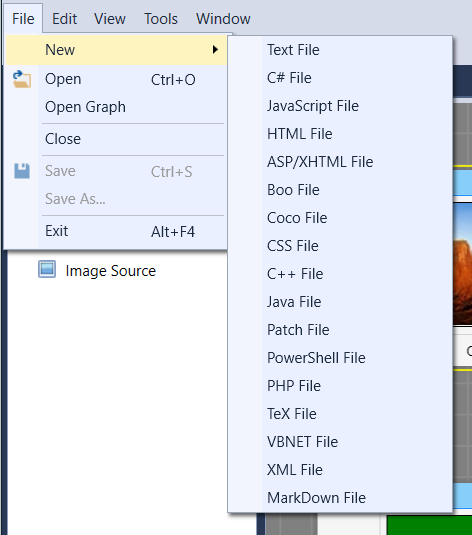
Adds a main menu to the top of the window.
- None
First, create commands, as described above in the "Commands" section. Then declare menus, menu item groups, and menu items. This is how the built-in File menu and menu items are declared; you can create your own menus in the same way.
publicstaticclassMenuDefinitions{[Export]publicstaticreadonlyMenuDefinitionFileMenu=newMenuDefinition(MainMenuBar,0,Resources.FileMenuText);[Export]publicstaticreadonlyMenuItemGroupDefinitionFileNewOpenMenuGroup=newMenuItemGroupDefinition(FileMenu,0);[Export]publicstaticreadonlyMenuItemDefinitionFileNewMenuItem=newTextMenuItemDefinition(MenuDefinitions.FileNewOpenMenuGroup,0,"_New");}You can either use an existing menu or menu item group as a parent for your menu items, or create your own.
To remove an existing menu item (such as a built-in menu item that you don't want), you can exclude it declaratively:
[Export]publicstaticreadonlyExcludeMenuItemDefinitionExcludeOpenMenuItem=new ExcludeMenuItemDefinition(Gemini.Modules.Shell.MenuDefinitions.FileOpenMenuItem);[Export]publicstaticreadonlyExcludeMenuItemGroupDefinitionExcludeWindowMenuItemGroup=new ExcludeMenuItemGroupDefinition(Gemini.Modules.MainMenu.MenuDefinitions.ViewToolsMenuGroup);[Export]publicstaticreadonlyExcludeMenuDefinitionExcludeWindowMenuDefinition=new ExcludeMenuDefinition(Gemini.Modules.MainMenu.MenuDefinitions.WindowMenu);
Adds a status bar to the bottom of the window.
IStatusBarStatusBarItemViewModelclass
- None
varstatusBar=IoC.Get<IStatusBar>();statusBar.AddItem("Hello world!",newGridLength(1,GridUnitType.Star));statusBar.AddItem("Ln 44",newGridLength(100));statusBar.AddItem("Col 79",newGridLength(100));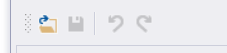
Adds a toolbar tray to the top of the window. By default, the toolbar tray is hidden - use
Shell.ToolBars.Visible = true to show it.
- None
First, create commands, as described above in the "Commands" section. Then declare toolbars, toolbar item groups, and toolbar items. This is how the standard toolbar and toolbar items are declared; you can create your own toolbars in the same way.
internalstaticclassToolBarDefinitions{[Export]publicstaticToolBarDefinitionStandardToolBar=newToolBarDefinition(0,"Standard");[Export]publicstaticToolBarItemGroupDefinitionStandardOpenSaveToolBarGroup=newToolBarItemGroupDefinition(ToolBars.ToolBarDefinitions.StandardToolBar,8);[Export]publicstaticToolBarItemDefinitionOpenFileToolBarItem=newCommandToolBarItemDefinition<OpenFileCommandDefinition>(StandardOpenSaveToolBarGroup,0);}// ...Shell.ToolBars.Visible=true;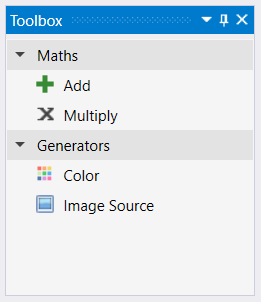
Reproduces the toolbox tool window from Visual Studio. Use the [ToolboxItem] attribute to provide
available items for listing in the toolbox. You specify the document type for each toolbox item.
When the user switches to a different document, Gemini manages showing only the toolbox items that
are supported for the active document type. Items are listed in categories.
The toolbox supports drag and drop.
IToolboxtool windowToolboxItemAttributeattributeToolboxDragDroputility class
- None
[ToolboxItem(typeof(GraphViewModel),"Image Source","Generators")]publicclassImageSource:ElementViewModel{// ...}Handling dropping onto a document (this code is from GraphView.xaml.cs):
privatevoidOnGraphControlDragEnter(objectsender,DragEventArgse){if(!e.Data.GetDataPresent(ToolboxDragDrop.DataFormat))e.Effects=DragDropEffects.None;}privatevoidOnGraphControlDrop(objectsender,DragEventArgse){if(e.Data.GetDataPresent(ToolboxDragDrop.DataFormat)){varmousePosition=e.GetPosition(GraphControl);vartoolboxItem=(ToolboxItem)e.Data.GetData(ToolboxDragDrop.DataFormat);varelement=(ElementViewModel)Activator.CreateInstance(toolboxItem.ItemType);element.X=mousePosition.X;element.Y=mousePosition.Y;ViewModel.Elements.Add(element);}}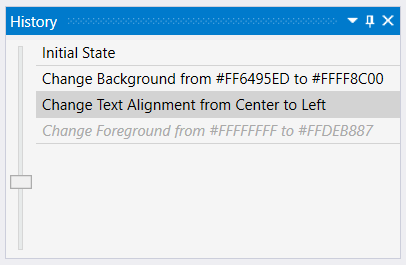
Provides a framework for adding undo/redo support to your application. An undo/redo stack is maintained separately for each document. The screenshot above shows the history tool window. You can drag the slider to move forward or backward in the document's history.
IHistoryTooltool windowIUndoableActioninterfaceUndoRedoToolbarItemsutility class
- None
First, define an action. The action needs to implement IUndoableAction:
publicclassMyAction:IUndoableAction{publicstringName{get{return"My Action";}}publicvoidExecute(){// Do something}publicvoidUndo(){// Put it back}}Then execute the action:
varundoRedoManager=IoC.Get<IShell>().ActiveItem.UndoRedoManager;undoRedoManager.ExecuteAction(newMyAction());Now the action will be shown in the history tool window. If you are using the Undo or Redo menu items or toolbar buttons, they will also react appropriately to the action.
Uses Roslyn to compile C# code. Currently, ICodeCompiler exposes a very simple interface:
publicinterfaceICodeCompiler{AssemblyCompile(IEnumerable<SyntaxTree>syntaxTrees,IEnumerable<MetadataReference>references,stringoutputName);}An interesting feature, made possible by Roslyn, is that the compiled assemblies are garbage-collectible.
This means that you can compile C# source code, run the resulting assembly in the same AppDomain as
your main application, and then unload the assembly from memory. This would be very useful, for example, in
a game editor where you want the game preview window to update as soon as the user modifies a script
source file.
ICodeCompilerservice
This example is from HelixViewModel in one of the sample applications.
varnewAssembly=_codeCompiler.Compile(new[]{SyntaxTree.ParseText(_helixView.TextEditor.Text)},new[]{MetadataReference.CreateAssemblyReference("mscorlib"),MetadataReference.CreateAssemblyReference("System"),MetadataReference.CreateAssemblyReference("PresentationCore"),newMetadataFileReference(typeof(IResult).Assembly.Location),newMetadataFileReference(typeof(AppBootstrapper).Assembly.Location),newMetadataFileReference(GetType().Assembly.Location)},"GeminiDemoScript");Once there are no references to newAssembly, it will be eligible for garbage collection.
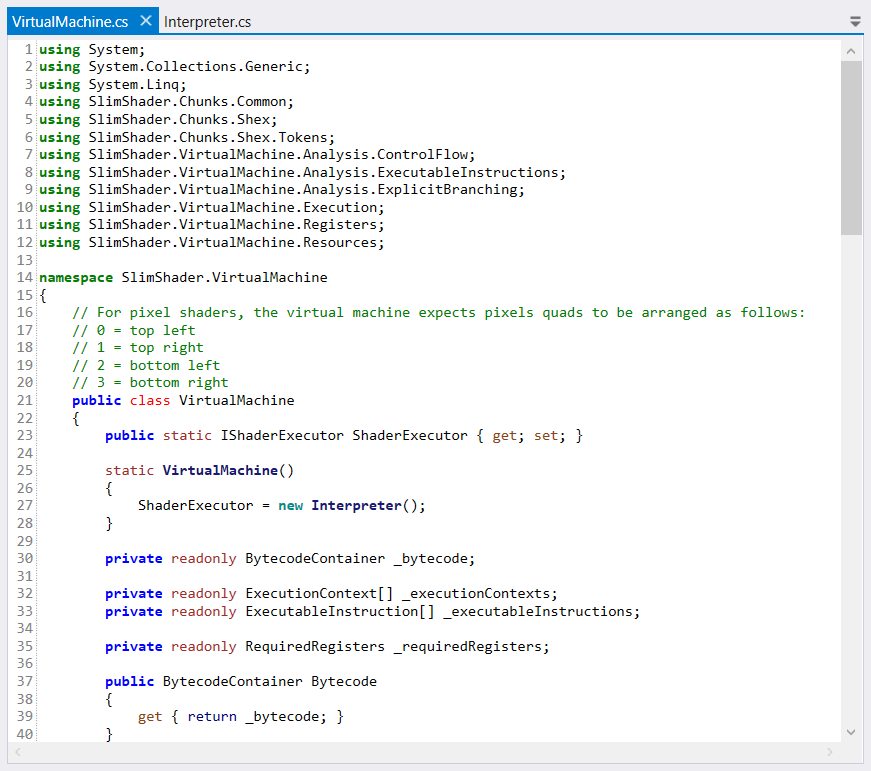
Uses AvalonEdit to provide syntax highlighting and other features for editing C# source files.
EditorProviderfor C# source filesCodeEditorcontrol
Opening a file with a .cs extension will automatically use the CodeEditor module to display
the document. You can also use the CodeEditor control in your own views:
<codeeditor:CodeEditorSyntaxHighlighting="C#" />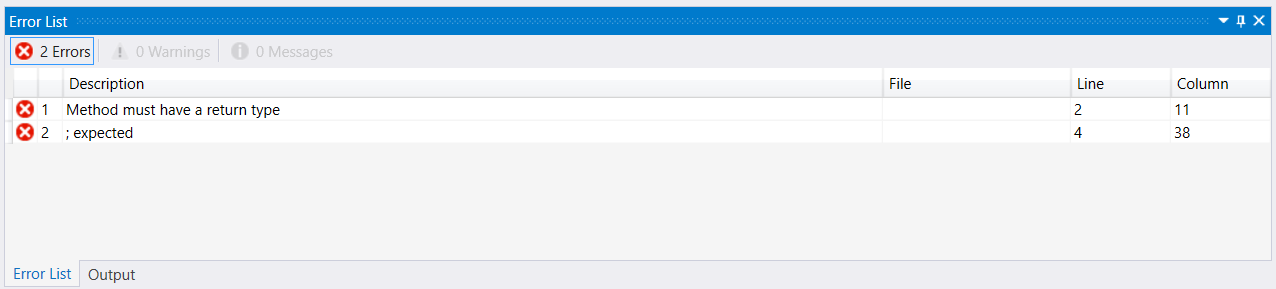
Reproduces the error list tool window from Visual Studio. Can be used to show errors, warning, or information.
IErrorListtool window
- None
varerrorList=IoC.Get<IErrorList>();errorList.Clear();errorList.AddItem(ErrorListItemType.Error,"Description of the error",@"C:\MyFile.txt",1,// Line20);// ColumnYou can optionally provide a callback that will be executed when the user double-clicks on an item:
errorList.AddItem(ErrorListItemType.Error,"Description of the error",@"C:\MyFile.txt",1,// Line20,// Character()=>{varopenDocumentResult=newOpenDocumentResult(@"C:\MyFile.txt");IoC.BuildUp(openDocumentResult);openDocumentResult.Execute(null);});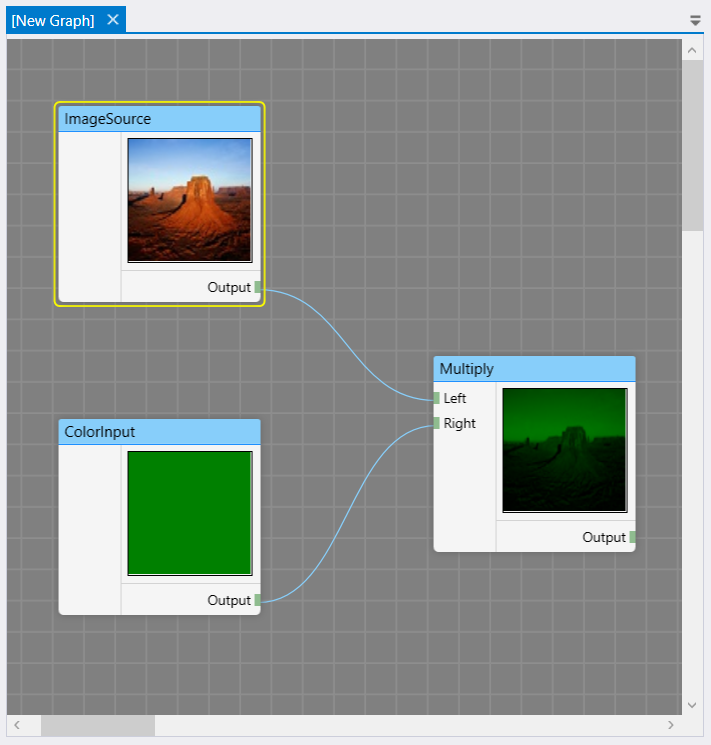
Implements a general purpose graph / node editing UI. This module provides the UI controls - the logic and view models are usually specific to your application, and are left to you. The FilterDesigner sample application (in the screenshot above) is one example of how it can be used.
Although I implemented it slightly differently, I got a lot of inspiration and some ideas for the code from Ashley Davis's CodeProject article.
GraphControlcontrolConnectorItemcontrolBezierLinecontrolZoomAndPanControlcontrol from this CodeProject article
- None
You'll need to create view models to represent:
- the graph itself
- elements
- connectors
- connections.
I suggest looking at the FilterDesigner sample application to get an idea of what's involved.
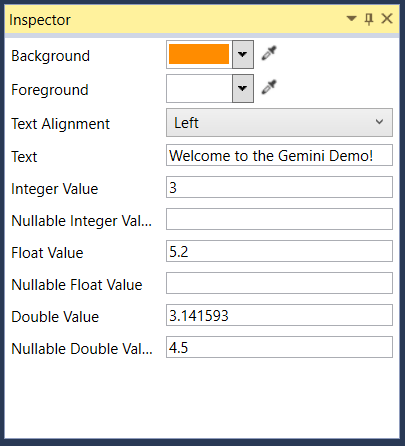
Similar in purpose to the property grid, but the Inspector module takes a more flexible approach. Instead of the strict "two-column / property per row" layout used in the standard PropertyGrid, the Inspector module allows each editor to customise its own view.
It comes with the following editors:
- BitmapSource
- CheckBox
- CollapsibleGroup
- Color (WPF)
- Enum
- Point3D (WPF)
- Range
- TextBox
IInspectorTooltool windowInspectableObjectBuilderclass
- Extended WPF Toolkit (for the colour picker)
You can build up the inspector for an object in two ways:
- Convention-based. The Inspector module can reflect over an object and create editors for the properties whose
types it recognises. It comes with built-in editors for
int,string,Enum, etc. - Manually. Use the fluent interface on
InspectableObjectBuilderto create editors.
You can also mix and match these approaches.
varinspectorTool=IoC.Get<IInspectorTool>();inspectorTool.SelectedObject=newInspectableObjectBuilder().WithCollapsibleGroup("My Group", b =>b.WithColorEditor(myObject, x =>x.Color)).WithObjectProperties(Shell.ActiveItem, pd =>true)// Automatically adds browsable properties..ToInspectableObject();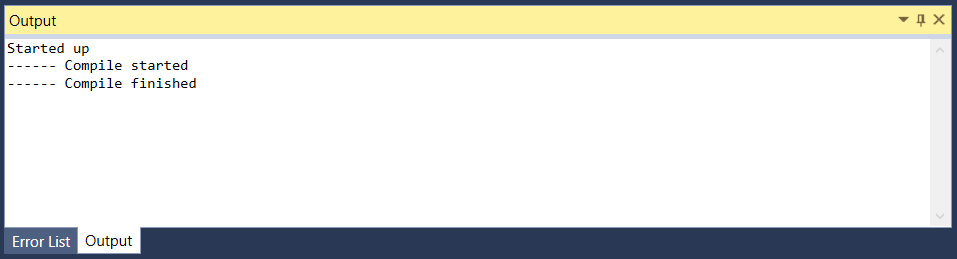
Much like the output tool window from Visual Studio.
IOutputtool window
- None
varoutput=IoC.Get<IOutput>();output.AppendLine("Started up");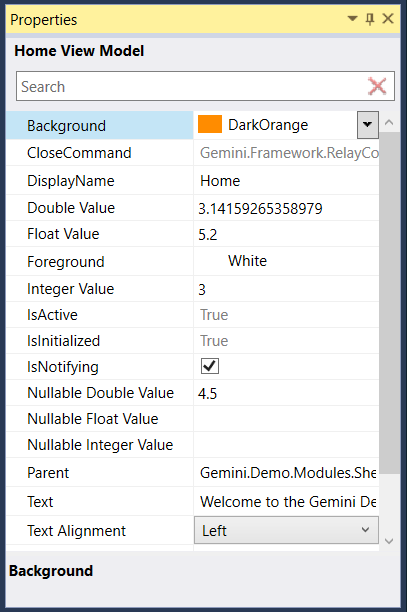
Pretty much does what it says on the tin. It uses the PropertyGrid control from the Extended WPF Toolkit.
IPropertyGridtool window
varpropertyGrid=IoC.Get<IPropertyGrid>();propertyGrid.SelectedObject=myObject;Gemini.Demo showcases many of the available modules. The screenshot below shows the interactive script editor in action - as you type, the code will be compiled in real-time into a dynamic assembly and then executed in the same AppDomain.
It also includes a very basic example of a filter designer, built on the GraphEditor module.

I've used Gemini on several of my own projects:
- Meshellator
- Rasterizr
- SlimShader
- coming soon...
- Many of the original ideas, and much of the early code came from Rob Eisenberg, creator of the Caliburn Micro framework. I have extended and modified his code to integrate better with AvalonDock 2.0, which natively supports MVVM-style binding.
- I used the VS2010 theme from Edi.
Gemini is not the only WPF framework for building IDE-like applications. Here are some others:
- SoapBox Core - source here, but I think this project might be dead.
- Wide - looks promising, and has a CodeProject article.