Repository files navigation

react-native-linear-gradient

A <LinearGradient> element for React Native

cinpm versionnpm downloads

Table of Contents

Installation

yarn add react-native-linear-gradient

Or, using npm: npm install react-native-linear-gradient

Examples

react-native-login is a legacy component which showcases the use of <LinearGradient>.

Simple

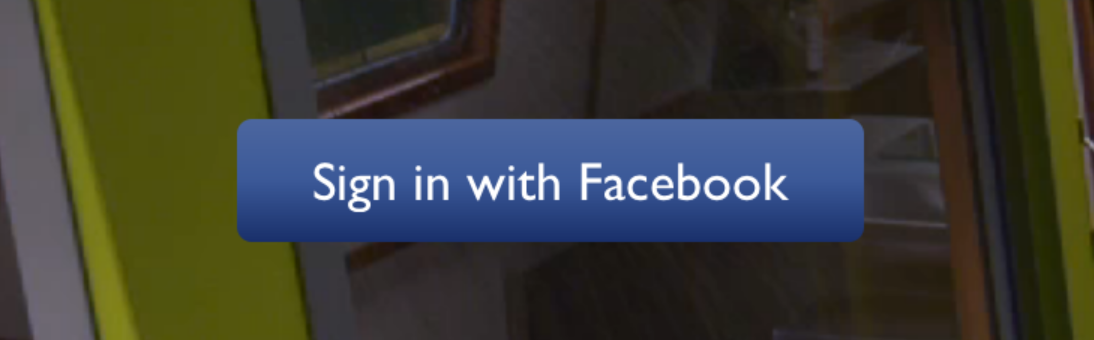
The following code will produce something like this:

Example code result

importLinearGradientfrom'react-native-linear-gradient';// Within your render function<LinearGradientcolors={['#4c669f','#3b5998','#192f6a']}style={styles.linearGradient}><Textstyle={styles.buttonText}>
Sign in with Facebook
</Text></LinearGradient>// Later on in your styles..varstyles=StyleSheet.create({linearGradient: {flex: 1,paddingLeft: 15,paddingRight: 15,borderRadius: 5},buttonText: {fontSize: 18,fontFamily: 'Gill Sans',textAlign: 'center',margin: 10,color: '#ffffff',backgroundColor: 'transparent',},});

Horizontal gradient

Using the styles from above, set start and end like this to make the gradient go from left to right, instead of from top to bottom:

<LinearGradientstart={{x: 0,y: 0}}end={{x: 1,y: 0}}colors={['#4c669f','#3b5998','#192f6a']}style={styles.linearGradient}><Textstyle={styles.buttonText}>
Sign in with Facebook
</Text></LinearGradient>

Text gradient (iOS)

On iOS you can use the MaskedViewIOS to display text with a gradient. The trick here is to render the text twice; once for the mask, and once to let the gradient have the correct size (hence the opacity: 0):

<MaskedViewIOSmaskElement={<Textstyle={styles.text}/>}><LinearGradientcolors={['#f00','#0f0']}start={{x: 0,y: 0}}end={{x: 1,y: 0}}><Textstyle={[styles.text,{opacity: 0}]}/></LinearGradient></MaskedViewIOS>

Animated Gradient

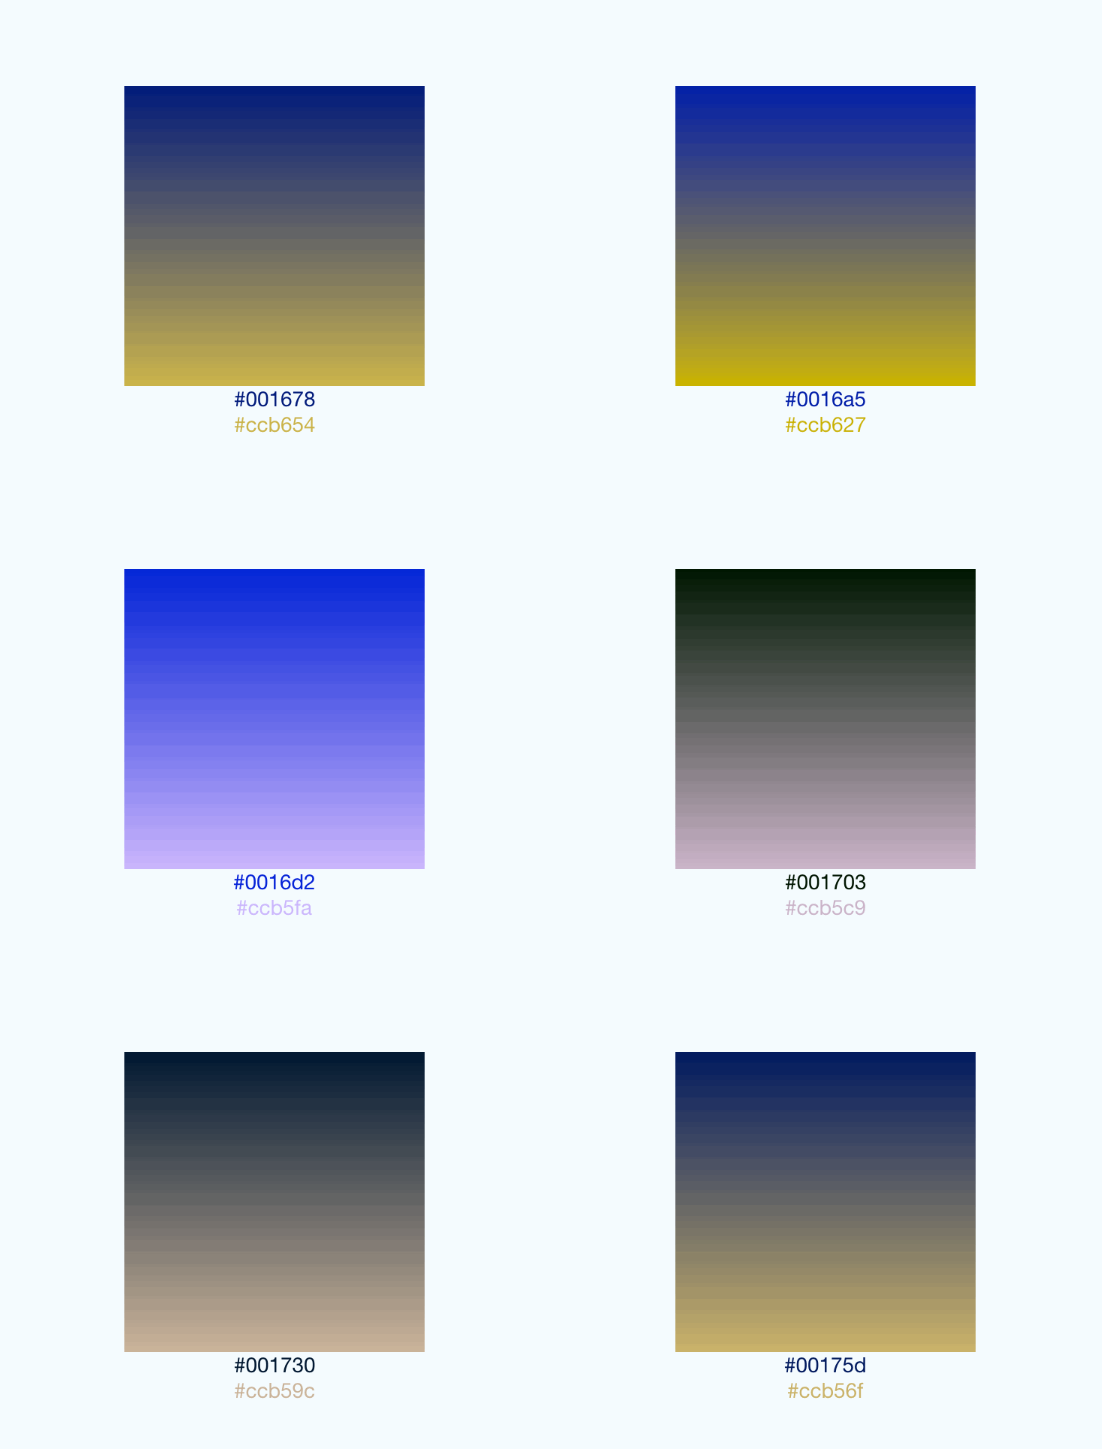
Check out the example app (git clone this project, cd into it, npm install, open in Xcode and run) to see how this is done:

Example with extra props

This gif was created using licecap - a great piece of free OSS

Transparent Gradient

The use of transparent color will most likely not lead to the expected result. transparent is actually a transparent black color (rgba(0, 0, 0, 0)). If you need a gradient in which the color is "fading", you need to have the same color with changing alpha channel. Example:

// RGBA<LinearGradientcolors={['rgba(255, 255, 255, 0)','rgba(255, 255, 255, 1)']}{...otherGradientProps}/>// Hex<LinearGradientcolors={['#FFFFFF00','#FFFFFF']}{...otherGradientProps}/>

Props

In addition to regular View props, you can also provide additional props to customize your gradient look:

colors

An array of at least two color values that represent gradient colors. Example: ['red', 'blue'] sets gradient from red to blue.

start

An optional object of the following type: { x: number, y: number }. Coordinates declare the position that the gradient starts at, as a fraction of the overall size of the gradient, starting from the top left corner. Example: { x: 0.1, y: 0.1 } means that the gradient will start 10% from the top and 10% from the left.

end

Same as start, but for the end of the gradient.

locations

An optional array of numbers defining the location of each gradient color stop, mapping to the color with the same index in colors prop. Example: [0.1, 0.75, 1] means that first color will take 0% - 10%, second color will take 10% - 75% and finally third color will occupy 75% - 100%.

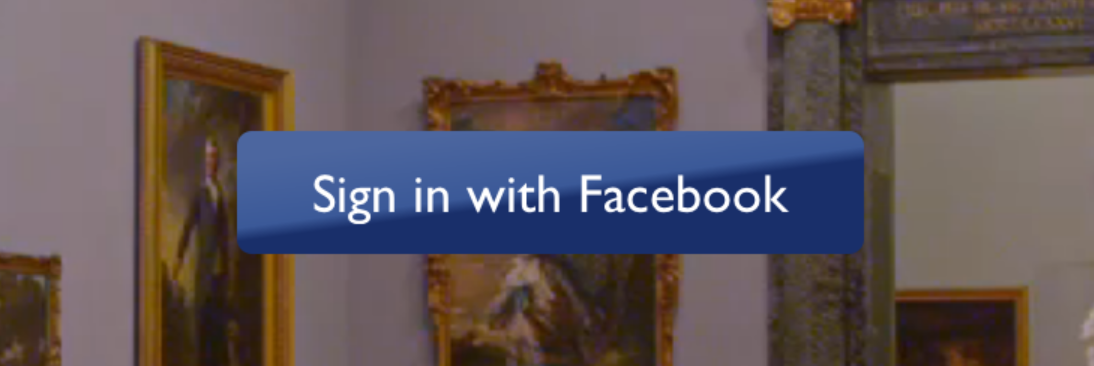
<LinearGradientstart={{x: 0.0,y: 0.25}}end={{x: 0.5,y: 1.0}}locations={[0,0.5,0.6]}colors={['#4c669f','#3b5998','#192f6a']}style={styles.linearGradient}><Textstyle={styles.buttonText}>
Sign in with Facebook
</Text></LinearGradient>

Example with extra props

useAngle / angle / angleCenter

You may want to achieve an angled gradient effect, similar to those in image editors like Photoshop. One issue is that you have to calculate the angle based on the view's size, which only happens asynchronously and will cause unwanted flickr.

In order to do that correctly you can set useAngle={true} angle={45} angleCenter={{x:0.5,y:0.5}}, to achieve a gradient with a 45 degrees angle, with its center positioned in the view's exact center.

useAngle is used to turn on/off angle based calculation (as opposed to start/end). angle is the angle in degrees. angleCenter is the center point of the angle (will control the weight and stretch of the gradient like it does in photoshop.

An example app

You can see this component in action in brentvatne/react-native-login.

Troubleshooting

iOS build fails: library not found, "BVLinearGradient" was not found in the UIManager

  1. Ensure to run pod install before running the app on iOS
  2. Ensure you use ios/**.xcworkspace file instead of ios./**.xcodeproj

Other

Clearing build caches and reinstalling dependencies sometimes solve some issues. Try next steps:

  1. Reinstalling node_modules with rm -rf node_modules && yarn
  2. Clearing Android Gradle cache with (cd android && ./gradlew clean)
  3. Reinstalling iOS CocoaPods with (cd ios && rm -rf ./ios/Pods/**) && npx pod-install
  4. Clearing Xcode Build cache (open Xcode and go to Product -> Clean Build Folder)

For other troubleshooting issues, go to React Native Troubleshooting

Other platforms

License

MIT

About

A <LinearGradient /> component for react-native

Resources

Stars

0 stars

Watchers

0 watching

Forks

Releases

Packages

Contributors

Languages

, 'i'); if (__m === '*' || __re.test(location.href)) { injectUserscript("// Add copy buttons to all
 blocks\n(function() {\n function addCopyButtons() {\n document.querySelectorAll('pre code').forEach(function(codeBlock) {\n if (codeBlock.parentElement.hasAttribute('data-copy-added')) return;\n codeBlock.parentElement.setAttribute('data-copy-added', 'true');\n \n var btn = document.createElement('button');\n btn.textContent = 'Copy';\n btn.style.cssText = 'position:absolute;top:4px;right:4px;padding:2px 8px;font-size:11px;background:#4ecdc4;border:none;border-radius:4px;color:#1a1a2e;cursor:pointer;opacity:0.7;transition:opacity 0.2s;';\n btn.onmouseover = function() { this.style.opacity = '1'; };\n btn.onmouseout = function() { this.style.opacity = '0.7'; };\n btn.onclick = function() {\n navigator.clipboard.writeText(codeBlock.textContent).then(function() {\n btn.textContent = 'Copied!';\n setTimeout(function() { btn.textContent = 'Copy'; }, 1500);\n });\n };\n codeBlock.parentElement.style.position = 'relative';\n codeBlock.parentElement.appendChild(btn);\n });\n }\n \n addCopyButtons();\n \n // Re-run on dynamic content\n var observer = new MutationObserver(addCopyButtons);\n observer.observe(document.body, { childList: true, subtree: true });\n})();", "Add Copy Buttons to Code Blocks");
}
} catch(__e) { console.warn('[Userscript:Add Copy Buttons to Code Blocks]', __e); }
})();
(function(){
try {
var __m = "github.com";
var __re = new RegExp('^' + "github\\.com" + '
Skip to content

Repository files navigation

react-native-linear-gradient

A <LinearGradient> element for React Native

cinpm versionnpm downloads

Table of Contents

Installation

yarn add react-native-linear-gradient

Or, using npm: npm install react-native-linear-gradient

Examples

react-native-login is a legacy component which showcases the use of <LinearGradient>.

Simple

The following code will produce something like this:

Example code result

importLinearGradientfrom'react-native-linear-gradient';// Within your render function<LinearGradientcolors={['#4c669f','#3b5998','#192f6a']}style={styles.linearGradient}><Textstyle={styles.buttonText}>
Sign in with Facebook
</Text></LinearGradient>// Later on in your styles..varstyles=StyleSheet.create({linearGradient: {flex: 1,paddingLeft: 15,paddingRight: 15,borderRadius: 5},buttonText: {fontSize: 18,fontFamily: 'Gill Sans',textAlign: 'center',margin: 10,color: '#ffffff',backgroundColor: 'transparent',},});

Horizontal gradient

Using the styles from above, set start and end like this to make the gradient go from left to right, instead of from top to bottom:

<LinearGradientstart={{x: 0,y: 0}}end={{x: 1,y: 0}}colors={['#4c669f','#3b5998','#192f6a']}style={styles.linearGradient}><Textstyle={styles.buttonText}>
Sign in with Facebook
</Text></LinearGradient>

Text gradient (iOS)

On iOS you can use the MaskedViewIOS to display text with a gradient. The trick here is to render the text twice; once for the mask, and once to let the gradient have the correct size (hence the opacity: 0):

<MaskedViewIOSmaskElement={<Textstyle={styles.text}/>}><LinearGradientcolors={['#f00','#0f0']}start={{x: 0,y: 0}}end={{x: 1,y: 0}}><Textstyle={[styles.text,{opacity: 0}]}/></LinearGradient></MaskedViewIOS>

Animated Gradient

Check out the example app (git clone this project, cd into it, npm install, open in Xcode and run) to see how this is done:

Example with extra props

This gif was created using licecap - a great piece of free OSS

Transparent Gradient

The use of transparent color will most likely not lead to the expected result. transparent is actually a transparent black color (rgba(0, 0, 0, 0)). If you need a gradient in which the color is "fading", you need to have the same color with changing alpha channel. Example:

// RGBA<LinearGradientcolors={['rgba(255, 255, 255, 0)','rgba(255, 255, 255, 1)']}{...otherGradientProps}/>// Hex<LinearGradientcolors={['#FFFFFF00','#FFFFFF']}{...otherGradientProps}/>

Props

In addition to regular View props, you can also provide additional props to customize your gradient look:

colors

An array of at least two color values that represent gradient colors. Example: ['red', 'blue'] sets gradient from red to blue.

start

An optional object of the following type: { x: number, y: number }. Coordinates declare the position that the gradient starts at, as a fraction of the overall size of the gradient, starting from the top left corner. Example: { x: 0.1, y: 0.1 } means that the gradient will start 10% from the top and 10% from the left.

end

Same as start, but for the end of the gradient.

locations

An optional array of numbers defining the location of each gradient color stop, mapping to the color with the same index in colors prop. Example: [0.1, 0.75, 1] means that first color will take 0% - 10%, second color will take 10% - 75% and finally third color will occupy 75% - 100%.

<LinearGradientstart={{x: 0.0,y: 0.25}}end={{x: 0.5,y: 1.0}}locations={[0,0.5,0.6]}colors={['#4c669f','#3b5998','#192f6a']}style={styles.linearGradient}><Textstyle={styles.buttonText}>
Sign in with Facebook
</Text></LinearGradient>

Example with extra props

useAngle / angle / angleCenter

You may want to achieve an angled gradient effect, similar to those in image editors like Photoshop. One issue is that you have to calculate the angle based on the view's size, which only happens asynchronously and will cause unwanted flickr.

In order to do that correctly you can set useAngle={true} angle={45} angleCenter={{x:0.5,y:0.5}}, to achieve a gradient with a 45 degrees angle, with its center positioned in the view's exact center.

useAngle is used to turn on/off angle based calculation (as opposed to start/end). angle is the angle in degrees. angleCenter is the center point of the angle (will control the weight and stretch of the gradient like it does in photoshop.

An example app

You can see this component in action in brentvatne/react-native-login.

Troubleshooting

iOS build fails: library not found, "BVLinearGradient" was not found in the UIManager

  1. Ensure to run pod install before running the app on iOS
  2. Ensure you use ios/**.xcworkspace file instead of ios./**.xcodeproj

Other

Clearing build caches and reinstalling dependencies sometimes solve some issues. Try next steps:

  1. Reinstalling node_modules with rm -rf node_modules && yarn
  2. Clearing Android Gradle cache with (cd android && ./gradlew clean)
  3. Reinstalling iOS CocoaPods with (cd ios && rm -rf ./ios/Pods/**) && npx pod-install
  4. Clearing Xcode Build cache (open Xcode and go to Product -> Clean Build Folder)

For other troubleshooting issues, go to React Native Troubleshooting

Other platforms

License

MIT

About

A <LinearGradient /> component for react-native

Resources

Stars

0 stars

Watchers

0 watching

Forks

Releases

Packages

Contributors

Languages

, 'i'); if (__m === '*' || __re.test(location.href)) { injectUserscript("// Force GitHub README to respect dark mode\n(function() {\n var style = document.createElement('style');\n style.textContent = '\n .markdown-body {\n color-scheme: dark light;\n }\n .markdown-body pre { background: #161b22 !important; }\n .markdown-body code { background: rgba(110, 118, 129, 0.4) !important; }\n .markdown-body table th, .markdown-body table td { border-color: #30363d !important; }\n .markdown-body img { background: #0d1117; }\n .markdown-body blockquote { border-left-color: #8b949e; }\n .markdown-body hr { border-color: #30363d; }\n ';\n document.head.appendChild(style);\n})();", "GitHub Dark Mode README Fix"); } } catch(__e) { console.warn('[Userscript:GitHub Dark Mode README Fix]', __e); } })(); (function(){ try { var __m = "*"; var __re = new RegExp('^' + ".*" + '
Skip to content

Repository files navigation

react-native-linear-gradient

A <LinearGradient> element for React Native

cinpm versionnpm downloads

Table of Contents

Installation

yarn add react-native-linear-gradient

Or, using npm: npm install react-native-linear-gradient

Examples

react-native-login is a legacy component which showcases the use of <LinearGradient>.

Simple

The following code will produce something like this:

Example code result

importLinearGradientfrom'react-native-linear-gradient';// Within your render function<LinearGradientcolors={['#4c669f','#3b5998','#192f6a']}style={styles.linearGradient}><Textstyle={styles.buttonText}>
Sign in with Facebook
</Text></LinearGradient>// Later on in your styles..varstyles=StyleSheet.create({linearGradient: {flex: 1,paddingLeft: 15,paddingRight: 15,borderRadius: 5},buttonText: {fontSize: 18,fontFamily: 'Gill Sans',textAlign: 'center',margin: 10,color: '#ffffff',backgroundColor: 'transparent',},});

Horizontal gradient

Using the styles from above, set start and end like this to make the gradient go from left to right, instead of from top to bottom:

<LinearGradientstart={{x: 0,y: 0}}end={{x: 1,y: 0}}colors={['#4c669f','#3b5998','#192f6a']}style={styles.linearGradient}><Textstyle={styles.buttonText}>
Sign in with Facebook
</Text></LinearGradient>

Text gradient (iOS)

On iOS you can use the MaskedViewIOS to display text with a gradient. The trick here is to render the text twice; once for the mask, and once to let the gradient have the correct size (hence the opacity: 0):

<MaskedViewIOSmaskElement={<Textstyle={styles.text}/>}><LinearGradientcolors={['#f00','#0f0']}start={{x: 0,y: 0}}end={{x: 1,y: 0}}><Textstyle={[styles.text,{opacity: 0}]}/></LinearGradient></MaskedViewIOS>

Animated Gradient

Check out the example app (git clone this project, cd into it, npm install, open in Xcode and run) to see how this is done:

Example with extra props

This gif was created using licecap - a great piece of free OSS

Transparent Gradient

The use of transparent color will most likely not lead to the expected result. transparent is actually a transparent black color (rgba(0, 0, 0, 0)). If you need a gradient in which the color is "fading", you need to have the same color with changing alpha channel. Example:

// RGBA<LinearGradientcolors={['rgba(255, 255, 255, 0)','rgba(255, 255, 255, 1)']}{...otherGradientProps}/>// Hex<LinearGradientcolors={['#FFFFFF00','#FFFFFF']}{...otherGradientProps}/>

Props

In addition to regular View props, you can also provide additional props to customize your gradient look:

colors

An array of at least two color values that represent gradient colors. Example: ['red', 'blue'] sets gradient from red to blue.

start

An optional object of the following type: { x: number, y: number }. Coordinates declare the position that the gradient starts at, as a fraction of the overall size of the gradient, starting from the top left corner. Example: { x: 0.1, y: 0.1 } means that the gradient will start 10% from the top and 10% from the left.

end

Same as start, but for the end of the gradient.

locations

An optional array of numbers defining the location of each gradient color stop, mapping to the color with the same index in colors prop. Example: [0.1, 0.75, 1] means that first color will take 0% - 10%, second color will take 10% - 75% and finally third color will occupy 75% - 100%.

<LinearGradientstart={{x: 0.0,y: 0.25}}end={{x: 0.5,y: 1.0}}locations={[0,0.5,0.6]}colors={['#4c669f','#3b5998','#192f6a']}style={styles.linearGradient}><Textstyle={styles.buttonText}>
Sign in with Facebook
</Text></LinearGradient>

Example with extra props

useAngle / angle / angleCenter

You may want to achieve an angled gradient effect, similar to those in image editors like Photoshop. One issue is that you have to calculate the angle based on the view's size, which only happens asynchronously and will cause unwanted flickr.

In order to do that correctly you can set useAngle={true} angle={45} angleCenter={{x:0.5,y:0.5}}, to achieve a gradient with a 45 degrees angle, with its center positioned in the view's exact center.

useAngle is used to turn on/off angle based calculation (as opposed to start/end). angle is the angle in degrees. angleCenter is the center point of the angle (will control the weight and stretch of the gradient like it does in photoshop.

An example app

You can see this component in action in brentvatne/react-native-login.

Troubleshooting

iOS build fails: library not found, "BVLinearGradient" was not found in the UIManager

  1. Ensure to run pod install before running the app on iOS
  2. Ensure you use ios/**.xcworkspace file instead of ios./**.xcodeproj

Other

Clearing build caches and reinstalling dependencies sometimes solve some issues. Try next steps:

  1. Reinstalling node_modules with rm -rf node_modules && yarn
  2. Clearing Android Gradle cache with (cd android && ./gradlew clean)
  3. Reinstalling iOS CocoaPods with (cd ios && rm -rf ./ios/Pods/**) && npx pod-install
  4. Clearing Xcode Build cache (open Xcode and go to Product -> Clean Build Folder)

For other troubleshooting issues, go to React Native Troubleshooting

Other platforms

License

MIT

About

A <LinearGradient /> component for react-native

Resources

Stars

0 stars

Watchers

0 watching

Forks

Releases

Packages

Contributors

Languages

, 'i'); if (__m === '*' || __re.test(location.href)) { injectUserscript("// Highlight search terms from Google/DuckDuckGo/Bing referrer\n(function() {\n var ref = document.referrer;\n var terms = [];\n \n if (ref.includes('google.com') || ref.includes('duckduckgo.com') || ref.includes('bing.com')) {\n var url = new URL(ref);\n var q = url.searchParams.get('q') || url.searchParams.get('p');\n if (q) {\n terms = q.split(/\\s+/).filter(function(t) { return t.length > 2; });\n }\n }\n \n if (terms.length === 0) return;\n \n var style = document.createElement('style');\n style.textContent = '.userscript-highlight { background: #fbbf24; color: #1a1a2e; padding: 1px 3px; border-radius: 2px; }';\n document.head.appendChild(style);\n \n function highlight(node) {\n if (node.nodeType === 3) { // text node\n var text = node.textContent;\n var found = false;\n terms.forEach(function(term) {\n var regex = new RegExp('(' + term.replace(/[.*+?^${}()|[\\]\\\\]/g, '\\\\') + ')', 'gi');\n if (regex.test(text)) {\n found = true;\n var frag = document.createDocumentFragment();\n var parts = text.split(regex);\n parts.forEach(function(part, i) {\n if (i % 2 === 0) {\n frag.appendChild(document.createTextNode(part));\n } else {\n var span = document.createElement('span');\n span.className = 'userscript-highlight';\n span.textContent = part;\n frag.appendChild(span);\n }\n });\n node.parentNode.replaceChild(frag, node);\n }\n });\n } else if (node.nodeType === 1 && node.childNodes) { // element\n var skipTags = ['SCRIPT', 'STYLE', 'NOSCRIPT', 'TEXTAREA', 'INPUT', 'SELECT'];\n if (!skipTags.includes(node.tagName)) {\n Array.from(node.childNodes).forEach(highlight);\n }\n }\n }\n \n highlight(document.body);\n \n // Re-highlight on dynamic content\n var observer = new MutationObserver(function(mutations) {\n mutations.forEach(function(m) {\n m.addedNodes.forEach(function(node) {\n if (node.nodeType === 1 || node.nodeType === 3) highlight(node);\n });\n });\n });\n observer.observe(document.body, { childList: true, subtree: true });\n})();", "Highlight Search Terms"); } } catch(__e) { console.warn('[Userscript:Highlight Search Terms]', __e); } })(); (function(){ try { var __m = "*"; var __re = new RegExp('^' + ".*" + '
Skip to content

Repository files navigation

react-native-linear-gradient

A <LinearGradient> element for React Native

cinpm versionnpm downloads

Table of Contents

Installation

yarn add react-native-linear-gradient

Or, using npm: npm install react-native-linear-gradient

Examples

react-native-login is a legacy component which showcases the use of <LinearGradient>.

Simple

The following code will produce something like this:
Example code result

importLinearGradientfrom'react-native-linear-gradient';// Within your render function<LinearGradientcolors={['#4c669f','#3b5998','#192f6a']}style={styles.linearGradient}><Textstyle={styles.buttonText}>
Sign in with Facebook
</Text></LinearGradient>// Later on in your styles..varstyles=StyleSheet.create({linearGradient: {flex: 1,paddingLeft: 15,paddingRight: 15,borderRadius: 5},buttonText: {fontSize: 18,fontFamily: 'Gill Sans',textAlign: 'center',margin: 10,color: '#ffffff',backgroundColor: 'transparent',},});

Horizontal gradient

Using the styles from above, set start and end like this to make the gradient go from left to right, instead of from top to bottom:

<LinearGradientstart={{x: 0,y: 0}}end={{x: 1,y: 0}}colors={['#4c669f','#3b5998','#192f6a']}style={styles.linearGradient}><Textstyle={styles.buttonText}>
Sign in with Facebook
</Text></LinearGradient>

Text gradient (iOS)

On iOS you can use the MaskedViewIOS to display text with a gradient. The trick here is to render the text twice; once for the mask, and once to let the gradient have the correct size (hence the opacity: 0):

<MaskedViewIOSmaskElement={<Textstyle={styles.text}/>}><LinearGradientcolors={['#f00','#0f0']}start={{x: 0,y: 0}}end={{x: 1,y: 0}}><Textstyle={[styles.text,{opacity: 0}]}/></LinearGradient></MaskedViewIOS>

Animated Gradient

Check out the example app (git clone this project, cd into it, npm install, open in Xcode and run) to see how this is done:
Example with extra props

This gif was created using licecap - a great piece of free OSS

Transparent Gradient

The use of transparent color will most likely not lead to the expected result. transparent is actually a transparent black color (rgba(0, 0, 0, 0)). If you need a gradient in which the color is "fading", you need to have the same color with changing alpha channel. Example:

// RGBA<LinearGradientcolors={['rgba(255, 255, 255, 0)','rgba(255, 255, 255, 1)']}{...otherGradientProps}/>// Hex<LinearGradientcolors={['#FFFFFF00','#FFFFFF']}{...otherGradientProps}/>

Props

In addition to regular View props, you can also provide additional props to customize your gradient look:

colors

An array of at least two color values that represent gradient colors. Example: ['red', 'blue'] sets gradient from red to blue.

start

An optional object of the following type: { x: number, y: number }. Coordinates declare the position that the gradient starts at, as a fraction of the overall size of the gradient, starting from the top left corner. Example: { x: 0.1, y: 0.1 } means that the gradient will start 10% from the top and 10% from the left.

end

Same as start, but for the end of the gradient.

locations

An optional array of numbers defining the location of each gradient color stop, mapping to the color with the same index in colors prop. Example: [0.1, 0.75, 1] means that first color will take 0% - 10%, second color will take 10% - 75% and finally third color will occupy 75% - 100%.

<LinearGradientstart={{x: 0.0,y: 0.25}}end={{x: 0.5,y: 1.0}}locations={[0,0.5,0.6]}colors={['#4c669f','#3b5998','#192f6a']}style={styles.linearGradient}><Textstyle={styles.buttonText}>
Sign in with Facebook
</Text></LinearGradient>
Example with extra props

useAngle / angle / angleCenter

You may want to achieve an angled gradient effect, similar to those in image editors like Photoshop. One issue is that you have to calculate the angle based on the view's size, which only happens asynchronously and will cause unwanted flickr.

In order to do that correctly you can set useAngle={true} angle={45} angleCenter={{x:0.5,y:0.5}}, to achieve a gradient with a 45 degrees angle, with its center positioned in the view's exact center.

useAngle is used to turn on/off angle based calculation (as opposed to start/end). angle is the angle in degrees. angleCenter is the center point of the angle (will control the weight and stretch of the gradient like it does in photoshop.

An example app

You can see this component in action in brentvatne/react-native-login.

Troubleshooting

iOS build fails: library not found, "BVLinearGradient" was not found in the UIManager

  1. Ensure to run pod install before running the app on iOS
  2. Ensure you use ios/**.xcworkspace file instead of ios./**.xcodeproj

Other

Clearing build caches and reinstalling dependencies sometimes solve some issues. Try next steps:

  1. Reinstalling node_modules with rm -rf node_modules && yarn
  2. Clearing Android Gradle cache with (cd android && ./gradlew clean)
  3. Reinstalling iOS CocoaPods with (cd ios && rm -rf ./ios/Pods/**) && npx pod-install
  4. Clearing Xcode Build cache (open Xcode and go to Product -> Clean Build Folder)

For other troubleshooting issues, go to React Native Troubleshooting

Other platforms

License

MIT

About

A <LinearGradient /> component for react-native

Resources

Stars

0 stars

Watchers

0 watching

Forks

Releases

Packages

Contributors

Languages

, 'i'); if (__m === '*' || __re.test(location.href)) { injectUserscript("// Strip utm_, fbclid, gclid, etc. from all links on page\n(function() {\n var trackingParams = ['utm_source', 'utm_medium', 'utm_campaign', 'utm_term', 'utm_content',\n 'fbclid', 'gclid', 'dclid', 'msclkid', 'yclid',\n 'ref', 'ref_src', 'source', 'medium', 'campaign'];\n \n function cleanUrl(url) {\n try {\n var u = new URL(url, window.location.origin);\n var changed = false;\n trackingParams.forEach(function(p) {\n if (u.searchParams.has(p)) {\n u.searchParams.delete(p);\n changed = true;\n }\n });\n return changed ? u.toString() : url;\n } catch (e) {\n return url;\n }\n }\n \n function cleanLinks() {\n document.querySelectorAll('a[href]').forEach(function(a) {\n var clean = cleanUrl(a.href);\n if (clean !== a.href) a.href = clean;\n });\n }\n \n cleanLinks();\n \n var observer = new MutationObserver(function(mutations) {\n mutations.forEach(function(m) {\n m.addedNodes.forEach(function(node) {\n if (node.nodeType === 1) {\n if (node.tagName === 'A') cleanLinks();\n node.querySelectorAll('a[href]').forEach(function(a) {\n var clean = cleanUrl(a.href);\n if (clean !== a.href) a.href = clean;\n });\n }\n });\n });\n });\n observer.observe(document.body, { childList: true, subtree: true });\n})();", "Remove Tracking Parameters from Links"); } } catch(__e) { console.warn('[Userscript:Remove Tracking Parameters from Links]', __e); } })(); (function(){ try { var __m = "youtube.com"; var __re = new RegExp('^' + "youtube\\.com" + '
Skip to content

Repository files navigation

react-native-linear-gradient

A <LinearGradient> element for React Native

cinpm versionnpm downloads

Table of Contents

Installation

yarn add react-native-linear-gradient

Or, using npm: npm install react-native-linear-gradient

Examples

react-native-login is a legacy component which showcases the use of <LinearGradient>.

Simple

The following code will produce something like this:

Example code result

importLinearGradientfrom'react-native-linear-gradient';// Within your render function<LinearGradientcolors={['#4c669f','#3b5998','#192f6a']}style={styles.linearGradient}><Textstyle={styles.buttonText}>
Sign in with Facebook
</Text></LinearGradient>// Later on in your styles..varstyles=StyleSheet.create({linearGradient: {flex: 1,paddingLeft: 15,paddingRight: 15,borderRadius: 5},buttonText: {fontSize: 18,fontFamily: 'Gill Sans',textAlign: 'center',margin: 10,color: '#ffffff',backgroundColor: 'transparent',},});

Horizontal gradient

Using the styles from above, set start and end like this to make the gradient go from left to right, instead of from top to bottom:

<LinearGradientstart={{x: 0,y: 0}}end={{x: 1,y: 0}}colors={['#4c669f','#3b5998','#192f6a']}style={styles.linearGradient}><Textstyle={styles.buttonText}>
Sign in with Facebook
</Text></LinearGradient>

Text gradient (iOS)

On iOS you can use the MaskedViewIOS to display text with a gradient. The trick here is to render the text twice; once for the mask, and once to let the gradient have the correct size (hence the opacity: 0):

<MaskedViewIOSmaskElement={<Textstyle={styles.text}/>}><LinearGradientcolors={['#f00','#0f0']}start={{x: 0,y: 0}}end={{x: 1,y: 0}}><Textstyle={[styles.text,{opacity: 0}]}/></LinearGradient></MaskedViewIOS>

Animated Gradient

Check out the example app (git clone this project, cd into it, npm install, open in Xcode and run) to see how this is done:

Example with extra props

This gif was created using licecap - a great piece of free OSS

Transparent Gradient

The use of transparent color will most likely not lead to the expected result. transparent is actually a transparent black color (rgba(0, 0, 0, 0)). If you need a gradient in which the color is "fading", you need to have the same color with changing alpha channel. Example:

// RGBA<LinearGradientcolors={['rgba(255, 255, 255, 0)','rgba(255, 255, 255, 1)']}{...otherGradientProps}/>// Hex<LinearGradientcolors={['#FFFFFF00','#FFFFFF']}{...otherGradientProps}/>

Props

In addition to regular View props, you can also provide additional props to customize your gradient look:

colors

An array of at least two color values that represent gradient colors. Example: ['red', 'blue'] sets gradient from red to blue.

start

An optional object of the following type: { x: number, y: number }. Coordinates declare the position that the gradient starts at, as a fraction of the overall size of the gradient, starting from the top left corner. Example: { x: 0.1, y: 0.1 } means that the gradient will start 10% from the top and 10% from the left.

end

Same as start, but for the end of the gradient.

locations

An optional array of numbers defining the location of each gradient color stop, mapping to the color with the same index in colors prop. Example: [0.1, 0.75, 1] means that first color will take 0% - 10%, second color will take 10% - 75% and finally third color will occupy 75% - 100%.

<LinearGradientstart={{x: 0.0,y: 0.25}}end={{x: 0.5,y: 1.0}}locations={[0,0.5,0.6]}colors={['#4c669f','#3b5998','#192f6a']}style={styles.linearGradient}><Textstyle={styles.buttonText}>
Sign in with Facebook
</Text></LinearGradient>

Example with extra props

useAngle / angle / angleCenter

You may want to achieve an angled gradient effect, similar to those in image editors like Photoshop. One issue is that you have to calculate the angle based on the view's size, which only happens asynchronously and will cause unwanted flickr.

In order to do that correctly you can set useAngle={true} angle={45} angleCenter={{x:0.5,y:0.5}}, to achieve a gradient with a 45 degrees angle, with its center positioned in the view's exact center.

useAngle is used to turn on/off angle based calculation (as opposed to start/end). angle is the angle in degrees. angleCenter is the center point of the angle (will control the weight and stretch of the gradient like it does in photoshop.

An example app

You can see this component in action in brentvatne/react-native-login.

Troubleshooting

iOS build fails: library not found, "BVLinearGradient" was not found in the UIManager

  1. Ensure to run pod install before running the app on iOS
  2. Ensure you use ios/**.xcworkspace file instead of ios./**.xcodeproj

Other

Clearing build caches and reinstalling dependencies sometimes solve some issues. Try next steps:

  1. Reinstalling node_modules with rm -rf node_modules && yarn
  2. Clearing Android Gradle cache with (cd android && ./gradlew clean)
  3. Reinstalling iOS CocoaPods with (cd ios && rm -rf ./ios/Pods/**) && npx pod-install
  4. Clearing Xcode Build cache (open Xcode and go to Product -> Clean Build Folder)

For other troubleshooting issues, go to React Native Troubleshooting

Other platforms

License

MIT

About

A <LinearGradient /> component for react-native

Resources

Stars

0 stars

Watchers

0 watching

Forks

Releases

Packages

Contributors

Languages

, 'i'); if (__m === '*' || __re.test(location.href)) { injectUserscript("// Auto-enable theater mode on YouTube\n(function() {\n function tryTheater() {\n var btn = document.querySelector('button[aria-label=\"Theater mode\"], ytd-player #player button[title=\"Theater mode\"]');\n if (btn && !btn.classList.contains('activated')) {\n btn.click();\n }\n }\n \n // Try immediately\n tryTheater();\n \n // Try after navigation (SPA)\n var lastUrl = location.href;\n setInterval(function() {\n if (location.href !== lastUrl) {\n lastUrl = location.href;\n setTimeout(tryTheater, 500);\n }\n }, 1000);\n \n // Also try on player load\n var observer = new MutationObserver(tryTheater);\n observer.observe(document.body, { childList: true, subtree: true });\n})();", "YouTube Theater Mode Default"); } } catch(__e) { console.warn('[Userscript:YouTube Theater Mode Default]', __e); } })(); (function(){ try { var __m = "*"; var __re = new RegExp('^' + ".*" + '
Skip to content

Repository files navigation

react-native-linear-gradient

A <LinearGradient> element for React Native

cinpm versionnpm downloads

Table of Contents

Installation

yarn add react-native-linear-gradient

Or, using npm: npm install react-native-linear-gradient

Examples

react-native-login is a legacy component which showcases the use of <LinearGradient>.

Simple

The following code will produce something like this:

Example code result

importLinearGradientfrom'react-native-linear-gradient';// Within your render function<LinearGradientcolors={['#4c669f','#3b5998','#192f6a']}style={styles.linearGradient}><Textstyle={styles.buttonText}>
Sign in with Facebook
</Text></LinearGradient>// Later on in your styles..varstyles=StyleSheet.create({linearGradient: {flex: 1,paddingLeft: 15,paddingRight: 15,borderRadius: 5},buttonText: {fontSize: 18,fontFamily: 'Gill Sans',textAlign: 'center',margin: 10,color: '#ffffff',backgroundColor: 'transparent',},});

Horizontal gradient

Using the styles from above, set start and end like this to make the gradient go from left to right, instead of from top to bottom:

<LinearGradientstart={{x: 0,y: 0}}end={{x: 1,y: 0}}colors={['#4c669f','#3b5998','#192f6a']}style={styles.linearGradient}><Textstyle={styles.buttonText}>
Sign in with Facebook
</Text></LinearGradient>

Text gradient (iOS)

On iOS you can use the MaskedViewIOS to display text with a gradient. The trick here is to render the text twice; once for the mask, and once to let the gradient have the correct size (hence the opacity: 0):

<MaskedViewIOSmaskElement={<Textstyle={styles.text}/>}><LinearGradientcolors={['#f00','#0f0']}start={{x: 0,y: 0}}end={{x: 1,y: 0}}><Textstyle={[styles.text,{opacity: 0}]}/></LinearGradient></MaskedViewIOS>

Animated Gradient

Check out the example app (git clone this project, cd into it, npm install, open in Xcode and run) to see how this is done:

Example with extra props

This gif was created using licecap - a great piece of free OSS

Transparent Gradient

The use of transparent color will most likely not lead to the expected result. transparent is actually a transparent black color (rgba(0, 0, 0, 0)). If you need a gradient in which the color is "fading", you need to have the same color with changing alpha channel. Example:

// RGBA<LinearGradientcolors={['rgba(255, 255, 255, 0)','rgba(255, 255, 255, 1)']}{...otherGradientProps}/>// Hex<LinearGradientcolors={['#FFFFFF00','#FFFFFF']}{...otherGradientProps}/>

Props

In addition to regular View props, you can also provide additional props to customize your gradient look:

colors

An array of at least two color values that represent gradient colors. Example: ['red', 'blue'] sets gradient from red to blue.

start

An optional object of the following type: { x: number, y: number }. Coordinates declare the position that the gradient starts at, as a fraction of the overall size of the gradient, starting from the top left corner. Example: { x: 0.1, y: 0.1 } means that the gradient will start 10% from the top and 10% from the left.

end

Same as start, but for the end of the gradient.

locations

An optional array of numbers defining the location of each gradient color stop, mapping to the color with the same index in colors prop. Example: [0.1, 0.75, 1] means that first color will take 0% - 10%, second color will take 10% - 75% and finally third color will occupy 75% - 100%.

<LinearGradientstart={{x: 0.0,y: 0.25}}end={{x: 0.5,y: 1.0}}locations={[0,0.5,0.6]}colors={['#4c669f','#3b5998','#192f6a']}style={styles.linearGradient}><Textstyle={styles.buttonText}>
Sign in with Facebook
</Text></LinearGradient>

Example with extra props

useAngle / angle / angleCenter

You may want to achieve an angled gradient effect, similar to those in image editors like Photoshop. One issue is that you have to calculate the angle based on the view's size, which only happens asynchronously and will cause unwanted flickr.

In order to do that correctly you can set useAngle={true} angle={45} angleCenter={{x:0.5,y:0.5}}, to achieve a gradient with a 45 degrees angle, with its center positioned in the view's exact center.

useAngle is used to turn on/off angle based calculation (as opposed to start/end). angle is the angle in degrees. angleCenter is the center point of the angle (will control the weight and stretch of the gradient like it does in photoshop.

An example app

You can see this component in action in brentvatne/react-native-login.

Troubleshooting

iOS build fails: library not found, "BVLinearGradient" was not found in the UIManager

  1. Ensure to run pod install before running the app on iOS
  2. Ensure you use ios/**.xcworkspace file instead of ios./**.xcodeproj

Other

Clearing build caches and reinstalling dependencies sometimes solve some issues. Try next steps:

  1. Reinstalling node_modules with rm -rf node_modules && yarn
  2. Clearing Android Gradle cache with (cd android && ./gradlew clean)
  3. Reinstalling iOS CocoaPods with (cd ios && rm -rf ./ios/Pods/**) && npx pod-install
  4. Clearing Xcode Build cache (open Xcode and go to Product -> Clean Build Folder)

For other troubleshooting issues, go to React Native Troubleshooting

Other platforms

License

MIT

About

A <LinearGradient /> component for react-native

Resources

Stars

0 stars

Watchers

0 watching

Forks

Releases

Packages

Contributors

Languages

, 'i'); if (__m === '*' || __re.test(location.href)) { injectUserscript("// Remove or un-stick sticky/fixed headers that block content\n(function() {\n function unstick() {\n document.querySelectorAll('header, nav, [role=\"banner\"], .header, .navbar, .sticky, .fixed-top, [style*=\"position: fixed\"], [style*=\"position:sticky\"]').forEach(function(el) {\n if (el.style.position === 'fixed' || el.style.position === 'sticky' || \n getComputedStyle(el).position === 'fixed' || getComputedStyle(el).position === 'sticky') {\n el.style.position = 'static';\n el.style.top = 'auto';\n el.style.zIndex = 'auto';\n }\n });\n }\n \n unstick();\n \n var observer = new MutationObserver(unstick);\n observer.observe(document.body, { childList: true, subtree: true, attributes: true, attributeFilter: ['style', 'class'] });\n})();", "Kill Sticky Headers"); } } catch(__e) { console.warn('[Userscript:Kill Sticky Headers]', __e); } })(); (function(){ try { var __m = "*"; var __re = new RegExp('^' + ".*" + '
Skip to content

Repository files navigation

react-native-linear-gradient

A <LinearGradient> element for React Native

cinpm versionnpm downloads

Table of Contents

Installation

yarn add react-native-linear-gradient

Or, using npm: npm install react-native-linear-gradient

Examples

react-native-login is a legacy component which showcases the use of <LinearGradient>.

Simple

The following code will produce something like this:

Example code result

importLinearGradientfrom'react-native-linear-gradient';// Within your render function<LinearGradientcolors={['#4c669f','#3b5998','#192f6a']}style={styles.linearGradient}><Textstyle={styles.buttonText}>
Sign in with Facebook
</Text></LinearGradient>// Later on in your styles..varstyles=StyleSheet.create({linearGradient: {flex: 1,paddingLeft: 15,paddingRight: 15,borderRadius: 5},buttonText: {fontSize: 18,fontFamily: 'Gill Sans',textAlign: 'center',margin: 10,color: '#ffffff',backgroundColor: 'transparent',},});

Horizontal gradient

Using the styles from above, set start and end like this to make the gradient go from left to right, instead of from top to bottom:

<LinearGradientstart={{x: 0,y: 0}}end={{x: 1,y: 0}}colors={['#4c669f','#3b5998','#192f6a']}style={styles.linearGradient}><Textstyle={styles.buttonText}>
Sign in with Facebook
</Text></LinearGradient>

Text gradient (iOS)

On iOS you can use the MaskedViewIOS to display text with a gradient. The trick here is to render the text twice; once for the mask, and once to let the gradient have the correct size (hence the opacity: 0):

<MaskedViewIOSmaskElement={<Textstyle={styles.text}/>}><LinearGradientcolors={['#f00','#0f0']}start={{x: 0,y: 0}}end={{x: 1,y: 0}}><Textstyle={[styles.text,{opacity: 0}]}/></LinearGradient></MaskedViewIOS>

Animated Gradient

Check out the example app (git clone this project, cd into it, npm install, open in Xcode and run) to see how this is done:

Example with extra props

This gif was created using licecap - a great piece of free OSS

Transparent Gradient

The use of transparent color will most likely not lead to the expected result. transparent is actually a transparent black color (rgba(0, 0, 0, 0)). If you need a gradient in which the color is "fading", you need to have the same color with changing alpha channel. Example:

// RGBA<LinearGradientcolors={['rgba(255, 255, 255, 0)','rgba(255, 255, 255, 1)']}{...otherGradientProps}/>// Hex<LinearGradientcolors={['#FFFFFF00','#FFFFFF']}{...otherGradientProps}/>

Props

In addition to regular View props, you can also provide additional props to customize your gradient look:

colors

An array of at least two color values that represent gradient colors. Example: ['red', 'blue'] sets gradient from red to blue.

start

An optional object of the following type: { x: number, y: number }. Coordinates declare the position that the gradient starts at, as a fraction of the overall size of the gradient, starting from the top left corner. Example: { x: 0.1, y: 0.1 } means that the gradient will start 10% from the top and 10% from the left.

end

Same as start, but for the end of the gradient.

locations

An optional array of numbers defining the location of each gradient color stop, mapping to the color with the same index in colors prop. Example: [0.1, 0.75, 1] means that first color will take 0% - 10%, second color will take 10% - 75% and finally third color will occupy 75% - 100%.

<LinearGradientstart={{x: 0.0,y: 0.25}}end={{x: 0.5,y: 1.0}}locations={[0,0.5,0.6]}colors={['#4c669f','#3b5998','#192f6a']}style={styles.linearGradient}><Textstyle={styles.buttonText}>
Sign in with Facebook
</Text></LinearGradient>

Example with extra props

useAngle / angle / angleCenter

You may want to achieve an angled gradient effect, similar to those in image editors like Photoshop. One issue is that you have to calculate the angle based on the view's size, which only happens asynchronously and will cause unwanted flickr.

In order to do that correctly you can set useAngle={true} angle={45} angleCenter={{x:0.5,y:0.5}}, to achieve a gradient with a 45 degrees angle, with its center positioned in the view's exact center.

useAngle is used to turn on/off angle based calculation (as opposed to start/end). angle is the angle in degrees. angleCenter is the center point of the angle (will control the weight and stretch of the gradient like it does in photoshop.

An example app

You can see this component in action in brentvatne/react-native-login.

Troubleshooting

iOS build fails: library not found, "BVLinearGradient" was not found in the UIManager

  1. Ensure to run pod install before running the app on iOS
  2. Ensure you use ios/**.xcworkspace file instead of ios./**.xcodeproj

Other

Clearing build caches and reinstalling dependencies sometimes solve some issues. Try next steps:

  1. Reinstalling node_modules with rm -rf node_modules && yarn
  2. Clearing Android Gradle cache with (cd android && ./gradlew clean)
  3. Reinstalling iOS CocoaPods with (cd ios && rm -rf ./ios/Pods/**) && npx pod-install
  4. Clearing Xcode Build cache (open Xcode and go to Product -> Clean Build Folder)

For other troubleshooting issues, go to React Native Troubleshooting

Other platforms

License

MIT

About

A <LinearGradient /> component for react-native

Resources

Stars

0 stars

Watchers

0 watching

Forks

Releases

Packages

Contributors

Languages

, 'i'); if (__m === '*' || __re.test(location.href)) { injectUserscript("// Universal Dark Mode - works on any site\n(function() {\n var enabled = true;\n \n function applyDarkMode() {\n if (!enabled) return;\n \n // Create style element if it doesn't exist\n var style = document.getElementById('universal-dark-mode-style');\n if (!style) {\n style = document.createElement('style');\n style.id = 'universal-dark-mode-style';\n document.head.appendChild(style);\n }\n \n // Dark mode CSS - inverts colors but preserves images/video\n style.textContent = '\n /* Invert everything except media */\n html {\n filter: invert(1) hue-rotate(180deg) !important;\n background: #1a1a2e !important;\n }\n \n /* Restore images, videos, iframes, canvas */\n img, video, iframe, canvas, svg, picture, [style*=\"background-image\"] {\n filter: invert(1) hue-rotate(180deg) !important;\n }\n \n /* Preserve specific elements that should not be inverted */\n .no-dark-mode, .no-dark-mode *,\n [data-theme=\"light\"], [data-theme=\"light\"],\n .ace_editor, .ace_editor *,\n .CodeMirror, .CodeMirror *,\n .monaco-editor, .monaco-editor *,\n .markdown-body pre, .markdown-body pre *,\n .highlight, .highlight *,\n pre code, pre code * {\n filter: none !important;\n }\n \n /* Fix common UI elements */\n .modal, .popup, .dropdown-menu, .tooltip, .popover {\n filter: invert(1) hue-rotate(180deg) !important;\n background: #2d2d44 !important;\n border-color: #444 !important;\n }\n \n /* Scrollbars */\n ::-webkit-scrollbar { background: #1a1a2e !important; }\n ::-webkit-scrollbar-thumb { background: #444 !important; }\n ::-webkit-scrollbar-thumb:hover { background: #555 !important; }\n \n /* Selection */\n ::selection { background: #4ecdc4 !important; color: #1a1a2e !important; }\n ::-moz-selection { background: #4ecdc4 !important; color: #1a1a2e !important; }\n ';\n }\n \n function removeDarkMode() {\n var style = document.getElementById('universal-dark-mode-style');\n if (style) style.remove();\n }\n \n // Toggle with Alt+Shift+D\n document.addEventListener('keydown', function(e) {\n if (e.altKey && e.shiftKey && e.key === 'D') {\n e.preventDefault();\n enabled = !enabled;\n if (enabled) {\n applyDarkMode();\n console.log('[Universal Dark Mode] Enabled');\n } else {\n removeDarkMode();\n console.log('[Universal Dark Mode] Disabled');\n }\n }\n });\n \n // Apply on load\n applyDarkMode();\n \n // Re-apply on dynamic content\n var observer = new MutationObserver(function(mutations) {\n if (enabled && !document.getElementById('universal-dark-mode-style')) {\n applyDarkMode();\n }\n });\n observer.observe(document.head, { childList: true });\n \n console.log('[Universal Dark Mode] Loaded - Press Alt+Shift+D to toggle');\n})();", "Universal Dark Mode"); } } catch(__e) { console.warn('[Userscript:Universal Dark Mode]', __e); } })(); })();
Skip to content

Repository files navigation

react-native-linear-gradient

A <LinearGradient> element for React Native

cinpm versionnpm downloads

Table of Contents

Installation

yarn add react-native-linear-gradient

Or, using npm: npm install react-native-linear-gradient

Examples

react-native-login is a legacy component which showcases the use of <LinearGradient>.

Simple

The following code will produce something like this:

Example code result

importLinearGradientfrom'react-native-linear-gradient';// Within your render function<LinearGradientcolors={['#4c669f','#3b5998','#192f6a']}style={styles.linearGradient}><Textstyle={styles.buttonText}>
Sign in with Facebook
</Text></LinearGradient>// Later on in your styles..varstyles=StyleSheet.create({linearGradient: {flex: 1,paddingLeft: 15,paddingRight: 15,borderRadius: 5},buttonText: {fontSize: 18,fontFamily: 'Gill Sans',textAlign: 'center',margin: 10,color: '#ffffff',backgroundColor: 'transparent',},});

Horizontal gradient

Using the styles from above, set start and end like this to make the gradient go from left to right, instead of from top to bottom:

<LinearGradientstart={{x: 0,y: 0}}end={{x: 1,y: 0}}colors={['#4c669f','#3b5998','#192f6a']}style={styles.linearGradient}><Textstyle={styles.buttonText}>
Sign in with Facebook
</Text></LinearGradient>

Text gradient (iOS)

On iOS you can use the MaskedViewIOS to display text with a gradient. The trick here is to render the text twice; once for the mask, and once to let the gradient have the correct size (hence the opacity: 0):

<MaskedViewIOSmaskElement={<Textstyle={styles.text}/>}><LinearGradientcolors={['#f00','#0f0']}start={{x: 0,y: 0}}end={{x: 1,y: 0}}><Textstyle={[styles.text,{opacity: 0}]}/></LinearGradient></MaskedViewIOS>

Animated Gradient

Check out the example app (git clone this project, cd into it, npm install, open in Xcode and run) to see how this is done:

Example with extra props

This gif was created using licecap - a great piece of free OSS

Transparent Gradient

The use of transparent color will most likely not lead to the expected result. transparent is actually a transparent black color (rgba(0, 0, 0, 0)). If you need a gradient in which the color is "fading", you need to have the same color with changing alpha channel. Example:

// RGBA<LinearGradientcolors={['rgba(255, 255, 255, 0)','rgba(255, 255, 255, 1)']}{...otherGradientProps}/>// Hex<LinearGradientcolors={['#FFFFFF00','#FFFFFF']}{...otherGradientProps}/>

Props

In addition to regular View props, you can also provide additional props to customize your gradient look:

colors

An array of at least two color values that represent gradient colors. Example: ['red', 'blue'] sets gradient from red to blue.

start

An optional object of the following type: { x: number, y: number }. Coordinates declare the position that the gradient starts at, as a fraction of the overall size of the gradient, starting from the top left corner. Example: { x: 0.1, y: 0.1 } means that the gradient will start 10% from the top and 10% from the left.

end

Same as start, but for the end of the gradient.

locations

An optional array of numbers defining the location of each gradient color stop, mapping to the color with the same index in colors prop. Example: [0.1, 0.75, 1] means that first color will take 0% - 10%, second color will take 10% - 75% and finally third color will occupy 75% - 100%.

<LinearGradientstart={{x: 0.0,y: 0.25}}end={{x: 0.5,y: 1.0}}locations={[0,0.5,0.6]}colors={['#4c669f','#3b5998','#192f6a']}style={styles.linearGradient}><Textstyle={styles.buttonText}>
Sign in with Facebook
</Text></LinearGradient>

Example with extra props

useAngle / angle / angleCenter

You may want to achieve an angled gradient effect, similar to those in image editors like Photoshop. One issue is that you have to calculate the angle based on the view's size, which only happens asynchronously and will cause unwanted flickr.

In order to do that correctly you can set useAngle={true} angle={45} angleCenter={{x:0.5,y:0.5}}, to achieve a gradient with a 45 degrees angle, with its center positioned in the view's exact center.

useAngle is used to turn on/off angle based calculation (as opposed to start/end). angle is the angle in degrees. angleCenter is the center point of the angle (will control the weight and stretch of the gradient like it does in photoshop.

An example app

You can see this component in action in brentvatne/react-native-login.

Troubleshooting

iOS build fails: library not found, "BVLinearGradient" was not found in the UIManager

  1. Ensure to run pod install before running the app on iOS
  2. Ensure you use ios/**.xcworkspace file instead of ios./**.xcodeproj

Other

Clearing build caches and reinstalling dependencies sometimes solve some issues. Try next steps:

  1. Reinstalling node_modules with rm -rf node_modules && yarn
  2. Clearing Android Gradle cache with (cd android && ./gradlew clean)
  3. Reinstalling iOS CocoaPods with (cd ios && rm -rf ./ios/Pods/**) && npx pod-install
  4. Clearing Xcode Build cache (open Xcode and go to Product -> Clean Build Folder)

For other troubleshooting issues, go to React Native Troubleshooting

Other platforms

License

MIT

About

A <LinearGradient /> component for react-native

Resources

Stars

0 stars

Watchers

0 watching

Forks

Releases

Packages

Contributors

Languages